
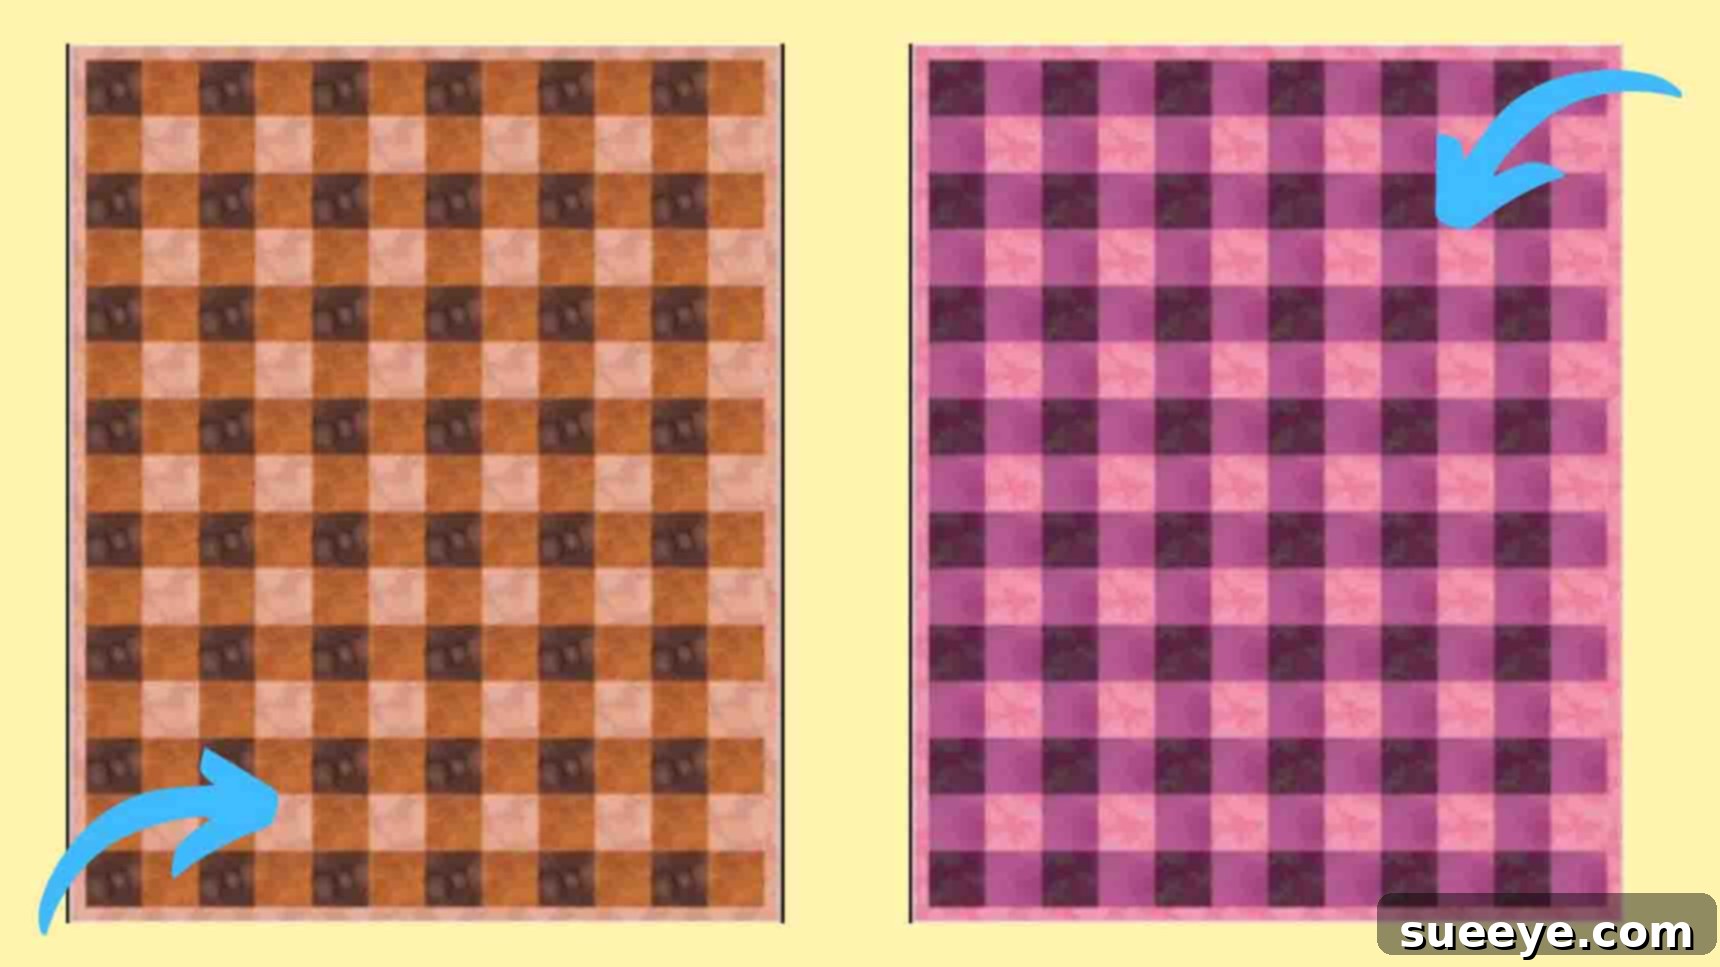
Embark on a delightful quilting journey with the timeless gingham pattern! If you’re new to quilting or simply seeking a relaxing yet rewarding project, this comprehensive tutorial, inspired by Teresa DownUnder on Youtube, is perfectly designed for you. The gingham pattern, with its charming checkered appearance, might seem intricate at first glance, but you’ll soon discover it’s surprisingly simple to master. It’s a cherished pattern among quilters for its classic appeal and the ease with which it comes together, making it an ideal choice for both personal projects and thoughtful, handmade gifts. Whether you’re honing your sewing skills or looking for a meaningful present for friends and family, a classic gingham quilt is always a cherished creation. Dive into the world of quilting with confidence and watch the video tutorial below to see just how effortlessly beautiful this quilt can be.
Why Choose the Gingham Quilt Pattern?
The gingham pattern stands as a testament to classic design, offering an elegance that never fades. Its distinct checkered look, achieved by strategically combining fabrics of different shades within the same color family, creates a visual rhythm that is both soothing and stylish. For beginners, it’s an excellent pattern to build foundational quilting skills, including accurate cutting, precise piecing, and consistent seam allowances, without feeling overwhelmed.
Beyond its educational value, a gingham quilt makes an incredibly versatile addition to any home decor. It can evoke a rustic farmhouse charm, a vibrant modern aesthetic, or a cozy cottage feel, depending on your fabric choices. Imagine wrapping yourself in a blanket you’ve crafted with your own hands, or presenting a loved one with a personalized gift that showcases your dedication and creativity. Gingham quilts are perfect for baby blankets, lap quilts, picnic blankets, or even a decorative throw for your sofa. This project offers a wonderful opportunity to express your personal style through fabric selection, transforming simple squares into a cherished work of art.
Materials You’ll Need:
To create a beautiful 48″ x 60″ gingham quilt, you’ll need a selection of quality quilting cottons and essential tools. Using high-quality fabric ensures your quilt will withstand the test of time and countless cuddles.
- Dark-colored Fabric: 3/4 yard (e.g., a deep navy, forest green, or rich burgundy)
- Medium-colored Fabric: 1 1/4 yard (e.g., a sky blue, olive green, or dusty rose)
- Light-colored Fabric: 1 yard (e.g., a soft white, cream, or very pale grey)
- Backing Fabric: Approximately 3 yards (This will be the fabric for the back of your quilt. Choose a coordinating print or solid color.)
- Batting: A piece approximately 52″ x 64″ (Batting provides warmth and loft to your quilt. Cotton, polyester, or blends are common choices.)
- Binding Fabric: Approximately 1/2 yard (For the strips that finish the edges of your quilt.)
- Rotary Cutter: Essential for precise, clean cuts.
- Cutting Mat: Protects your work surface and provides a steady base for cutting.
- Quilting Ruler: A clear acrylic ruler (at least 6″ x 24″ is recommended) for accurate measuring and cutting.
- Sewing Machine: With a 1/4″ piecing foot, if available, to ensure consistent seam allowances.
- Iron and Ironing Board: Crucial for pressing seams flat and setting stitches.
- Coordinating Thread: High-quality thread that matches or blends with your fabrics.
- Fabric Scissors: For trimming threads and other small cuts.
- Pins or Fabric Clips: To hold fabric pieces together before sewing.
Preparation is Key: Setting Up for Success
Before you even make your first cut, a few preparatory steps will ensure a smoother quilting process and a more beautiful finished product.
Pre-wash Your Fabrics: It’s always recommended to pre-wash all your quilting cottons. This helps to prevent potential dye bleeding, especially important when combining dark, medium, and light shades. Pre-washing also preshrinks your fabric, ensuring that your quilt maintains its shape and size after its first wash. Wash on a gentle cycle with cold water and tumble dry on low, or air dry.
Press Your Fabrics: After pre-washing and drying, meticulously press all your fabrics flat. Any wrinkles or creases can lead to inaccurate cuts and distort your piecing. A well-pressed fabric is the foundation for precise quilting.
Accurate Cutting: Precision is paramount in quilting. Take your time when cutting your squares. Use a sharp rotary cutter, a non-slip quilting ruler, and a self-healing cutting mat. Always cut on a flat, stable surface. Small inaccuracies in cutting can compound quickly, leading to blocks that don’t align perfectly. Remember the adage: “measure twice, cut once!”
Directions: Crafting Your Easy Gingham Quilt
Step 1: Creating the Gingham Block (6″ x 6″ Finished)
The heart of your gingham quilt lies in its individual blocks. For our 48″ x 60″ quilt, we will focus on creating 6″ x 6″ finished blocks. Each block is composed of four smaller squares, expertly arranged to form the classic gingham pattern.
Start by cutting four 3 1/2″ x 3 1/2″ squares from your main fabrics. For each block, you will need:
- One 3 1/2″ x 3 1/2″ square in your dark-colored fabric.
- Two 3 1/2″ x 3 1/2″ squares in your medium-colored fabric.
- One 3 1/2″ x 3 1/2″ square in your light-colored fabric.
It is highly recommended that these varying shades belong to the same color family (e.g., dark blue, medium blue, light blue) to achieve the most authentic gingham effect.
Once your squares are cut, arrange them on your cutting mat or design wall to form the gingham block. The classic arrangement for a 2×2 grid is as follows:
- Place the dark square in the top-left position.
- Place one medium square in the top-right position.
- Place the other medium square in the bottom-left position.
- Place the light square in the bottom-right position.
This creates a diagonal flow from dark to light, with the medium squares forming the “cross” of the gingham pattern.
Now, it’s time to sew. Using a 1/4″ seam allowance (often called a “scant 1/4 inch” in quilting, meaning slightly less than 1/4 inch to account for the thread), sew your squares together in rows.
- Sew the top-left (dark) square to the top-right (medium) square.
- Sew the bottom-left (medium) square to the bottom-right (light) square.
Press your seams. For the top row, press the seam towards the dark square. For the bottom row, press the seam towards the light square. Pressing seams in opposite directions allows them to “nest” together when you join the rows, creating perfectly aligned points.
Finally, sew the two rows together, again using a 1/4″ seam allowance. Carefully align the center seam where the two medium squares meet. Press this final seam open or to one side. Your finished block should measure 6″ x 6″. Repeat this process to create a total of 80 blocks (8 blocks across x 10 blocks down) for your 48″ x 60″ quilt top.
Step 2: Exploring Larger Gingham Blocks (8″ x 8″ Finished – An Alternative)
While the 6″ x 6″ block is perfect for our 48″ x 60″ quilt, you might explore creating larger gingham blocks for different quilt sizes or design preferences. For example, to create an 8″ x 8″ finished block, you would cut four 4 1/2″ x 4 1/2″ squares: one in dark, two in medium, and one in light. The assembly process remains identical to Step 1: arrange them in the classic gingham pattern, sew them in rows with a 1/4″ seam allowance, and press your seams carefully.
Understanding how to adjust the initial square size allows you to customize your quilt to any desired dimensions. If you want a 10″ x 10″ finished block, you’d start with 5.5″ x 5.5″ squares, and so on. Always remember that your starting square size needs to be 1 inch larger than the desired finished measurement of each quadrant to account for the two 1/4″ seam allowances.
The flexibility of the gingham pattern means you can create a huge variety of projects, from small placemats to king-sized quilts, simply by adjusting the size of your initial fabric squares. For the 48″ x 60″ quilt as our primary example, we will proceed with the 6″ x 6″ blocks constructed in Step 1.
Step 3: Assembling Your Quilt Top
Once you have created all 80 of your 6″ x 6″ gingham blocks, the next exciting phase is assembling them into the complete quilt top.
- Lay Out Your Blocks: On a large flat surface (your floor, a design wall, or a spacious table), arrange your blocks into 10 rows of 8 blocks each. Take the time to step back and look at your arrangement. This is your chance to make sure the gingham pattern flows consistently and that you’re happy with the overall visual effect.
- Sew Blocks into Rows: Beginning with the first row, take two adjacent blocks and sew them together with a 1/4″ seam allowance. Continue adding blocks to form a complete row of 8 blocks. As you sew each row, press the seams in alternating directions. For instance, press seams to the right for odd-numbered rows and to the left for even-numbered rows. This will help your seams “nest” when joining rows.
- Join Rows to Form the Top: Once all 10 rows are sewn, it’s time to join them. Take the first two rows and, carefully aligning the nested seams, pin them together. Sew with a 1/4″ seam allowance. Repeat this process until all 10 rows are joined, forming your complete quilt top. Press these final long seams either open or to one side, whichever provides a flatter finish. Your quilt top should now measure approximately 48″ x 60″.
Step 4: Layering and Quilting Your Gingham Quilt
With your quilt top complete, the next step is to create the “quilt sandwich” – combining the quilt top, batting, and backing.
- Prepare Your Layers: Lay your backing fabric face down on a clean, flat surface, smoothing out any wrinkles. Tape the edges to the floor or table to keep it taut. Next, center your batting on top of the backing fabric. Finally, place your quilt top face up on top of the batting, making sure it’s centered and smooth. All three layers should be free of wrinkles.
- Basting: Basting holds your layers together during the quilting process. You can use safety pins (known as “pin basting,” placing pins every 4-6 inches across the quilt), temporary fabric adhesive spray, or hand-basting stitches. Ensure all layers are securely held together to prevent shifting.
- Quilting: Now for the creative part! This is where you stitch through all three layers to create texture and secure them permanently. For a beginner-friendly approach, consider these methods:
- Stitch-in-the-Ditch: Simply sew along the seam lines of your pieced blocks. This is a subtle yet effective method that helps define the block patterns.
- Straight Line Quilting: Quilt parallel lines across your quilt, either horizontally, vertically, or diagonally. You can use your walking foot (if your machine has one) and a ruler as a guide for evenly spaced lines.
- Tie Quilting: For a very quick and easy finish, use embroidery floss or yarn to tie knots through all three layers at regular intervals (e.g., at the corners of each block).
Choose a quilting design that complements your gingham pattern and your skill level.
Step 5: The Finishing Touch – Attaching the Binding
The binding provides a clean, durable edge to your quilt and is the final step in bringing your project to completion.
- Trim and Square Up: After quilting, trim any excess batting and backing fabric, ensuring all edges are straight and your quilt is perfectly square.
- Prepare Binding Strips: From your binding fabric, cut 2 1/2″ wide strips. For a 48″ x 60″ quilt, you’ll need approximately 6-7 strips (assuming standard fabric width of 42″). Sew these strips together end-to-end at a 45-degree angle to create one continuous long strip. Press the seams open and then press the entire strip in half lengthwise, wrong sides together.
- Attach Binding to Quilt: Starting in the middle of one side, align the raw edges of your folded binding strip with the raw edge of your quilt top. Sew the binding to the quilt using a 1/4″ seam allowance. When you reach a corner, stop 1/4″ from the edge, backstitch, remove from the machine, and fold the binding to create a mitered corner before continuing to sew.
- Finish Binding: Once the binding is sewn all around the quilt, join the ends using a diagonal seam for a neat finish. Then, flip the folded edge of the binding to the back of the quilt. You can hand-stitch the binding in place for a traditional, invisible finish, or machine-stitch it for a quicker, more durable result.
Tips for Quilting Success
- Scant 1/4″ Seam Allowance: This is a quilter’s secret! A seam allowance that is just a hair less than 1/4″ accounts for the thickness of the thread when sewing and helps your blocks finish at the correct size.
- Press, Don’t Iron: When joining pieces, “press” your seams by lifting and placing the iron, rather than sliding it. This prevents stretching and distortion of your fabric.
- Stay Organized: Keep your cut squares and assembled blocks organized to avoid confusion, especially when working on a larger quilt.
- Patience is a Virtue: Quilting is a journey, not a race. Take breaks, enjoy the process, and don’t be afraid to use a seam ripper if needed. It’s better to correct a mistake than to leave it in.
- Sharp Tools: Use a sharp rotary cutter blade and fresh sewing machine needles. Sharp tools make a significant difference in the quality of your cuts and stitches.
Personalizing Your Gingham Quilt
The beauty of quilting lies in its endless possibilities for personalization. While this tutorial focuses on a classic gingham, feel free to experiment:
- Color Palettes: Instead of a single color family, try a vibrant mix! Imagine a rainbow gingham, or a two-color gingham for a bolder statement. You can even use patterned fabrics for your light or medium squares, as long as they maintain the light, medium, dark contrast.
- Adding Borders: To increase the size of your quilt or add a decorative frame, consider adding one or more borders around your finished quilt top before layering.
- Mixing Block Sizes: For a more advanced look, you could create a quilt that features both 6″ x 6″ and 8″ x 8″ blocks, perhaps using the larger blocks for a central panel and smaller ones for a surrounding border, though this would require careful planning.
Easy Gingham Quilt Pattern Tutorial: Your Journey Begins!
You’ve now learned the steps to create a charming and classic gingham quilt. This pattern is not only achievable for beginners but also deeply satisfying to complete. With precise cutting, careful piecing, and a little patience, you will create a beautiful, handmade quilt that will be treasured for years to come. So gather your fabrics, fire up your sewing machine, and start creating your very own easy gingham quilt today!