
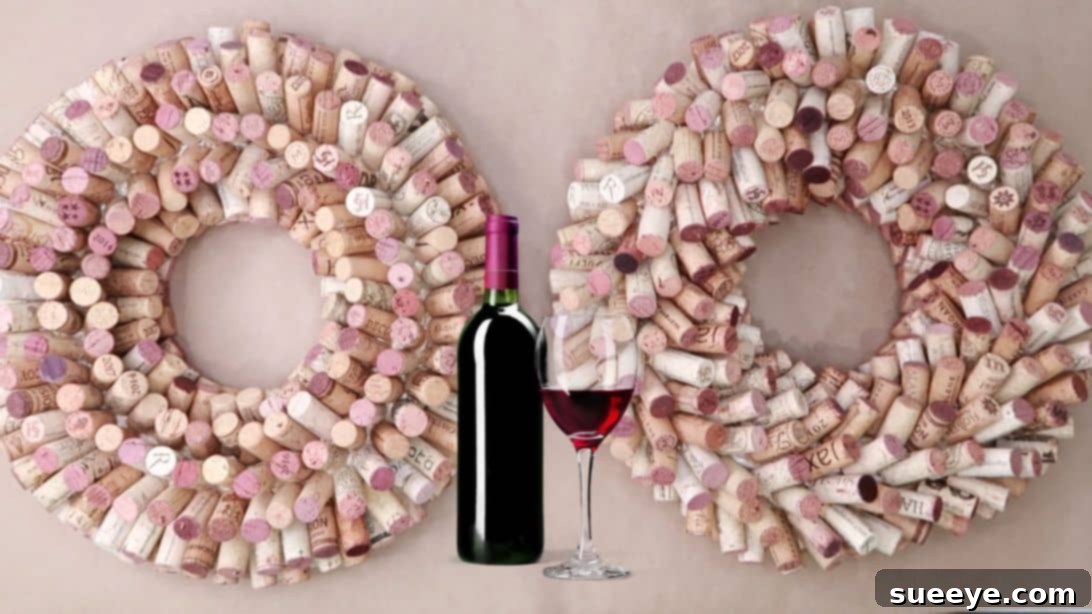
Craft a Stunning DIY Wine Cork Wreath: An Easy Upcycling Project for Home Decor
Do you find yourself with a growing collection of wine corks after enjoying countless bottles? Instead of discarding them, transform these humble stoppers into exquisite home decor. A DIY wine cork wreath is not only a fantastic way to upcycle but also an opportunity to create a truly unique and personalized piece for your home. This charming craft allows you to celebrate your love for wine in a sustainable and stylish manner. Imagine the subtle variations in reds and pinks from wine stains on the corks, adding character and warmth to your decor. We’ll guide you through creating a beautiful wine cork wreath, inspired by the creative vision of Wood Brain by Lindsay Zuelich on YouTube. This project is surprisingly simple, yet yields impressive results, making it perfect for crafters of all skill levels. Get ready to turn your wine cork collection into a focal point that will surely spark conversations.
Why Choose a DIY Wine Cork Wreath for Your Home?
Beyond its aesthetic appeal, a homemade wine cork wreath offers several compelling benefits. Firstly, it embodies the spirit of sustainability by giving new life to materials that would otherwise be thrown away. This eco-friendly approach reduces waste and promotes mindful consumption. Secondly, it’s a wonderfully personal addition to your home. Each cork tells a story, perhaps from a memorable dinner, a special celebration, or a relaxing evening. Assembled, they create a tapestry of personal history. Thirdly, these wreaths are incredibly versatile. They can adorn your front door, hang above a fireplace, or serve as a unique centerpiece on a table. Depending on how you embellish it, a wine cork wreath can fit various decor styles, from rustic farmhouse to modern chic. Lastly, the process of crafting itself can be a meditative and rewarding experience, offering a creative outlet that results in a tangible piece of art.
Gather Your Materials: What You’ll Need to Begin Your Wine Cork Wreath Project
Before diving into the crafting process, it’s essential to gather all your materials. Having everything at hand ensures a smooth and enjoyable crafting experience. Here’s a detailed list of what you’ll need for your DIY wine cork wreath:
- 14-inch Hay Wreath Form: This serves as the sturdy base for your corks. Hay wreaths are ideal due to their natural texture and their ability to securely hold pins and glue. You can find these at most craft stores, often available in various sizes. A 14-inch form is a popular choice, providing a good balance between size and manageability for this project.
- Wine Corks (Plenty!): The star of your project! The exact number will depend on the size of your wreath and how densely you pack the corks. For a 14-inch wreath, you’ll likely need anywhere from 150 to 250 corks. Start saving them well in advance, or ask friends, family, or local restaurants to contribute to your collection. A mix of natural and synthetic corks can be used, though natural corks often have more character and vary in shade, adding visual interest.
- Thin Cotton Rope or Twine: This will be used to create the hanging mechanism for your wreath. Cotton rope is recommended because it’s strong, relatively inexpensive, and easy to tie. The thinness ensures it doesn’t distract from the beauty of the corks. Choose a natural color that complements the corks, or a colored twine for a pop of contrast.
- A Generous Supply of Hot Glue Sticks: Hot glue is your primary adhesive for this project, providing a quick and strong bond. You’ll need a lot, so make sure you have extra glue sticks on hand. A good quality hot glue gun with a fine tip is also advisable for precision and safety.
- Sewing Pins: These pins act as an initial anchor, helping to hold the corks in place while the hot glue dries. They provide extra stability, especially for the first layer of corks, ensuring they are firmly secured to the hay wreath form. Standard dressmaker pins work well; look for ones with a flat head for easier handling.
- Thin Foam Sheets: A foam sheet, cut to the diameter of your wreath, will serve as a protective backing. This prevents the wreath from scratching walls or doors and gives it a finished, professional look. Craft foam or thin EVA foam sheets are suitable.
Preparation and Essential Tips Before You Begin
A little preparation goes a long way in ensuring your crafting project is enjoyable and successful. Take a moment to set up your workspace and consider these tips:
Safety First
Working with a hot glue gun requires caution. Always be mindful of the hot nozzle and molten glue to prevent burns. Keep children and pets away from your immediate workspace. Ensure good ventilation, especially when using a lot of hot glue. If you have sensitive skin, you might consider wearing thin gloves.
Organizing Your Workspace
Clear a flat, stable surface for crafting. Lay down newspaper or a drop cloth to protect your table from glue drips. Arrange your materials within easy reach: corks, glue gun, glue sticks, pins, rope, and foam sheets. Having everything organized will streamline the process and allow you to focus on the creative aspects.
Sorting Your Corks
Before you start, you might want to sort your wine corks by size, color variation, or any unique markings. This can help you plan your design, whether you prefer a uniform look or a more eclectic mix. Some crafters enjoy strategically placing corks with visible winery names or dates to add special meaning.
Crafting Your Beautiful Wine Cork Wreath: A Step-by-Step Guide
Now, let’s get to the exciting part – assembling your unique wine cork wreath. Follow these instructions carefully to ensure a sturdy and aesthetically pleasing result.
Step 1: Secure the Foundation – Pinning the First Layer of Corks
The first step establishes the base for your wreath and is crucial for its overall stability. Take one sewing pin and insert it approximately halfway into the side of a wine cork. This placement ensures enough pin remains exposed to attach to the wreath form. Apply a small dot of hot glue to the exposed end of the pin, and then firmly push the cork, pin-first, into the hay wreath form. Hold it in place for a few seconds until the glue sets. The pin acts as an immediate anchor, preventing the cork from shifting while the hot glue forms a stronger, more permanent bond. Repeat this process for the initial layer of corks, working your way around the outer edge of the wreath. Aim for consistent spacing and depth, laying the groundwork for a uniform and attractive wreath. This initial layer doesn’t need to be perfectly dense; its primary purpose is to create a secure anchor for subsequent corks.
Step 2: Constructing the Wreath Hanger
A sturdy and well-positioned hanger is essential for displaying your finished wreath. Begin by tying one end of your thin cotton rope or twine securely to the top right section of the hay wreath form. Ensure the knot is tight and reliable, as it will bear the weight of the wreath. Leave a small amount of slack in the rope, about 1-2 inches, before cutting the excess. This slack allows for some flexibility and helps create a balanced hanger. Repeat this process on the top left section of the wreath, mirroring the first attachment point. Once both sides are secured, tie another piece of rope between these two anchor points. This new segment of rope will form the actual hanger. To further reinforce the knots and prevent any slippage, apply a small dab of hot glue over each knot and gently roll the rope between your fingers (carefully, mind the heat!) to ensure the glue fully saturates and secures the knot. This extra step provides peace of mind that your beautiful creation will hang safely and securely.
Step 3: Attaching the Wine Corks – Two Creative Approaches
This is where your wreath truly comes to life! There are two primary methods for attaching the bulk of your wine corks, each offering a slightly different aesthetic and building technique. Consider which approach best suits your desired look and crafting comfort level.
Method 1: The Layered, Flat-to-Slanted Technique
This method focuses on building layers from the outside in, creating a voluminous and structured wreath. Start by gluing corks to the outermost edge of the wreath, keeping them as flat and parallel to the crafting surface as possible. Apply a generous amount of hot glue to the side of each cork and press it firmly against the hay form, holding for a few seconds until secure. Work your way inward, creating successive rows. The initial rows will lie flatter, but as you progress towards the center, gradually begin to slant the corks. The goal is to have the final layers slanted towards the center of the wreath, giving it a domed or rounded appearance on the front. Once the entire front face is covered, flip the wreath over. Repeat the layering process on the inside edge, creating another layer of corks that fills out the inner ring of the wreath. This ensures a full, complete look from all angles.
Method 2: The Angled, Inside-Out Fill
This approach emphasizes a more organic, textured look, often creating a fuller, more “bursting” effect. Begin by gluing your wine corks from the inside edge of the wreath form, working your way outwards. The key here is to position each cork at an almost 45-degree angle, pushing it firmly into the hay wreath. This angle helps create depth and visual interest. Apply hot glue liberally to the side of the cork that will adhere to the form, ensuring a strong bond. Continue adding corks, maintaining the angle, until the entire front surface is covered. You might notice some small gaps between corks – this is normal and adds to the rustic charm. Once the front is complete, flip the wreath over and meticulously fill any voids or gaps you observe from the back, particularly around the edges, to ensure a dense and robust appearance. This method often results in a wreath that feels very full and rich in texture.
Step 4: The Finishing Touch – Backing for Protection and Polish
The final structural step involves adding a protective backing to your wreath. This not only gives your wine cork wreath a professional, finished look but also protects your walls or doors from any stray glue, rough edges of the hay form, or shifting corks. Take your thin foam sheet and carefully cut a ring from it that has the same outer and inner diameter as your completed wreath. You can achieve this by tracing the wreath’s outline onto the foam. Once cut, apply a generous amount of hot glue to the back of the cork wreath, around both the inner and outer edges, and press the foam ring firmly into place. Hold it for a few moments to ensure a strong adhesion across the entire surface. This foam backing ensures your wreath hangs beautifully and without causing any damage to your home surfaces.
Personalize Your Wine Cork Wreath: Embellishment Ideas
Once the basic structure of your wine cork wreath is complete, it’s time to unleash your creativity and personalize it! Here are a few ideas to make your wreath truly yours:
- Ribbons and Bows: A classic choice! Drape elegant satin ribbons, rustic burlap, or festive plaid ribbons. A large bow at the top or bottom can add a touch of sophistication or cheer.
- Artificial Flowers or Greenery: Tuck small clusters of artificial flowers, berries, or evergreen sprigs into the gaps between corks. This is perfect for seasonal themes – bright spring blooms, autumnal leaves, or winter evergreens.
- Small Ornaments: Miniature wine bottles, tiny grape clusters, or even small holiday ornaments can be strategically placed to add charm.
- Paint or Glitter: For a more whimsical look, consider lightly dusting some cork ends with glitter or painting a few corks in complementary colors.
- Personalized Signs: Attach a small wooden or metal sign with a welcoming message, your family initial, or a wine-themed quote.
- Fairy Lights: For an enchanting evening glow, weave a delicate string of battery-operated fairy lights through your wreath.
Displaying and Caring for Your Upcycled Masterpiece
Your beautiful wine cork wreath is ready to be admired! Choose a prominent spot where it can be appreciated. Common display locations include your front door (under a covered porch to protect it from harsh weather), above a fireplace mantel, on a gallery wall, or as a unique kitchen accent. To keep your wreath looking its best, gently dust it periodically with a soft brush or a can of compressed air. Avoid direct prolonged sunlight, which can fade corks over time, and protect it from extreme humidity or moisture. With proper care, your DIY wine cork wreath will remain a charming and sustainable piece of home decor for years to come.
Conclusion: A Sustainable and Stylish Statement for Your Home
Creating a DIY wine cork wreath is more than just a craft project; it’s an act of sustainable living and a celebration of creativity. By repurposing materials that would otherwise be discarded, you’ve transformed a simple collection of corks into a unique piece of art that tells a story. This easy-to-make wine cork wreath, inspired by Wood Brain by Lindsay Zuelich, not only adds warmth and character to your home but also serves as a beautiful reminder of cherished moments. Whether you prefer the structured layers of Method 1 or the organic texture of Method 2, the result is a stunning, personalized accent that truly stands out. Embrace the joy of upcycling and proudly display your handcrafted wine cork wreath, knowing you’ve created something beautiful, eco-friendly, and uniquely yours.