
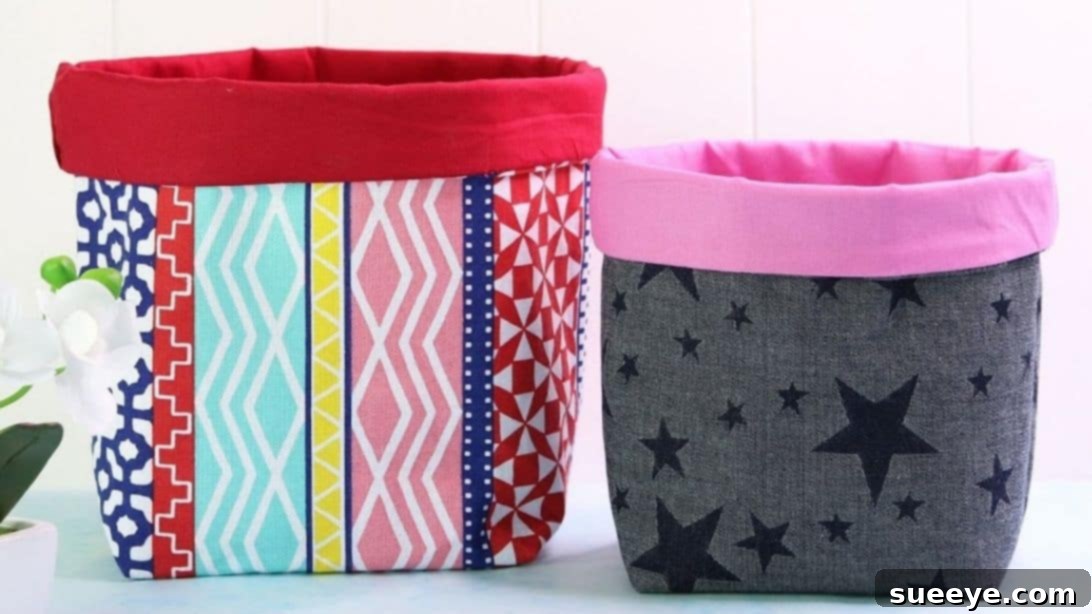
DIY Fabric Baskets: Create Stylish & Multipurpose Storage Solutions
Are you searching for a rewarding weekend project that adds both style and functionality to your home? Look no further! This comprehensive guide will walk you through sewing adorable and incredibly versatile fabric baskets in various sizes. Perfect for organizing clutter, enhancing your home decor, or creating thoughtful handmade gifts, these fabric bins are a fantastic entry point for beginner sewers. Inspired by the excellent video tutorial by Treasurie on YouTube, this project is designed to be fun, straightforward, and requires only a few basic materials.
Fabric baskets are a powerhouse of practicality. They can hold anything from craft supplies and toys to toiletries and pantry items. Best of all, making them yourself allows for complete customization in terms of fabric patterns, colors, and sizes, ensuring they perfectly match your personal style and specific needs. Dive into the world of creative sewing and discover the satisfaction of crafting something beautiful and useful with your own hands.
Why Sew Your Own Fabric Baskets?
Embarking on a DIY fabric basket project offers a multitude of benefits beyond just having a new storage container. Here’s why this sewing endeavor is a worthwhile investment of your time and effort:
- Cost-Effective Storage: Compared to store-bought baskets, making your own can significantly reduce expenses, especially if you utilize fabric scraps or remnants.
- Endless Customization: You have complete control over the design! Choose fabrics that perfectly match your home decor, reflect seasonal themes, or express your unique personality. This level of personalization is impossible to find off the shelf.
- Sustainable Crafting: Repurpose old curtains, denim, or even sturdy garments to give them a new life, reducing waste and promoting eco-friendly practices.
- Perfect Handmade Gifts: A set of handmade fabric baskets makes a charming and practical gift for housewarmings, baby showers, or birthdays. Fill them with goodies for an extra special touch.
- Beginner-Friendly: The construction involves mostly straight seams, making it an ideal project for those new to sewing machines. It helps build foundational skills like cutting, pressing, and basic assembly.
- Boost Your Skills: While beginner-friendly, this project introduces you to working with interfacing, creating boxed corners, and assembling lined items—all valuable skills for more complex sewing projects.
- Sense of Accomplishment: There’s immense satisfaction in seeing a pile of fabric transform into a functional and beautiful item created solely by your hands.
Essential Materials for Your Fabric Baskets
Before you begin, gather all your supplies. Having everything at hand will make the sewing process smoother and more enjoyable. The beauty of this project lies in its simplicity, requiring only a few key items:
- Main or Outer Fabric: For the exterior of your basket, choose a medium-weight fabric like cotton decorator fabrics, canvas, duck cloth, or even denim. These fabrics provide good structure and durability, ensuring your basket holds its shape and stands up to everyday use. Consider patterns or solids that complement your decor.
- Lining Fabric: Quilting cotton is an excellent choice for the lining due to its smooth finish, ease of handling, and wide variety of prints. It adds a pop of color or a subtle contrast to the interior of your basket, making it even more appealing.
- Heavy Fusible Interfacing Fabric: This is crucial for giving your baskets stability and shape. For smaller baskets (XS, S, M), a heavy-weight fusible interfacing will suffice. However, for larger baskets (L and XL), you’ll need an extra-heavy fusible interfacing to ensure they stand upright and maintain their structure even when empty or filled. Fusible interfacing has an adhesive on one side that bonds to your fabric when pressed with an iron.
- Sharp Fabric Scissors: Precision cutting is key for a professional finish. Ensure your scissors are sharp and reserved specifically for fabric.
- Fabric Marking Pen or Chalk: Essential for marking cut lines and sewing guidelines accurately on your fabric.
- Ruler or Measuring Tape: For precise measurements and straight lines. A clear acrylic quilting ruler is highly recommended for accuracy.
- Pins or Fabric Clips: To hold fabric layers together securely before sewing.
- Sewing Machine: Any standard sewing machine capable of sewing a straight stitch will work perfectly.
- Universal Sewing Needle and Matching Thread: Choose a needle appropriate for the weight of your fabric (e.g., a universal 80/12 or 90/14 for medium-weight cottons). Select thread that matches or subtly contrasts with your main fabric for a clean, finished look.
- Iron and Ironing Board: Pressing seams open and applying interfacing are critical steps that contribute significantly to the professional appearance of your finished basket.
Step-by-Step Guide: Sewing Your Multipurpose Fabric Baskets
This tutorial breaks down the process into clear, manageable steps, ensuring a smooth sewing experience. Remember to press your fabric before you start cutting for the most accurate results.
Step 1: Preparing and Cutting Your Fabric Pieces
Precision in cutting is the foundation for a well-structured basket. Take your time with this initial step.
- Cut Fabric Squares: From both your main (outer) fabric and your lining fabric, cut two identical square pieces. Ensure these pieces are perfectly square for an even basket.
- Determine Basket Size & Boxed Corner Dimensions: The size of the squares and the cut-out corners will dictate the final dimensions of your basket. Here’s a guide:
- XS Basket: Start with 11×11 inch fabric squares. Cut out 2.5×2.5 inch squares from each of the bottom corners.
- S Basket: Start with 13×13 inch fabric squares. Cut out 3×3 inch squares from each of the bottom corners.
- M Basket: Start with 15×15 inch fabric squares. Cut out 3.5×3.5 inch squares from each of the bottom corners.
- L Basket: Start with 17×17 inch fabric squares. Cut out 4×4 inch squares from each of the bottom corners.
- XL Basket: Start with 19×19 inch fabric squares. Cut out 5×5 inch squares from each of the bottom corners.
- Cut Corners: Stack your two main fabric pieces and two lining fabric pieces neatly. Using your ruler and marking pen, carefully mark the specified square dimensions from the bottom two corners of each fabric piece. Cut these squares out precisely. These cut-outs will create the “boxed” bottom of your basket.
- Apply Fusible Interfacing: Take your two main fabric pieces. On the wrong side of each piece, carefully position and press your fusible interfacing. Follow the manufacturer’s instructions for your specific interfacing to ensure a strong, even bond. This step is vital for the basket’s structure.
Step 2: Constructing the Main Basket Body
Now that your fabric is prepared, it’s time to bring the main basket together.
- Sew Main Fabric Sides: Lay the two main fabric pieces (now fused with interfacing) together with their right sides facing each other. Align the raw edges perfectly. Pin along both side edges and the shorter bottom edge. Using a sewing machine, stitch these three edges together with a ½-inch seam allowance. Backstitch at the beginning and end of each seam to secure.
- Press Seams Open: Carefully press all sewn seams open using your iron. This reduces bulk and helps the basket lie flatter and look neater, creating a professional finish.
- Form Boxed Corners: This is where the magic happens! Pinch the center of one of the cut-out “boxed” corners, pulling the raw edges apart until the side seam and the bottom seam meet and align. This will create a straight seam line. Pin this new seam in place.
- Sew Boxed Corners: Stitch across this newly aligned seam with a ½-inch seam allowance, creating a sturdy corner. Repeat this process for the other boxed corner on the main fabric. Trim any excess seam allowance if desired, being careful not to cut too close to your stitches.
Step 3: Assembling the Lining and Combining Basket Pieces
The lining will give your basket a clean interior and hide all raw edges.
- Sew Lining Fabric: Repeat the exact same sewing process for your lining fabric pieces as you did for the main fabric (steps 1-4 above). This includes sewing the side and bottom seams with a ½-inch seam allowance, pressing seams open, and forming and sewing the boxed corners.
- Leave a Turning Gap: The crucial difference for the lining is to leave a 3 to 4-inch gap unstitched along one of the side seams. This opening will be used later to turn your entire basket right side out. Remember to backstitch before and after the gap to reinforce the seam.
- Prepare for Assembly: Turn the main fabric basket right side out. Leave the lining fabric basket with its wrong side out.
- Insert Main into Lining: Carefully insert the main fabric basket into the lining fabric basket, ensuring that their right sides are facing each other. The main basket should be nestled perfectly inside the lining basket.
- Align and Pin Top Edges: Match the side seams of the main fabric with the side seams of the lining fabric. Align the raw top edges of both fabric layers all the way around the basket opening. Pin them securely in place to prevent shifting while sewing.
- Sew Top Edge: Stitch all the way around the top opening of the basket with a ½-inch seam allowance. Take your time to ensure an even seam.
- Turn Right Side Out: Reach through the unstitched gap in the lining fabric’s side seam. Gently pull the entire main fabric basket out through this opening until the entire basket is turned right side out.
- Close the Gap: Once the basket is turned, carefully stitch the turning gap closed. You can do this by hand using an invisible ladder stitch for a seamless finish, or by machine-stitching very close to the edge.
Step 4: Finishing Touches and Styling Your Basket
These final steps will give your fabric basket a polished, professional look.
- Tuck and Press: Gently push and tuck the lining fabric completely inside the main fabric basket. Make sure the lining is smooth and extends all the way to the bottom. Carefully press the top edge of the basket, rolling the seam slightly so that the lining fabric doesn’t show from the outside. Give the entire basket a good, thorough press to crisp up all the seams and flatten any wrinkles.
- Create the Cuff: For a classic basket look, fold down the top edge (the cuff) to about 2 to 3 inches, or to your preferred depth. Press this fold sharply. This cuff adds extra stability and a decorative element to your finished basket.
Expert Tips for a Perfect Fabric Basket
Achieve professional-looking results with these helpful tips and tricks:
- Pre-Wash Your Fabrics: Always wash and dry your fabrics before cutting, especially if they are made of natural fibers like cotton. This prevents shrinkage after your basket is sewn, ensuring it maintains its shape.
- Use Quality Interfacing: Do not skimp on interfacing! The right weight and quality will make a significant difference in how well your basket holds its shape.
- Press, Press, Press: Ironing isn’t just for removing wrinkles. Pressing seams open after each sewing step helps to set the stitches, create crisp edges, and ensures a flat, professional finish.
- Clip Corners and Curves: When working with corners, trim the seam allowances diagonally (clip the corners) before turning. This reduces bulk and allows the fabric to lay flatter, creating sharper corners.
- Use Plenty of Pins or Clips: Secure your fabric layers generously, especially when sewing the top edge where multiple layers meet. This prevents shifting and ensures accurate seams.
- Adjust Stitch Length: For heavier fabrics or when sewing through multiple layers (like the boxed corners), a slightly longer stitch length (e.g., 3.0mm) can be beneficial.
- Match Your Thread: While not strictly necessary, using thread that closely matches your main fabric color helps stitches blend in and creates a more polished look.
Creative Customization Ideas for Your Baskets
One of the joys of DIY is personalization. Here are some ideas to make your fabric baskets truly unique:
- Add Handles: Integrate fabric loops, rope, or even leather handles during the assembly phase (before sewing the top edge) for easy portability.
- Embellishments: Consider adding appliqués, embroidery, fabric labels, or decorative trim to the exterior for an extra touch of charm.
- Pockets: Sew small pockets onto the lining before assembling the basket for extra storage of tiny items.
- Different Fabric Combinations: Mix and match contrasting patterns or textures for a more dynamic look. Use a bold print for the exterior and a subtle solid for the lining, or vice-versa.
- Themed Baskets: Create baskets with specific themes, such as holiday fabrics for festive decor, nursery prints for baby essentials, or sturdy denim for workshop tools.
- Personalized Tags: Add custom fabric tags with names or purposes (e.g., “Toys,” “Crafts,” “Laundry”).
Uses for Your Handmade Fabric Baskets
The versatility of these fabric baskets is truly remarkable. Once you start making them, you’ll find endless ways to incorporate them into your daily life:
- Home Organization: Perfect for tidying up shelves, closets, and drawers. Store anything from socks and scarves to linens and towels.
- Craft Room: Organize yarn, fabric scraps, sewing notions, art supplies, or stationery.
- Kids’ Rooms & Playrooms: A stylish way to corral toys, books, puzzles, and art supplies, making cleanup a breeze.
- Nursery: Keep diapers, wipes, lotions, and small baby essentials neatly organized on a changing table or dresser.
- Bathroom: Hold toiletries, guest towels, hair accessories, or makeup.
- Entryway: A convenient spot for keys, mail, sunglasses, or small accessories near the door.
- Pantry or Kitchen: Organize snacks, spice packets, small appliances, or cleaning supplies.
- Gifting: Fill a handmade basket with treats, bath products, or a small plant for a thoughtful and personalized gift.
Conclusion: Your New Favorite Sewing Project
You’ve now mastered the art of sewing multipurpose fabric baskets! This project is a fantastic way to develop your sewing skills while creating practical and beautiful items for your home or as gifts. The ability to customize fabrics and sizes means each basket can be a unique reflection of your style and needs. We hope you found this expanded tutorial helpful and inspiring.
Remember, the original inspiration for this fantastic project comes from Treasurie via YouTube. We highly recommend visiting her channel and subscribing for more brilliant sewing tutorials and creative ideas!