
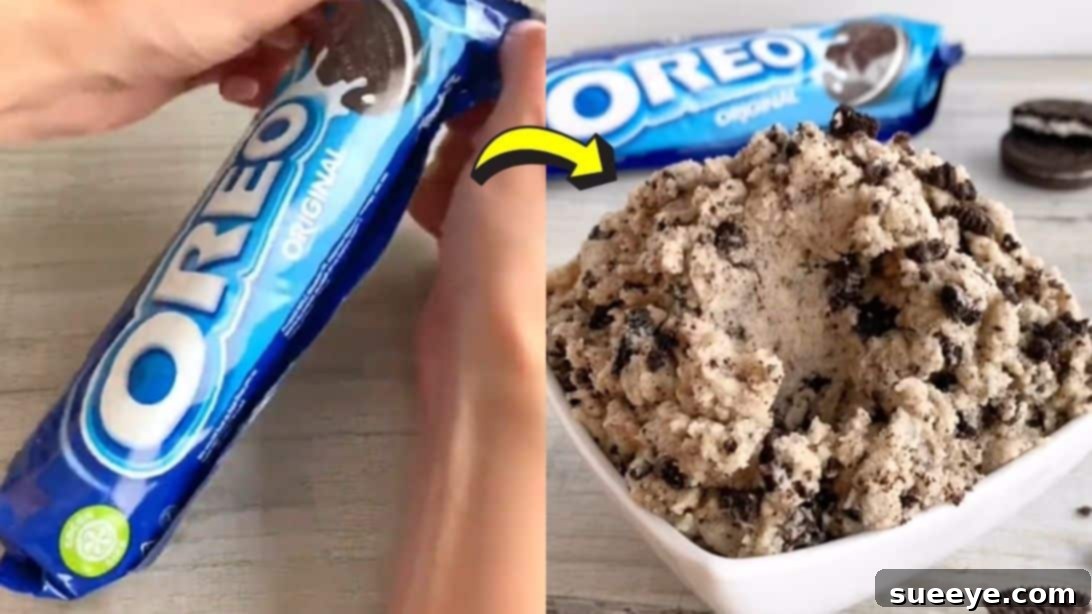
Craving a delightful treat that combines the irresistible crunch of Oreos with the creamy, sweet indulgence of cookie dough? Look no further! This incredible No-Bake Oreo Cookie Dough recipe from the renowned Fitwaffle Kitchen is an absolute game-changer. It’s designed for anyone who loves quick, easy, and utterly delicious desserts, without the hassle of baking. You’re about to discover your new favorite sweet obsession – a treat so simple yet so satisfying, it’s sure to become a staple in your recipe collection. The best part? This cookie dough is completely safe to eat raw, thanks to a clever heat-treatment process for the flour and the absence of eggs, making it perfect for guilt-free snacking straight from the bowl or shaped into delectable bites.
Why This No-Bake Oreo Cookie Dough Is Your Next Must-Try Dessert
Imagine sinking your teeth into rich, vanilla-flavored cookie dough, generously studded with crunchy bits of your favorite chocolate sandwich cookies. That’s precisely what this recipe delivers. What sets this particular Oreo cookie dough recipe apart is its commitment to both flavor and safety. Many raw cookie dough recipes are off-limits due to concerns about raw eggs and flour. However, Fitwaffle Kitchen has perfected a method that eliminates these worries, allowing you to enjoy every spoonful without a second thought. It’s ideal for impromptu cravings, quick dessert fixes, or even as a fun, interactive treat to make with kids. Plus, being a no-bake recipe, it’s perfect for warm weather or when you simply don’t want to turn on the oven.
This dessert isn’t just easy; it’s a nostalgic trip for anyone who grew up sneaking spoonfuls of raw cookie dough. Now, you can relive that joy with a recipe that’s not only safe but also elevates the classic experience with the iconic taste of Oreos. Whether you’re a seasoned baker or a complete novice in the kitchen, these simple instructions will guide you to a perfect batch of safe-to-eat cookie dough every time. Get ready to impress your taste buds and everyone lucky enough to share this delightful creation.
Essential Ingredients for Your Delicious Oreo Cookie Dough
Crafting this phenomenal no-bake Oreo cookie dough requires just a few readily available ingredients. Quality matters here, as each component plays a crucial role in achieving that perfect texture and flavor profile. Below is a detailed list of what you’ll need to gather:
- 7 Whole Oreos: The star of the show! These will be crushed to provide both texture and that unmistakable Oreo flavor that pairs so wonderfully with the sweet dough. Ensure they are the classic chocolate sandwich cookies for the best results.
- 1/2 Cup (113g) Unsalted Butter, Softened: Using unsalted butter allows you to control the overall saltiness of your dough. Ensure it’s softened to room temperature for easier creaming with the sugar, leading to a smoother, more uniform dough consistency.
- 9 1/4 Tablespoons (approx. 115g) Granulated Sugar: This provides the primary sweetness and contributes to the dough’s tender texture. The precise measurement ensures the perfect balance of sweetness without being overpowering.
- 2 Tablespoons (30ml) Milk (Dairy or Non-Dairy): Milk helps to bring the dough together, adding moisture and ensuring a pliable, scoopable consistency. You can use any type of milk you prefer, making it adaptable to dietary needs.
- 1 Teaspoon (5ml) Vanilla Extract: A crucial flavor enhancer, vanilla extract adds warmth and depth, complementing the sweetness and the chocolatey notes of the Oreos beautifully. Don’t skip this!
- 1 1/4 Cups (150g) Plain (All-Purpose) Flour, Heat-Treated: This is the secret ingredient for safety. Plain flour provides the structure for the dough. Heat-treating it is vital to eliminate potential bacteria, making the dough safe for raw consumption.
- 1/2 Teaspoon (2.5g) Salt: A small but mighty ingredient, salt balances the sweetness, enhances the other flavors, and prevents the dough from tasting flat.
Step-by-Step Guide to Crafting Your No-Bake Oreo Cookie Dough
Follow these easy steps meticulously to create the most divine Oreo cookie dough you’ve ever tasted. Precision and patience are key, especially in the initial stages, to ensure a perfectly safe and delicious outcome.
Step 1: Safely Heat Treat Your Flour
Before you begin combining any ingredients, the most critical step for making safe-to-eat raw cookie dough is to heat treat your plain flour. Raw flour can sometimes contain harmful bacteria, so this step ensures your delicious dessert is completely safe to consume. Place the 1 1/4 cups of plain flour in a microwave-safe bowl. Microwave it on high for approximately 1 minute, pausing every 20 seconds to stir the flour thoroughly. This ensures even heating and prevents scorching. The flour should reach an internal temperature of 160°F (71°C). If you have a food thermometer, you can check this. Once heated, remove the bowl from the microwave and allow the flour to cool completely to room temperature before proceeding. This cooling process is essential as hot flour could melt your butter and affect the dough’s texture.
Step 2: Prepare Your Oreo Crumbs
While your flour is cooling, you can prepare the delightful Oreo component. Take your 7 Oreos and place them inside a sturdy zip-lock bag. Using a rolling pin, gently yet firmly crush the Oreos until they form coarse crumbs with some larger pieces still intact. This variation in texture adds an extra layer of enjoyment to the cookie dough. Avoid turning them into a fine powder; you want those distinct Oreo chunks! Once crushed, set the bag aside. These will be folded into your dough later, distributing that iconic chocolatey goodness throughout.
Step 3: Cream Together Butter and Sugar
In a large mixing bowl, combine the 1/2 cup of softened unsalted butter and the 9 1/4 tablespoons of granulated sugar. Using an electric mixer (handheld or stand mixer with a paddle attachment) on medium speed, beat these two ingredients together until they are light, fluffy, and creamy. This process incorporates air into the mixture, which is crucial for achieving a tender, delicious cookie dough texture. Scrape down the sides of the bowl periodically to ensure everything is thoroughly combined. This creaming process should take about 2-3 minutes.
Step 4: Incorporate Liquid Flavor Enhancers
Once your butter and sugar mixture is beautifully creamed, it’s time to add the liquid elements that will infuse your dough with flavor and moisture. Pour in the 2 tablespoons of milk and the 1 teaspoon of vanilla extract into the creamed butter and sugar. Continue mixing on low speed until all the ingredients are fully incorporated and the mixture is smooth. Be careful not to overmix at this stage; just combine until uniform. The vanilla extract will lend a wonderful aroma and taste, while the milk will help achieve the perfect dough consistency.
Step 5: Form Your Delicious Cookie Dough Base
Now, it’s time to bring everything together and create the actual cookie dough. Gradually add the cooled, heat-treated 1 1/4 cups of plain flour and the 1/2 teaspoon of salt to your wet mixture. Start mixing on a low speed, or even by hand with a spatula, until the flour is just incorporated. Overmixing flour can develop gluten, which is desirable in baked goods but can make raw cookie dough tough. Mix until a cohesive dough forms. It should be thick, slightly sticky, and easily moldable. Scrape down the sides of the bowl to ensure no dry pockets of flour remain.
Step 6: Fold in the Crushed Oreos and Enjoy!
The final and arguably most exciting step is adding the star ingredient! Take your previously crushed Oreos and gently fold them into the prepared cookie dough. Use a spatula or a sturdy spoon to mix until the Oreo crumbs are evenly distributed throughout the dough. You want to see those beautiful dark flecks and chunks of Oreo throughout your creamy dough. Once fully incorporated, your delectable No-Bake Oreo Cookie Dough is ready to be enjoyed! You can devour it immediately, store it in the fridge for later, or roll it into small, bite-sized balls for easy snacking. For longer storage, placing the rolled balls in an airtight container in the freezer is a fantastic option.
Pro Tips for the Ultimate No-Bake Oreo Cookie Dough Experience
While the recipe is straightforward, a few extra tips can elevate your Oreo cookie dough from great to absolutely legendary. These insights will help you achieve the perfect texture, flavor, and make the most out of your delightful creation.
- Ensure Butter is Truly Softened: Cold butter won’t cream properly, leading to a lumpy dough. Room temperature butter (soft enough to indent with a finger but not melted) is key for a smooth base.
- Don’t Skip Cooling the Flour: Patience here is paramount. Adding hot flour will melt your butter, turning your dough into an oily mess. Let it cool completely.
- Vary Oreo Crunchiness: For a different texture, you can crush some Oreos more finely and leave some in larger chunks. This offers a delightful contrast in every bite. You could even use some finely crushed Oreos as a topping!
- Chill for Firmer Dough: While edible immediately, chilling the dough in the refrigerator for at least 30 minutes will firm it up, making it easier to roll into balls and giving it a more cohesive texture.
- Serving Suggestions: Enjoy this no-bake cookie dough by the spoonful, roll it into truffles and dip in melted chocolate, or even use it as a decadent topping for ice cream, milkshakes, or cupcakes. It’s incredibly versatile!
- Storage for Freshness: Store any leftover cookie dough in an airtight container in the refrigerator for up to a week. For longer preservation, tightly wrap individual balls or the whole batch and freeze for up to a month. Thaw in the fridge before enjoying.
Creative Variations to Personalize Your Cookie Dough
The beauty of a simple base recipe like this Oreo cookie dough is how easily it can be adapted and customized to your personal preferences. Don’t be afraid to experiment with these fun variations:
- Different Cookies: While Oreos are classic, try swapping them out for other crushed cookies like Biscoff, Nutter Butters, chocolate chip cookies, or even graham crackers for a unique twist.
- Add-Ins Galore: Once the Oreos are mixed in, consider folding in additional treats. Mini chocolate chips (milk, dark, or white), sprinkles, M&M’s, chopped nuts, or even a swirl of peanut butter can add extra layers of flavor and texture.
- Flavor Extracts: Beyond vanilla, a tiny drop of peppermint extract for a mint Oreo vibe, almond extract for a subtle nuttiness, or even a touch of coffee extract can dramatically alter the flavor profile.
- Chocolate Coating: For a truly decadent experience, roll the chilled cookie dough into balls and dip them in melted chocolate (milk, dark, or white). Let them set on parchment paper in the fridge for a truffle-like dessert.
- Dairy-Free/Vegan Option: By using a plant-based butter alternative and a non-dairy milk (like almond or oat milk), and ensuring your Oreos are vegan-friendly (original Oreos often are, but always check labels), you can easily make a delicious vegan version of this no-bake dessert.
Frequently Asked Questions About No-Bake Cookie Dough
To ensure you have all the information you need, here are answers to some common questions about making and enjoying this delightful raw cookie dough:
- Is raw flour really harmful? Why do I need to heat treat it?
- Yes, raw flour can contain harmful bacteria like E. coli, which are naturally present in the environment where wheat is grown. Heat treating the flour, by microwaving or baking it until it reaches a safe temperature, kills these bacteria, making it safe for consumption without baking.
- Can I use brown sugar instead of granulated sugar?
- While granulated sugar gives this recipe a classic cookie dough texture, brown sugar can be used for a chewier, more moist dough with a hint of caramel flavor. The texture will be slightly different but still delicious. If substituting, you might need a tiny bit less milk as brown sugar contains more moisture.
- How long does this No-Bake Oreo Cookie Dough last?
- When stored in an airtight container in the refrigerator, this cookie dough will stay fresh and delicious for up to 7 days. If you freeze it, it can last for up to 1 month. Always bring it to room temperature for a few minutes before serving for the best texture.
- Can I make this recipe without a microwave for heat-treating the flour?
- Absolutely! You can also heat treat flour in the oven. Spread the flour thinly on a baking sheet and bake at 300°F (150°C) for about 5-7 minutes, stirring halfway through. Ensure it reaches 160°F (71°C) internal temperature, then let it cool completely before using.
- What if my dough is too sticky or too dry?
- If your dough is too sticky, try adding a tablespoon or two more of heat-treated flour until it reaches the desired consistency. If it’s too dry and crumbly, add milk half a teaspoon at a time until it comes together. Humidity and butter consistency can slightly affect the required liquid.
Did you love crafting this incredibly simple yet satisfying No-Bake Oreo Cookie Dough? If you enjoyed this recipe and are looking for more amazing dessert ideas, we highly recommend checking out Fitwaffle Kitchen on YouTube. She consistently shares tons of creative, easy-to-follow, and absolutely delicious dessert recipes that are sure to delight your palate. Subscribe to her channel to stay updated with her latest sweet creations!
No-Bake Oreo Cookie Dough
This article has been a comprehensive guide to making the perfect safe-to-eat No-Bake Oreo Cookie Dough. We hope you’ve found the instructions clear, the tips helpful, and the variations inspiring. Enjoy your delicious, homemade treat!