
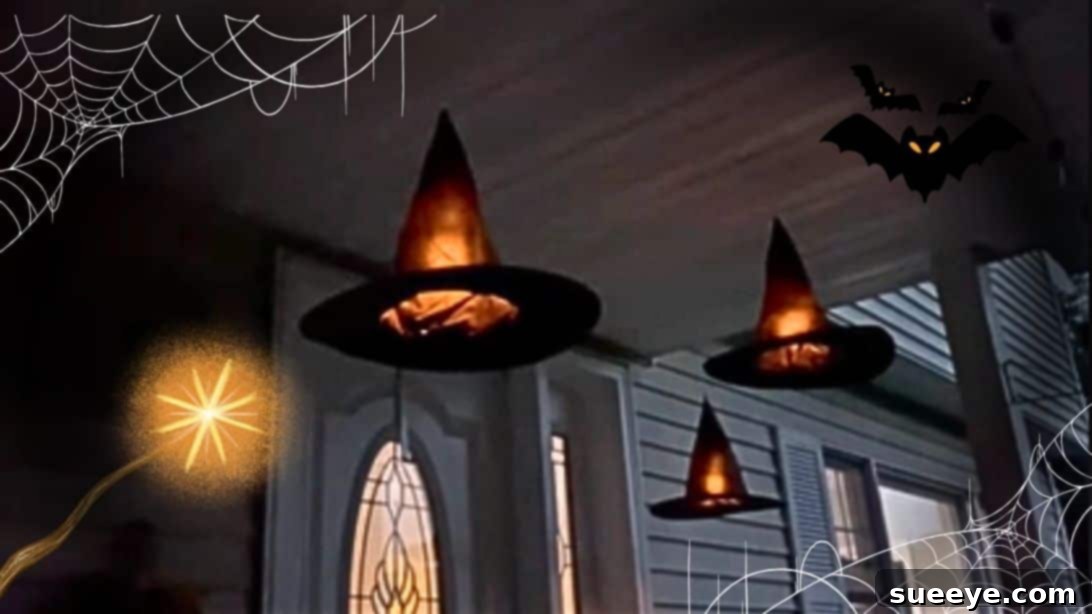
As the air turns crisp and autumn leaves begin to fall, a sense of enchanting anticipation fills the atmosphere. Halloween is just around the corner, and the excitement is palpable! Like many enthusiasts, I’ve already dived headfirst into the spooky season, curating a collection of delicious recipes and transforming the interior of my home with an array of festive decorations. However, one crucial area remained untouched: my front porch. I was on a quest for an outdoor Halloween decoration that was not only incredibly easy to create but also promised to be a showstopper, leaving a lasting impression on trick-or-treaters and guests alike. That’s when I stumbled upon the ingenious concept of “floating witch hats.” The idea instantly captivated me – a magical, whimsical, and slightly eerie display that seemed perfect for setting the tone for a bewitching night. Without hesitation, I made a quick trip to the store to gather all the necessary supplies. This DIY project is absolutely brilliant, offering a fantastic blend of simplicity and stunning visual impact. I’m incredibly eager to assemble them this week! If you’re ready to conjure up some Halloween magic, keep reading for the full step-by-step instructions.
Halloween decor doesn’t have to be complicated or expensive to be extraordinary. The beauty of DIY projects lies in their ability to deliver personalized, high-impact results with minimal effort. Imagine a cluster of ethereal witch hats seemingly suspended in mid-air, casting an otherworldly glow as dusk settles. This particular project achieves exactly that, creating an illusion of weightless enchantment that transforms a simple porch into a gateway to a magical realm. It’s the kind of decoration that sparks conversation, ignites imagination, and perfectly embodies the spirit of Halloween without requiring advanced crafting skills. Get ready to impress your neighborhood with this captivating and memorable display.
The Magic Behind Floating Witch Hats: A Viral Sensation
The inspiration for this spellbinding outdoor decoration originated from TikTok, a hub for innovative and shareable DIY ideas. TikTok creator scarrie_halloween unveiled her method for transforming ordinary witch hats into a gorgeous, captivating hanging Halloween decor, perfect for any front porch. Her video quickly soared to viral status, garnering millions of views, likes, and an avalanche of enthusiastic comments from users worldwide. The overwhelming sentiment was clear: people adored this imaginative and straightforward concept. And it’s not hard to see why! The design is remarkably simple yet incredibly eye-catching, making it an accessible project for crafters of all skill levels. It perfectly balances a minimalist approach with maximum visual impact, ensuring your Halloween display stands out.
@scarrie_halloween Floating Witch Hats #halloween #halloweendecor #halloweenprops #halloweendiy #witches
♬ original sound – Scarrie Halloween
Why Choose DIY for Your Halloween Decor?
Embracing the DIY approach for your Halloween decorations offers a multitude of benefits beyond just saving money. Firstly, it allows for unparalleled personalization. Instead of generic store-bought items, you can create pieces that perfectly align with your aesthetic vision and the specific theme you want to convey. This ensures your home stands out from the crowd and reflects your unique personality. Secondly, DIY projects, especially simpler ones like these floating witch hats, can be incredibly fun and rewarding. They offer a creative outlet, a chance to relax, and an opportunity to engage with the festive spirit in a hands-on way. It’s also a fantastic activity to do with family or friends, creating lasting memories. Lastly, the sense of accomplishment you feel when displaying something you’ve crafted yourself is immense. Guests and neighbors will undoubtedly appreciate the effort and creativity, often finding handmade decorations far more charming and impressive than mass-produced ones. This Halloween, elevate your decor game by crafting something truly special and memorable.
Gathering Your Spooky Supplies: What You’ll Need
Before you begin your magical transformation, it’s essential to have all your materials ready. One of the best aspects of this DIY Halloween project is that it requires only a handful of inexpensive, readily available items. You won’t need any specialized tools or exotic ingredients – just a few basic craft supplies to bring your vision to life. Let’s take a closer look at what you’ll need to gather:
Witch Hats
The star of the show! You’ll need several witch hats, depending on how grand you want your display to be. These are typically available at most dollar stores, craft stores, or party supply shops during the Halloween season. Consider the material and rigidity of the hats; stiffer hats will hold their shape better, while softer ones might offer a more whimsical, flowing look. Black hats are classic, but don’t shy away from experimenting with purple, green, or even striped options for a unique twist. The size of the hats can also vary, allowing you to create a dynamic display with different dimensions. Opt for hats that are lightweight enough to be easily suspended.
Battery-Operated LED Candles
These are crucial for creating the glowing, ethereal effect. The original creator, Scarrie, specifically used remote-operated battery candles, which is a brilliant tip! Remote control functionality allows you to easily turn them on and off, or even set timers, without having to individually reach each hat once they’re hung. This is particularly convenient if your hats are suspended at varying heights or in hard-to-reach places. LED candles are safe, flameless, and often come with a flickering effect that mimics real candlelight, adding to the authentic spooky ambiance without any fire hazard. Ensure you have enough batteries to power all your candles throughout the season.
Clear Fishing Line
This is your invisible magic thread! Clear fishing line is paramount because it creates the illusion that the hats are truly floating. Its strength-to-diameter ratio is excellent, meaning a thin, almost invisible line can easily support the lightweight hats and candles. You can find fishing line at any sporting goods store, craft store, or even some larger supermarkets. Choose a line with a decent test weight (e.g., 10-20 lb test) to ensure it’s strong enough to hold everything securely without snapping, especially if exposed to light wind. A spool will last you for many projects.
A Large Needle
A sturdy, large-eyed needle will be indispensable for threading the fishing line through the point of the witch hat. A standard sewing needle might be too small or flimsy. Look for a tapestry needle, darning needle, or even a doll-making needle, which typically have larger eyes and are more robust. This will make the threading process much easier and prevent frustration.
Scissors
You’ll need a good pair of sharp scissors for cutting the fishing line to your desired lengths. Craft scissors or even household scissors will work perfectly for this task.
Step-by-Step Guide: Crafting Your Floating Witch Hats
Now that you have all your materials assembled, let’s dive into the simple steps to create your enchanting floating witch hats. Remember, precision in each step will ensure your decorations look professional and last through the Halloween season.
Step 1: Prepare Your Workspace and Materials
Before you start, find a clear, well-lit workspace where you can comfortably lay out your materials. Unwrap your witch hats, ensuring they are free of creases or damage. Test all your battery-operated candles to confirm they are working and have fresh batteries installed, especially if they are remote-controlled. Pre-cut several lengths of fishing line – it’s better to have them a bit longer than you think you’ll need, as you can always trim excess later. About 3-5 feet per hat is a good starting point, allowing for flexibility in hanging heights.
Step 2: Secure the Candle to the Fishing Line
This is the first critical step to ensure your “floating” effect. Take one of your battery-operated candles. Wrap one end of a long strand of fishing line tightly around the base of the candle. Make sure it’s snug and secure, perhaps wrapping it several times and tying a strong double knot. The goal is for the candle to hang straight down without slipping. After securing the line around the candle, create a loop at the very top of the fishing line – this will be the loop you use to hang the entire witch hat assembly. Scarrie, the original creator, also added a piece of strong tape around the knot on the candle to provide extra reinforcement, preventing any slippage or unraveling. This small detail can significantly enhance the durability of your design, ensuring your candle stays perfectly in place once hung.
Step 3: Thread the Fishing Line Through the Hat
Now, it’s time to integrate the hat. Take the other end of the fishing line (the one not attached to the candle) and thread it carefully through the eye of your large needle. Next, gently push the needle through the very top point of the witch hat. Guide the needle and fishing line all the way through until the line emerges from the inside of the hat. Be careful not to tear the hat material; a sharp needle and steady hand will help. You should now have the candle hanging from the line *below* the hat, with the top hanging loop emerging *above* the hat’s point.
Step 4: Adjust Height and Knot Securely
This is a crucial step for achieving the desired “floating” effect and ensuring the candle hangs at the perfect spot inside the hat. Hold the hat up and let the candle hang freely inside. You’ll want the candle to be suspended roughly in the center of the hat, or slightly above the rim, so its light illuminates the hat from within. Once you’ve determined the ideal hanging height for the candle, create a secure knot on the *inside* of the witch hat, using the fishing line that has been pulled through the hat’s point. This knot will act as a stopper, preventing the candle from pulling further down or slipping out of position. Make sure the knot is tight and large enough that it won’t slip back through the hole you made with the needle. You can even tie a double or triple knot for extra security. This step is key to maintaining the illusion of a candle magically glowing within a suspended hat. Once the knot is secure, you can trim any excess fishing line from the inside, leaving just enough to ensure the knot holds.
Bringing Your Display to Life: Installation Tips & Tricks
With your floating witch hats assembled, the final step is to strategically hang them to create a truly mesmerizing display. This is where your creativity can truly shine, transforming your front porch or yard into a spooky wonderland.
Choosing the Perfect Spot
Consider areas with natural overhangs or structures. Porch ceilings are ideal, as are tree branches, pergolas, or even sturdy clotheslines stretched across your yard. Ensure the chosen spot is visible from the street and provides enough clearance for the hats to hang freely without bumping into walls or other decorations. For an extra eerie touch, try hanging them over a pathway where trick-or-treaters will pass.
Hanging Techniques
Use small hooks, nails, or even strong adhesive hooks (for temporary solutions on smooth surfaces) to attach the top loop of your fishing line. Varying the hanging heights of each hat adds significant visual interest and depth to your display. Some can be high, others lower, creating a dynamic, floating cluster. Experiment with different arrangements – a straight line, a semicircle, or a random scattering can all look fantastic depending on your space.
Weatherproofing Your Display
Since these decorations are for outdoor use, consider the elements. While the fishing line is durable, strong winds can tangle or damage the hats. If you live in a particularly windy area, you might want to add a small weight to the bottom rim of the hat (perhaps a small, hidden fishing weight or washer) to keep it from spinning excessively. While the battery-operated candles are generally designed for some outdoor exposure, heavy rain might warrant bringing them inside or choosing a more sheltered spot. However, the hats themselves are usually made of synthetic materials that can withstand a light drizzle.
Arranging for Maximum Impact
For a truly bewitching effect, group several hats together in clusters. This creates a more dramatic statement than single hats spread far apart. Think about the overall composition from different viewing angles, especially from the street. At night, the glowing candles within the hats will create a focal point, drawing attention to your magically floating display.
Elevate Your Enchantment: Customization Ideas
While the basic floating witch hat design is stunning on its own, there’s ample room for personalization and extra flair to make your display truly unique and even more captivating.
Decorating the Hats
Don’t limit yourself to plain black hats! Before hanging, you can embellish your witch hats with various spooky additions. Glue on fake spider webs, attach plastic spiders or bats, sprinkle glitter for a shimmering effect, or tie ribbons in Halloween colors around the brim. For a truly magical touch, consider using glow-in-the-dark paint on the hat fabric itself. A strip of LED fairy lights wrapped around the brim can also add an extra layer of sparkle.
Adding More Light
If you want a brighter, more dynamic glow, you could experiment with small, battery-operated LED string lights (often called “fairy lights”) in addition to, or instead of, the single candle. Wrap a short strand around the inside of the hat’s cone before securing it, allowing the tiny lights to twinkle from within. Colored LED candles are also an option for a different ambiance – imagine green or purple glowing hats!
Combining with Other Elements
Integrate your floating witch hats with other Halloween decorations for a cohesive theme. They look fantastic suspended above carved pumpkins, alongside spooky garlands, or as part of a larger graveyard scene. You could even add some fake fog effects below them for an extra layer of mystique, making it seem as if they are truly floating out of a magical mist. Imagine these hats floating above a cauldron filled with dry ice – pure enchantment!
Maintenance and Longevity
To ensure your floating witch hat display remains magical throughout the Halloween season and beyond, a little maintenance goes a long way.
Battery Management
Battery-operated candles will eventually run out of power. Keep spare batteries on hand and check the candles periodically, especially if you have them on a timer. The remote-controlled versions often provide the best battery life optimization. If you notice the glow dimming, it’s time for a quick battery swap.
Storage Tips
When Halloween is over, carefully take down your hats. The fishing line is delicate, so avoid harsh pulling. Detach the candles and store them separately with their batteries removed to prevent corrosion. The hats can often be stacked or gently flattened for compact storage. Keep all components in a dry, safe place, and you’ll be ready to bring out your enchanting floating witch hats again next year, saving you time and effort.
And just like that, you’re done! Your enchanting floating witch hats are ready to transform your outdoor space into a magical, spooky spectacle. All that’s left to do is hang them securely in your chosen spot and, as night falls, turn the lights on. It’s truly astonishing how straightforward it is to create such a high-impact Halloween decoration. This project is a testament to the power of simple materials and a creative idea to produce something truly memorable. So go ahead, unleash your inner witch or wizard, and prepare for a Halloween filled with wonder and compliments. Happy haunting!