
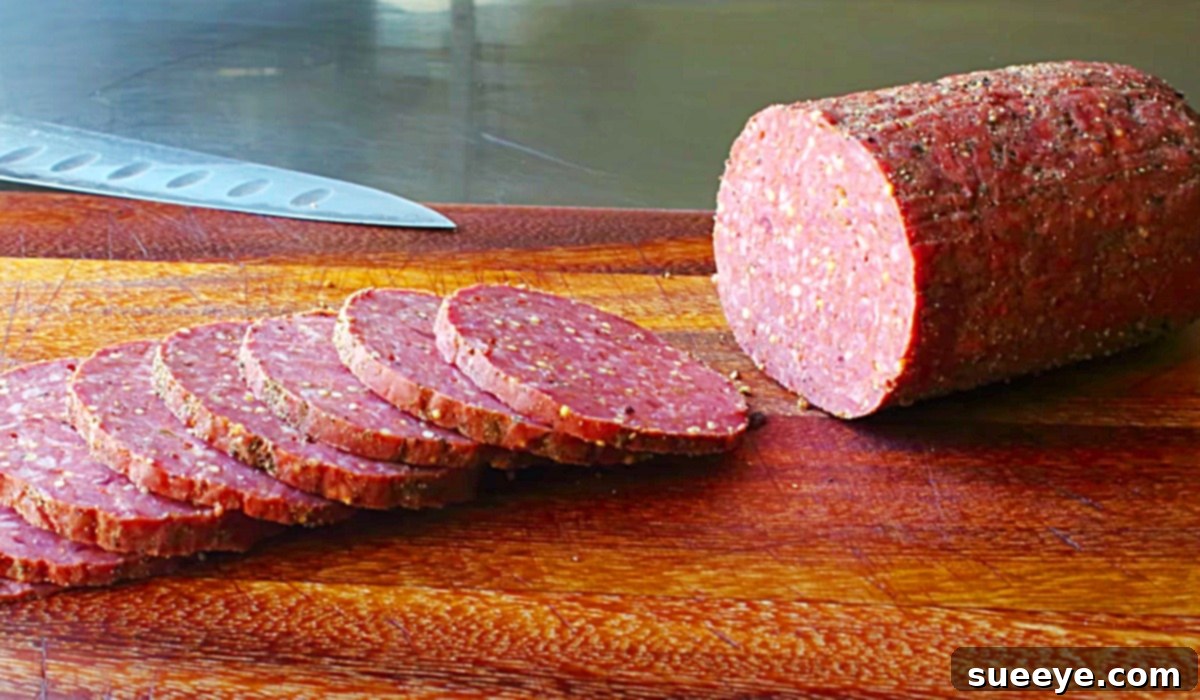
Homemade 24-Hour Summer Sausage Recipe
Summer sausage, a beloved deli staple, holds a special place in the hearts of many food enthusiasts. Its rich, tangy, and savory flavor profile makes it incredibly versatile, perfect for elevating sandwiches, complementing crackers, or adding a burst of flavor to soups and pasta dishes. Traditionally, crafting this delectable sausage at home has been a labor of love, requiring weeks, even months, of careful curing and drying to achieve its signature taste and texture. This lengthy process often deters home cooks from attempting it, reserving the joy of summer sausage for store-bought convenience.
However, what if you could bypass the extensive wait without compromising on flavor or quality? This revolutionary 24-hour homemade summer sausage recipe promises exactly that – a quick, easy, and incredibly delicious way to enjoy your favorite sausage, ready in a fraction of the time. Inspired by the innovative approach of Food Wishes on YouTube, this recipe transforms the complex art of sausage making into an accessible project for any home kitchen. Imagine preparing this savory delight one evening and having it perfectly cured and cooked by the following evening, ready to impress your family and friends. Get ready to embark on a culinary adventure that redefines homemade sausage, making it faster, simpler, and just as satisfying.
Essential Ingredients For Your Homemade Summer Sausage
Crafting the perfect 24-hour summer sausage begins with selecting high-quality ingredients. Each component plays a crucial role in developing the rich flavor, ideal texture, and safe consumption of your homemade delight. Here’s what you’ll need, along with a brief explanation of why each ingredient is important:
- 2 pounds of freshly ground beef: The foundation of your sausage. Opt for a lean-to-fat ratio of about 80/20 or 85/15 for the best flavor and moisture. Freshness is key for both taste and safety.
- 1/4 cup of finely diced celery: Adds a subtle crunch and a hint of fresh, earthy flavor that complements the savory meat and spices, contributing to the overall complexity.
- 20 grams of kosher salt: Beyond just seasoning, salt is vital for the curing process, drawing out moisture and contributing to the sausage’s texture and preservation. Precision in measurement is important for curing recipes.
- 1 tablespoon of garlic powder: Delivers a consistent, aromatic garlic flavor throughout the sausage without the moisture of fresh garlic, which can impact the curing process.
- 2 tablespoons of mustard seed: A signature spice in many traditional summer sausages. Mustard seeds provide a distinctive tangy, slightly pungent flavor and a delightful textural pop.
- 1 tablespoon of smoked paprika: Imparts a wonderful smoky depth and a vibrant reddish hue to the sausage, enhancing its visual appeal and aromatic profile.
- 1 teaspoon of coarsely ground black pepper: Adds a classic peppery kick and aroma. Coarsely ground pepper provides a more pronounced texture and flavor.
- A pinch of cayenne pepper: For those who enjoy a little heat, cayenne offers a subtle warmth that balances the richness of the beef and other spices. Adjust to your preference.
- 1/4 teaspoon of pink curing salt (Insta Cure #1): This is a critical ingredient for safety and traditional summer sausage flavor/color. It contains sodium nitrite, which inhibits the growth of harmful bacteria, especially Clostridium botulinum, and helps achieve the characteristic pink color and cured flavor. It must be measured precisely; never substitute or use more than recommended.
- 1 tablespoon liquid smoke: While not essential for preservation, liquid smoke provides an authentic smoky flavor that mimics traditional slow-smoked sausages, without the need for a smoker.
Note on Cooking: After preparation, your summer sausage will be cooked at 275°F for 1 & 1/2 hours. This lower, slower cooking method ensures the sausage cooks through evenly while allowing the flavors to meld beautifully.
Step-by-Step Guide: Crafting Your 24-Hour Summer Sausage
This recipe, expertly demonstrated by Food Wishes on YouTube, breaks down the process of making delicious homemade summer sausage into a few incredibly easy and satisfying steps. Forget the long waiting times; with this method, you’ll have a delectable, ready-to-eat sausage in just about 24 hours. Let’s dive into the details:
Phase 1: Mixing and Curing (The Evening Before)
Step 1: Prepare Your Ingredients. Begin by ensuring all your ingredients are measured out and ready. Finely dice your celery. Have your ground beef at a cool temperature, but not frozen, for optimal mixing.
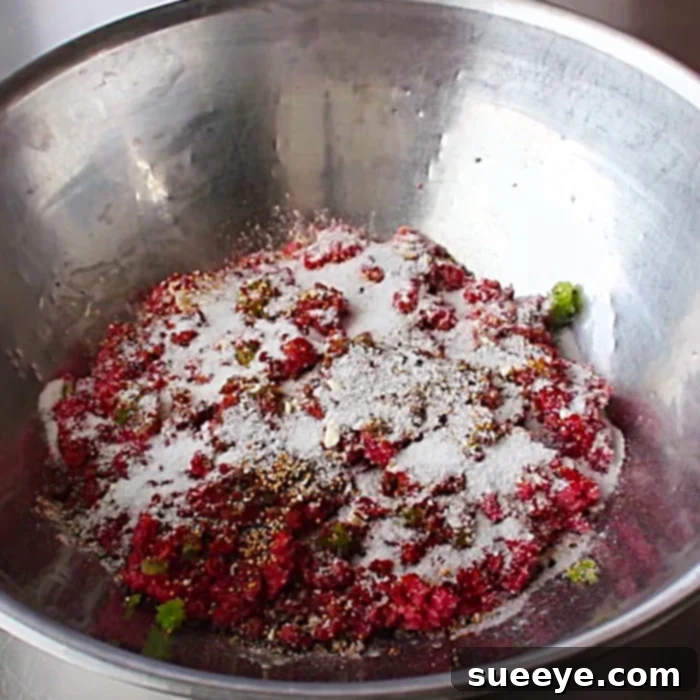
Step 2: Combine and Mix Thoroughly. In a large, sturdy mixing bowl, combine the ground beef, diced celery, kosher salt, garlic powder, mustard seed, smoked paprika, coarsely ground black pepper, cayenne pepper, pink curing salt (Insta Cure #1), and liquid smoke. It’s crucial to mix these ingredients very thoroughly. You can use your hands (wearing gloves is recommended for hygiene and to protect your skin from the curing salt) or a stand mixer with a paddle attachment. The goal is to distribute the spices and especially the pink curing salt evenly throughout the meat. This even distribution is vital for both flavor consistency and the safety of the sausage. Mix until the mixture becomes sticky and somewhat cohesive – typically 5-7 minutes of good mixing.
Step 3: Shape and Cure Overnight. Once mixed, form the sausage mixture into one or two compact logs, depending on your preference for size. Wrap each log tightly in plastic wrap, ensuring no air pockets. Place these wrapped logs in the refrigerator and allow them to cure overnight, for at least 12-18 hours. This overnight rest period allows the curing salts and spices to penetrate the meat thoroughly, developing that classic summer sausage flavor and ensuring the curing process is effective.
Phase 2: Baking and Cooling (The Following Day)
Step 4: Preheat and Prepare for Baking. The next day, preheat your oven to 275°F (135°C). While the oven heats, remove your sausage logs from the refrigerator. Unwrap them from the plastic wrap. Each log should then be tightly wrapped in a layer of parchment paper, followed by a layer of aluminum foil. The parchment paper prevents the sausage from sticking and maintains its shape, while the foil helps to trap moisture and ensure even cooking, preventing the exterior from drying out too quickly.
Step 5: Bake the Sausage. Place the foil-wrapped sausage logs on a baking sheet. Carefully transfer the baking sheet to your preheated oven. Bake for approximately 1 hour and 30 minutes (1 & 1/2 hours). The low and slow cooking temperature is crucial here; it allows the sausage to cook through gently, preventing it from drying out and ensuring a tender, flavorful result.
Step 6: Check for Doneness. To ensure your summer sausage is safe to eat, it must reach an internal temperature of 160°F (71°C). Carefully unwrap one end of a sausage log and insert a meat thermometer into the thickest part. If it hasn’t reached 160°F, return it to the oven for additional time, checking every 10-15 minutes.

Phase 3: Cooling, Chilling, and Serving
Step 7: Cool Completely. Once the sausage has reached the target internal temperature, remove it from the oven. Let the sausage logs cool down completely at room temperature, still wrapped in their parchment and foil. This can take several hours. Do not rush this step, as proper cooling is important for texture and flavor development.
Step 8: Chill for Firmness. After cooling to room temperature, transfer the wrapped sausage logs to the refrigerator. Chill them for at least 4-6 hours, or ideally overnight, before slicing. This chilling period is essential for the sausage to firm up properly, making it much easier to slice neatly and enhancing its overall texture. The flavors will also continue to meld and deepen during this time.
Step 9: Slice and Enjoy! Once thoroughly chilled, unwrap your homemade summer sausage. It’s now ready to be sliced and enjoyed! Use a sharp knife to cut it into thin rounds for charcuterie boards, thicker slices for sandwiches, or dice it for cooking applications.
Tips for Perfect Homemade Summer Sausage
Achieving outstanding results with your 24-hour summer sausage is easy when you keep a few key tips in mind:
- Meat Quality: Always start with high-quality, fresh ground beef. The fat content is important for flavor and moisture, so an 80/20 or 85/15 lean-to-fat ratio is ideal.
- Precise Measurement of Curing Salt: Pink curing salt (Insta Cure #1) is crucial for both food safety and the authentic flavor of cured meats. However, it must be measured precisely. Too little may compromise safety, and too much can be harmful. Use a scale for accuracy if possible.
- Thorough Mixing: Don’t underestimate the importance of mixing. A well-mixed sausage ensures that spices and curing salts are evenly distributed, leading to consistent flavor and proper curing throughout the log. Mix until the meat becomes sticky and forms a cohesive ball.
- Tight Wrapping: When forming the logs and wrapping them in parchment and foil, ensure they are tightly packed. This helps maintain the shape of the sausage during cooking and prevents air pockets that could lead to uneven cooking or dryness.
- Internal Temperature: Always use a reliable meat thermometer to confirm the sausage has reached an internal temperature of 160°F (71°C). This is the standard safe cooking temperature for ground meat products.
- Patience with Cooling and Chilling: While this is a “24-hour” recipe, don’t rush the cooling and chilling stages. Allowing the sausage to cool completely at room temperature and then chilling thoroughly in the refrigerator is essential for its texture, sliceability, and flavor development.
- Experiment with Spices: Once you’ve mastered the basic recipe, feel free to experiment with additional spices or flavorings. Consider adding a touch of dried thyme, crushed red pepper flakes for extra heat, or even a splash of good quality dry red wine during the mixing stage for a deeper, more complex flavor.
Serving Suggestions for Your Homemade Summer Sausage
The versatility of homemade summer sausage is one of its greatest appeals. Once you’ve successfully made your batch, here are some delightful ways to enjoy it:
- Charcuterie Boards: Arrange thin slices of summer sausage alongside an assortment of cheeses, crackers, olives, pickles, and fresh fruit for an impressive appetizer spread.
- Sandwiches & Hoagies: Layer slices generously on your favorite bread or rolls with cheese, lettuce, tomatoes, and a tangy mustard for a hearty lunch.
- Snack Time: Simply pair with your favorite crackers for a quick, satisfying snack. The contrast of the crunchy cracker and savory sausage is irresistible.
- Breakfast Hash: Dice the summer sausage and sauté it with potatoes, onions, and peppers for a flavorful breakfast hash, topped with a fried egg.
- Pasta Dishes: Cut into small cubes or crumbles and add to pasta sauces, casseroles, or baked ziti for a rich, meaty flavor boost.
- Soups & Stews: Incorporate diced summer sausage into hearty bean soups, lentil stews, or split pea soup to add depth and a smoky, savory element.
- Pizza Topping: Thinly slice and use as a delicious, unique topping for homemade pizzas.
Why Make Your Own Summer Sausage?
Beyond the sheer enjoyment of a quick and delicious recipe, there are compelling reasons to make your own summer sausage:
- Control Over Ingredients: You choose the quality of your meat and spices, avoiding fillers, artificial flavors, and excessive sodium often found in commercial products. This allows for a healthier, more natural product.
- Freshness and Flavor: Nothing beats the taste of freshly made food. Your homemade sausage will have a vibrancy and depth of flavor that is hard to match with pre-packaged alternatives.
- Customization: The ability to adjust spice levels, add unique herbs, or even incorporate different types of ground meat (like pork or a beef/pork blend) opens up a world of customization possibilities to suit your palate.
- Satisfaction: There’s immense satisfaction in creating something delicious from scratch. Making your own summer sausage is a rewarding culinary achievement that will surely impress.
- Cost-Effective: In many cases, making your own specialty meats can be more economical than regularly purchasing premium deli items.
This 24-hour homemade summer sausage recipe is a game-changer for anyone who loves the distinct flavors of cured sausage but doesn’t have the time or equipment for traditional methods. It’s an accessible, rewarding, and incredibly delicious way to bring the deli experience right into your kitchen. So, gather your ingredients, follow these simple steps, and prepare to be amazed by the savory results. Your culinary adventure awaits, yielding a perfectly seasoned, beautifully textured summer sausage that’s ready to enjoy in just one day. Don’t just dream about gourmet deli meats—make them a reality tonight!
For a visual guide and more expert tips, be sure to watch the full tutorial by Food Wishes on YouTube. Happy cooking!