
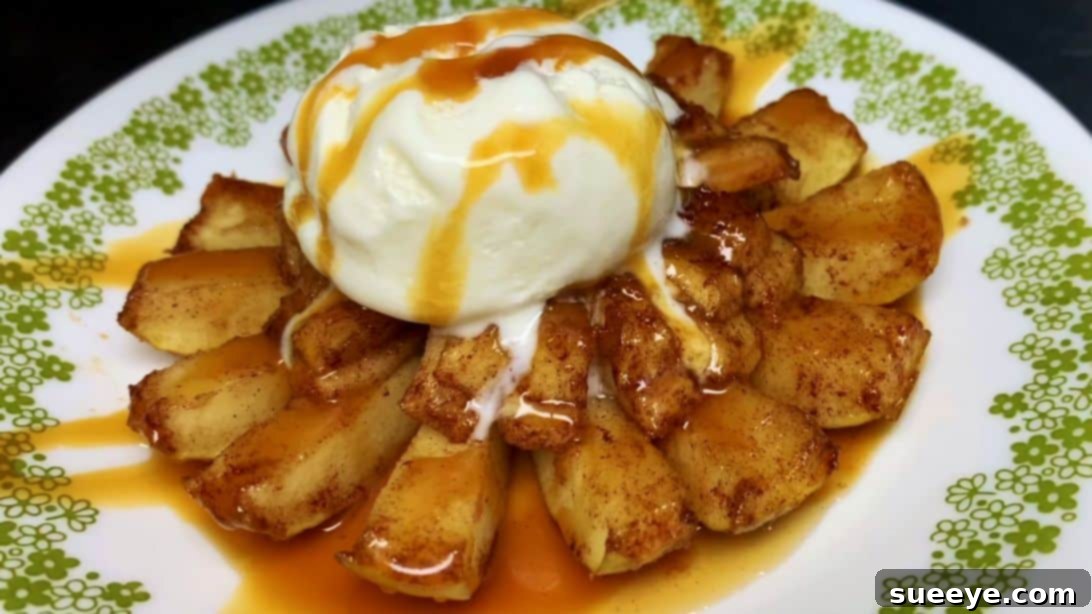
Easy Baked Blooming Apples: A Delectable Dessert That Impresses
Few fruits capture the essence of home baking quite like the humble apple. Its versatility, natural sweetness, and ability to hold its texture through the baking process make it a perennial favorite for countless desserts. Among the myriad of apple-based treats, the baked blooming apple stands out as a truly spectacular creation. It’s a dessert that not only tastes incredible but also boasts an eye-catching presentation, resembling a blossoming flower ready to be enjoyed.
Inspired by the brilliant recipe from Team Bequette on YouTube, this baked blooming apple recipe elevates simple ingredients into an extraordinary culinary experience. Each apple is meticulously prepared, allowing its flesh to fan out beautifully as it bakes, absorbing a rich, buttery, and sweet cinnamon mixture. The result is a tender, fragrant, and exquisitely flavored apple that becomes even more irresistible when paired with a scoop of creamy vanilla ice cream and a generous drizzle of warm, gooey caramel sauce. This is more than just a dessert; it’s a comforting indulgence that promises to become a go-to favorite for any occasion, from cozy family dinners to elegant gatherings.
Whether you’re a seasoned baker or just starting your culinary journey, these blooming apples are surprisingly simple to prepare, yet yield a gourmet-level dessert that will impress everyone at the table. Get ready to transform ordinary apples into an unforgettable treat!
Ingredients for Your Blooming Apple Delight:
To create these stunning and delicious baked blooming apples, gather the following fresh and pantry staples. The quantities below are perfect for serving a small group, but can easily be scaled up for larger gatherings.
- 5 large Granny Smith apples (or other firm, tart baking apples like Honeycrisp or Fuji)
- 4 tbsp (½ stick) of unsalted butter, melted
- 1 tbsp of packed light brown sugar
- 1 tbsp of granulated sugar
- ½ tsp of ground cinnamon
- 10 pieces of chewy caramel squares (such as Kraft Caramels), unwrapped
- Vanilla ice cream, for serving
- Extra caramel sauce, for drizzling
Choosing the Right Apples:
While Granny Smith apples are recommended for their tartness and firm texture, which holds up beautifully during baking, feel free to experiment with other varieties. Honeycrisp offers a delightful balance of sweet and tart, while Fuji apples provide a sweeter profile. The key is to select apples that are firm and not overly soft, ensuring they maintain their shape and develop a tender, not mushy, consistency.
Step-by-Step Guide to Crafting Perfect Baked Blooming Apples:
Follow these detailed instructions to create beautifully “bloomed” and incredibly flavorful baked apples. Attention to each step ensures a perfect result every time.
Step 1: Prepare the Apples for Blooming
Begin by thoroughly rinsing and cleaning each apple under cool running water. Pat them dry. This initial preparation is crucial for a clean and hygienic dessert. Next, carefully slice off the very top of each apple, creating a flat surface. This step not only makes the apple easier to handle but also creates an opening for coring.
Using either a melon baller or a sturdy teaspoon, scoop out the core from the center of each apple. Be careful not to go all the way through the bottom, leaving a solid base for the filling. The goal is to create a neat cavity that will later hold the luscious caramel.
Once the cores are removed, place an apple on a cutting board, cut-side down. Grab a sharp paring knife and make two circular cuts around the top flesh of the apple. These cuts should be about half an inch deep, circling the hollowed-out core. These initial cuts will guide your vertical slices.
Now, with the apple still cut-side down, carefully start slicing the apple vertically, working your way around the fruit. Make sure to leave the very center, where the core was, intact. This central portion acts as the anchor, holding all the slices together while allowing them to fan out during baking. Aim for slices that are about ¼ to ½ inch thick. The more evenly you slice, the more beautiful and uniform your “blooming” effect will be. The apple should now resemble a flower waiting to open, with its petals lightly connected at the base.
Step 2: Create the Flavorful Butter Mixture and Bake
Preheat your oven to 375°F (190°C). Ensuring your oven is at the correct temperature before placing the apples in is key for even baking and proper caramelization. While the oven preheats, prepare the delicious coating for your apples.
In a medium-sized mixing bowl, combine the melted butter, ground cinnamon, granulated sugar, and packed brown sugar. Whisk these ingredients together until they are thoroughly combined and the sugar has largely dissolved into the butter. This aromatic mixture will infuse the apples with rich, sweet, and spicy notes as they bake.
Lightly grease a baking dish with nonstick cooking spray. This prevents the apples and any melted caramel from sticking, making cleanup a breeze. Carefully transfer the prepared apples to the greased baking dish, ensuring their cut side, with the fanned-out slices, is facing up.
Generously brush the top and sides of each apple with the buttery cinnamon-sugar mixture. Don’t be shy – this coating is what gives the apples their incredible flavor and helps them caramelize beautifully. Make sure to get some of the mixture between the slices to ensure every part of the apple is seasoned.
Now for the delightful surprise center! Place two unwrapped chewy caramel candies into the hollowed-out core of each apple. As the apples bake, these caramels will melt into a warm, gooey, and incredibly rich sauce that perfectly complements the tender apple flesh.
Carefully place the baking dish into your preheated oven. Bake for approximately 40 to 45 minutes, or until the apples are tender when pierced with a fork and the edges of the slices are golden brown and slightly caramelized. The exact baking time may vary depending on the size and variety of your apples and your specific oven. Keep an eye on them towards the end to prevent over-browning.
Serving Suggestions for Your Irresistible Blooming Apples:
Once baked to perfection, these blooming apples are a showstopper. Serve them warm straight from the oven for the best experience. The melted caramel inside will be wonderfully molten and fragrant.
- Classic Pairing: A generous scoop of cold vanilla ice cream is the quintessential accompaniment. The contrast between the warm, tender apple and the cool, creamy ice cream is simply divine.
- Extra Caramel Drizzle: Don’t forget an extra drizzle of your favorite store-bought or homemade caramel sauce over the top of the ice cream and apple.
- Whipped Cream & Nuts: For an added touch of luxury, top with a dollop of freshly whipped cream and a sprinkle of chopped pecans or walnuts for texture.
- A Dash of Spice: A light dusting of extra cinnamon or a pinch of nutmeg can further enhance the autumnal flavors.
- Cheese Pairing: For a more sophisticated touch, a thin slice of sharp cheddar cheese pairs surprisingly well with baked apples, offering a delightful sweet and savory combination.
Tips for Achieving Blooming Apple Perfection:
To ensure your baked blooming apples turn out perfectly every time, keep these helpful tips in mind:
- Apple Choice is Key: Always opt for firm, crisp apples that can withstand baking without becoming mushy. Granny Smith, Honeycrisp, Braeburn, and Fuji are excellent choices.
- Prevent Browning: As you prepare your apples, if you’re working with several and they start to brown, you can lightly brush them with a little lemon juice or submerge them briefly in a bowl of water with a tablespoon of lemon juice. Pat them dry before applying the butter mixture.
- Sharp Knife: A very sharp paring knife is essential for making clean, even slices that contribute to the beautiful blooming effect.
- Don’t Cut Through: Remember to leave the very center of the apple intact at the base when slicing. This is crucial for holding the apple together.
- Even Coating: Be generous when brushing the butter-sugar mixture. Ensure it gets into the crevices between the slices for maximum flavor and caramelization.
- Monitor Baking: Ovens can vary. Check the apples for tenderness around the 35-minute mark. If they are browning too quickly, you can loosely tent them with aluminum foil.
- Rest Before Serving: While tempting to dive in immediately, letting the apples rest for 5-10 minutes after coming out of the oven allows the internal caramel to settle slightly and prevents scalding hot filling.
Creative Variations to Customize Your Baked Blooming Apples:
While the classic recipe is wonderful, don’t hesitate to personalize your blooming apples with these delightful variations:
- Nutty Crunch: Add a tablespoon of finely chopped pecans, walnuts, or almonds to the caramel filling before baking for an extra layer of texture and flavor.
- Dried Fruit Infusion: Mix a few dried cranberries, raisins, or chopped apricots with the caramel for a fruity twist.
- Spiced Up: Enhance the spice profile by adding a tiny pinch of nutmeg, allspice, or ground ginger to the butter mixture.
- Streusel Topping: For an added crumbly texture, prepare a simple streusel (butter, flour, brown sugar) and sprinkle it over the apples before baking.
- Chocolate Drizzle: Instead of or in addition to caramel sauce, drizzle warm chocolate sauce over the finished apples.
- Cream Cheese Filling: For a richer center, mix cream cheese with a little sugar and cinnamon and use it as a filling alongside or instead of caramel.
- Maple Pecan: Substitute some of the brown sugar with maple syrup in the butter mixture and add chopped pecans to the core.
Why These Baked Blooming Apples Will Become Your Go-To Dessert:
There are countless reasons why this recipe is destined to become a staple in your kitchen:
- Stunning Presentation: The “blooming” effect is genuinely captivating and makes this dessert perfect for impressing guests without extensive effort.
- Incredible Flavor: The combination of tender, sweet, and tart apple with warm cinnamon, buttery goodness, and molten caramel is simply irresistible.
- Customizable: Easily adapt the recipe with various spices, fillings, and toppings to suit your taste or what you have on hand.
- Comfort Food at Its Best: There’s something inherently cozy and satisfying about warm baked apples, especially when served with ice cream.
- Relatively Simple: Despite its impressive appearance, the steps are straightforward and manageable for any home cook.
- Perfect for Any Season: While apples are a quintessential fall fruit, this dessert is a welcome treat year-round.
Storage and Reheating Instructions:
While these blooming apples are best enjoyed fresh and warm from the oven, you can store and reheat leftovers:
- Storage: Allow any leftover baked apples to cool completely. Store them in an airtight container in the refrigerator for up to 2-3 days.
- Reheating: For best results, reheat individual apples in a microwave for 30-60 seconds until warmed through, or in a preheated oven at 300°F (150°C) for 10-15 minutes. This will help crisp up the edges slightly. Avoid overheating, as it can make the apples mushy.
We extend our heartfelt gratitude to Team Bequette via YouTube for inspiring this delightful recipe and for providing the wonderful images used here. Their creativity has brought joy to many kitchens! We encourage you to visit their channel for more fantastic culinary inspiration and consider subscribing to their content.