
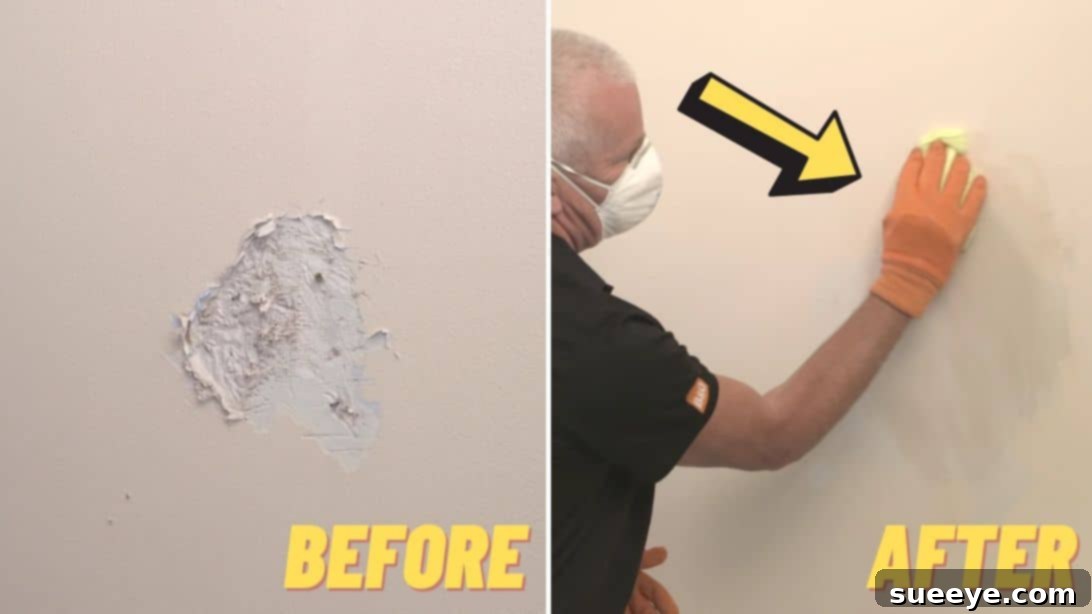
Master the Art of Wall Repair: A Comprehensive Guide to Fixing Plaster Holes Effortlessly
There are few things as frustrating as a noticeable hole or crack marring the smooth surface of your wall. Whether it’s from a misplaced picture hook, a door slamming too hard, or just general wear and tear, wall damage is a common occurrence in any home. The good news? You don’t need to be a seasoned professional to tackle these repairs. With the right tools, a clear understanding of the process, and a little patience, you can restore your walls to their pristine condition, saving both time and money. This comprehensive guide, inspired by expert tips from B&Q on YouTube, will walk you through every step of patching a plaster wall, making it surprisingly simple even for beginners. Get ready to embrace your inner DIY enthusiast and achieve a professional-looking finish!
Why Tackle Wall Repair Yourself?
Before diving into the how-to, let’s briefly consider the compelling reasons to undertake this home improvement task yourself:
- Cost Savings: Hiring a professional for minor wall repairs can quickly add up. Doing it yourself significantly reduces labor costs, allowing you to allocate your budget to other projects.
- Sense of Accomplishment: There’s immense satisfaction in successfully completing a home repair project. Standing back and admiring your flawlessly restored wall is a rewarding experience.
- Empowerment: Learning basic DIY skills builds confidence and empowers you to handle future household issues without immediate reliance on external help.
- Immediate Action: Small holes can often be patched relatively quickly, preventing them from becoming larger, more costly problems down the line.
- Improved Aesthetics: A smooth, unblemished wall instantly enhances the visual appeal of any room, creating a cleaner and more inviting living space.
Essential Materials for a Flawless Plaster Repair:
Gathering all your materials before you begin will ensure a smooth and efficient repair process. Here’s what you’ll need, along with a brief explanation of each item’s purpose:
- Dust sheet or dust cloth: Absolutely essential for protecting your flooring, furniture, and any surrounding areas from plaster dust and debris. A clean workspace is a safe and efficient workspace.
- Utility knife and scraper or hammer and cold chisel: These tools are your first line of defense against damaged plaster. A utility knife and scraper are perfect for carefully trimming loose edges, while a hammer and cold chisel can be employed for more stubborn or larger sections of crumbling plaster that need to be removed.
- Cable and pipe detector: This is a non-negotiable safety device. Before making any cuts into your wall, use this detector to scan for hidden electrical cables, water pipes, or gas lines. Ignoring this step could lead to serious injury or costly damage.
- Spirit level: Crucial for ensuring your repair is perfectly flush with the existing wall surface, preventing any unsightly bumps or depressions.
- Steel rule: Used in conjunction with the spirit level, a steel rule helps in accurately assessing the depth of the damaged area and guiding your plaster application.
- Flat plastering trowel: This is your primary tool for applying, spreading, and smoothing the plaster repair material. A clean, flat trowel is key to achieving an even finish.
- Ready use plaster repair and skim: This versatile product serves as the core material for your repair. “Plaster repair” is generally thicker and suitable for deeper holes, while “skim” is finer and ideal for achieving a smooth top coat or filling very shallow imperfections.
- Coarse grade sandpaper: Used for the initial sanding phase, coarse sandpaper helps to remove larger imperfections, level out proud areas, and create a relatively flat surface after the plaster has dried.
- Medium-grade sandpaper: Essential for the final stages of sanding, medium-grade sandpaper provides a smoother finish, preparing the wall for painting, wallpapering, or tiling.
- Diluted PVA adhesive: PVA acts as a primer and a bonding agent. When applied to the damaged area, it creates a “key,” allowing the new plaster to adhere securely to the old surface and prevents rapid moisture absorption from the plaster.
- Damp cloth or sponge: For wiping away dust after sanding and for lightly wetting your trowel during the smoothing process.
- Appropriate sealer (if painting, wallpapering, or tiling): If your repaired area will be covered, applying a suitable plaster sealer or primer is crucial. This helps to equalize porosity, prevents flash banding, and ensures a consistent finish for your chosen decorative covering.
Step-by-Step Guide: How to Patch a Hole in Your Wall Like a Pro:
Step 1: Preparing the Damaged Area for Repair and Ensuring Safety
The success of your wall repair hinges significantly on thorough preparation. Take your time with this initial phase:
- Protect Your Workspace: Begin by laying a dust sheet or cloth on the floor directly beneath the damaged area. This will catch any falling debris and plaster dust, making cleanup much easier.
- Inspect and Remove Loose Plaster: Carefully inspect the damaged area. Use a utility knife and scraper, or if dealing with more stubborn sections, a hammer and cold chisel, to meticulously remove any loose, cracked, or crumbling plaster. The goal here is to create a stable, clean edge for your repair material to adhere to, ensuring the integrity of the patch. Cut back until you reach solid, sound plaster, but be mindful not to deepen the hole beyond approximately 3mm in a single layer if using a skimming plaster. For deeper repairs, you’ll build up layers as described in Step 2.
- Prioritize Safety with a Detector: Before making any significant cuts or deeper excavations into the wall, it is absolutely paramount to use a cable and pipe detector. Thoroughly scan the area to identify the presence of any hidden electrical wires, water pipes, or gas lines. Proceeding without this crucial safety check can lead to severe personal injury or extensive property damage.
- Prepare the Surface:
- Sanding Glossy Surfaces: If the surrounding wall surface is glossy, it won’t provide good adhesion for new plaster. Lightly sand the glossy area with coarse-grade sandpaper to scuff it up, creating a better “key” for the repair material.
- Clean Thoroughly: Use a brush to remove all dust and loose particles from the damaged area. A clean surface is essential for good adhesion.
- Check for Dampness or Grease: Inspect for any signs of dampness or grease. If grease is present, clean the area thoroughly with a suitable degreaser and allow it to dry completely. If you suspect dampness, which could indicate a more serious underlying issue like a leak, it is strongly advised to seek expert advice from a professional before attempting any repair. Repairing over dampness will only lead to recurring problems.
- Address Protruding Fixings: If there are any nails, screws, or other fixings within the repair area, ensure their heads are well below the surface of the wall. Any fixings that protrude should be carefully removed or hammered in further to be flush or recessed, preventing them from interfering with your smooth plaster finish.
Step 2: Applying Plaster and Achieving a Seamless Finish
With the damaged area meticulously prepared, it’s time to apply the repair material and create a smooth, invisible patch:
- Prime with Diluted PVA: Apply a coat of diluted PVA adhesive to the entire repair area using a brush. Allow this to become tacky, but not completely dry. This priming step is crucial as it stabilizes the porous surface, improves adhesion for the new plaster, and prevents the existing wall from absorbing moisture too quickly from the fresh plaster, which could lead to cracking.
- Assess Depth and Select Material: Before you start applying plaster, use your steel rule and spirit level to re-check the depth of the damaged area.
- For Depths Greater than 3mm: If the hole is deeper than approximately 3mm, you will need to use a dedicated plaster repair filler. Apply this in layers, allowing each layer to partially dry and firm up before applying the next. Each layer can typically be up to 12mm thick. Building up in thinner layers helps prevent sagging, cracking, and ensures proper drying.
- For Depths Around 3mm or Less: If the depth is minimal (around 3mm or less), a single layer of ready-mix plaster repair or skim will likely suffice.
- Apply the Filler: Using your flat plastering trowel, apply the plaster repair material directly to the wall. Start by loading a small amount onto your trowel, then press it firmly into the hole, working from the outside edges towards the center. Aim to overfill the area slightly, as it’s easier to sand down excess than to add more later.
- Smooth and Level: With consistent pressure, use the trowel to flatten and smooth the applied plaster as much as possible, feathering the edges into the surrounding wall. Your goal is to make the repair flush with the existing surface. Use the spirit level and steel rule to periodically check for flatness. Clean your trowel regularly to prevent hardened plaster from creating imperfections.
- Allow to Dry (Initial Set): Let the plaster begin to set. Drying times vary based on product, thickness, and humidity, so refer to your product’s instructions. As it starts to firm up but is not yet rock hard, lightly wet your plastering trowel.
- Final Smoothing: Use the damp trowel to gently buff and smooth the plaster surface again. The moisture helps to lubricate the trowel, allowing you to achieve an incredibly smooth finish. Work with light, sweeping motions until you are satisfied with the surface.
- Full Drying and Sanding: Allow the plaster to dry completely. This can take several hours to a full day, depending on thickness and environmental conditions. Once fully dry, lightly rub over the entire repaired surface using medium-grade sandpaper. Use a sanding block for even pressure. The aim is to create a seamless transition between the new plaster and the old wall, ensuring a perfectly smooth and uniform texture.
- Clean and Prepare for Finishing: After sanding, wipe over the sanded surface with a damp cloth to remove any lingering dust. This ensures the surface is clean and ready for its final treatment.
- Seal Before Decorating: If you plan to paint, wallpaper, or tile the repaired area, do not skip this crucial step! Coat the new plaster with an appropriate sealer or primer (as mentioned in the materials list). This will prepare the surface for decorative finishes, ensuring even absorption of paint, preventing patchy finishes, and providing better adhesion for wallpaper or tiles.
Safety First: Important Considerations
While fixing a hole in a wall might seem like a minor task, safety should always be your top priority. Beyond the crucial use of a cable and pipe detector, consider these additional points:
- Ventilation: When sanding, plaster dust can be irritating to the respiratory system. Ensure good ventilation in your workspace and consider wearing a dust mask to protect your lungs.
- Eye Protection: Always wear safety glasses or goggles to protect your eyes from flying debris or plaster dust, especially when chiseling or sanding.
- Tool Handling: Handle utility knives, scrapers, hammers, and chisels with care to prevent cuts or impact injuries. Keep tools clean and sharp for better control.
- Working at Heights: If the repair area is high on the wall, use a stable stepladder or scaffolding. Never overreach or use unstable platforms.
- Chemicals: When using PVA adhesive, plaster repair compounds, or sealers, always read and follow the manufacturer’s safety data sheets and instructions, including any recommendations for gloves or ventilation.
Pro Tips for a Flawless Finish
To elevate your wall repair from good to truly excellent, keep these expert tips in mind:
- Think Thin Layers: Especially for deeper holes, applying several thin layers of plaster repair, allowing each to firm up, is far more effective than one thick application. This reduces cracking and ensures a stronger, more stable patch.
- Patience is Key: Rushing the drying process or attempting to sand plaster that isn’t fully cured can lead to a messy, uneven finish. Allow ample time for each stage to dry properly.
- Check in Different Lighting: Once the plaster is dry and sanded, inspect the repair from different angles and in varying light conditions (e.g., natural daylight, artificial light). Imperfections often become more visible under certain lighting, allowing you to catch and correct them before painting.
- Practice Makes Perfect: Don’t get discouraged if your first attempt isn’t flawless. Plastering is a skill that improves with practice. Start with smaller, less conspicuous repairs if you’re feeling nervous.
- Clean Tools Immediately: Plaster dries quickly and becomes incredibly hard. Clean your trowel and other tools with water immediately after use to prevent material from hardening on them, which can make them difficult to clean and less effective for future use.
Conclusion: Enjoy Your Flawless Walls!
Patching a hole in your plaster wall is a fundamental home maintenance skill that yields incredibly satisfying results. By following these detailed steps, prioritizing safety, and using the right materials, you can confidently tackle unsightly wall damage and restore the smooth, clean appearance of your living space. The journey from a chipped, cracked, or punctured wall to a perfectly seamless surface is not just about repair; it’s about empowering yourself with practical knowledge and enhancing the beauty of your home. So, gather your tools, commit to the process, and soon you’ll be admiring your handiwork – a testament to your newfound DIY prowess. Enjoy your beautifully restored walls!
*These amazing images are all credited to B&Q via YouTube. Check their other content and follow for more inspiring DIY projects!