
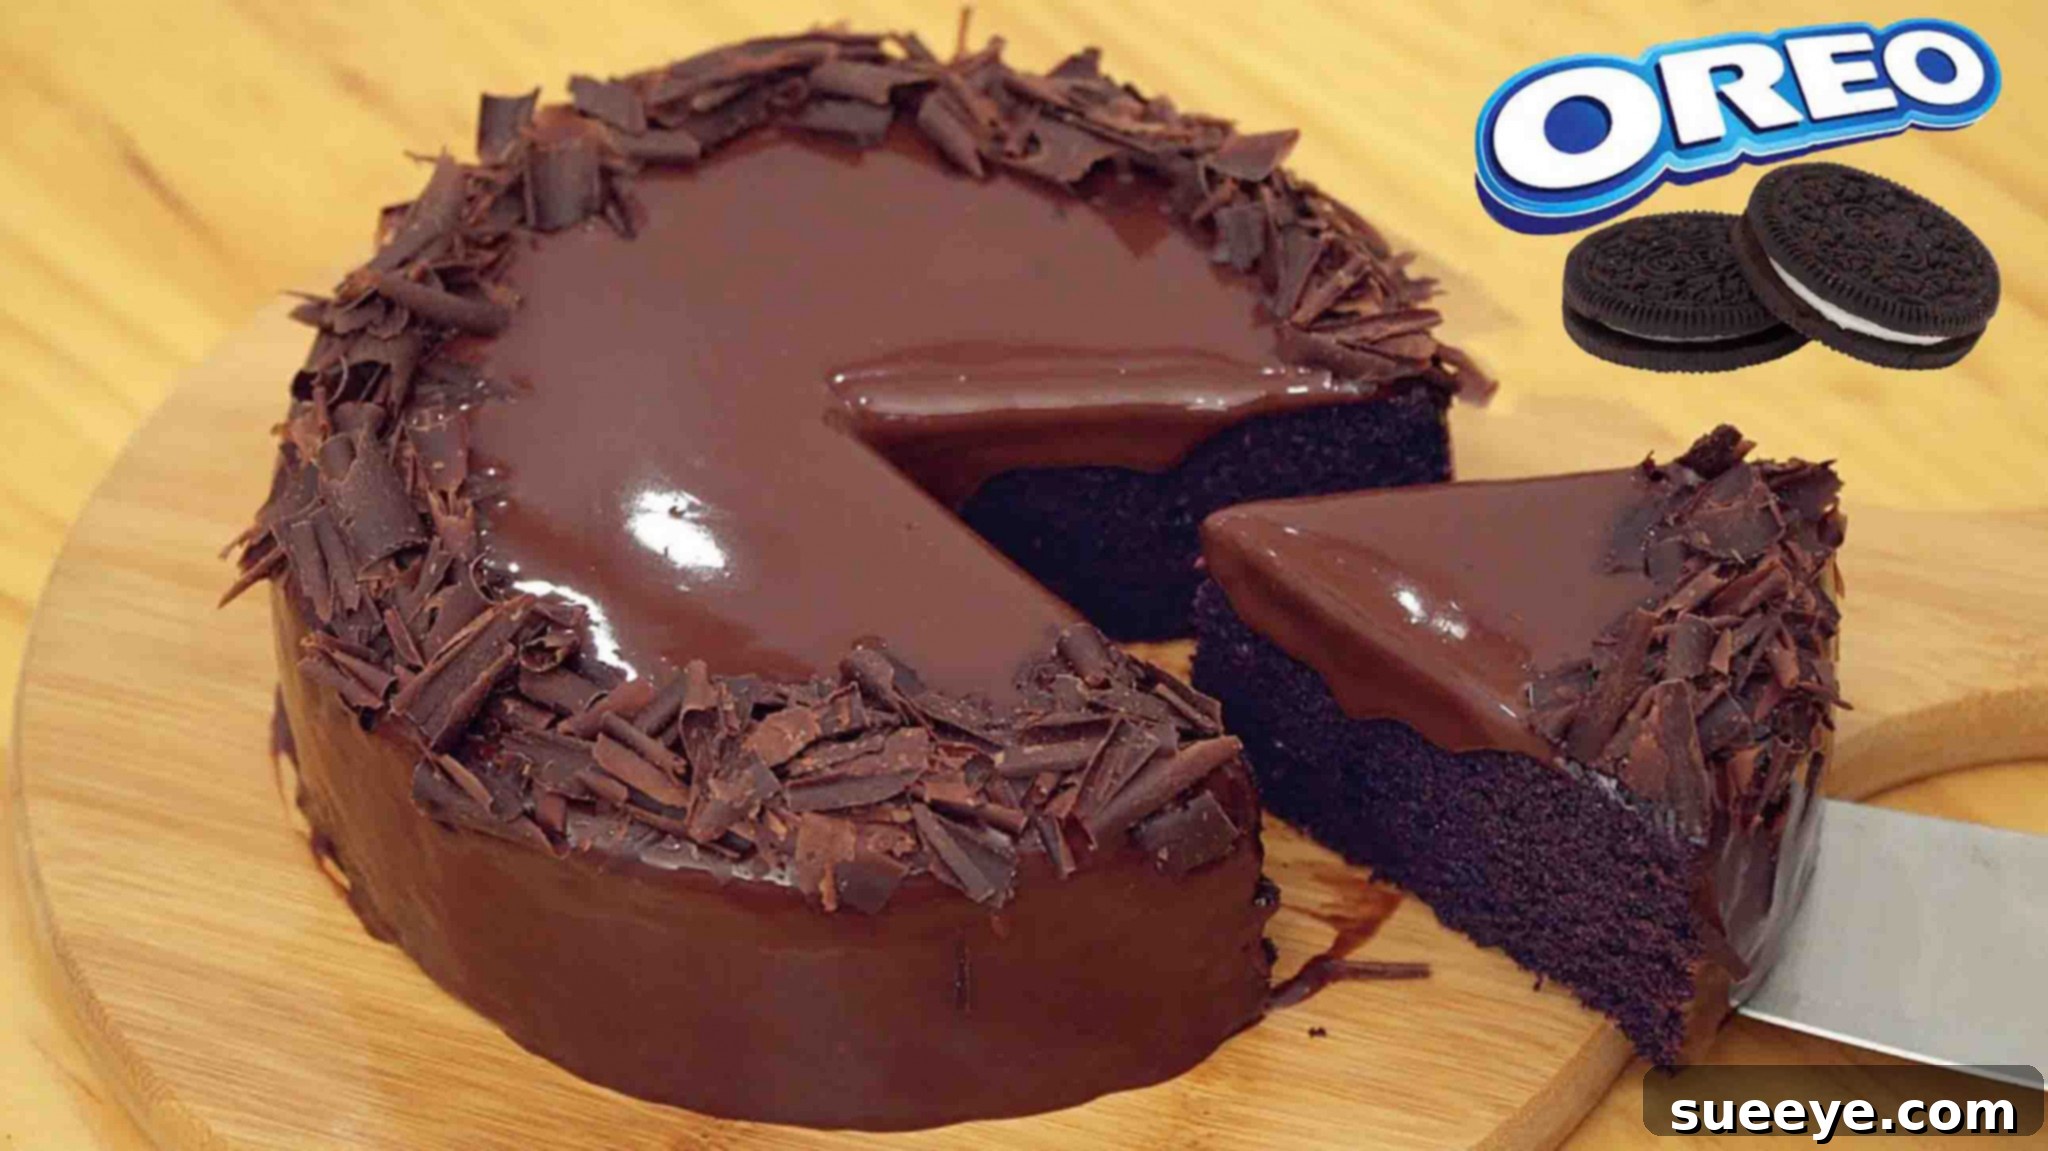
Oreo cookies are undeniably a global phenomenon, captivating hearts and taste buds with their iconic chocolatey wafers and creamy filling. Their universal appeal has naturally led to an explosion of creative recipes, transforming this beloved snack into an endless array of delightful desserts. While you’ll encounter countless variations, from milkshakes to cheesecakes, this particular recipe stands out as a true gem. Featured by the renowned Nino’s Home on YouTube, this incredible 3-ingredient chocolate cake is made entirely from Oreo cookies and requires absolutely no oven! Yes, you read that right – no baking needed, making it perfect for novice bakers, busy individuals, or anyone craving a quick and delicious treat without the fuss. If you’re looking to elevate your creation even further, a luscious chocolate glaze can transform it into a truly decadent masterpiece. Prepare to impress your family and friends with this unbelievably simple yet spectacularly tasty dessert. Ready to embark on this delightful culinary journey? Let’s dive into the recipe below and discover how to create this magical no-bake Oreo cake!
Essential Ingredients for Your No-Bake Oreo Cake
The beauty of this recipe lies in its minimalist approach. With just three core ingredients, you can craft a cake that tastes like it came from a professional bakery. Ensure you have these items ready:
- 28 pieces of classic Oreo cookies: These form the foundation and main flavor profile of our cake. Using the original chocolate sandwich cookies ensures that distinct, beloved Oreo taste.
- 1 teaspoon of baking powder: While this is a no-bake cake in the traditional sense, baking powder plays a crucial role in giving the cake a light, airy texture, preventing it from becoming too dense.
- 1 cup of milk: Whole milk is recommended for richness, but you can use any milk you prefer. It binds the ingredients together, creating a smooth and pliable batter.
For those looking to add an optional, yet highly recommended, chocolate glaze, you’ll also need:
- 5 ounces of dark chocolate (chips or finely chopped bar)
- 5 ounces of hot whipping cream
Step-by-Step Guide to Crafting Your Perfect Oreo Cake
Follow these simple directions carefully, and you’ll have a delectable Oreo chocolate cake ready to enjoy in no time. Precision in preparation ensures the best results for this no-bake wonder.
Step 1: Preparing the Oreo Base and Batter
The first step involves transforming your beloved Oreo cookies into the rich, chocolatey base of your cake. This process is straightforward and enjoyable.
- Separate the Oreo cookies and cream: Gently twist each Oreo cookie to separate the chocolate wafers from their creamy white filling. Place the wafers in one bowl and meticulously scrape the cream filling into a separate bowl. This separation ensures that the cream will be incorporated smoothly into the batter later, contributing to its moistness and flavor.
- Crush the Oreo wafers: Once separated, gather all the chocolate cookie wafers. For a therapeutic experience, place them into a sturdy ziplock bag, seal it, and use a rolling pin or the bottom of a heavy pan to smash them until they form fine crumbs. Alternatively, for a quicker and more consistent result, a food processor or blender can pulverize the cookies into a fine powder in mere seconds. The finer the crumbs, the smoother your cake texture will be, so aim for a consistent, sand-like consistency.
- Combine dry ingredients: Transfer the crushed Oreo wafers into a large mixing bowl. Add 1 teaspoon of baking powder to the crumbs. Using a whisk or spatula, mix these dry ingredients thoroughly. Even distribution of the baking powder is key to achieving that desired lightness in the final cake.
- Incorporate wet ingredients: Next, pour 1 cup of milk into the bowl with the Oreo crumbs and baking powder. Immediately follow this with the reserved Oreo cream filling.
- Mix to form a smooth batter: Begin mixing the entire concoction. It’s crucial to mix thoroughly until all the ingredients are well combined and the Oreo cream completely dissolves into the mixture, creating a smooth, consistent batter. If you’re using a hand mixer or a blender, this process will be much faster and will ensure a lump-free batter. The final consistency should resemble a thick, pourable brownie batter – neither too runny nor too stiff.
Step 2: The No-Bake Cooking Process and Optional Glaze
This unique method allows you to “bake” a cake without a traditional oven, relying instead on gentle, indirect heat from your stovetop. This technique is surprisingly effective and yields a beautifully moist cake.
- Prepare your cooking pan: Select a thick-bottomed pan, ideally a non-stick one, that has a tight-fitting lid. The thickness of the pan is vital for even heat distribution, preventing the bottom of your cake from burning. Lightly grease the inside of the pan with cooking oil or butter. Then, line the bottom with a circle of baking paper (parchment paper). This step is crucial for easily removing the cake once it’s cooked.
- Pour the batter: Carefully pour your prepared Oreo mixture into the lined pan. Use a spatula to spread the batter evenly across the bottom, ensuring a uniform thickness for consistent cooking.
- Set up the stovetop “oven”: Place a large, thick-bottomed skillet or another heavy pan (wider than your cake pan) on your stove burner. Turn the stove to a low heat setting. This initial pan acts as a heat diffuser, preventing direct heat from scorching your cake.
- Place and cover: Once the diffuser pan is gently warmed, place your cake pan (with the Oreo batter) directly on top of it. Immediately cover the cake pan with its lid. The lid traps steam and heat, creating a humid environment similar to an oven.
- “Bake” on low heat: Allow the cake to cook on low heat for approximately 40 to 45 minutes. It’s essential to maintain a consistently low heat to ensure the cake cooks through without burning. Resist the urge to lift the lid frequently, as this releases trapped heat and steam, prolonging the cooking time.
- Check for doneness: After 40 minutes, carefully lift the lid and insert a clean wooden skewer, toothpick, or knife into the center of the cake. If the skewer comes out clean, with no wet batter clinging to it, your cake is perfectly cooked. If it’s still wet, cover it again and continue cooking for another 5-10 minutes, checking periodically.
- Cool the cake: Once cooked, remove the pan from the stove. Allow the cake to cool in the pan for about 10-15 minutes before carefully inverting it onto a serving plate. Peel off the baking paper. Let the cake cool completely to room temperature before applying any glaze or decorations. This step is crucial for ensuring the glaze sets properly.
Optional: Elevate with a Luxurious Chocolate Glaze
While delicious on its own, a simple homemade chocolate glaze (ganache) adds an extra layer of decadence to your no-bake Oreo cake.
- Prepare the ganache: In a heatproof bowl, place 5 ounces of dark chocolate chips or finely chopped dark chocolate. In a small saucepan, gently heat 5 ounces of whipping cream until it just begins to simmer around the edges – do not boil.
- Combine and mix: Pour the hot whipping cream directly over the dark chocolate. Let it sit undisturbed for 2-3 minutes to allow the heat from the cream to melt the chocolate. Then, using a whisk or spatula, gently stir from the center outwards until the mixture is completely smooth, glossy, and uniform. This will create a rich, pourable ganache.
- Glaze the cake: Once the cake has cooled completely, pour the warm (but not hot) chocolate ganache over the top, allowing it to slowly drip down the sides for a beautiful, rustic look. You can use an offset spatula to spread it evenly if desired.
- Decorate and serve: For an extra touch of elegance, decorate your glazed cake with grated chocolate, extra crushed Oreos, a dusting of cocoa powder, fresh berries, or even a sprinkle of sea salt to enhance the chocolate flavor. Allow the glaze to set slightly before slicing and serving.
Why This No-Bake Oreo Chocolate Cake Will Be Your New Favorite
This 3-ingredient no-bake Oreo chocolate cake is more than just a recipe; it’s a testament to how simple ingredients can create extraordinary results. Here’s why this cake is poised to become a staple in your dessert repertoire:
- Unbeatable Simplicity: With only three main ingredients and no oven required, this recipe is incredibly accessible, even for those with minimal cooking experience or limited kitchen equipment.
- Effortless Preparation: The process is designed for ease, from crushing cookies to the unique stovetop cooking method. It’s quick to prepare, making it ideal for last-minute cravings or spontaneous gatherings.
- Incredibly Delicious: The rich, chocolatey flavor of Oreos combined with a moist, cake-like texture is a match made in dessert heaven. The optional chocolate glaze takes it to an even more luxurious level.
- Perfect for All Occasions: Whether it’s a birthday celebration, a casual dessert for family, or a treat for yourself, this cake fits every scenario. Its unique preparation is also a great conversation starter!
- Versatile and Customizable: While fantastic as is, this cake is also a blank canvas for customization. Experiment with different Oreo flavors, add mix-ins like chocolate chips or nuts, or top with whipped cream, sprinkles, or fresh fruit.
Tips for Achieving No-Bake Oreo Cake Perfection
Even with a simple recipe, a few tips can ensure your cake turns out flawlessly every time:
- Ingredient Quality Matters: Use fresh Oreo cookies and baking powder for the best results. The type of milk can slightly alter the richness, so choose what you prefer.
- Cookie Crumb Consistency: Aim for fine, consistent crumbs. This ensures a smooth batter and a uniform cake texture. A food processor is highly recommended for this step.
- Thorough Mixing: Ensure the Oreo cream is fully dissolved and the batter is smooth before cooking. Lumps can lead to uneven texture in the final product.
- Low and Slow Heat: Patience is key during the stovetop cooking. Keep the heat consistently low to prevent burning the bottom of the cake while allowing the center to cook through.
- Pan Selection: A thick-bottomed pan and parchment paper are non-negotiable. They prevent sticking and promote even cooking.
- Cooling is Crucial: Allow the cake to cool completely before glazing. Applying glaze to a warm cake will cause it to melt and run off, rather than setting beautifully.
Creative Variations and Serving Suggestions
Don’t be afraid to get creative with your no-bake Oreo cake!
- Oreo Flavor Swaps: Try using mint Oreos, golden Oreos, or peanut butter Oreos for different flavor profiles.
- Mix-Ins: Fold in mini chocolate chips, chopped nuts, or even a swirl of caramel or peanut butter into the batter before cooking.
- Topping Alternatives: Instead of ganache, consider a simple dusting of powdered sugar, a dollop of whipped cream, a scoop of vanilla ice cream, or a drizzle of chocolate syrup.
- Mini Cakes: Pour the batter into greased ramekins or muffin tins (lined with paper) for individual servings, adjusting cooking time accordingly.
- Serving: This cake is delicious served at room temperature, but a short chill in the refrigerator can enhance its fudgy texture, especially if glazed.
Storage Instructions
Store any leftover no-bake Oreo cake in an airtight container in the refrigerator for up to 3-4 days. It tastes fantastic chilled, making it a great make-ahead dessert option.
There you have it – a magnificent, stress-free, 3-ingredient no-bake Oreo chocolate cake that promises to deliver pure delight with every slice. This recipe truly redefines easy baking, proving that you don’t need a complicated ingredient list or a fancy oven to create something truly special. So, gather your ingredients, follow these simple steps, and prepare to indulge in a dessert that’s as fun to make as it is to eat. Share your creations and enjoy the magic of this effortless Oreo masterpiece!