
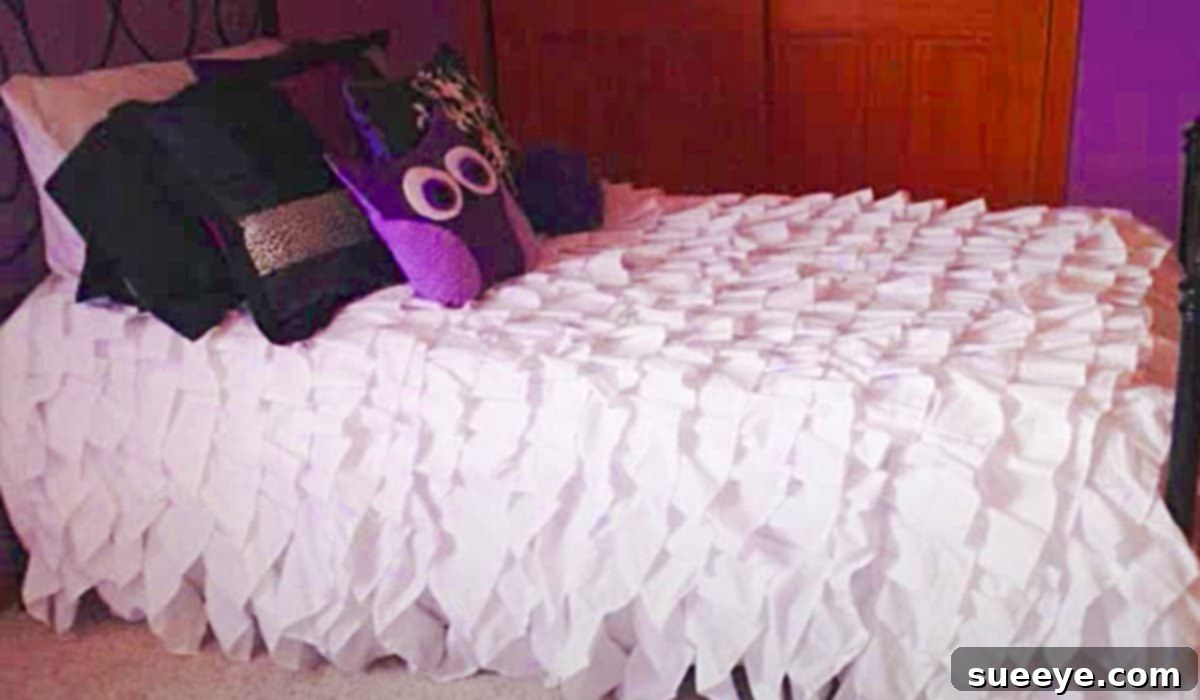
Are you dreaming of a luxurious, custom-designed bedroom without breaking the bank? Imagine transforming ordinary flat sheets into a stunning, elegant ruffled bedspread that instantly elevates your room’s aesthetic. This incredible DIY project allows you to create a high-end look on a budget, offering both immense satisfaction and a unique centerpiece for your decor. We were inspired by the fantastic video tutorial by Sarah Beth on YouTube, which brilliantly demonstrates just how simple and affordable it is to craft one of these awesome bedspreads using standard flat sheets. Get ready to add a touch of charming sophistication to your personal sanctuary!
How To Make A Ruffled Bedspread From Flat Sheets
Creating a ruffled bedspread from flat sheets is not only a fantastic way to personalize your bedroom but also an incredibly practical one. This project is perfect for those who love to infuse their living spaces with handmade charm and creativity. Whether you’re a seasoned seamstress or just starting your sewing journey, the simplicity of this method will surprise you. By repurposing readily available and inexpensive materials, you can achieve a bespoke look that perfectly matches your style and existing decor.
Why Choose a DIY Ruffled Bedspread?
There are numerous compelling reasons to embark on this delightful DIY project, beyond just its aesthetic appeal:
- Cost-Effective Elegance: High-quality ruffled bedspreads can be quite expensive in retail stores. By using flat sheets, you significantly reduce the cost, making luxurious bedding accessible on any budget.
- Unleash Your Creativity: This project offers endless opportunities for customization. Choose sheets in colors and patterns that perfectly complement your bedroom’s palette, or mix and match for a truly eclectic vibe.
- Beginner-Friendly Project: Despite its sophisticated appearance, the process of making this bedspread involves relatively simple sewing techniques, making it an excellent project for those new to using a sewing machine.
- Sustainable Style: Repurposing old or unused flat sheets is an eco-conscious choice, giving new life to textiles that might otherwise go to waste.
- Personalized Comfort: Enjoy the satisfaction of sleeping under a bedspread you crafted yourself, knowing it’s made with care and designed specifically for your comfort and style preferences.
Materials You’ll Need For This DIY Project:
Before diving into the sewing process, ensure you have all the necessary materials gathered. Having everything at hand will make your crafting experience much smoother and more enjoyable.
- 1 Flat Full, Queen, or King Sheet (for the base): This will serve as the foundation of your bedspread. Choose a sheet that matches the size of your bed. Opt for a durable yet comfortable fabric, as it will be the backing for your ruffles. A solid color often works best for the base, allowing the ruffles to truly stand out.
- 4 Twin Flat Sheets (for the ruffles): These sheets will be cut into strips to create the beautiful ruffles. Twin sheets are ideal because their width provides ample material for continuous strips. You can choose sheets of the same color as your base for a monochromatic look, or select contrasting colors and patterns for added visual interest. Ensure they are clean and pre-shrunk.
- A Sewing Machine: A basic sewing machine capable of a straight stitch is all you need. If your machine has a gathering foot, it can significantly speed up the ruffling process, but it’s not essential.
- A Pair of Sharp Fabric Scissors: Clean, crisp cuts are crucial for neat ruffle strips. Invest in a good pair of scissors specifically for fabric to avoid frayed edges and uneven strips.
- A Ruler (Yardstick or Measuring Tape): Accuracy is key in sewing. A long ruler or yardstick will help you measure and mark your cutting lines straight and consistently across the width of your sheets.
- A Fabric Marker or Tailor’s Chalk: Use a washable fabric marker or tailor’s chalk to clearly mark your cutting and sewing lines on the sheets. These marks will guide your cuts and stitches without leaving permanent traces.
- High-Quality Thread: Choose a thread that matches or complements the color of your sheets. Strong polyester thread is recommended for durability.
- Sewing Pins: A generous supply of sewing pins will help hold your ruffle strips in place as you attach them to the base sheet, preventing shifting and ensuring even placement.
- An Iron and Ironing Board (Optional but Recommended): Pressing your fabric before cutting and after sewing each section can make a huge difference in the final professional appearance of your bedspread.
Step-by-Step Guide: Crafting Your Ruffled Bedspread
Inspired by Sarah Beth’s insightful video tutorial on YouTube, we’ll guide you through the process of creating this magnificent bedspread in a series of easy-to-follow steps. Precision and patience are your best friends here!
Step 1: Prepare Your Base Sheet
Begin by laying your full, queen, or king flat sheet (the base sheet) flat on a large, clean surface, such as the floor or a large table. Smooth out any wrinkles. If necessary, give it a good press with an iron to ensure it’s perfectly flat. This will be the foundation onto which all your ruffles will be sewn. Make sure the side you want to be visible on the underside of the bedspread is facing down, as you’ll be sewing the ruffles onto the right side (top) of the base sheet.
Step 2: Transform Flat Sheets into Ruffle Strips
This is where your twin flat sheets come into play. Lay one twin sheet flat and smooth it out. Using your ruler and fabric marker, measure and mark 6-inch wide strips across the entire length of the sheet. It’s crucial to be precise with these measurements to ensure uniform ruffles. Carefully cut along your marked lines using your sharp fabric scissors. Repeat this process for all four twin flat sheets. You’ll end up with many long strips of fabric. The more strips you cut, the fuller and more luxurious your ruffled bedspread will appear. A typical full/queen bedspread might require anywhere from 20-30 strips, depending on how densely packed you want your ruffles.
Step 3: Create the Ruffles
Now, it’s time to create the signature ruffle effect. There are a few methods to achieve this:
- Using a Gathering Foot: If your sewing machine has a gathering foot attachment, this is the quickest and easiest method. Simply attach the foot and sew a straight stitch along one long edge of each 6-inch strip. The foot will automatically gather the fabric as you sew, creating beautiful, even ruffles.
- Basting Stitch Method: For machines without a gathering foot, set your sewing machine to the longest stitch length (a basting stitch) and sew two parallel lines of stitches along one long edge of each strip, about 1/4 inch and 1/2 inch from the edge. Do not backstitch at the beginning or end. Then, gently pull the bobbin threads of both stitch lines simultaneously, gathering the fabric to your desired ruffle density. Distribute the gathers evenly along the strip.
- Manual Pleating: For a more controlled look, you can manually create small pleats or gathers as you sew each strip directly onto the base sheet. This requires a bit more practice but gives you precise control over the ruffle spacing.
Aim for a consistent ruffle density across all your strips to maintain a cohesive look. Each ruffled strip should be slightly longer than the width of your base sheet, allowing for trimming later.
Step 4: Attaching the Ruffles to the Base
With your ruffle strips prepared, it’s time to attach them to your base sheet. You can start either from the bottom edge of the bedspread and work your way up, or from the top. Many find it easier to start from the bottom. Take your first ruffled strip and align its unruffled edge along the bottom edge of your base sheet, right side up. Pin it securely in place, ensuring the ruffles face downwards (towards the bottom of the bedspread). Sew the ruffle strip to the base sheet using a straight stitch, about 1/2 inch from the edge. Trim any excess fabric from the ends of the ruffle strip.
For the subsequent rows, position the next ruffled strip about 2-3 inches above the previous one, overlapping the top edge of the previous ruffle slightly. This overlap creates a continuous, full cascade of ruffles. Pin and sew each strip in the same manner, working your way up the entire length of the base sheet. Ensure your rows are straight and evenly spaced for a polished finish. Patience here will yield the best results.
Step 5: Finishing Touches
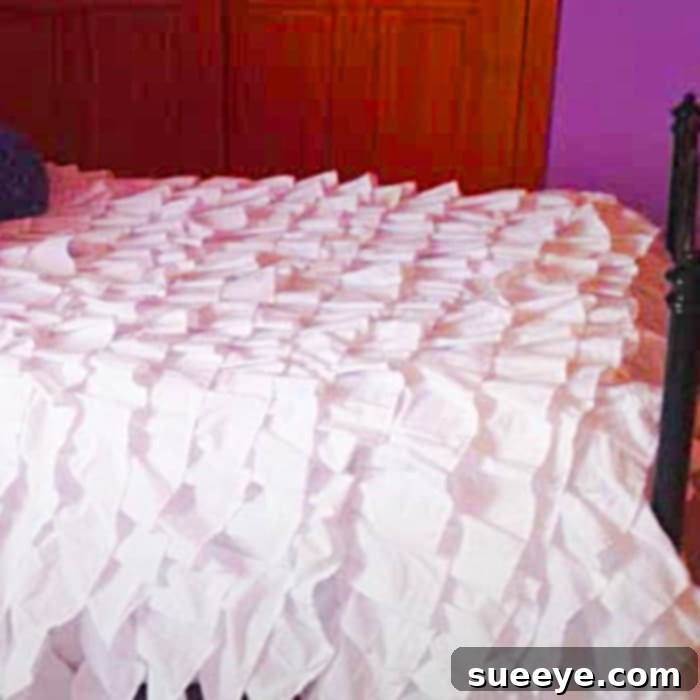
Once all your ruffle strips are sewn onto the base sheet, give your new bedspread a final inspection. Trim any loose threads. You might want to gently press the entire bedspread from the back to help the ruffles lay nicely. Consider adding a simple hem around the remaining three edges of the bedspread (the sides and the top) to give it a clean, finished look, if your base sheet didn’t already have one. And there you have it – your magnificent, custom-made ruffled bedspread is ready to adorn your bed!
Customization Ideas for Your Ruffled Bedspread
This DIY project is a fantastic canvas for your creativity. Don’t be afraid to experiment and make it truly your own:
- Varying Ruffle Widths: Instead of all 6-inch strips, try alternating between 4-inch and 8-inch strips for a more dynamic texture and visual interest.
- Mixed Fabrics: While flat sheets are cost-effective, you could incorporate strips of lace, satin, or even delicate sheer fabrics for an extra layer of luxury and dimension.
- Color Blocking or Ombre: Use sheets in various shades of the same color to create a beautiful ombre effect, or alternate contrasting colors for a vibrant, bold statement.
- Add Embellishments: Consider sewing on fabric flowers, delicate beads, or a strip of decorative trim along the top edge of some ruffles for an even more ornate look.
- Matching Pillows: Use leftover sheet fabric to create matching ruffled pillow shams or decorative throw pillows to complete your bedroom ensemble.
Care and Maintenance
To ensure your beautiful ruffled bedspread remains fresh and lovely for years to come, follow these simple care instructions:
- Washing: Machine wash your bedspread on a gentle cycle with cold water. Due to the volume of fabric, it might be best to use a large capacity washing machine.
- Detergent: Use a mild detergent and avoid harsh chemicals or bleach, which can damage the fabric and fade colors.
- Drying: Tumble dry on a low heat setting or, preferably, air dry by laying it flat or hanging it over several lines to prevent stretching and maintain the ruffle shape. Remove promptly to avoid excessive wrinkling.
- Ironing: If necessary, iron on a low setting, being careful to avoid flattening the ruffles too much. A steam iron can help fluff up the ruffles after washing.
Frequently Asked Questions (FAQ)
Here are some common questions about making a ruffled bedspread from flat sheets:
Q: How many sheets do I really need for a Queen size bedspread?
A: For a Queen size base, you’ll need one Queen flat sheet. For the ruffles, typically 4-5 twin flat sheets provide enough material for a good density of ruffles. The exact number can vary based on your desired fullness and the dimensions of your bed.
Q: Can I use fitted sheets instead of flat sheets?
A: While theoretically possible, it’s not recommended. Fitted sheets have elastic and curved corners, which would need to be cut off, resulting in less usable fabric and more waste. Flat sheets are much easier to work with for cutting straight strips.
Q: Is this project suitable for absolute beginners?
A: Absolutely! The core techniques involve straight cutting and straight stitching. If you can operate a sewing machine, you can definitely tackle this project. It’s a great way to build confidence in your sewing skills.
Q: How long does it typically take to complete this project?
A: The time required can vary based on your sewing speed and experience. On average, expect to spend anywhere from 6 to 12 hours. Breaking it down into stages (cutting, ruffling, attaching) can make it feel more manageable over a couple of days.
Q: What if I don’t have a sewing machine?
A: While a sewing machine significantly speeds up the process, you could technically hand-sew this project. However, it would be extremely time-consuming and challenging to achieve consistent stitches for all the ruffles. Borrowing a machine or finding a local sewing workshop might be a better option.
Q: Can I make a ruffled duvet cover instead?
A: Yes! The principle is similar. You would create two large panels (one for the front with ruffles, one for the back) and sew them together, leaving an opening for inserting a duvet. You might need additional base sheets for the back panel.
This is truly a wonderful DIY project that yields stunning results. There’s immense joy in creating something beautiful and functional with your own hands. We love this bedspread so much, and we’re confident you will too! Enjoy the process of crafting your elegant, personalized ruffled bedspread and revel in the transformation of your bedroom into a cozy, chic retreat. Happy sewing!