
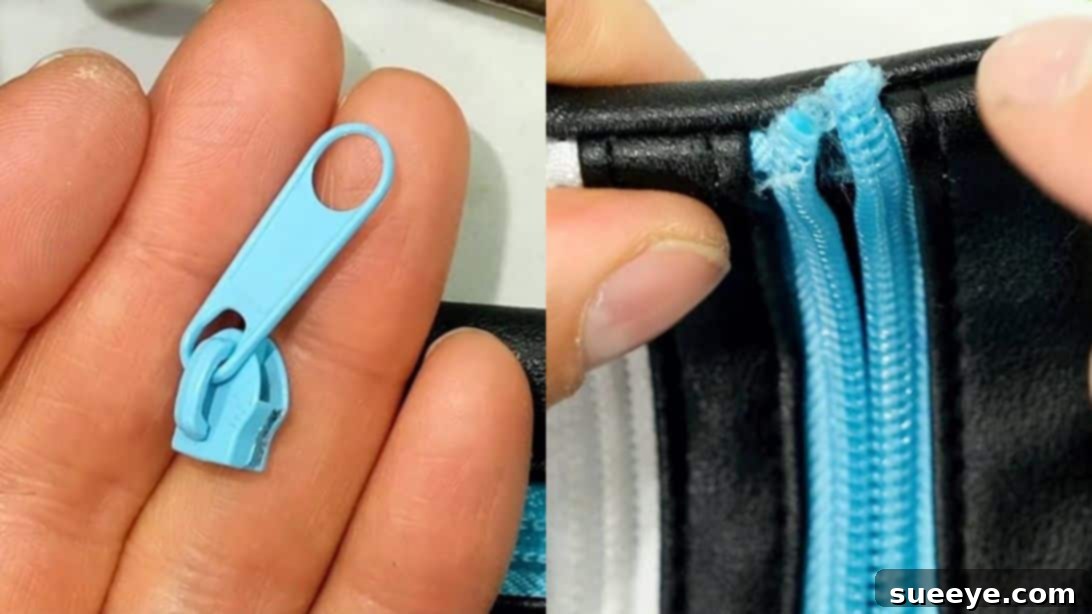
Mastering Zipper Repair: A Complete DIY Guide to Fixing a Broken Zipper Pull and Slider
Has the zipper pull or slider on your cherished jacket, favorite pair of jeans, or essential purse suddenly come off? Don’t despair! A detached zipper pull can be incredibly frustrating, but it’s a surprisingly common problem with an equally simple solution. You don’t need to replace the entire zipper, nor do you need to be a seasoned seamstress to tackle this repair. With just a few basic tools and a clear understanding of the process, you can easily restore your zipper to full functionality. This comprehensive guide will walk you through each step, making what might seem like a daunting task feel straightforward and achievable. Follow along with this easy-to-understand tutorial, inspired by expert tips from sources like ecologicaltime, and save your valuable items from premature retirement.
Before diving into the repair, it’s worth noting that preventing future zipper issues often comes down to proper care. For those interested in mastering more zipper-related skills, you might find this related article helpful: How to Sew Zippers Without Waves.
Understanding Common Zipper Failures: Why Do Zipper Pulls Come Off?
A zipper pull detaching from its slider, or the slider itself coming off the zipper teeth, isn’t always a sign of a completely broken zipper. Understanding the root cause can help you make a more effective repair and even prevent future occurrences. Here are some of the most common reasons why a zipper pull or slider might fail:
- Wear and Tear on the Slider: Over time, constant use can cause the metal or plastic of the slider to widen or deform. This slight change in shape means the slider can no longer grip the zipper teeth securely, leading it to slip off the track.
- Stress and Strain: Applying excessive force when zipping up an overstuffed bag or a tight garment can put immense pressure on the zipper. This strain can cause the teeth to misalign, or the slider to twist and separate from the chain.
- Poor-Quality Zippers: Unfortunately, not all zippers are created equal. Cheaper zippers, often found on less expensive items, may use thinner metals or plastics that are prone to bending, breaking, or simply wearing out much faster than high-quality counterparts.
- Damaged Zipper Teeth or Chain: Sometimes, the problem isn’t the slider but the zipper chain itself. If the end of the zipper teeth or the fabric tape to which they are attached tears away from the material of the item, it creates an open pathway for the slider to escape. This is a crucial area to address during the repair process.
- Foreign Objects: Dirt, lint, fabric snags, or other debris can get lodged in the zipper mechanism, causing it to jam. Forcing a jammed zipper can lead to the slider becoming dislodged or the teeth becoming damaged.
Regardless of the reason, the good news is that many of these issues are solvable with a straightforward DIY approach. For a more visual guide on tackling some specific zipper tooth issues, you might want to explore this tip: How to Fix a Zipper with a Broken Tooth.
Essential Tools for a Successful Zipper Repair
Before you begin, gather your tools. Having everything at hand will make the process smoother and more efficient. Most of these items are likely already in your household toolbox or sewing kit:
- Screwdriver (Small Flat-head): This is your primary tool for gently prying open the zipper slider. A small flat-head screwdriver, often found in eyeglass repair kits or precision tool sets, is ideal. Its thin blade allows for precise manipulation without causing damage.
- Needle: A standard sewing needle, suitable for hand stitching, will be needed. Choose one that is sharp enough to pass through the fabric of your item and the zipper tape easily.
- Thread: Opt for a strong, durable thread that matches the color of your item or the zipper tape, if possible. Polyester or nylon threads are generally more resilient than cotton and less prone to breaking under stress.
- Pliers (Optional but Recommended): A pair of needle-nose pliers or regular pliers can be incredibly helpful. They provide extra grip and leverage for bending metal, especially when closing the slider securely. They can also be useful for holding small parts in place.
- Thimble (Optional): If you’ll be doing a lot of hand sewing, a thimble can protect your finger from repeated needle pricks.
- Good Lighting: Working with small components requires good visibility. Ensure your workspace is well-lit.
Step-by-Step Guide: How to Fix a Broken Zipper Pull and Slider
Once you have your tools ready, you’re prepared to tackle the repair. This method focuses on re-securing the slider and reinforcing the zipper end to prevent future detachment. Take your time with each step for the best results.
Step 1: Preparing the Zipper Chain – Open and Separate
The first critical step is to fully open the zipper, which means separating the two sides of the zipper teeth or chain. If your zipper slider has completely come off, this might be as simple as gently pulling the two sides apart at the very end. If the slider is still partially attached but dislodged, carefully maneuver it to the very bottom end of the zipper track. The goal is to create two distinct, accessible ends of the zipper tape, making it easier to reintroduce the slider.
Step 2: Reattaching the Slider – The Initial Threading
Now, take your zipper slider. Identify the correct orientation – the wider, “throat” end of the slider typically faces upwards when zipping, and the narrow end is where the pull tab usually connects. Begin by carefully threading one side of the zipper teeth into one of the channels of the slider. This can sometimes be a bit fiddly, requiring patience. Once one side is securely in place, pull it a short distance into the slider. This gives you room to work with the other side. Do not force it; gentle wiggling and alignment are key. The aim is to have the slider partially engaged on just one side of the zipper chain for now.
Step 3: Reinforcing the Zipper End – Anchoring for Durability
This step is crucial for ensuring the zipper pull doesn’t come off again. Thread your needle with a strong, matching thread. You need to secure the very end of the zipper tape to the fabric of the item. This acts as a physical barrier, preventing the slider from sliding beyond its intended stopping point. Start by making several small, tight stitches (at least four loops or passes) directly over the very end of the zipper teeth and the tape, anchoring it firmly to the garment or bag material. Create a robust stopper. Next, if the two halves of the zipper chain were completely separated and the fabric tape at the very end is loose, sew the two pieces of the zipper tape together at their extreme ends. This effectively closes off the edge, creating a secure base where the slider can rest without escaping. Use strong knots to finish your stitching.
Step 4: Preparing the Slider for the Second Side – Gentle Widening
Now, with one side of the zipper chain inserted and the end reinforced, it’s time to prepare the slider for the second side. Hold the zipper slider firmly with one hand. Locate the “throat” of the zipper pull – this is the opening where the teeth enter. Carefully insert the tip of your small flat-head screwdriver into this throat. Apply gentle, controlled pressure to slightly open the gap. The goal is to widen it just enough to accommodate the second set of zipper teeth without deforming the slider excessively. Avoid applying too much force, as this can permanently damage the slider or make it too loose to function properly. See the provided photo for a visual reference of this delicate operation.
Step 5: Inserting the Second Side and Securing the Slider
With the throat of the slider slightly widened, carefully slide the other side of the zipper teeth or chain into the second channel of the slider. This might require a little wiggling and gentle persuasion. Once both sides of the zipper teeth are inside their respective channels, you need to ensure they are seated properly. Gently “squash” or press the two sides of the slider together. You can use your fingers for this initially, then take your screwdriver or pliers and carefully press down on the sides of the slider, particularly near the throat, to gently close it back to its original, snug position. This action secures the teeth inside and ensures the slider will grip them effectively when moved. Test the fit: the slider should feel firm, not loose, around the teeth.
Step 6: Testing and Final Adjustment
The repair is almost complete! With both sides of the zipper chain properly inserted into the slider and the slider gently crimped back into shape, carefully pull the zipper pull all the way back up the track. Zip it closed and then open it again a few times. Observe how smoothly the slider moves. Does it catch? Does it feel too loose? If it catches, check for any misaligned teeth or obstructions. If it feels too loose and the zipper opens easily without the pull, you might need to gently crimp the slider a little more with pliers to tighten its grip on the teeth. If it’s too tight and hard to move, you might need to slightly loosen the slider’s grip by prying it open just a tiny bit with the screwdriver again. Make small, incremental adjustments until the zipper operates smoothly and securely.
Preventative Maintenance and Troubleshooting Tips
Now that you’ve successfully repaired your zipper, a little preventative maintenance can go a long way in extending its life and preventing future issues:
- Lubrication: If a zipper feels stiff, a simple lubricant can work wonders. Use a graphite pencil to rub over the teeth, or apply a specialized zipper lubricant (available at outdoor or sewing stores). Avoid oil-based lubricants as they can attract dirt.
- Cleanliness: Keep zippers free from dirt, lint, and debris. Use a small brush or an old toothbrush to clean the teeth regularly.
- Gentle Use: Avoid forcing zippers. If it snags, gently pull the fabric away from the teeth and try again. Don’t overstuff bags or force garments that are too tight.
- Inspect Regularly: Periodically check zippers on frequently used items for signs of wear, such as a widening slider or bent teeth. Addressing minor issues early can prevent major repairs.
- Reinforce Weak Spots: If you notice the fabric tape at the end of a zipper starting to fray or detach, reinforce it with a few stitches before the slider has a chance to escape.
By following these steps and incorporating some simple maintenance practices, you’ll not only be able to repair a broken zipper pull but also ensure your zippers remain functional for much longer. This DIY skill is a fantastic way to save money, reduce waste, and extend the lifespan of your favorite items, giving them a second chance at life.