
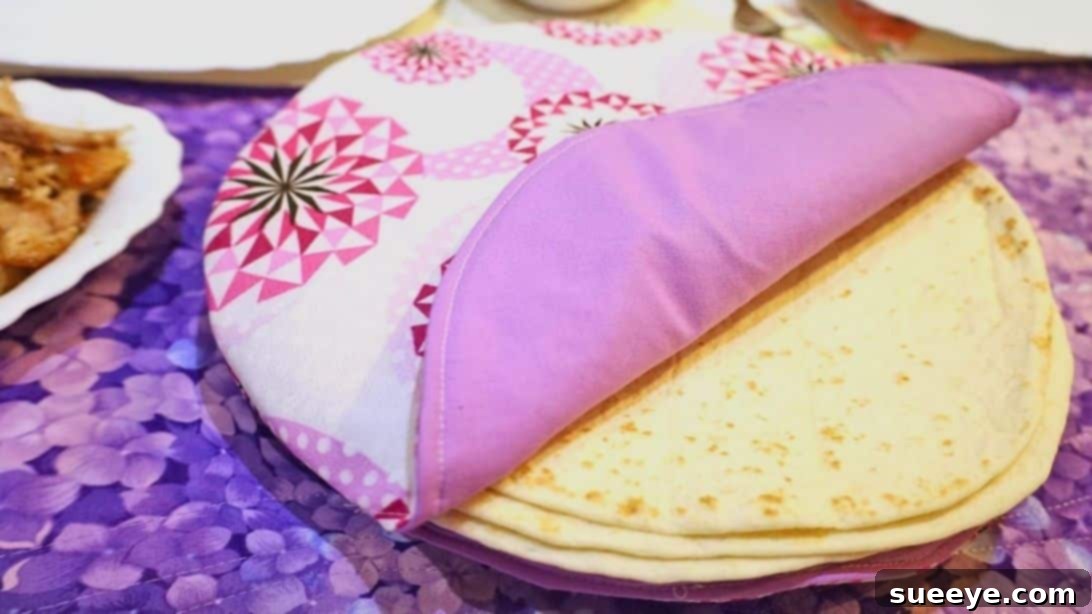
Master the Art of Warm Tortillas: An Easy DIY Fabric Tortilla Warmer Sewing Tutorial
There’s nothing quite like a warm, soft tortilla to complete a delicious meal, whether it’s for tacos, burritos, fajitas, or wraps. However, we’ve all experienced the disappointment of tortillas that quickly turn cold, soggy, or rubbery shortly after being heated. This common kitchen dilemma often dampens the enjoyment of what should be a perfectly delightful meal. Our family, like many others, absolutely adores tortilla-based recipes, making them a regular feature at our dinner table. Constantly reheating tortillas only leads to frustration and often results in an undesirable texture.
That’s why discovering the magic of fabric tortilla warmers was a game-changer! These simple yet incredibly effective kitchen accessories are designed to keep your tortillas perfectly warm and pliable throughout your meal. What’s even better is that they are surprisingly easy to sew, making them an ideal project for beginners eager to dive into the world of fabric crafts. If you’re ready to banish cold, stiff tortillas from your dining experience and add a charming handmade touch to your kitchen, then you’re in the right place! We’ll guide you through making your very own fabric tortilla warmer, inspired by the fantastic video tutorial from Hello Sewing on YouTube.
Why Every Kitchen Needs a Fabric Tortilla Warmer
Before we dive into the sewing process, let’s explore the incredible benefits of owning a fabric tortilla warmer:
- Keeps Tortillas Warm Longer: The primary function, and arguably the most important, is to insulate and maintain the warmth of your tortillas, from the first one to the last. No more rushing through your meal to enjoy warm tortillas!
- Prevents Sogginess: Unlike traditional reheating methods that can steam tortillas into a soggy mess, a fabric warmer helps absorb excess moisture, keeping them soft and fresh without becoming damp.
- Maintains Softness and Flexibility: Cold tortillas become stiff and prone to cracking. A fabric warmer ensures your tortillas remain pliable and easy to fold, enhancing the overall dining experience.
- Eco-Friendly Alternative: Reduce the need for disposable foil or plastic wrap when serving. A reusable fabric warmer is a sustainable choice for your kitchen.
- Adds a Handmade Touch: Beyond its practical use, a homemade tortilla warmer brings a unique, personal charm to your table setting, perfect for family meals or entertaining guests.
- Microwave Safe (with proper materials): Made with 100% cotton fabric and batting, these warmers are generally safe to pop into the microwave with your tortillas for a quick refresh, assuming no metallic threads or embellishments are used.
- Versatile Use: While designed for tortillas, these warmers can also keep pancakes, waffles, pita bread, and other flatbreads warm.
Materials You’ll Need for Your DIY Tortilla Warmer
Gathering your materials is the first exciting step in any sewing project. For this fabric tortilla warmer, we prioritize natural fibers like 100% cotton to ensure microwave safety and effective insulation. Here’s a detailed list of what you’ll need:
- Main Fabric (100% Woven Cotton): This will be the outer, visible layer of your tortilla warmer. Choose a print or solid color that complements your kitchen decor or reflects your personal style. Woven cotton is crucial here because it’s breathable, durable, and most importantly, microwave-safe.
- Lining Fabric (100% Woven Cotton): This fabric will be on the inside of your warmer. While it can be a coordinating print or a simple solid, ensuring it’s also 100% woven cotton is vital for consistent performance and safety.
- Cotton Batting: This is the insulation layer that traps heat. Make sure to select 100% cotton batting, as synthetic alternatives can melt or pose a fire risk in the microwave. Look for a lightweight to medium-weight batting for good insulation without excessive bulk.
- Matching Thread (100% Cotton): A good quality, 100% cotton thread will ensure strong seams and a professional finish. Choose a color that blends well with your main fabric.
- Scissors or Rotary Cutter and a Cutting Mat: A good pair of fabric scissors will work perfectly, but for faster and more precise cuts, especially for circles, a rotary cutter paired with a self-healing cutting mat is highly recommended.
- Ruler or Measuring Tape: Essential for accurate measurements, especially if you’re adapting the pattern or checking fabric dimensions.
- Iron and Ironing Board: Pressing your fabric at various stages is key to crisp seams and a professional-looking finished product. Don’t skip this step!
- Fabric Clips or Pins: These will hold your fabric layers securely in place while you sew, preventing shifting and ensuring accurate seams.
- Sewing Machine: Any basic sewing machine capable of a straight stitch will be suitable for this project. Make sure it’s threaded correctly and tested on scrap fabric before you begin.
- Tortilla Warmer Pattern: This is a crucial element to ensure your warmer is perfectly round and sized appropriately. You can download the free pattern by clicking here to be redirected to Hello Sewing’s website. Having a reliable pattern will make the cutting process much simpler and more accurate.
Detailed Sewing Instructions for Your Fabric Tortilla Warmer
Now that you have all your materials ready, let’s get down to the exciting part: sewing! Follow these steps carefully for a beautiful and functional fabric tortilla warmer.
Step 1: Preparing Your Fabric Layers
Accuracy in cutting is paramount for a professional finish, especially with circular patterns. Take your time with this initial step:
- Download and Print the Pattern: Begin by downloading the free pattern from Hello Sewing’s website. Ensure it prints at 100% scale (check the calibration square if provided) and then carefully cut out the paper pattern piece.
- Cut the Main Fabric: Fold your main fabric in half, ensuring the selvage edges are aligned and the fabric lies flat. Place the pattern piece onto the folded fabric, aligning the pattern’s “fold line” with the fabric’s fold. Pin the pattern securely to prevent shifting. Using sharp fabric scissors or a rotary cutter, carefully cut around the pattern. You will end up with one large circular piece of main fabric when unfolded.
- Cut the Lining Fabric: Repeat the exact process for your lining fabric. Fold it in half, place the pattern on the fold, pin, and cut. This will give you one large circular lining piece.
- Cut the Cotton Batting: Again, fold your cotton batting in half, place the pattern on the fold, pin, and cut. You will now have one large circular piece of batting.
- Create a Second Set: The tortilla warmer consists of two distinct circular pockets. To make the second pocket, repeat steps 2, 3, and 4 to create another large circle each of main fabric, lining fabric, and batting. In total, you should have two main fabric circles, two lining fabric circles, and two batting circles, all of equal size.
- Assemble the First Fabric Sandwich: Lay one of your round batting fabrics flat on your work surface. This will be the bottom layer. Next, place one of the lining fabric circles directly on top of the batting, with its right side (the side you want to be visible) facing upwards. Finally, place one of the main fabric circles on top of the lining fabric, with its right side facing downwards (right sides together for the main and lining fabric).
- Align and Pin: Carefully align all three layers – batting, lining (right side up), and main fabric (right side down) – ensuring their raw edges match perfectly all the way around the circle. Use plenty of fabric clips or pins to secure all three layers together, preventing them from shifting during sewing.
- Prepare the Second Fabric Sandwich: Repeat steps 6 and 7 with the remaining set of batting, lining, and main fabric circles. You should now have two identical “fabric sandwiches,” each securely pinned.
Step 2: Sewing, Turning, and Finishing the Pockets
This stage involves stitching your fabric layers, turning them right side out, and preparing them for the final assembly.
- Sew the First Circle: Take one of your pinned fabric sandwiches to your sewing machine. Starting about an inch or two from the edge of your opening, begin sewing all three layers together around the entire circle using a 1/4-inch (0.6 cm) seam allowance. Make sure to backstitch at the beginning and end of your stitching. Crucially, leave an opening of about 3-4 inches (7-10 cm) unsewn along one edge. This gap is essential for turning the fabric right side out later.
- Sew the Second Circle: Repeat the exact same sewing process for the second pinned fabric sandwich. Remember to leave a 3-4 inch opening for turning.
- Clip Curves (Optional but Recommended): For smoother curves when turned, use your scissors to make small, perpendicular snips into the seam allowance all around the sewn circle, being careful not to cut through your stitching. This helps the fabric lay flat.
- Turn Right Side Out: Reach through the unsewn opening of your first circle and carefully pull all the fabric layers through until the main fabric is on the outside and the right side of the lining is now visible on the inside. Gently push out the curves to make a neat circle.
- Press Flat: Take your turned circle to the iron. Carefully press the entire circle flat, paying special attention to the seams. As you press, tuck the raw edges of the unsewn opening inward, aligning them with the sewn seam line, creating a clean, crisp edge. Pin this opening neatly in place.
- Topstitch the First Circle: Return to your sewing machine. Starting near the pinned opening, topstitch all the way around the entire circle, very close to the edge (either 1/4-inch or 1/8-inch from the edge, whichever you prefer). This topstitching will serve two purposes: it will securely close the opening you left for turning, and it will give your tortilla warmer a professional, finished look. Remove pins as you sew.
- Repeat for the Second Circle: Turn the second fabric sandwich right side out, press it flat, tuck in the opening, pin, and topstitch around the entire circle, just as you did for the first.
- Assemble the Two Circles: Now you have two beautifully finished fabric circles. Lay one circle flat on your work surface with its main fabric side facing up. Place the second circle directly on top of it, ensuring its main fabric side is facing *down*, so the two main fabric sides are facing each other (right sides together).
- Align and Pin Halfway: Carefully align the raw edges of the two circles. Pin or clip them together around approximately half of the circumference. This specific pinning is crucial for creating the pocket opening.
- Sew Half of the Circle: Using your sewing machine, sew the two circles together along the pinned half, using a 1/4-inch (0.6 cm) seam allowance. Make sure to backstitch at the beginning and end of your stitching to secure the seam. This creates the ‘hinge’ of your tortilla warmer.
- Final Turn and Finish: Once sewn, turn the entire assembly right side out, so the main fabric sides are now on the outside and the lining fabrics form the inner pockets. Give it one final press with your iron to make it neat and crisp. Your homemade fabric tortilla warmer is now complete!
Tips for Using and Caring for Your New Tortilla Warmer
To get the most out of your handmade tortilla warmer and ensure its longevity, here are a few practical tips:
- Pre-warm Tortillas: For best results, heat your tortillas briefly on a griddle, in a dry skillet, or in the microwave before placing them inside the warmer.
- Layering: Stack your heated tortillas inside one of the pockets of the warmer. You can usually fit 6-10 standard-sized tortillas comfortably.
- Serving: Once your tortillas are inside, fold the warmer over to enclose them completely. This creates an insulated environment that traps heat effectively.
- Microwave Reheating: If your tortillas start to cool, you can place the entire fabric warmer (with tortillas inside) into the microwave for a short burst (e.g., 30 seconds to 1 minute, depending on your microwave’s power and the number of tortillas). Always use caution and monitor, as excessive heating can damage the fabric.
- Cleaning: Since it’s made entirely of cotton, your tortilla warmer is machine washable. Wash it on a gentle cycle with similar colors, and then tumble dry on low or air dry. Iron as needed to remove wrinkles.
- Avoid Overfilling: Don’t cram too many tortillas into the warmer, as this can hinder heat retention and make it difficult to close properly.
- Safety Note: Always ensure your fabric, batting, and thread are 100% cotton if you plan to use the warmer in the microwave. Synthetic materials can melt or even catch fire.
Unleash Your Creativity: Easy Tortilla Warmer Sewing Tutorial
Making your own fabric tortilla warmer is more than just a practical sewing project; it’s an opportunity to infuse your kitchen with a personal touch and ensure every meal is enjoyed with perfectly warm tortillas. This easy-to-follow tutorial proves that even beginners can create functional and beautiful items for their home. Imagine the delight of serving perfectly warm, soft tortillas at your next family dinner or gathering, all thanks to your handmade creation!
Don’t hesitate to experiment with different cotton fabric prints to match seasons, holidays, or your kitchen’s aesthetic. This project also makes a wonderful handmade gift for friends and family who love to entertain or enjoy Mexican cuisine. So, dust off your sewing machine, grab your favorite cotton fabrics, and get ready to transform your tortilla experience forever. Happy sewing!
*These amazing images are all credited to Hello Sewing via YouTube. Check her other content and follow for more inspiring DIY projects!