
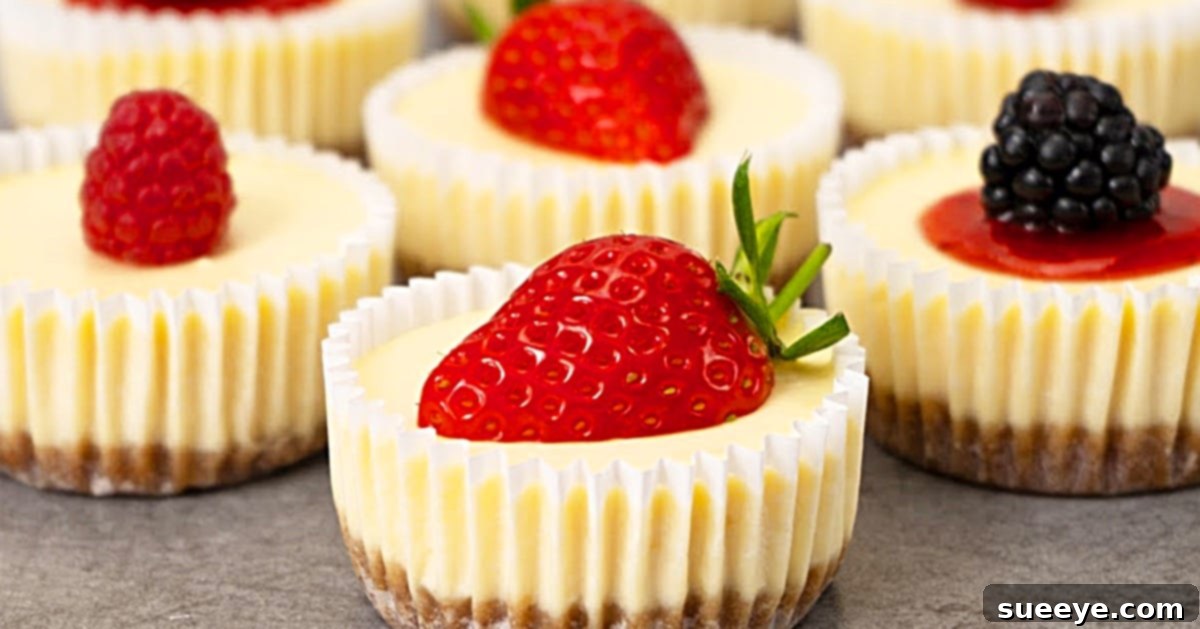
Irresistible Mini Cheesecakes: Your Guide to Bakery-Quality Treats at Home
There’s something undeniably enchanting about mini cheesecakes. These bite-sized delights offer the perfect balance of creamy indulgence and delicate crust, all wrapped up in an adorable, perfectly portioned package. Whether you’re planning an elegant luncheon, searching for the ideal homemade gift, or simply craving a personal sweet treat, mini cheesecakes are a fantastic choice that consistently impress.
For many, the name “cheesecake” conjures images of the legendary Cheesecake Factory, a true temple of dessert where every slice is a masterpiece. Their mini cheesecakes, in particular, are renowned for their exquisite flavor and flawless texture. What if we told you that achieving that same level of bakery-quality perfection in your own kitchen is not only possible but surprisingly straightforward?
We’ve discovered an exceptional recipe that brings the magic of the Cheesecake Factory’s mini cheesecakes right to your home. This recipe captures the essence of those beloved treats, offering a rich, smooth filling and a buttery, crisp crust. Our inspiration stems from the brilliant work of YouTube creator El Mundo Eats. Their mini cheesecake tutorial is an absolute joy to follow, providing clear, visual guidance that makes the baking process enjoyable for cooks of all skill levels. We wholeheartedly recommend watching their video for an excellent visual walkthrough that complements this written guide perfectly.
Embrace the joy of baking as we delve into creating these delightful mini cheesecakes. They are not just desserts; they are little parcels of happiness, promising to elevate any occasion and satisfy every sweet tooth.
The Charm of Mini Cheesecakes: Why They’re a Must-Bake
Beyond their undeniable cuteness, mini cheesecakes offer a host of practical advantages that make them a superior choice for many occasions:
- Perfect Portions: Each mini cheesecake is a self-contained serving, eliminating the need for slicing and ensuring everyone gets just the right amount of decadent dessert without overindulging.
- Effortless Serving: No messy slicing, no awkward plating. Simply grab and enjoy! This makes them ideal for parties, buffets, and potlucks.
- Visual Appeal: Their diminutive size and elegant presentation make them incredibly attractive. Garnish with a single berry or a drizzle of sauce, and they instantly transform into gourmet treats.
- Versatility: They can be easily customized with different crusts, flavors, and toppings, catering to a variety of tastes and dietary preferences.
- Great for Gifts: Packaged in small boxes or arranged on a platter, mini cheesecakes make thoughtful and impressive homemade gifts for friends, family, or hosts.
- Faster Baking & Cooling: Smaller size means less time in the oven and quicker chilling, getting you to dessert faster!
- Reduced Risk of Cracks: Compared to larger cheesecakes, mini versions are less prone to developing cracks due to rapid temperature changes, making them more forgiving for novice bakers.
Essential Ingredients for Your Mini Cheesecake Masterpiece
Crafting the perfect mini cheesecake begins with high-quality ingredients, particularly ensuring your dairy components are at room temperature for optimal blending and texture.
The Buttery, Crunchy Cheesecake Crust:
- 5.3 ounces (approx. 1 1/4 cups) Digestive Biscuits or Graham Crackers: These form the classic, irresistible base. Digestive biscuits offer a slightly more savory, buttery flavor, while graham crackers provide a distinct sweetness. Both crush beautifully to create a sturdy foundation. (Crushed finely, a food processor is highly recommended for an even crumb.)
- 1/4 cup Unsalted Butter: Melted, this butter acts as the crucial binder, holding the crushed biscuit crumbs together to form a firm, delicious crust. Unsalted butter allows you to control the overall saltiness of your dessert.
The Smooth, Creamy Cheesecake Filling:
- 10.5 ounces Full-Fat Cream Cheese: This is the star of the show. Using full-fat cream cheese is essential for achieving that characteristic rich, dense, and creamy cheesecake texture. Ensure it’s at room temperature to prevent lumps and ensure smooth blending.
- 1/2 cup Granulated Sugar: Provides the perfect level of sweetness, balancing the tanginess of the cream cheese and sour cream.
- 2 Large Eggs: Eggs are vital for binding the filling, adding richness, and contributing to the cheesecake’s structure and smooth texture. Like the cream cheese, they should be at room temperature for best results, incorporating more evenly into the mixture.
- 1 teaspoon Pure Vanilla Extract: A classic flavor enhancer that adds warmth and depth to the cheesecake, complementing the dairy notes beautifully.
- 1 teaspoon Fresh Lemon Juice: A touch of lemon juice brightens the flavors, cutting through the richness of the cream cheese and adding a subtle, refreshing tang without making the cheesecake taste overtly lemony.
- 1 1/2 teaspoons All-Purpose Flour: A small amount of flour acts as a stabilizer, helping to prevent cracks in the cheesecake and giving it a slightly firmer set.
- 6.5 ounces Full-Fat Sour Cream: This ingredient is key to achieving that signature creamy, velvety texture and a delightful subtle tang that makes cheesecakes so addictive. Again, ensure it’s at room temperature for seamless incorporation.
Delectable Topping Suggestions:
- Fresh Berries of Your Choice: Strawberries, raspberries, blueberries, or mixed berries add a burst of fresh flavor, vibrant color, and a lovely textural contrast.
- Strawberry Jam or Other Fruit Marmalade: A spoon of your favorite jam provides a sweet, glossy finish and an extra layer of fruit flavor. Raspberry, cherry, or apricot marmalades also work beautifully.
Equipment for Effortless Baking
Having the right tools can make your mini cheesecake baking experience even more enjoyable and efficient:
- Standard 12-Cup Muffin Tin: Essential for shaping your mini cheesecakes.
- Cupcake Liners (Paper or Silicone): Prevents sticking and makes for easy removal and serving.
- Food Processor: (Highly recommended for crust) For quickly and evenly crushing biscuits/crackers. Alternatively, a Ziploc bag and a rolling pin work.
- Large Mixing Bowls: For preparing the crust and the filling.
- Spatula or Wooden Spoon: For mixing and scraping down the sides of the bowl.
- Measuring Cups and Spoons: For accurate ingredient proportions.
- Electric Hand Mixer or Stand Mixer: (Optional but helpful) While a spoon works, an electric mixer makes creaming the cheese and sugar faster and ensures a perfectly smooth filling. Just be careful not to overmix!
Step-by-Step Directions to Mini Cheesecake Perfection
Follow these detailed steps to create your own batch of delightful mini cheesecakes.
Phase 1: Preparing the Irresistible Crust
- Crush the Biscuits: Begin by crushing your digestive biscuits or graham crackers. If using a food processor, pulse until you have fine, even crumbs. If doing it by hand, place the biscuits in a large zip-top bag, seal it, and use a rolling pin or the bottom of a heavy pan to crush them into fine crumbs. The finer the crumbs, the more cohesive your crust will be.
- Melt the Butter: In a microwave-safe bowl or small saucepan, melt the 1/4 cup of unsalted butter until fully liquid.
- Combine and Press: Pour the melted butter over the crushed crumbs in a mixing bowl. Stir well with a fork or spatula until all the crumbs are evenly moistened. They should resemble wet sand.
- Line Muffin Tin: Line a standard 12-cup muffin tin with paper or silicone cupcake liners. This recipe typically yields 12 mini cheesecakes.
- Form the Crust Bases: Place approximately one tablespoon of the buttered crumb mixture into the bottom of each lined muffin cup. Using the back of a spoon, your fingers, or a small, flat-bottomed glass (like a shot glass), press the crumbs firmly and evenly into a compact layer at the bottom of each liner. This creates a sturdy base for your cheesecake.
- Chill (Optional but Recommended): For an extra firm crust, you can place the muffin tin in the refrigerator while you prepare the filling.
Phase 2: Crafting the Silky-Smooth Cheesecake Filling
- Preheat Oven: Preheat your oven to 350°F (175°C).
- Cream Cheese and Sugar: In a large mixing bowl, add the room temperature full-fat cream cheese and granulated sugar. Using an electric mixer on medium speed (or a sturdy spoon), beat until the mixture is completely smooth, light, and fluffy, with no lumps of cream cheese remaining. This usually takes 2-3 minutes. Scrape down the sides of the bowl frequently.
- Incorporate Eggs: Add the two room temperature eggs, one at a time. Mix on low speed just until each egg is fully incorporated into the batter. Be careful not to overmix at this stage, as incorporating too much air can lead to cracks during baking.
- Add Flavorings & Flour: Gently mix in the vanilla extract, fresh lemon juice, and all-purpose flour. Mix on low speed until just combined. The flour helps stabilize the cheesecake.
- Fold in Sour Cream: Finally, add the room temperature full-fat sour cream. Fold it into the mixture with a spatula until just combined and smooth. Again, avoid overmixing to maintain the creamy texture.
Phase 3: Baking and Chilling to Perfection
- Fill the Liners: Spoon or pour the cheesecake filling evenly over the prepared crusts in the muffin tin. Fill each liner approximately two-thirds full. Do not overfill.
- Bake: Carefully place the muffin tin into your preheated 350°F (175°C) oven. Bake for approximately 15-20 minutes. The cheesecakes are done when the edges are set and lightly golden, and the centers have a slight jiggle when gently shaken.
- Cool Gradually: Once baked, turn off the oven and prop the oven door open slightly (about an inch) using a wooden spoon. Allow the cheesecakes to cool inside the oven for 30 minutes. This gradual cooling process helps prevent cracking.
- Counter Cool: Remove the muffin tin from the oven and transfer it to a wire rack. Let the mini cheesecakes cool completely at room temperature for about 1-2 hours.
- The Essential Chill: Once completely cool to the touch, transfer the muffin tin to the refrigerator. This is a crucial step! Chill the mini cheesecakes for a minimum of 4 hours, but ideally, overnight. Chilling allows the cheesecakes to fully set, develop their ideal texture, and enhance their flavors.
- Unmold and Garnish: Once thoroughly chilled, gently remove the mini cheesecakes from their liners. Top with your chosen fresh berries, a dollop of strawberry jam, or any other desired topping just before serving.
Expert Tips for Flawless Mini Cheesecakes
Achieving bakery-level mini cheesecakes is within reach with these helpful tips:
- Room Temperature is Key: We can’t stress this enough! Cream cheese, eggs, and sour cream at room temperature blend together smoothly, preventing lumps and ensuring a perfectly uniform, silky batter.
- Do Not Overmix: After adding the eggs, mix only until just combined. Overmixing incorporates too much air, which can cause the cheesecakes to puff up excessively in the oven and then fall and crack as they cool.
- Patience with Chilling: The overnight chill is not a suggestion; it’s a requirement for the best results. It allows the cheesecakes to fully set, firm up, and achieve that delightful dense-yet-creamy texture.
- Scrape Down the Bowl: Regularly scrape down the sides and bottom of your mixing bowl to ensure all ingredients are thoroughly incorporated and no unmixed pockets remain.
- Quality Ingredients Matter: Using good quality full-fat cream cheese and sour cream will significantly impact the final taste and texture of your cheesecakes.
- Prevent Cracking: The gradual cooling in the oven with the door slightly ajar is a simple yet effective trick to minimize the chances of your cheesecakes cracking from a sudden temperature drop.
- For a Crisper Crust: You can optionally pre-bake your crusts for 5-7 minutes at 350°F (175°C) before adding the filling. Let them cool slightly before filling.
Endless Customization and Topping Ideas
While fresh berries and jam are classic, don’t hesitate to get creative with your mini cheesecakes:
- Fruit Compotes: Homemade or store-bought fruit compotes (cherry, blueberry, peach) make elegant toppings.
- Chocolate Drizzle: Melted dark, milk, or white chocolate drizzled over the top adds a touch of decadence.
- Caramel or Butterscotch Sauce: A sweet and sticky addition that pairs wonderfully with cream cheese.
- Lemon Curd: For a bright and tangy kick that complements the creamy filling.
- Whipped Cream & Zest: A dollop of fresh whipped cream and a sprinkle of citrus zest (lemon, lime, or orange) for a light finish.
- Crushed Candy: Sprinkle with crushed Oreos, Heath bars, or other favorite candies for a fun twist.
- Nutty Crunch: Toasted chopped pecans, walnuts, or almonds can add a textural element.
- Flavor Variations: Infuse the filling with different extracts like almond, peppermint, or even a touch of coffee liqueur. Swirl in melted chocolate or a spoonful of pumpkin puree for seasonal variations.
- Different Crusts: Experiment with crushed Oreo cookies, Nilla wafers, gingersnaps, or shortbread cookies for varied flavor profiles.
Serving and Storage Suggestions
These mini cheesecakes are best served chilled. Remove them from the refrigerator about 15-20 minutes before serving to allow the flavors to bloom slightly, but don’t let them get warm.
Store any leftover mini cheesecakes in an airtight container in the refrigerator for up to 3-5 days. For longer storage, you can freeze them! Place unfrosted mini cheesecakes (without toppings) on a baking sheet and freeze until firm, about 1-2 hours. Then, transfer them to a freezer-safe airtight container or bag, separating layers with parchment paper. They can be frozen for up to 1-2 months. Thaw in the refrigerator overnight before serving and adding fresh toppings.
Why This Recipe Will Become Your Go-To
This mini cheesecake recipe is more than just a list of instructions; it’s an invitation to create something truly special. It’s designed to be approachable yet yield results that taste and look incredibly professional. The meticulous balance of ingredients, combined with clear steps, ensures that even if you’re new to baking cheesecakes, you’ll achieve a spectacular outcome.
You’ll find yourself turning to this recipe again and again for its reliability, the sheer deliciousness of the end product, and the endless possibilities for customization. Get ready to impress your family and friends, or simply treat yourself to these divine, perfectly portioned morsels of joy.
So, roll up your sleeves, gather your ingredients, and prepare to churn out these mini cheesecakes like a factory – a cheesecake factory, that is! Happy baking!