
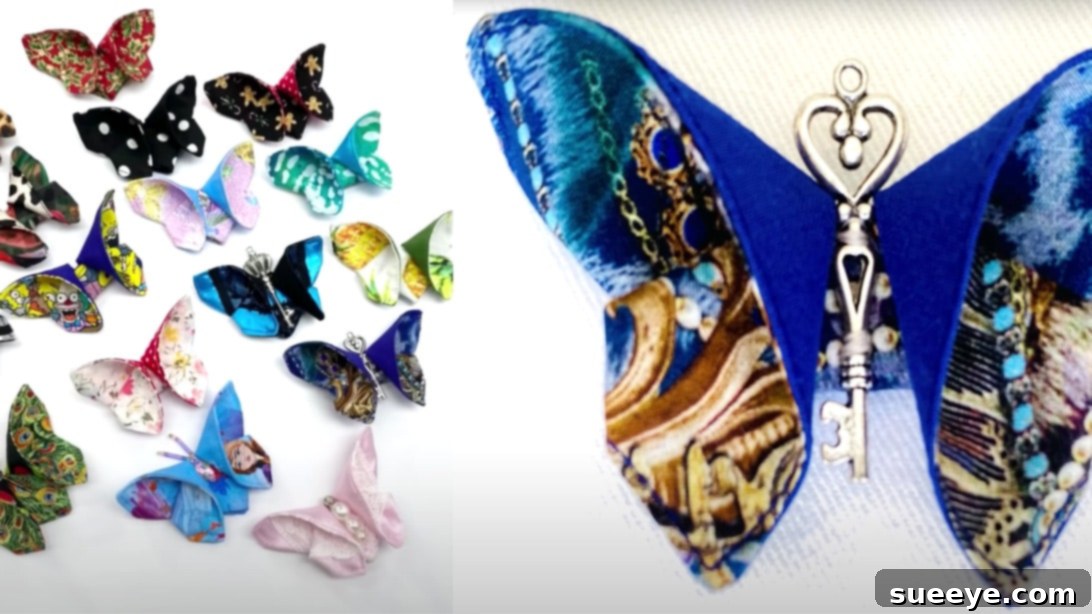
Transform Scrap Fabric into Beautiful Butterflies: An Easy DIY Sewing Guide
Every crafter knows the dilemma of a growing pile of scrap fabric. Those beautiful remnants from past projects often gather dust, waiting for a purpose. What if we told you there’s a delightful way to breathe new life into them, transforming them into charming, decorative pieces? This comprehensive sewing project, inspired by the creative insights of Notches Sewing on YouTube, guides you through creating exquisite fabric butterflies. These aren’t just any butterflies; they are unique, handmade embellishments perfect for decorating clothes, curtains, pillows, or even serving as delightful accessories.
Fabric butterflies offer a wonderful blend of sustainability and artistry. Instead of discarding small pieces of fabric, you can turn them into something beautiful and useful, adding a personalized touch to almost anything. This tutorial is designed to be accessible for crafters of all skill levels, breaking down each step into clear, manageable instructions. Get ready to unleash your creativity and give your scrap fabric a magnificent second act!
Essential Materials and Tools You’ll Need
Before you begin this exciting journey of transforming fabric scraps, gather all the necessary materials and tools. Having everything prepared will ensure a smooth and enjoyable crafting experience.
- Scrap Fabric: The star of our project! Choose a variety of colors, patterns, and textures for diverse butterflies. Cotton, linen, or lightweight denim scraps work wonderfully.
- Large Cutting Mat: Provides a stable, protected surface for cutting, preventing damage to your table and ensuring accuracy.
- Rotating Cutting Mat (Optional but Recommended): This specialized mat allows you to rotate your fabric as you cut, making it easier to achieve precise cuts without repositioning your fabric or body.
- 5″ x 5″ Template or Ruler: For consistent and accurate fabric cutting. You can use a cardboard template or a quilter’s ruler.
- Silicone Template Grips (Optional): Adhere to your ruler or template to prevent it from slipping while cutting, greatly enhancing safety and precision.
- Rotary Cutter: An indispensable tool for cutting fabric quickly and accurately, especially useful for straight lines and multiple layers. Remember to always use a sharp blade for clean cuts.
- Scissors: For trimming threads and making smaller, more intricate cuts where a rotary cutter isn’t suitable.
- Pins: Essential for holding fabric layers together securely before sewing.
- Magnetic Bowl: A handy tool for keeping your pins organized and preventing them from scattering across your workspace.
- Thread Snippers: Small, sharp scissors designed for quickly and cleanly snipping threads close to the fabric.
- Sewing Machine: Your primary tool for stitching the fabric pieces together. Ensure it’s in good working order and threaded correctly.
- Ironing Board: Provides a firm, heat-resistant surface for pressing your fabric, crucial for achieving crisp seams and a professional finish.
- Cloth Iron: Used to press seams flat and shape your fabric, ensuring your butterflies have sharp edges and a neat appearance.
- Hand Sewing Needle: A sharp needle for the final hand-stitching steps to shape and secure the butterfly.
- Strong Thread: A durable thread suitable for hand-sewing and gathering, matching or contrasting with your fabric as desired.
Step-by-Step Directions to Craft Your Fabric Butterflies
Let’s dive into the creation process. Follow these detailed steps carefully to construct your beautiful fabric butterflies.
Step 1: Prepare Your Fabric Strips
Begin by laying your chosen scrap fabric flat on your cutting mat. Using your ruler or template and rotary cutter, cut your fabric into rectangular strips measuring 5 inches by 3.5 inches (approximately 13 cm x 9 cm). The beauty of this project lies in its flexibility; you can make your butterflies larger or smaller by adjusting these dimensions. However, a helpful guideline is to ensure the width measurement is approximately 70% of the length. This ratio generally creates aesthetically pleasing butterfly wing proportions. Cut as many fabric strips as you wish, depending on how many butterflies you plan to make. Remember to cut precisely, as accuracy here will contribute to a neater final product.
Step 2: Sew the Fabric Rectangles
Take two of your cut fabric strips. Place them right sides together, ensuring the shorter 3.5-inch ends are facing you. This orientation will make it easier to manage your fabric during sewing. Now, you’ll need to mark a small opening for turning the fabric right side out later. Using a fabric marker or a pin, mark a 2-inch opening on one of the longer sides, roughly centered. This gap is crucial for turning your fabric and will be sealed later.
Using your sewing machine, begin sewing with a standard seam allowance (typically 1/4 inch or 0.5 cm). Start by placing your needle at the beginning of your marked opening and backtacking to secure your stitches. Stitch along the first long edge, pivot at the corner, and continue along the short edge. When you approach the next corner, stitch until you are about 1/4 inch from the edge, then lift your presser foot, leave the needle down in the fabric, pivot the fabric, and lower your presser foot to continue stitching the next side. Repeat this process for all four corners, sewing all around the edges of the rectangle, but remember to stop at the other end of your marked 2-inch opening. Backtack again to secure the stitches at the end of the opening. This will leave you with a fabric rectangle sewn on all sides except for the small opening you’ve created.
Step 3: Trim Corners and Turn Fabric
Once you’ve finished sewing, carefully trim all four corners of the fabric rectangle diagonally. It’s important to trim close to the stitching, but be extremely careful not to cut through the thread. Trimming the corners reduces bulk, allowing for crisp, sharp points when the fabric is turned right side out. After trimming, gently push all the fabric through the 2-inch opening you left. Take your time with this step, using a pointed tool like a chopstick or a dull pencil (or even your closed scissors) to carefully push out the corners from the inside, ensuring they are as sharp as possible. This step is critical for a professional-looking finish.
Step 4: Press for Crispness
Move to your ironing board. Before pressing, ensure the edges of the opening and all other sides are straight and well-defined. Use your cloth iron to press the entire fabric rectangle flat, paying special attention to the seams. Pressing creates clean, crisp edges and helps to set the stitches, giving your future butterfly a polished appearance. For the opening, fold the raw edges inward so they align with the sewn seam, then press them flat. This creates a neat, finished edge for the opening that will be sealed in the next step.
Step 5: Edge Stitching to Finish
Return to your sewing machine. Starting from the center of the opening you just pressed, begin edge stitching around the entire perimeter of your fabric rectangle. Edge stitching (or topstitching) means sewing very close to the finished edge. This step serves two important purposes: it securely closes the turning opening and adds a neat, professional finish to your fabric rectangle. Backtack at the beginning and end of your stitching to ensure durability. Once done, trim any excess threads closely and neatly.
Step 6: Prepare Your Thread for Gathering
To create the gathered body of the butterfly, you’ll need a strong hand-sewing thread. Pull out approximately 1.2 meters (about 47 inches) of thread. Fold this thread in half, bringing the two ends together. Push the folded loop through the eye of a hand-sewing needle, then pull the two loose strands until they are even. Cut the thread from the spool. Now, tie a secure knot at the end of the two loose strands. This technique creates a double-stranded thread, which is much stronger for gathering and securing the butterfly shape. You should end up with a working strand of about 12 inches (30 cm) or so after folding and knotting.
Step 7: Fold Your Fabric for the Butterfly Shape
This is where your fabric rectangle truly begins to take the form of a butterfly. Lay your fabric flat on your cutting mat with the wrong side facing up (the side where the original opening was might be considered the “wrong” side for this step). Follow these precise folding instructions:
- First Fold: Fold the fabric to match the short edges together. Finger press the bottom fold firmly to create a crease. This helps define the center line.
- Second Fold: Now, fold the right edges to meet the left edges. Finger press the centerfold you just created. You should now have a smaller, multi-layered rectangle.
- Creating the First Wing Segment: Hold onto the top-left corner flap. Gently lift only the top layer of fabric upwards and to the left, revealing a triangular shape at the bottom-left. This triangular fold will form part of your butterfly’s wing.
- Preparing for Symmetry: Carefully flip the entire folded fabric over. While holding onto the corner on the bottom (which was the previously created triangle), slowly open the fabric again. Adjust the fabric symmetrically, aiming for a balanced shape that will form the wings on both sides. This step requires a bit of manipulation to get the angles just right, so take your time.
Step 8: Form the Butterfly Body
Once you have your fabric symmetrically arranged with what will become the wings, hold everything firmly in place with your left hand. With your right index finger, gently push the center fabric down a bit. Then, fold this center fabric over the front. This action compresses the middle section, creating the distinct “body” segment of the butterfly and bringing the wing sections together.
Step 9: Secure the Center Gathering
With the butterfly shape now clearly visible, securely turn it around. Grab your prepared hand-sewing needle with the double-stranded thread. Insert the needle from the center corner, carefully pushing it through four layers of fabric. This initial stitch anchors the thread. Pull the thread through. Then, push your needle back beside the thread you just pulled out, creating a small stitch. Repeat this process twice more, effectively “cinching” and securing the center of the butterfly. Pull the thread tightly to gather the fabric and form the defined butterfly body. Once you’re satisfied with the gathering, tie a secure knot to close the stitch and cut off any excess thread. This step makes the first wing section.
Step 10: Create the Second Wing
Now, repeat the wing-folding process (Steps 7 and 8) on the other side of the butterfly, ensuring you leave a small space in the very center where you secured the first gathering. This space will become the central “body” of your butterfly. Once the second wing is folded and shaped, you have a couple of options: you can either leave the center point as is for a softer look, or for a more defined body, fold back the very center point and stitch it in place with a few small, discreet hand stitches. This final securing step holds the entire butterfly shape together, making it durable and ready for use.
Tips for Success and Creative Variations
- Fabric Choice: Experiment with different fabric types! While cotton and linen are easy to work with, consider using silk for a delicate butterfly, or a stiffer fabric for a more structured look. Small prints and subtle textures often add depth.
- Symmetry is Key: Pay close attention to achieving symmetry during the folding and shaping steps. A well-balanced butterfly is visually more appealing.
- Pressing Power: Don’t skip the ironing! Pressing each step not only makes the project easier but also results in a much more professional and crisp final product.
- Practice Makes Perfect: If your first butterfly isn’t exactly as you envisioned, don’t get discouraged. Practice a few times, and you’ll quickly get the hang of the folding and shaping.
- Embellishments: Elevate your butterflies with embellishments! Sew on small beads, sequins, or a tiny button in the center for added sparkle or detail. You could even use fabric paint for subtle accents.
- Antennae: For a realistic touch, attach small wire antennae. You can twist thin craft wire or even use stiff embroidery floss to create antennae that stand up from the body.
Creative Ways to Use Your Handmade Fabric Butterflies
These beautiful fabric butterflies are incredibly versatile and can add a whimsical, handmade touch to a wide array of items. Here are just a few ideas to inspire you:
- Fashion Accessories:
- Brooches: Attach a pin back to transform them into charming brooches for jackets, scarves, or bags.
- Hair Accessories: Glue them onto hair clips, headbands, or barrettes for a unique hair ornament.
- Clothing Embellishments: Hand-stitch them onto plain t-shirts, denim jackets, skirts, or even hats for a personalized touch.
- Home Decor:
- Curtains and Drapes: Clip or sew them onto curtains to add a playful or elegant accent.
- Pillows and Cushions: Embellish throw pillows for a cozy, customized feel.
- Wall Art: Arrange a collection of different-sized butterflies on a canvas or frame for unique 3D wall decor.
- Wreaths: Incorporate them into seasonal or decorative wreaths for added texture and charm.
- Table Decor: Use them as napkin rings, place card holders, or simply scatter them on a festive table.
- Gifts and Special Occasions:
- Gift Toppers: Instead of a traditional bow, use a fabric butterfly to adorn gift packages.
- Card Embellishments: Glue a small butterfly onto handmade greeting cards for a special touch.
- Party Favors: Create a batch of butterflies as charming take-home gifts for guests.
- Ornaments: Add a loop of thread and hang them as unique ornaments for a Christmas tree or other festive displays.
- Scrapbooking and Crafts:
- Scrapbook Layouts: Add a three-dimensional element to your scrapbook pages.
- Journal Decor: Embellish journal covers or inner pages.
Conclusion: Embrace Your Creativity!
You’ve now learned how to transform simple scrap fabric into enchanting fabric butterflies, a testament to the magic of repurposing and handmade crafts. This project is not only an excellent way to use up fabric remnants but also provides endless opportunities for personal expression and decorative flair. Whether you’re enhancing your wardrobe, sprucing up your home, or crafting unique gifts, these fabric butterflies are sure to bring a smile. We extend our gratitude to Notches Sewing for the original inspiration behind this wonderful project.
Don’t be afraid to experiment with different fabrics, colors, and sizes. Let your imagination soar, just like these beautiful butterflies. Share your creations with others and inspire a more sustainable, creative approach to crafting. Happy sewing!