
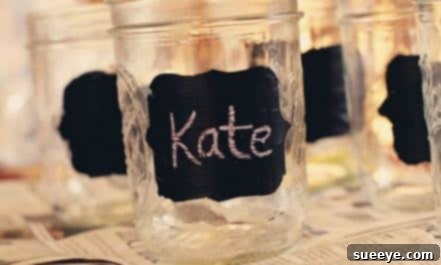
DIY Chalkboard Labels: Create Custom Organization with Rustic Charm
Have you been captivated by the charming aesthetic of chalkboard labels adorning everything from pantry jars to craft supply bins? They’ve become a staple in stylish home organization, offering both practicality and a touch of rustic elegance. While the allure of pre-made chalkboard labels is undeniable, the price tag can often be a surprising deterrent. Many of us have experienced that moment of excitement at a store, only to have it deflated by the cost of just a few labeled jars. But what if you could achieve that same sophisticated look, customized precisely to your needs, without breaking the bank?
The good news is, crafting your own chalkboard labels at home is not only incredibly simple but also immensely rewarding. Forget those expensive store-bought options; with a few basic supplies and a clear guide, you can create an endless supply of personalized labels that perfectly match your style and organizational demands. This comprehensive guide will walk you through everything you need to know, from gathering materials to creative applications, ensuring your home organization is both functional and beautifully cohesive.
Why DIY Chalkboard Labels Are a Game-Changer for Home Organization
Beyond the initial cost savings, there are numerous compelling reasons to embrace the DIY approach for your chalkboard labels:
- Unbeatable Affordability: The materials required for homemade chalkboard labels are surprisingly inexpensive, especially when compared to purchasing pre-labeled items or even packs of blank chalkboard labels. A single can of chalkboard paint can yield hundreds of labels, making it an incredibly cost-effective solution.
- Limitless Customization: Store-bought labels come in predetermined shapes, sizes, and colors. When you make your own, the possibilities are endless! You can design labels to fit any container, reflect any theme, or integrate seamlessly with your existing decor. Want heart-shaped labels for your craft glitter or tall, narrow labels for spice jars? You got it.
- Personal Touch & Satisfaction: There’s a unique sense of accomplishment that comes from creating something beautiful and functional with your own hands. Your DIY labels will carry a personal touch, making your organized spaces feel even more uniquely “you.”
- Versatility for Any Space: Chalkboard labels aren’t just for the kitchen. Their erasable nature makes them ideal for dynamically organized spaces like children’s playrooms, home offices, workshops, and even garden sheds.
- Eco-Friendly Reusability: Instead of constantly buying new labels, you can simply wipe off and rewrite on your chalkboard labels, reducing waste and promoting sustainable living.
Essential Materials: What You’ll Need to Get Started
Gathering your supplies is the first exciting step in your DIY journey. Most of these items are readily available at craft stores, hardware stores, or even online. Here’s what you’ll typically need:
Primary Materials:
- Chalkboard Paint: This is the star of the show. Available in spray cans or traditional brush-on cans. A small can goes a long way. Matte black is classic, but some brands offer other colors like green or even tintable options.
- Surface for Labels:
- Adhesive Vinyl or Contact Paper: Ideal for creating peel-and-stick labels. Choose a smooth, durable type. Black is common, but any color can be painted over.
- Cardstock or Chipboard: Great for hang tags or non-adhesive labels.
- Directly on Containers: You can also paint directly onto glass jars, plastic bins, or metal tins if you want a permanent chalkboard area.
- Chalk or Chalk Markers: Traditional chalk provides a classic, dusty look, while liquid chalk markers offer vibrant, smudge-resistant writing that’s still erasable with a damp cloth.
Tools & Accessories:
- Scissors or Craft Knife (e.g., X-Acto knife): For cutting your labels into desired shapes. A craft knife with a cutting mat offers precision for intricate designs.
- Cutting Mat: Essential if using a craft knife to protect your work surface.
- Painter’s Tape: Useful for masking off areas if painting directly onto containers, or for securing your vinyl while cutting.
- Paint Brush or Foam Roller: If using brush-on chalkboard paint. Foam rollers often give a smoother finish.
- Protective Drop Cloth or Newspaper: To protect your workspace from paint spills.
- Pencil and Ruler: For drawing out label shapes and ensuring straight lines.
- Templates or Stencils (Optional): For consistent shapes or decorative borders.
- Sponge or Damp Cloth: For curing the chalkboard surface and for erasing.
Step-by-Step Guide: Crafting Your Own Chalkboard Labels
Now that you have your supplies, let’s dive into the simple process of making your custom chalkboard labels. We’ll focus on creating adhesive labels from vinyl, as it offers the most versatility for various containers.
1. Prepare Your Workspace and Materials
Lay down a drop cloth or newspaper in a well-ventilated area. If you’re using brush-on paint, stir it thoroughly. If using spray paint, shake the can well according to manufacturer instructions. Ensure your vinyl or chosen label surface is clean and free of dust.
2. Design and Prepare Your Label Blanks
Decide on the size and shape of your labels. You can:
- Draw Freehand: Sketch your desired shapes (rectangles, circles, ovals, ornate designs) directly onto the non-adhesive backing of your vinyl or onto your cardstock using a pencil.
- Use Templates: Find printable templates online or use cookie cutters, bottle caps, or other household items to trace perfect shapes.
- Cut Simple Strips: For a clean, minimalist look, simply cut strips or squares of your chosen material to paint.
You can either cut out the blank shapes *before* painting, or paint a larger sheet of vinyl and cut the labels out *after* the paint has dried and cured. Painting a larger sheet and then cutting often yields a smoother painted surface on the labels.
3. Apply the Chalkboard Paint
This step requires patience to achieve a durable, smooth finish.
- For Brush-on Paint: Apply thin, even coats using a foam roller or a good quality brush. Avoid thick coats, as they can lead to streaking or cracking. Allow each coat to dry completely to the touch before applying the next.
- For Spray Paint: Hold the can about 6-8 inches from the surface and apply light, even coats with a sweeping motion. Multiple thin coats are always better than one thick, drippy coat.
Typically, 2-3 coats are sufficient for a solid chalkboard surface. Ensure adequate drying time between coats and for the final coat – often 1-2 hours between coats and at least 24 hours for the final coat to fully dry before moving to the next step. Refer to your paint can’s instructions for specific drying times.
4. Cure Your Chalkboard Surface (Crucial Step!)
This is arguably the most important step to ensure your labels are durable and receptive to chalk. Skipping this can lead to permanent ghosting of your first writings.
- Once the chalkboard paint has fully dried (usually 24-72 hours, check paint instructions), take a piece of regular white chalk.
- Lie the chalk on its side and gently rub it all over the entire painted surface, covering it completely with a light layer of chalk dust.
- Use a soft, dry cloth or an eraser to wipe off the chalk dust.
This process “primes” the surface, conditioning it to be truly erasable. Your labels are now ready for use!
5. Cut and Apply Your Custom Labels
If you painted a larger sheet of vinyl or cardstock:
- Cutting: Carefully cut out your desired label shapes using sharp scissors or a craft knife on a cutting mat.
- Applying (for Adhesive Labels): Peel the backing off your vinyl labels and carefully smooth them onto your clean containers. Start from one edge and gently press down, working out any air bubbles.
- Applying (for Non-Adhesive Labels): If you made cardstock labels, you can punch a hole and tie them with twine, or simply rest them against items.
Tips for Success and Longevity
To ensure your DIY chalkboard labels look great and last for a long time, keep these tips in mind:
- Ventilation is Key: Always work in a well-ventilated area when using chalkboard paint, especially spray paint.
- Thin Coats Over Thick: Patience with thin coats will prevent drips, uneven textures, and peeling.
- Respect Drying Times: Rushing the drying or curing process can compromise the durability and functionality of your labels.
- Choose Your Writing Tool Wisely:
- Regular Chalk: Offers an authentic, soft look. Easily erasable with a dry cloth or sponge. Can produce dust.
- Liquid Chalk Markers: Provide bolder, cleaner lines with less dust. Erasable with a damp cloth or specialized chalkboard cleaner. Some brands are more permanent than others, so test in an inconspicuous area if concerned.
- Cleaning: For light cleaning, a dry cloth is sufficient. For a deeper clean or to remove stubborn ghosting from chalk markers, use a slightly damp cloth or a chalkboard cleaning spray. Always ensure the surface is dry before writing again.
- Storage: If making a batch of adhesive labels, store them flat with their backing intact until ready to use.
Creative Applications for Your DIY Chalkboard Labels
Now that you’re a master of making chalkboard labels, let your creativity soar! Here are just a few ideas for where these versatile labels can transform your home:
Kitchen & Pantry Organization:
- Spice Jars: Keep your spice rack perfectly organized and easy to navigate.
- Canisters & Jars: Label flour, sugar, coffee, pasta, snacks, and more in clear, attractive containers.
- Pantry Shelves: Label bins for snacks, baking supplies, or seasonal items.
- Refrigerator Bins: Categorize produce, dairy, or leftovers for quick identification.
- Leftover Containers: Write contents and dates for easy meal planning and freshness tracking.
Craft Room & Office Solutions:
- Supply Bins: Organize buttons, beads, yarn, fabric scraps, or office supplies like pens and paperclips.
- Tool Boxes: Clearly mark compartments in your workshop.
- File Folders: Create stylish, changeable labels for documents.
Children’s Rooms & Play Areas:
- Toy Bins: Help kids learn to sort and put away their toys by category.
- Art Supplies: Label containers for crayons, markers, paints, and craft items.
- Bookshelves: Categorize books by genre or age group.
General Home & Decorative Uses:
- Garden Markers: Label herbs or plant types in your garden beds or pots. (Ensure the labels are weatherproof if outdoors).
- Gift Tags: Create charming, reusable gift tags for presents.
- Party Decor: Label food dishes on a buffet, drink dispensers, or party favors.
- Mudroom & Entryway: Label baskets for hats, gloves, or shoes.
- Laundry Room: Organize detergents, fabric softeners, and other supplies.
Beyond Labels: Expanding Your Chalkboard Creativity
Once you get comfortable with chalkboard paint, you might find yourself looking for more surfaces to transform. The possibilities are vast!
- Chalkboard Wall or Section: Designate a wall in your kitchen or playroom for daily menus, grocery lists, or creative drawings.
- Furniture Makeovers: Paint tabletops, drawer fronts, or even an old dresser to create writable surfaces.
- Serving Trays & Platters: A simple wooden tray can become a charming chalkboard platter for labeling cheeses or appetizers at a gathering.
- Flower Pots: Paint terracotta pots and label your herbs or flowers directly.
- Clipboards: Transform plain clipboards into versatile message boards.
Embrace the Charm of DIY Chalkboard Labels
From tackling kitchen clutter to adding a personalized touch to your craft room, DIY chalkboard labels offer an incredibly versatile, affordable, and stylish solution. The satisfaction of crafting something beautiful and functional that perfectly suits your needs is an experience well worth pursuing. With this comprehensive guide, you have all the knowledge and inspiration to transform ordinary containers into charming, organized masterpieces.
So, grab your supplies, unleash your inner DIY enthusiast, and start creating! Your perfectly organized, beautifully labeled home awaits.