
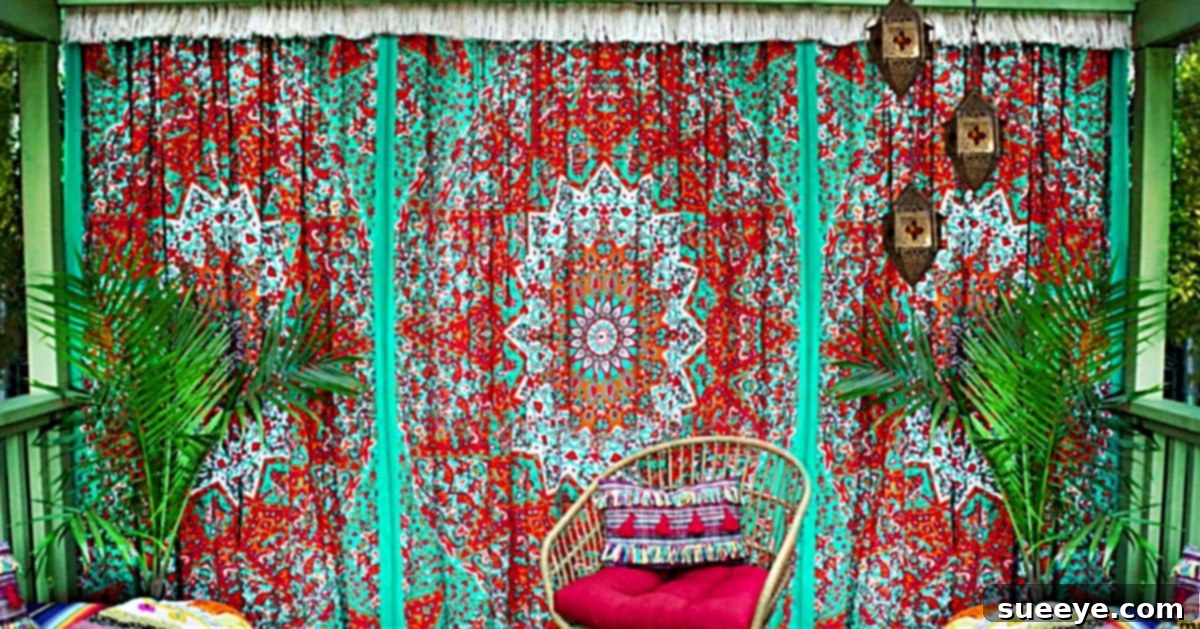
Transform Your Patio: The Ultimate No-Sew Boho Outdoor Curtains DIY Guide
Are you dreaming of an outdoor sanctuary that reflects your unique style and offers a cozy, inviting ambiance? Look no further than the enchanting world of Boho decor! For anyone seeking to infuse their patio, porch, or deck with a touch of whimsical elegance, DIY Boho outdoor curtains are an absolute game-changer. Imagine soft fabrics swaying gently in the breeze, casting playful shadows, and creating an intimate setting perfect for relaxation or entertaining. My recent quest for the perfect patio drapery led me down a delightful path, culminating in a stunning no-sew project that transformed my outdoor space into a bohemian haven. This wasn’t just about adding curtains; it was about crafting an experience, a mood, and a vibrant extension of my home’s personality.
The journey began with a simple desire: to add privacy and style to my outdoor patio. I envisioned something organic, relaxed, and utterly chic – a quintessential Boho vibe. However, the thought of intricate sewing patterns or expensive custom solutions was daunting. That’s when serendipity struck! While browsing YouTube for creative outdoor decor ideas, I stumbled upon an incredible tutorial for making No-Sew Boho Outdoor Curtains. It felt like winning the DIY lottery! The idea of achieving that coveted “Rockstar BoHo Chic” aesthetic in just a few hours, without even touching a sewing machine, was incredibly exciting. This discovery ignited my creative spirit and set the stage for one of the most rewarding home improvement projects I’ve undertaken.
Gathering Your Bohemian Essentials: Smart Shopping for Stunning Results
The success of any DIY project often hinges on the quality and affordability of its materials. With my newfound inspiration, the first stop was the fabric store. I immediately headed to JoAnn’s, a treasure trove for crafters, and made a beeline for their clearance section – a secret weapon for budget-conscious creators. If you’ve never explored the clearance racks at JoAnn’s, you are missing out on incredible deals! I cannot recommend it enough. This is where dreams meet practicality, where high-quality fabrics find new life at a fraction of their original cost.
On this particular visit, fortune smiled upon me. I discovered an indoor/outdoor Canvas Duck fabric, perfect for the resilience needed in an exterior setting. This durable, weather-resistant material was originally priced at $20 a yard, but I snagged it for an astonishing $3.50 a yard! This significant saving allowed me to allocate more of my budget to other decorative elements, like fringe. The JoAnn’s clearance section is a testament to the fact that you don’t need to break the bank to create luxurious, custom home decor. Always keep an eye out for these gems; patience and persistence in browsing can lead to remarkable finds.
Beyond the main fabric, I already had another essential component on hand: a generous bolt of cotton fringe. This particular find was a fantastic score from a local yard sale, proving that second-hand shopping can yield unique and character-rich embellishments that truly elevate a project. The beauty of Boho style lies in its eclectic nature, often incorporating textures and trims that tell a story. If you don’t have fringe readily available, craft stores offer a wide array of options, from classic tassels to pom-poms and brush fringe, allowing you to customize your curtains to your heart’s desire. When choosing your fringe, consider its material – cotton or polyester blends are often suitable for outdoor use, offering durability and a touch of softness.
Here’s a concise list of the materials you’ll need to embark on your own no-sew curtain adventure:
- Indoor/Outdoor Fabric (like Canvas Duck) – purchase 4.5 inches more than your desired finished length per panel.
- Cotton Fringe (or your preferred style)
- Strong Fabric Glue (ensure it’s suitable for outdoor use and flexible once dry)
- Measuring Tape
- Fabric Scissors
- Iron and Ironing Board
- Optional: Fabric clips or clothespins for holding edges while glue dries
Crafting Your Bohemian Masterpiece: The Easy No-Sew Steps
Once your supplies are gathered, the transformation begins! The simplicity of this no-sew method is truly remarkable, making it accessible even for novice DIYers. Precision in measuring and patience with the gluing process are your best friends here. Let’s dive into the steps:
Step 1: Measure and Cut Your Fabric
First, determine the exact length you want your finished curtains to be. Whether you prefer them to just skim the floor, puddle elegantly, or float slightly above, measure from where your curtain rod will hang down to your desired endpoint. For each curtain panel, you’ll need to cut your fabric to this desired length, plus an additional 4 and a half inches. This extra allowance is crucial for creating neat, sturdy hems at the top and bottom, which will give your curtains a professional finish and provide the structure needed for the rod pocket and the fringe attachment. Accuracy here will save you headaches later.
Step 2: Prepare the Side Hems (Optional but Recommended)
While the original tutorial might focus on the top and bottom, for a truly polished and durable outdoor curtain, I highly recommend creating small side hems. Fold about half an inch of fabric inward along each vertical edge, press it flat with your iron, and then apply a thin line of fabric glue. Press again to ensure a secure bond. This step prevents fraying and gives your curtains a much cleaner, more finished look. Allow the glue to dry completely before moving on.
Step 3: Create the Top Rod Pocket
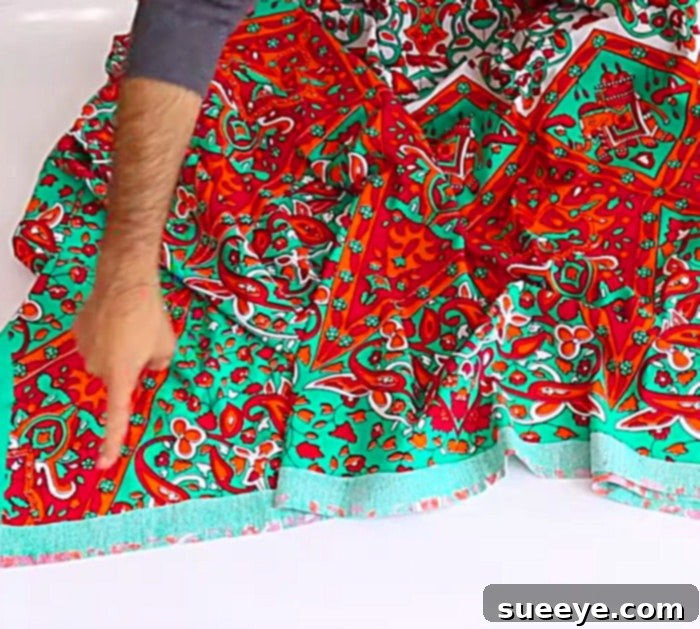
This is where the magic happens for hanging your curtains. Lay your fabric right side down. Take the top edge of your fabric and fold it over by about 4 inches. This creates a generous flap. Press this fold firmly with your iron to create a sharp crease. Now, apply a strong, continuous bead of fabric glue along the raw edge of this folded flap. Carefully press the folded edge down onto the right side of the fabric, ensuring it’s perfectly aligned and flat. This creates a channel for your curtain rod. The 4-inch fold provides ample space for most standard outdoor curtain rods, allowing the curtain to glide smoothly. Take your time to press firmly along the glued seam, ensuring a strong bond. Allow this to dry thoroughly.
Step 4: Attach the Bohemian Fringe
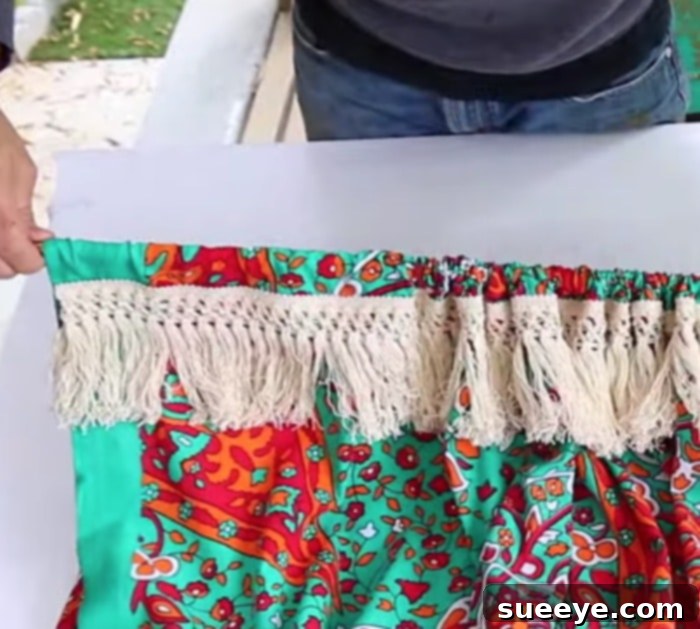
Now for the fun part – adding that distinctive Boho flair! With your fabric still laid out, right side up, it’s time to attach the fringe. You will glue your fringe to the top and the bottom edges of the right side facing of your BoHo fabric. For the top, apply a line of glue along the bottom edge of your newly created rod pocket (the part that faces you when the curtain is right side up). Carefully align the heading of your fringe (the part that will be hidden by the glue) with this glued line and press firmly. For the bottom, measure 0.5 inches from the raw bottom edge of your fabric. Fold this 0.5 inch under and press. Then, apply glue along the folded edge and attach the fringe, ensuring the decorative part drapes downwards. This method gives a clean finish to both the top and bottom of your curtain panels.
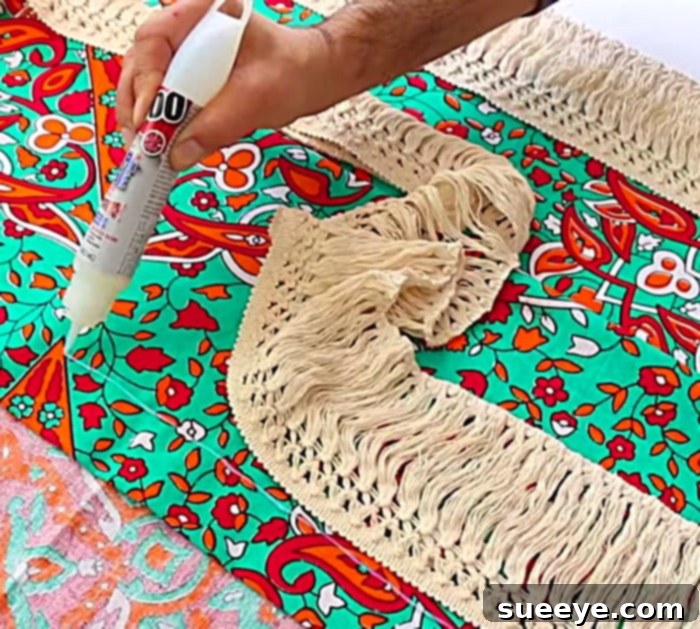
Ensure your fringe is straight and evenly applied. The fabric glue should hold it securely, but it’s crucial to let each glued section cure according to the product instructions. Patience here prevents your beautiful fringe from detaching prematurely. The choice of fringe style – whether it’s classic tassels, playful pom-poms, or elegant brush fringe – will dramatically influence the final aesthetic, adding texture and movement that are hallmarks of true bohemian design.
Step 5: The Grand Reveal!
Once all the glue has thoroughly dried and set, it’s time to unveil your creation. You will not believe your eyes when you slide the curtain rod through the newly formed pocket and hang your project in its full glory. The transformation is immediate and astounding. The once bare patio now exudes warmth, character, and an undeniable sense of style. The fabric catches the light beautifully, and the fringe adds that perfect touch of artistic whimsy, instantly elevating the entire outdoor space.
Beyond the Curtains: A Patio Transformed, A Dream Ignited
The impact of these simple curtains extended far beyond mere decoration. That evening, I surprised my husband when he returned home from work. I had prepared a romantic candlelight dinner on our newly adorned patio. The flickering candlelight danced off the vibrant new Boho curtains, creating an almost magical atmosphere. He was utterly captivated, remarking that he “almost died” from the sheer beauty and surprise. It was a truly unforgettable moment, made even more special by the fact that I had created this sanctuary with my own hands.
We sat outside for hours, the soft glow of the candles reflecting in the fabric, reminiscing about shared memories and excitedly chatting about our future plans. This single project became a catalyst, inspiring both of us to pursue a long-held dream: to start a DIY channel of our own. The joy and satisfaction derived from transforming our space, and the overwhelmingly positive reaction, made us realize the power of creative expression and the potential to share that passion with others. It proved that a simple DIY project can not only enhance your living space but also spark bigger dreams and deeper connections.
Maintaining Your Bohemian Oasis
To ensure your beautiful no-sew Boho outdoor curtains continue to provide charm and style for seasons to come, a little maintenance goes a long way. Since they are made from outdoor fabric, they are designed to withstand various weather conditions. However, occasional cleaning is recommended. Most outdoor fabrics can be spot-cleaned with a mild soap and water solution. For deeper cleaning, you can often gently hose them down or even machine wash on a delicate cycle (check your fabric’s specific care instructions). During colder months or prolonged periods of harsh weather, consider taking them down, cleaning them, and storing them in a dry, protected area to extend their lifespan. This simple care routine will keep your patio looking fresh and inviting year after year.
Embrace the DIY Spirit: Your Patio Awaits Its Bohemian Makeover!
This no-sew Boho outdoor curtain project is more than just a craft; it’s an invitation to unleash your creativity, personalize your living spaces, and discover the immense satisfaction that comes from making something beautiful yourself. From the thrill of finding incredible deals at JoAnn’s clearance section to the joy of seeing your vision come to life, every step of this DIY journey is rewarding. Whether you’re looking to add privacy, shade, or simply a touch of bohemian chic to your outdoor haven, this project offers an accessible and impactful solution. So, gather your materials, embrace the simple instructions, and prepare to transform your patio into a stunning, personalized retreat. Your outdoor oasis is just a few glue-and-press steps away!