
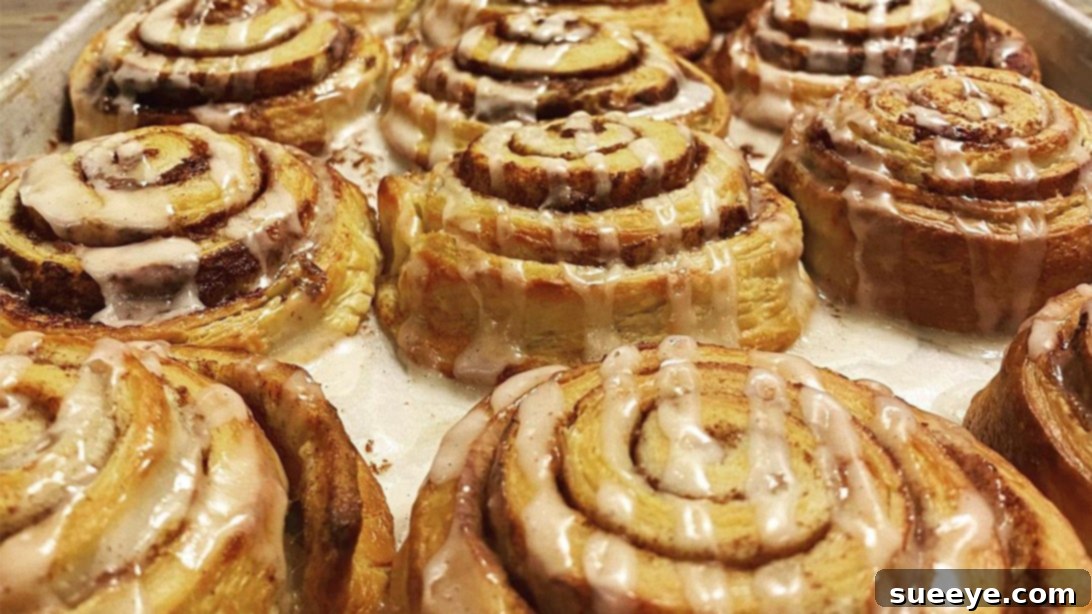
Easy Biscuit Cinnamon Rolls: Your New Go-To Quick Treat
Are you searching for a delightful dessert or a comforting breakfast that comes together in a flash? Imagine the warm, inviting aroma of freshly baked cinnamon rolls filling your kitchen, but without the fuss of yeast dough. Good news – your search ends here! We’re diving into a clever kitchen hack that transforms store-bought flaky layer biscuits into irresistible cinnamon rolls. You might have seen biscuits turned into donuts, but this cinnamon roll version is an absolute game-changer, especially when you need a quick, sweet fix.
This brilliant idea comes courtesy of Keeper of Home at 4D Farms, who shared this ingenious method for creating a delicious dessert on the fly. Whether you’re camping, on vacation, or simply looking for an easy baking project with the little ones, this recipe is designed for simplicity and speed. With just four core ingredients for the rolls and another four for the luscious cream cheese frosting, you’re mere minutes away from pure bliss. Get ready to rekindle cherished childhood memories with every warm, gooey bite!
Why These Biscuit Cinnamon Rolls Are a Must-Try
Traditional cinnamon rolls, while undeniably delicious, often require significant time and effort, mainly due to yeast activation and multiple proofing stages. This innovative biscuit hack eliminates all that waiting, bringing you fresh, warm cinnamon rolls in a fraction of the time. Here’s why this recipe deserves a permanent spot in your culinary repertoire:
- Unbeatable Speed: From pantry to plate in under 30 minutes. Perfect for unexpected guests or sudden cravings.
- Remarkable Simplicity: No complex techniques, no obscure ingredients. Just basic kitchen staples and simple steps suitable for even the most novice bakers.
- Family-Friendly Fun: This recipe is incredibly easy to make with children. They’ll love helping to flatten the biscuits, spread the filling, and roll them up.
- Versatile for Any Occasion: Ideal for a lazy Sunday breakfast, a holiday brunch, a quick camping dessert, or a delightful afternoon snack.
- Crispy, Flaky Texture: The beauty of flaky layer biscuits is how they bake up with beautiful layers, mimicking the classic cinnamon roll texture perfectly.
- Budget-Friendly: Using readily available and inexpensive ingredients makes this a treat everyone can enjoy without breaking the bank.
Gather Your Simple Ingredients
One of the most appealing aspects of this recipe is its minimal ingredient list. You likely have most of these items in your pantry and fridge already, making spontaneous baking a real possibility. For the best results, opt for quality ingredients, especially when it comes to butter and cream cheese, as they form the backbone of the flavor.
For the Flaky Cinnamon Rolls:
- Flaky Layer Biscuits: One standard can (usually 8 biscuits). Look for brands specifically labeled “flaky layers” for the best texture.
- Unsalted Butter: Melted. This acts as the binder for the sugar and spice, and contributes to the rich flavor.
- Light Brown Sugar: Packed. Provides that classic caramelly sweetness.
- Ground Cinnamon: The star spice! Feel free to adjust the amount to your preference.
- Optional Spices: A pinch of ground nutmeg or pumpkin pie spice can add extra depth and warmth, especially during cooler months.
For the Dreamy Cream Cheese Frosting:
- Cream Cheese: Softened to room temperature. Full-fat cream cheese yields the creamiest, most decadent frosting.
- Milk or Creamer: Just a touch to achieve the perfect spreadable consistency. Whole milk works wonderfully.
- Powdered Sugar (Confectioners’ Sugar): For a smooth, lump-free frosting and adjustable sweetness.
- Vanilla Extract: Essential for that classic, comforting aroma and flavor in your frosting.
Essential Equipment for Easy Baking
You won’t need any fancy gadgets for this recipe, just a few basic kitchen tools that most homes already possess. Having these ready before you start will make the process even smoother:
- Rolling Pin: For flattening the biscuits evenly. A heavy glass bottle can work in a pinch!
- Baking Dish: A 9×13 inch (or similar size) baking dish or a cast-iron skillet for baking the rolls.
- Mixing Bowls: One for the cinnamon filling mixture and another for the frosting.
- Whisk or Fork: For mixing the frosting ingredients until smooth. An electric hand mixer can also be used for extra creaminess.
- Measuring Cups and Spoons: For accurate ingredient proportions.
- Pastry Brush (Optional): For evenly spreading melted butter.
- Sharp Knife or Dental Floss: For neatly slicing the rolled biscuit dough.
Step-by-Step Directions to Cinnamon Roll Heaven
Follow these simple steps, and you’ll be enjoying warm, gooey, homemade cinnamon rolls in no time!
Step 1: Prepare Your Workspace and Biscuits
Begin by preheating your oven to 350 degrees F (175 degrees C). This ensures your oven is at the correct temperature when your rolls are ready to bake. Lightly flour your clean countertop or a large cutting board. This prevents the biscuits from sticking as you flatten them.
Take your flaky layer biscuits out of the can. Using a rolling pin, carefully flatten each biscuit. Your goal is to create thin, even disks. Once flattened, arrange them on your floured surface to form a large rectangle. A good starting point is usually four biscuits on the bottom row and four on the top, slightly overlapping. Gently pinch the seams of the biscuits together where they meet. This is a crucial step! Pinching them well helps fuse the biscuits into one continuous sheet, preventing them from separating during rolling and baking. Once formed into a rectangle, roll over the entire surface again with your rolling pin to ensure an even thickness and securely sealed seams.
Now, it’s time for the delicious filling! Generously spread the melted butter evenly over the entire surface of your biscuit rectangle. Next, sprinkle the brown sugar evenly across the buttered dough. Don’t be shy – this is where much of the sweetness and caramelization comes from. Finally, sprinkle a liberal amount of ground cinnamon (and any optional spices like nutmeg or pumpkin spice) all over the brown sugar. Ensure an even distribution for flavor in every bite.
Step 2: Roll, Slice, and Bake to Golden Perfection
Carefully start rolling the biscuit dough rectangle from one of the long edges. Roll it up tightly, but gently, creating a log. Aim for a consistent tightness throughout to ensure uniform rolls. Once fully rolled into a neat log, you can gently squeeze and reshape it if needed to make it even.
Using a sharp knife, or even unflavored dental floss for super clean cuts, slice the log into individual cinnamon rolls. The thickness is entirely up to you – typically, rolls are about 1 to 1.5 inches thick. A sharp knife pressed straight down (rather than sawing) will prevent the layers from squishing. If using floss, slide it under the log, cross the ends over the top, and pull to cut.
Lightly grease your chosen baking dish. This prevents the rolls from sticking and helps them brown beautifully on the bottom. Arrange the sliced cinnamon rolls in the prepared dish, leaving a little space between each roll for them to expand as they bake. Don’t overcrowd the dish.
Place the baking dish in your preheated oven. Bake for approximately 15-20 minutes, or until the rolls are golden brown on top, puffed up, and cooked through in the center. Baking times can vary depending on your oven and the thickness of your rolls, so keep an eye on them. The enticing aroma filling your kitchen will be your best indicator!
Step 3: Prepare the Irresistible Cream Cheese Frosting
While your cinnamon rolls are baking, it’s the perfect time to whip up the luxurious cream cheese frosting. In a medium-sized bowl, combine the softened room-temperature cream cheese, milk (or creamer), powdered sugar, and vanilla extract. Ensure your cream cheese is truly at room temperature; this is key to achieving a smooth, lump-free frosting. If it’s too cold, it will be difficult to mix evenly.
Using a whisk or an electric hand mixer on low speed, mix all the ingredients together until they are well combined and completely smooth. Scrape down the sides of the bowl as needed. The consistency should be thick enough to spread easily but not too stiff. If it’s too thick, add a tiny splash more milk; if too thin, add a tablespoon more powdered sugar until you reach your desired consistency. Taste and adjust the sweetness or vanilla flavoring according to your preference.
Step 4: The Grand Finale – Frost and Serve!
Once your cinnamon rolls are beautifully golden brown, remove them from the oven. You have a choice here: you can spread the frosting while the rolls are still warm (this allows the frosting to melt slightly into the warm crevices, creating an extra gooey texture) or wait a few minutes for them to cool slightly if you prefer a thicker, more defined frosting layer.
Generously dollop the cream cheese frosting over the warm cinnamon rolls and gently spread it with a knife or spatula, ensuring every roll gets a good coating. The aroma alone will be enough to make your mouth water! Serve immediately for the best experience, as these rolls are truly heavenly when fresh out of the oven.
Tips for Perfection & Creative Customizations
While this recipe is incredibly forgiving, a few tips can elevate your biscuit cinnamon rolls from great to absolutely outstanding:
- Don’t Skimp on Butter and Sugar: Ensure an even and generous coating of butter and brown sugar mixture for maximum flavor and gooeyness.
- Secure the Seams: Taking the time to properly pinch the biscuit seams together is vital to prevent them from unraveling during baking.
- Even Thickness: Aim for a consistent thickness when flattening and rolling the dough. This ensures all your rolls bake evenly.
- Room Temperature Cream Cheese: This is non-negotiable for a smooth, lump-free frosting. Plan ahead and let it sit out for 30-60 minutes.
- Adjust Frosting Consistency: If your frosting is too thick, add milk a teaspoon at a time. If too thin, add powdered sugar by the tablespoon.
- Serve Warm: While they are delicious at any temperature, these cinnamon rolls are truly exceptional when served warm, straight from the oven.
Creative Variations to Try:
Feel free to get creative and customize your biscuit cinnamon rolls:
- Spice It Up: Experiment with different spice blends. Try adding a touch of cardamom, ginger, or even a mix of apple pie spice for unique flavor profiles.
- Nutty Additions: Sprinkle finely chopped pecans or walnuts over the brown sugar mixture before rolling for an added crunch and nutty flavor.
- Fruity Twist: A thin layer of apple butter or a sprinkle of dried cranberries could be added to the filling.
- Citrus Zest: Add a teaspoon of fresh orange or lemon zest to your cinnamon filling or directly into the cream cheese frosting for a bright, zesty kick.
- Maple Frosting: Replace half of the vanilla extract with maple extract or a tablespoon of pure maple syrup in your frosting for a different sweetness.
- Chocolatey Delight: A handful of mini chocolate chips sprinkled over the cinnamon sugar before rolling would make these an extra decadent treat.
A Game-Changer for Quick, Delicious Baking
This easy biscuit cinnamon rolls recipe isn’t just about making a quick dessert; it’s about making joy accessible. It’s for the parent who wants to create a special moment with their kids, the busy individual craving a homemade treat without the hassle, or the camper who wants to elevate their outdoor breakfast. It’s a testament to how simple ingredients, combined with a clever idea, can produce something truly extraordinary.
Forget the long proofing times and the complex steps of traditional cinnamon rolls. Embrace the simplicity and sheer deliciousness of this biscuit hack. The flaky layers, the rich cinnamon-sugar swirl, and the decadent cream cheese frosting all come together to create a treat that tastes like it took hours, but only took minutes. So, next time you’re at the grocery store, grab a can of flaky layer biscuits, and prepare to be amazed. Your taste buds (and your family) will thank you!