
DIY Adorable Scarecrow Mason Jar: The Ultimate Fall & Halloween Decoration
As the leaves begin to change color and a crisp breeze fills the air, there’s no better time to immerse yourself in the cozy spirit of autumn. The fall season brings with it a delightful array of crafting opportunities, and among them, the scarecrow mason jar stands out as a particularly charming and rewarding project. Imagine a friendly little scarecrow, carefully crafted by your own hands, gracing your mantle, brightening a classroom, or adding a whimsical touch to your front porch. This isn’t just another craft; it’s a piece of seasonal art that embodies the warmth and character of autumn, perfect for both fall festivities and Halloween charm.
Mason jars have long been a beloved staple in the world of DIY and crafting, and for good reason. Their simple, versatile design makes them an ideal canvas for an endless array of creative projects. From rustic farmhouse chic to vibrant holiday themes, mason jars can be transformed into practically anything you can imagine. This project harnesses that versatility, inviting you to craft unique characters for the holidays, with the scarecrow being an absolute must-have for autumn. Not only are they incredibly fun and easy to make, but they also offer a fantastic way to personalize your seasonal decor with a handmade touch that store-bought items simply can’t replicate.
Why Mason Jars are the Perfect Canvas for Fall Crafts
The enduring popularity of mason jars in the crafting community is a testament to their adaptability and charm. But what makes them exceptionally suited for fall-themed projects?
- Versatility: Mason jars come in various sizes, allowing for a diverse collection of scarecrows – from tiny whimsical characters to larger, more prominent decorative pieces.
- Affordability: Often inexpensive and readily available, they provide an accessible base for crafters of all skill levels.
- Durability: Made of glass, they are sturdy and can be reused year after year, making your fall decor sustainable.
- Rustic Appeal: Their classic, simple aesthetic perfectly complements the natural, rustic themes associated with autumn and harvest seasons.
- Easy to Decorate: The smooth surface of a mason jar is easy to paint, glue, and embellish, making it a dream for any DIY enthusiast.
This scarecrow mason jar project capitalizes on all these benefits, transforming a humble glass jar into a heartwarming symbol of the season. Whether you’re a seasoned crafter or just starting, you’ll find the process incredibly satisfying and the results delightfully impressive.
Embracing the Whimsy of the Scarecrow Theme
Scarecrows are more than just figures in a field; they are iconic symbols of the harvest season, representing abundance, folklore, and the transition from summer to autumn. Their friendly, often whimsical expressions bring a sense of nostalgia and comfort, making them a popular motif for fall decorations. Crafting a scarecrow mason jar allows you to capture this endearing charm in a compact, decorative form.
The beauty of a scarecrow is its inherent playfulness. With a bit of paint, some fabric scraps, and a few embellishments, you can bring your scarecrow to life, giving it its own unique personality. Imagine a collection of these little fellows, each with a slightly different grin or tilt of the hat, adding character and warmth to any space. This project is a wonderful opportunity to express creativity and craft a decoration that truly stands out during the autumnal months.
The Joy and Benefits of DIY Fall Decor
Engaging in DIY projects, especially for seasonal decor, offers a wealth of benefits beyond just creating a beautiful item. Crafting your own scarecrow mason jar provides:
- Personalization: Tailor your decor to perfectly match your home’s aesthetic and your personal taste.
- Cost Savings: Often, handmade decorations are significantly more affordable than their store-bought counterparts.
- Creative Outlet: It’s a fantastic way to relax, de-stress, and tap into your artistic side.
- Unique Home Decor: Your scarecrow will be one-of-a-kind, adding a special touch to your home that no one else will have.
- Meaningful Gifts: These handmade treasures make heartfelt gifts for friends, family, or teachers.
- Family Bonding: It’s a wonderful activity to do with children, fostering creativity and creating lasting memories.
- Sense of Accomplishment: There’s immense satisfaction in seeing a project through from start to finish and admiring your own creation.
This little fellow will make the most wonderful fall decoration, whether serving as a charming pencil holder in a classroom, adding warmth to your home’s fall decor ensemble, or greeting guests from your front porch. The versatility of its placement only adds to its appeal.
Materials You’ll Need for Your Scarecrow Mason Jar
Before you embark on this delightful crafting journey, gathering your materials is key. Most items are easily found at craft stores, dollar stores, or even around your home!
Essential Supplies:
- Mason Jar(s): Any size will do, but pint or quart jars are popular choices.
- Acrylic Paints:
- Base color (e.g., tan, beige, light orange, or a muted yellow for the scarecrow’s face/body)
- Black (for eyes, mouth, stitches)
- Orange (for nose)
- Pink or Red (for rosy cheeks)
- Paint Brushes: A flat brush for large areas and a fine-tipped brush for details.
- Raffia or Straw: For the scarecrow’s hair and rustic texture.
- Fabric Scraps: Burlap, plaid fabric, denim, or felt for the hat and any patches.
- Artificial Sunflower: A key embellishment that truly enhances the fall aesthetic.
- Hot Glue Gun and Glue Sticks: For secure and quick adhesion.
- Scissors: For cutting fabric and raffia.
- Optional Embellishments: Buttons, mini pumpkins, artificial leaves, acorns, pipe cleaners, googly eyes, twine, small decorative patches.
Having all your materials organized beforehand will make the crafting process smooth and enjoyable, allowing your creativity to flow freely.
Step-by-Step Guide to Crafting Your Adorable Scarecrow Mason Jar
Now, let’s dive into the fun part: bringing your scarecrow to life! This simple tutorial will guide you through each stage, ensuring a successful and delightful outcome.
-
Prepare Your Mason Jar:
Start by ensuring your mason jar is clean and dry. Remove any labels. If you plan to paint the inside, ensure it’s thoroughly dry to prevent bubbling or peeling of paint.
-
Paint the Base Color:
Using your chosen base color (e.g., tan or light orange), paint the entire exterior of the mason jar. You might need two coats for opaque coverage. Allow each coat to dry completely before applying the next. For a visual guide on painting techniques, resources like Logan Lynn’s step-by-step tutorial can offer excellent insights and tips for achieving a smooth finish.
-
Add the Face Details:
Once the base paint is dry, it’s time to give your scarecrow a personality!
- Eyes: Use black paint to draw two simple oval or round eyes. Alternatively, you can glue on googly eyes for a whimsical touch.
- Nose: Paint a small orange triangle or circle for the nose.
- Mouth: With black paint, draw a cheerful, stitched smile. You can add small dash marks across the mouth to simulate stitching.
- Cheeks: Dip a clean brush or sponge into pink/red paint and lightly dab two rosy cheeks below the eyes.
-
Create the Hair:
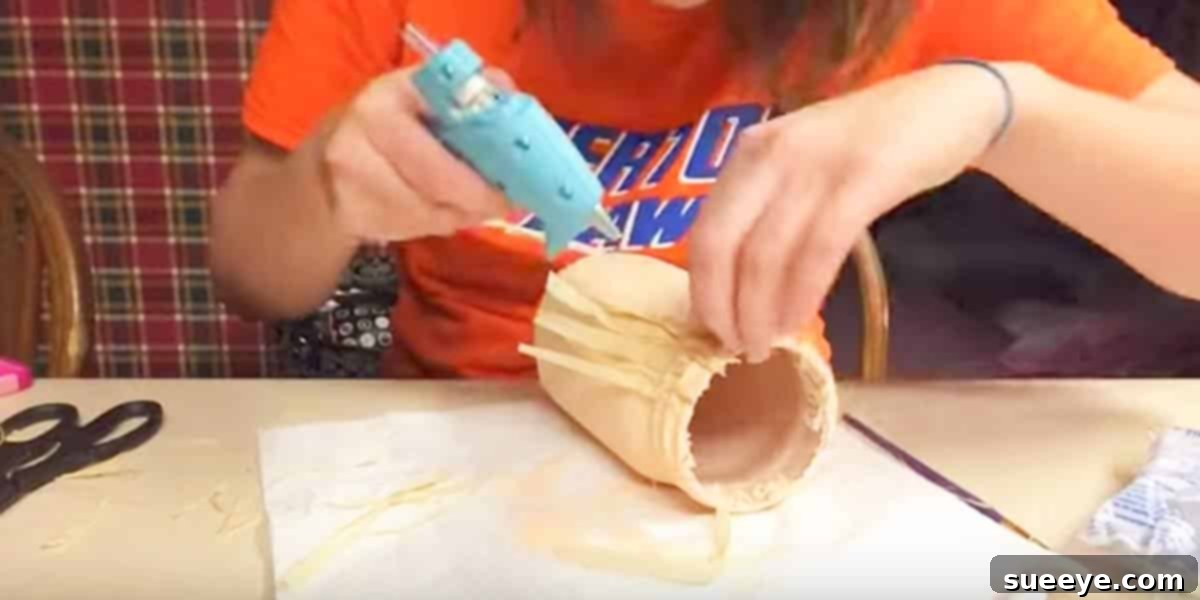
Take bunches of raffia or straw and secure them around the rim of the mason jar using your hot glue gun. Let some pieces hang down like messy scarecrow hair. You can trim them to your desired length.
-
Craft the Hat:
Cut a circular piece of fabric (like burlap or plaid) for the brim of the hat and a cone or cylinder shape for the crown. Hot glue these pieces together to form a mini scarecrow hat. Secure the hat onto the top of your scarecrow’s “hair” with hot glue. You can also use a small piece of twine or a thin strip of fabric to create a hat band.
-
Attach Embellishments:
This is where your scarecrow truly comes to life! The addition of a sunflower makes all the difference, brightening up the room and lifting spirits on even the gloomiest fall days. Hot glue an artificial sunflower to the front of the hat or slightly off to the side. You can also add other decorative elements like small fabric patches (painted on or glued), buttons, or artificial leaves to the jar’s body or hat.
-
Final Touches:
Consider adding a small fabric scarf around the neck of your scarecrow jar for an extra cozy touch. Ensure all glue is dry before handling extensively.
Creative Variations and Personalization Ideas
While the classic scarecrow design is delightful, feel free to unleash your creativity and personalize your mason jar to truly make it your own. Here are some ideas for variations:
- Different Sizes: Create a family of scarecrows using jars of varying sizes – small jelly jars for mini scarecrows, pint jars for medium ones, and quart jars for larger, more prominent pieces.
- Color Palettes: Experiment with different paint colors. Instead of a traditional tan, try muted greens, rustic browns, or even a deep burgundy for a unique fall vibe.
- Expressions: Give your scarecrow different facial expressions. A mischievous grin, wide-eyed wonder, or a sleepy look can add distinct character.
- Alternative Embellishments: Besides sunflowers, consider attaching small faux pumpkins, acorns, berries, or even tiny flags to the hat or body.
- Lighting: Place a battery-operated tea light or string of fairy lights inside the jar to create a warm, inviting glow, perfect for evenings.
- Themed Scarecrows: Adapt the scarecrow concept for other fall holidays, like a “Halloween Scarecrow” with spooky accents or a “Harvest Festival Scarecrow” adorned with miniature gourds.
- Personalized Accents: Add a small tag with a welcoming message, a family name, or the year to commemorate your creation.
There are many ways you can go about decorating your scarecrow mason jar craft, but we really do hope you’ll follow suit and add a sunflower as it makes all the difference. It will brighten up the room you place it in and lift the mood on the gloomiest of days, as we all know there are some dark days that come with the fall season.
Where to Display Your Charming Scarecrow Mason Jar
Once your adorable scarecrow mason jar is complete, the fun continues with finding the perfect spot to display it. Its versatility allows it to enhance a variety of settings:
- Home Decor: Place it on your mantle, a bookshelf, as a centerpiece on your dining table, or nestled among other fall decorations in your living room.
- Front Porch or Entryway: Welcome guests with a festive display by placing your scarecrow jar on your porch steps, a small table by the door, or hanging it near your entryway.
- Classroom or Office: It makes an excellent pencil holder or a cheerful desk decoration, bringing a touch of seasonal charm to a functional space.
- Kitchen Accent: Use it to hold utensils or simply as a decorative piece on your kitchen counter or windowsill.
- Gift Giving: Hand-crafted gifts are always appreciated. Share your creations with friends, family, or neighbors as a thoughtful gesture of fall cheer.
- Halloween Party Decor: While friendly, scarecrows perfectly fit a rustic Halloween theme, adding a warm, welcoming element to your party spread.
Care and Storage for Your Handmade Treasure
To ensure your scarecrow mason jar remains a cherished part of your fall decor for years to come, a little care goes a long way. To clean, gently wipe it with a dry or slightly damp cloth. Avoid harsh chemicals or submerging it in water, as this could damage the paint and glued embellishments. When the fall season concludes, carefully wrap your scarecrow jar in tissue paper or bubble wrap and store it in a box, ready to bring out and enjoy again next autumn.
Embrace the Autumn Spirit with Your DIY Scarecrow
Crafting your own scarecrow mason jar is more than just a project; it’s an invitation to embrace the beauty, warmth, and whimsical charm of the fall season. It’s a simple yet incredibly rewarding DIY activity that results in a unique piece of decor, capable of transforming any space into an inviting autumn haven. With its ease of creation and endless possibilities for personalization, this project is perfect for everyone, from seasoned crafters to those looking for a fun, creative outlet. So, gather your materials, let your imagination take flight, and create a little fellow that will spread joy and autumnal cheer throughout your home.
We encourage you to make one, or perhaps a few, to keep and to share with loved ones. Happy crafting!