
Easy DIY Stretch Fabric Top: Your Perfect Return to Sewing
Have you been away from your sewing machine for a while? Or perhaps you’re a complete beginner looking for that perfect first project that promises both ease and immediate gratification? Look no further! This comprehensive guide introduces you to an incredibly simple yet rewarding sewing tutorial: creating your very own stylish top from stretch fabric. It’s the ideal project to dust off those sewing skills or to confidently take your first stitches, resulting in a versatile garment you’ll love wearing.
The beauty of this project lies in its straightforward nature. You don’t need complicated patterns or advanced techniques to craft a beautiful, custom-fitted top. With just a few basic supplies and some enthusiasm, you’ll be well on your way to expanding your handmade wardrobe. Not only is this an excellent way to reacquaint yourself with sewing, but it also allows you to create something truly useful that fills a gap in your closet.
Why This DIY Top is the Ultimate Beginner-Friendly Project
Embarking on a sewing journey can sometimes feel daunting, but this particular top design eliminates much of the intimidation. Here’s why it’s a must-try for sewers of all levels, especially those just starting out or making a comeback:
- Simplicity at its Best: The construction involves minimal pattern pieces and straightforward seams, making it easy to follow even without extensive experience.
- Instant Gratification: You’ll be amazed at how quickly this top comes together. The rapid progress keeps motivation high and provides a tangible sense of accomplishment.
- Versatile Wardrobe Addition: Once completed, this top isn’t just a project; it’s a practical garment that pairs seamlessly with various outfits, from casual jeans to more formal skirts or trousers.
- Customization Opportunities: While simple, the design is a fantastic canvas for personalization. Experiment with different fabrics, sleeve lengths, and necklines to make each top uniquely yours.
- Skill Builder: This project introduces fundamental sewing techniques like working with stretch fabric, cutting patterns, and finishing seams—skills that are transferable to many other garment-making projects.
Getting Started: Fabric and Tools Essentials
Choosing the Right Fabric: Embrace the Stretch!
The secret to this top’s comfort and forgiving fit lies in its material: stretch fabric. When selecting your fabric, look for knit varieties with a good amount of elasticity. Popular choices include:
- Jersey Knit: A soft, flexible, and comfortable fabric, often made from cotton, rayon, or blends. It drapes beautifully and is excellent for tops.
- Interlock Knit: Similar to jersey but thicker, with a smoother finish on both sides. It’s stable and less prone to curling, making it even easier for beginners to handle.
- Spandex Blends (e.g., Lycra, Elastane): Fabrics with a small percentage of spandex offer excellent recovery and stretch, ensuring your top maintains its shape and provides a comfortable fit.
- Rib Knit: Recognizable by its vertical ribbed texture, this fabric offers significant stretch and is often used for neckbands and cuffs but can also make a lovely body of a top.
Pro Tip for Beginners: Opt for medium-weight knits over very thin or very thick ones. Medium-weight fabrics are easier to cut and sew without stretching out of shape or requiring specialized machine settings.
Essential Sewing Tools You’ll Need
Before you dive into cutting and stitching, gather these basic sewing supplies:
- Sewing Machine: Any standard machine will work. Ensure it’s threaded and in good working order.
- Stretch Needles: These needles have a slightly rounded tip that pushes fabric fibers aside rather than piercing them, preventing skipped stitches and fabric damage on knits.
- Good Quality Thread: Polyester all-purpose thread is suitable. Choose a color that matches or complements your fabric.
- Fabric Scissors or Rotary Cutter: Sharp scissors are crucial for clean cuts. A rotary cutter with a self-healing mat is fantastic for knits as it minimizes fabric shifting.
- Measuring Tape and Ruler: For accurate measurements and pattern adjustments.
- Fabric Markers or Chalk: To transfer pattern markings onto your fabric.
- Pins or Fabric Clips: To hold fabric pieces together. Clips are often preferred for knits as pins can sometimes snag or distort the fabric.
- Pinking Shears (Optional but Recommended): If you don’t have a serger, pinking shears provide a neat, fray-resistant finish to your seams.
- Iron and Ironing Board: Pressing seams as you go is key to a professional-looking finish.
Crafting Your Pattern: The Ingenious DIY Approach
One of the most appealing aspects of this tutorial is its clever approach to pattern creation. Forget fiddling with complex commercial patterns; we’ll be using a method that ensures a perfect fit every time: tracing an existing shirt! This technique is incredibly empowering, especially when the original tutorial might lack specific pattern details, as was the case for many.
How to Create Your Custom Top Pattern:
This method works best with a comfortable, well-fitting t-shirt or top made from a similar stretch fabric. Avoid anything too baggy or too tight that isn’t representative of the fit you desire.
- Select Your Master Top: Choose a top from your wardrobe that you love and want to replicate. It should have the desired fit, neckline, and sleeve length.
- Prepare for Tracing: Lay your chosen top flat on a large piece of paper (pattern paper, butcher paper, or even taped-together newspaper works). Fold the top neatly in half lengthwise, aligning the side seams and shoulder seams perfectly. This ensures symmetry.
- Trace the Outline: Carefully trace around the folded edges of your top. Pay close attention to the neckline, shoulder slope, armhole curve, and side seams. For the bottom hem, you can either trace the existing hem or draw a straight line.
- Add Seam Allowance: This is a crucial step! Your traced outline represents the finished size of your top. You must add seam allowance beyond this line. A standard seam allowance for clothing is 3/8 inch (1 cm) to 5/8 inch (1.5 cm). For this easy top, 1/2 inch (1.25 cm) is a good, manageable choice for all seams (shoulders, sides, armholes). For the hem, add at least 1 inch (2.5 cm) for a clean finish, and for the neckline, a small 3/8 inch (1 cm) is usually sufficient for a simple turned-under hem or binding.
- Cut Out Your Pattern Pieces: Once you’ve added all the seam allowances, carefully cut out your paper pattern. You will now have one ‘half-front/back’ piece. You might want to label it “Front/Back Bodice – Cut 2 on Fold.”
- Sleeve Pattern (Optional): If your chosen top has sleeves, trace one sleeve separately, ensuring you account for seam allowances around the armhole and side seams, and a hem allowance at the wrist. If you want a sleeveless top, you can skip this step and adjust the armhole to your preference.
By using an existing garment as your template, you’re guaranteed a fit that you already know and love, making the entire sewing process less about guesswork and more about creation.
Sewing the Top: A Step-by-Step Guide for Success
With your fabric chosen and your pattern ready, it’s time for the exciting part: bringing your top to life on the sewing machine. Remember to use a stretch stitch (often a zigzag stitch, triple straight stitch, or a lightning bolt stitch) on your machine to ensure the seams can stretch with the fabric without breaking.
- Cut Your Fabric:
- Fold your chosen stretch fabric in half lengthwise, ensuring the stretch runs across the body (from side to side, not up and down).
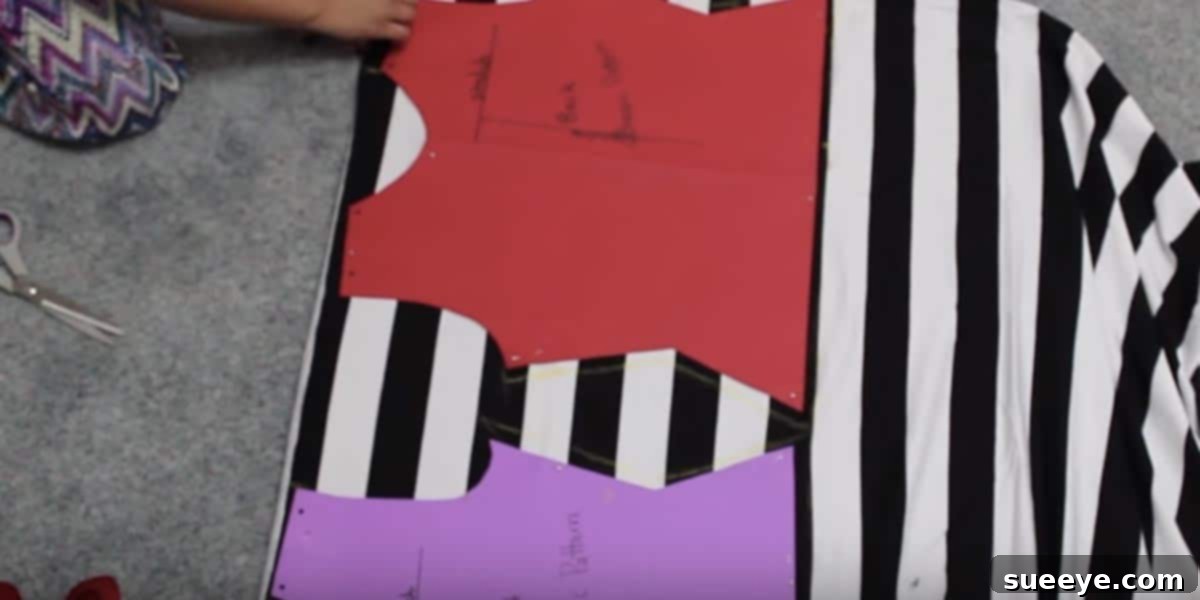
- Place your “half-front/back” pattern piece on the fabric with the straight edge along the fold. Pin it securely.
- Cut out two identical pieces for the front and back bodice.
- If making sleeves, cut two sleeve pieces as well.
- Sew Shoulder Seams:
- Place the front and back bodice pieces right sides together, aligning the shoulder seams.
- Pin securely.
- Sew the shoulder seams using your chosen stretch stitch and the appropriate seam allowance (e.g., 1/2 inch / 1.25 cm).
- Press the seams open or towards the back.
- Seam Finishing: If you have a serger, serge the raw edges of the shoulder seams. If not, use pinking shears to trim the raw edges or a narrow zigzag stitch to finish them and prevent fraying.
- Attach Sleeves (If Applicable):
- Open up your bodice so it lies flat, right side up.
- Take one sleeve piece and align its armhole curve with the armhole of the bodice, right sides together. Match the center top of the sleeve with the shoulder seam.
- Pin generously around the armhole curve.
- Sew the sleeve to the bodice, easing the fabric as needed.
- Repeat for the second sleeve.
- Finish the armhole seams as described above.
- Sew Side Seams and Sleeve Underarms (If Applicable):
- Fold the top again, right sides together, aligning the front and back pieces.
- Match the side seams from the bottom hem up to the armpit. If you have sleeves, align the underarm seam of the sleeve as well.
- Pin all along the side seam and down the sleeve seam in one continuous line.
- Sew this seam from the sleeve cuff (if applicable) all the way down to the bottom hem of the bodice.
- Repeat for the other side.
- Press seams open or towards the back and finish the raw edges.
- Finish the Neckline:
- There are several ways to finish a knit neckline. For a simple beginner approach:
- Fold the raw edge of the neckline under by 3/8 inch (1 cm) to the wrong side. Press well.
- Fold it under again by another 3/8 inch (1 cm) if you prefer a slightly wider finish, or just once.
- Topstitch around the neckline using a stretch stitch, securing the folded edge.
- Alternatively, you could add a simple neckband cut from the same fabric, or a self-fabric binding for a clean, professional finish.
- There are several ways to finish a knit neckline. For a simple beginner approach:
- Hem the Sleeves and Bottom:
- For the sleeves (if applicable) and the bottom hem of the top, fold the raw edge under by 1 inch (2.5 cm) to the wrong side. Press firmly.
- Fold it under again by another 1 inch (2.5 cm) to create a double-fold hem. Press again.
- Topstitch around the hem using a stretch stitch, keeping your stitches even. A twin needle can create a beautiful, ready-to-wear look on knit hems.
Customization Options: Make It Uniquely Yours
The beauty of sewing your own clothes extends far beyond simply replicating a store-bought item. This easy top provides a fantastic foundation for a myriad of creative customizations, allowing you to truly express your personal style.
Sleeve Length Variations: Adapt to Any Season
As the original article hinted, the sleeve length is entirely up to you. This simple change can transform the entire garment:
- Sleeveless: Perfect for summer days or as a layering piece under cardigans and jackets. Ensure a neat finish on the armholes with a binding or folded hem.
- Short Sleeves: A classic and comfortable choice for warmer weather or everyday wear.
- Three-Quarter Sleeves: Elegant and practical, offering a touch more coverage than short sleeves without being as warm as long sleeves.
- Long Sleeves: Ideal for cooler weather, providing warmth and a sleek silhouette. You can even add cuffs for extra detail.
Fabric Choices and Embellishments: Play with Texture and Color
Don’t limit yourself to just one solid color. The vast world of fabrics offers endless possibilities:
- Prints: From subtle florals to bold geometrics, a patterned stretch fabric can turn a simple top into a statement piece.
- Textures: Explore different knit textures like brushed hacci, rayon challis knit, or even a fine gauge sweater knit for varying levels of warmth and drape.
- Color Blocking: Use two or more complementary solid colors to create unique panels or shoulder accents.
- Embellishments: Consider adding a small embroidered detail, iron-on patch, lace trim along the hem or sleeves, or even fabric paint for a personalized touch. Remember to apply embellishments before you sew the garment together for easier access.
Styling Your New Wardrobe Staple
Once your beautiful new top is complete, you’ll find it incredibly versatile and easy to integrate into your existing wardrobe. Its simplicity is its strength, allowing it to adapt to various occasions and styles effortlessly.
- Casual Chic: Pair your handmade top with your favorite jeans for an instantly comfortable yet stylish everyday look. Add sneakers for ultimate comfort or sandals for a summery vibe.
- Office Ready: Elevate the top by pairing it with tailored slacks or a sophisticated pencil skirt. A blazer or cardigan over it can complete a polished, professional ensemble.
- Weekend Wanderer: Combine it with a flowy maxi skirt for a relaxed, bohemian feel, or with shorts for a comfortable outing.
- Layering Essential: This top serves as an excellent base layer during cooler months. Wear it under sweaters, cardigans, jackets, or vests for added warmth and style.
- Accessorize: Dress it up or down with accessories. A statement necklace, a colorful scarf, or a stylish belt can completely transform the look of your simple top.
Making several of these tops in different colors and patterns will truly enhance your wardrobe’s flexibility. Imagine having a perfect-fitting top in every color you need, ready for any occasion!
The Enduring Joys of Sewing Your Own Clothes
Beyond the immediate satisfaction of creating a new garment, sewing offers a wealth of lasting benefits. This easy top project is just the beginning of what can become a lifelong passion and a pathway to a more conscious and creative lifestyle.
- Perfect Fit, Every Time: Say goodbye to ill-fitting clothes! When you sew, you can tailor every aspect to your unique body shape, ensuring comfort and confidence.
- Unleash Your Creativity: Sewing is an art form. It allows you to choose exactly the fabric, color, and style you envision, bringing your sartorial dreams to life.
- Cost-Effective Fashion: While there’s an initial investment in tools, sewing your own clothes often proves to be more economical than regularly buying ready-to-wear, especially for quality garments.
- Sustainable Choice: By making your own clothes, you contribute to a more sustainable fashion industry. You reduce waste, support ethical manufacturing (by doing it yourself!), and create pieces designed to last.
- Therapeutic Hobby: The rhythmic motion of sewing, the focus required, and the tactile experience of working with fabric can be incredibly calming and meditative, offering a wonderful escape from daily stress.
- Sense of Accomplishment: There’s an unparalleled feeling of pride and accomplishment that comes with wearing something you’ve made with your own hands. Each stitch tells a story of your effort and skill.
Ready to Start Your Sewing Adventure?
This simple stretch fabric top is more than just a piece of clothing; it’s a gateway to rediscovering the joy of sewing, building confidence in your skills, and creating a truly personalized wardrobe. The steps outlined here provide a solid foundation, and while we’ve expanded on the original idea, the core simplicity remains.
Whether you’re picking up your needle after a long hiatus or threading it for the very first time, this project is designed to be accessible and fun. So, gather your supplies, pick out that fabulous fabric, and get ready to create something wonderful. Your next favorite top is just a few stitches away!
While this article provides detailed instructions, visual learners might still benefit from watching a step-by-step video tutorial. Search online for “easy stretch knit top tutorial” or “beginner t-shirt sewing” to find accompanying visual guides that can further assist you on your creative journey. Happy sewing!