
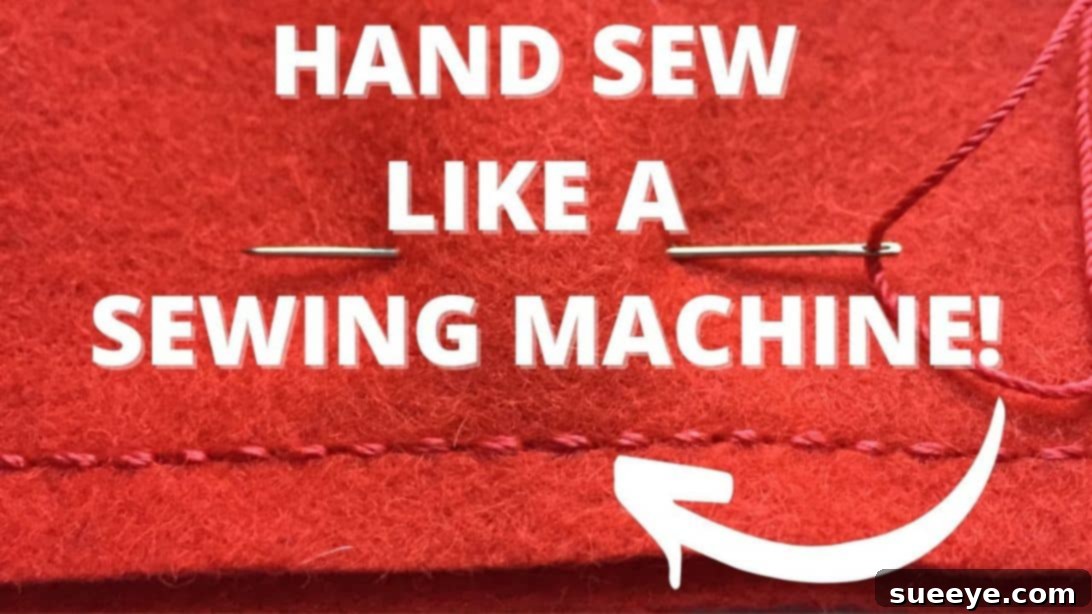
Master the Backstitch: The Ultimate Hand Sewing Tutorial for Unrivaled Strength and Durability
Dreaming of hand-sewn seams that rival the strength and precision of a sewing machine? Look no further! The backstitch is widely celebrated as the most robust and reliable hand sewing technique you can master. Whether you’re mending beloved garments, crafting intricate designs, or embarking on new fabric projects, understanding the backstitch is a fundamental skill that will elevate your work. This comprehensive tutorial will guide you through each step, ensuring you develop the confidence and technique to create incredibly durable and professional-looking stitches by hand.
Inspired by the fantastic demonstration from Sewn Company, we’re diving deep into the nuances of this essential stitch. If you prefer visual learning, we highly recommend watching their detailed video tutorial for additional insights. For a clear, step-by-step written guide, continue reading below and prepare to transform your hand sewing skills!
Why the Backstitch is Your Go-To Hand Sewing Technique
The backstitch isn’t just another stitch; it’s a powerhouse of hand sewing. Its unique overlapping nature creates a seam that is significantly stronger and more resistant to wear and tear than simpler stitches like the running stitch. Here’s why it should be a staple in your sewing arsenal, making it ideal for beginners and seasoned crafters alike:
- Unmatched Durability: Each stitch in a backstitch line locks into the previous one, forming a continuous, interlocked line of thread that is incredibly difficult to unravel. This makes it the strongest hand stitch available, perfect for seams that will undergo significant stress, such as those found in clothing, bags, or upholstery, ensuring your creations last longer.
- Machine-Like Appearance: When executed correctly and consistently, the backstitch can beautifully mimic the neat, uniform look of a machine-sewn seam. This offers a highly professional finish, making it an excellent alternative when a sewing machine isn’t available, or for projects requiring meticulous hand detailing.
- Versatility in Application: From constructing entire garments and repairing rips in jeans or shirts, to adding decorative details and reinforcing stress points on hems and buttonholes, the backstitch is adaptable to a vast array of sewing projects. Its reliability makes it suitable for both functional and aesthetic purposes.
- Precision and Control: Hand sewing with a backstitch allows for meticulous control over each individual stitch. This precision is invaluable for working with delicate fabrics, intricate patterns, or areas requiring exact alignment, giving you complete command over your sewing outcome.
- Accessibility for All: One of the greatest advantages of the backstitch is its simplicity in terms of required tools. All you need are basic sewing supplies – a needle, thread, and fabric. This makes it an incredibly accessible skill for beginners and a practical technique for anyone on the go, without the need for bulky or expensive machinery.
Essential Materials for Mastering Your Backstitch
Before you begin your hand sewing journey, it’s crucial to gather the correct supplies. Having the right tools readily available will not only make your learning process smoother but also significantly impact the quality and enjoyment of your sewing experience. Each item plays a crucial role in achieving perfect, strong stitches, especially when learning how to backstitch:
- Pins: These invaluable tools are used to hold your fabric layers securely together, preventing them from shifting, wrinkling, or misaligning while you stitch. Dressmaker pins, with their sharp points and small heads, are ideal as they glide easily through most fabrics without snagging or leaving large holes. Ensure you insert pins perpendicularly to your intended stitching line, about 1-2 inches apart, for easy removal as you sew.
- Fabric: For practicing your backstitch, choose a stable, non-stretchy woven fabric like plain cotton or linen. These materials are forgiving, easy to handle, and their weave makes stitches clearly visible, allowing you to focus purely on your stitching technique without battling fabric movement. Always start with scrap fabric before moving on to your main project.
- Needle and Thread:
- Needle: A sharp, all-purpose sewing needle (often labeled “sharps”) is highly recommended for general hand sewing. The size of the needle should correspond to the weight of your fabric and thread; a finer needle (higher number, e.g., size 9 or 10) for delicate fabrics, and a sturdier one (lower number, e.g., size 7 or 8) for thicker materials.
- Thread: All-purpose polyester thread is an excellent choice for most projects due to its inherent strength, durability, and resistance to shrinking or fading. For practice, a contrasting color thread can be incredibly helpful as it allows you to clearly see your stitches and assess your consistency. Cut a manageable length of thread, typically no longer than your forearm (about 18-24 inches or 45-60 cm), to minimize tangles and knots while sewing.
- Ruler or Measuring Tape: Precision is paramount in sewing, and these tools are essential for achieving it. A sturdy ruler or flexible measuring tape will help you accurately measure and draw straight guidelines for your stitching and maintain consistent seam allowances. This attention to detail ensures your finished piece looks professional and well-constructed.
- Pencil or Fabric Marker: These are absolutely essential for drawing your stitching guidelines directly onto the fabric. A regular pencil can work on light-colored fabrics, but a washable fabric marker or tailor’s chalk is preferable. These specialized tools are designed to leave clear marks that can be easily removed later without leaving permanent stains or residue on your finished project.
Preparation: Setting Up for Hand Sewing Success
A well-prepared workspace and properly handled materials are the foundations of successful hand sewing. Taking a few moments to ensure everything is ready before you start stitching will significantly enhance your comfort, accuracy, and overall enjoyment of the process:
- Establish a Comfortable Workspace: Find a well-lit area where you can sit comfortably without straining your neck or back. Good lighting is not just a preference; it is critical for seeing your stitches clearly, especially fine details, and for preventing eye fatigue during longer sewing sessions. A clean, uncluttered surface is also key.
- Thread Your Needle Properly: After selecting your thread, cut a manageable length, typically no more than 18-24 inches (45-60 cm). Longer lengths are prone to tangling and knotting, causing frustration. Thread your needle and make a secure knot at the end of the single thread, or use a double knot if you’re using a double strand for extra strength. For a professional finish, you can learn techniques to bury this initial knot within the fabric layers.
- Press Your Fabric: If your fabric is wrinkled, creased, or has been stored folded, give it a quick press with an iron. A smooth, flat surface is far easier to work with, as it allows for more accurate marking, precise pinning, and smoother stitching, minimizing any distortions in your final seam.
Step-by-Step Instructions: Mastering the Backstitch Technique
Step 1: Prepare Your Fabric and Draw a Guideline for Precision
Begin by placing your two pieces of fabric together with their right sides facing each other. The “right side” is the side of the fabric that will be visible on the finished project, while the “wrong side” is the interior or less attractive side. Align the raw edges of your fabric precisely. This technique is fundamental for creating seams where the raw edges and stitches will be neatly enclosed on the inside of your garment or project, resulting in a clean and professional exterior finish.
Once your fabric layers are perfectly aligned, secure them with pins. Insert the pins perpendicularly to your intended stitching line, placing them approximately 1 to 2 inches (2.5 to 5 cm) apart. Ensure each pin goes through both layers of fabric. This perpendicular placement makes it easier to remove the pins as you sew, minimizing any disruption to your stitching rhythm and preventing fabric distortion.
Next, using your ruler and a washable fabric marker (or pencil), draw a straight line on the top piece of fabric where you intend to stitch. This guideline is absolutely invaluable, especially for anyone practicing or new to backstitching. It eliminates the guesswork, allowing you to focus on the mechanics of the stitch while maintaining a perfectly straight and consistent seam, which is crucial for achieving that coveted professional, machine-like appearance in your hand sewing.
Step 2: Initiating Your First Backstitch – Setting the Foundation
Your hand dominance will typically dictate your stitching direction. If you are right-handed, you will find it most natural and comfortable to stitch from right to left across your fabric. Conversely, left-handed sewers will usually find it easier to stitch from left to right. Pick up your pinned fabric, holding it securely and comfortably in your non-dominant hand, ensuring a stable foundation for your needlework.
Take your needle and thread, ensuring your knot is securely tied at the end of the thread. From the underside of your fabric (the side facing you, which will eventually be the inside of your finished project), push your needle perpendicularly through both layers of fabric. Aim for the needle to emerge on the guideline you drew, approximately one full stitch length (e.g., 1/8 to 1/4 inch or 3-6mm) away from where your seam is intended to begin. This initial entry point marks the end of your very first ‘virtual’ stitch. Pull the thread all the way through until the knot you made earlier snugs securely and invisibly against the underside of the fabric. This ensures a clean start with no visible knot on the right side.
Step 3: Executing the Continuous Backstitching Motion for Strength
Now that your thread is secured on the top side of the fabric, let’s create the characteristic overlapping movement of the backstitch. With your needle on the fabric’s surface, re-insert the needle down into the fabric at the precise point where your stitch line is meant to *begin*. This is often the very start of your guideline, or directly at the point where you want your first full stitch to originate. Push the needle down through both fabric layers.
From the underside, without bringing the needle fully out, angle it forward under the fabric. Bring the needle back up through both layers on your guideline, approximately one consistent stitch length ahead of where your thread last emerged (the end of the virtual stitch from Step 2). This action completes your very first forward-moving stitch segment. Pull the thread through gently, ensuring it lies flat against the fabric without puckering.
To create the crucial “back” part of the backstitch, immediately insert your needle back down into the fabric at the precise point where your *previous* stitch ended (the hole from which your thread last emerged). For maximum strength, a truly seamless appearance, and to lock the stitches tightly, aim to go into the exact same needle hole or very, very close to it. This overlapping action is what gives the backstitch its superior durability.
After pushing the needle down, once again angle it forward under the fabric. Bring it up again on the guideline, one consistent stitch length ahead of where it last emerged. Pull the thread through, setting the stitch firmly. Continue this rhythmic “down-at-the-end-of-previous-stitch, up-one-stitch-length-forward” motion until you reach the end of your desired stitching line. Throughout this process, maintain a consistent stitch length and pull the thread tight enough to securely set the stitch into the fabric, but never so tight that it causes the fabric to pucker or gather.
Step 4: Securing Your Stitch Line – The Final Knot and Clean Finish
Once you’ve reached the end of your desired stitching line and completed your final backstitch, it’s essential to secure your work with a strong, reliable knot that won’t unravel. To do this, after your needle has come up for the final stitch, pretend you are about to make one more stitch. Instead of bringing the needle back up through the fabric, push the needle straight down through the fabric layers to the underside of your material, perpendicular to the stitch line. Pull the thread all the way through, bringing it completely to the back side of your work.
Now, flip your fabric over so you are looking at the underside where your thread has just emerged. Carefully pick up just a tiny bit of the fabric along with a few strands of the existing thread on the back of your seam. Do this by sliding your needle under a stitch or two without going through to the front. This action will create a small loop with your thread. Before pulling it tight, pass your needle through this newly formed loop two, or even three times, for extra security. This technique creates a very secure knot that sits close to the fabric, providing a strong anchor for your seam.
Finally, to ensure a clean, professional finish and prevent the thread tail from snagging or unraveling, it’s best to hide it. After securing your knot, insert your needle into the seam allowance or directly between the fabric layers, traveling about an inch or so (2.5 cm) within the fabric before gently bringing it out. Snip the excess thread close to the fabric. This not only enhances the appearance of your work but also adds another layer of security to your expertly stitched seam.
Common Backstitching Mistakes and How to Avoid Them
As with mastering any new skill, you might encounter a few challenges when learning to backstitch. Recognizing these common issues and knowing how to correct them will significantly accelerate your learning curve and improve your results:
- Uneven Stitches: This is a very common issue for beginners and is usually due to inconsistent stitch length or variable tension. The best remedy is diligent practice on fabric marked with a guideline. Focusing on making each “forward” segment of your stitch the same length and entering the needle at consistent points will greatly improve the uniformity of your stitches.
- Tangled Thread: The most frequent culprit here is using a piece of thread that is too long. Keep your thread length manageable, ideally no longer than your forearm (18-24 inches or 45-60 cm). Additionally, running your thread through beeswax or thread conditioner can significantly help reduce tangles, fraying, and static, making it glide through fabric more smoothly.
- Puckering Fabric: If your fabric is gathering, puckering, or looking distorted along the seam line, you’re likely pulling your stitches too tight. The goal is for stitches to be snug and firm, not taut. Ensure your initial knot isn’t excessively tight, and practice maintaining a gentle but consistent tension after each stitch, allowing the fabric to lie flat.
- Knots Pulling Through: This issue typically arises if your starting or ending knot is too small, flimsy, or not properly secured against the fabric fibers. Make sure your knots are substantial enough to catch securely on the fabric’s weave. For added security, use a double knot, or practice a hidden knot technique where the knot is trapped invisibly between fabric layers.
- Crooked Seams: This is precisely where your drawn guideline becomes your best friend. Rely on it! Always use a clear guideline when learning and whenever precision is important for your project. Keep your eyes focused on the line and aim your needle precisely on target with each entry and exit point.
Advanced Tips for Perfecting Your Hand Stitching
Once you’ve grasped the fundamentals of the backstitch, these tips can help you refine your technique and make your hand sewing even more efficient and enjoyable:
- Utilize a Thimble: A thimble is an invaluable tool that protects your finger (typically the middle finger of your dominant hand) when pushing the needle through thicker or multiple layers of fabric. It allows you to apply firm pressure without pain or injury, speeding up your stitching and making it more comfortable.
- Wax Your Thread: Running your thread through natural beeswax or a commercial thread conditioner before stitching can significantly reduce tangles, strengthen the thread, and make it glide through fabric more smoothly. This is especially useful for longer thread lengths or delicate threads.
- Practice Different Stitch Lengths: While a consistent 1/8 to 1/4 inch (3-6mm) stitch length is excellent for most sturdy seams, you can intentionally vary your stitch length for decorative purposes, finer details, or for heavier fabrics that might benefit from slightly longer stitches. Experiment to find what works best for various projects.
- Iron as You Go: Periodically pressing your seam open or to one side with an iron after stitching can help set the stitches, eliminate minor puckering, and give your project a beautifully professional, crisp finish. This step is often overlooked but dramatically improves the overall appearance of your hand-sewn items.
Conclusion: Embrace the Power of the Backstitch
Congratulations! You have now embarked on the journey of mastering the backstitch, undeniably the most powerful and reliable hand-sewn stitch in the world of fabric crafts. This essential technique empowers you to create incredibly durable, precise, and aesthetically pleasing seams for a multitude of projects, offering a level of strength and finish often associated with machine sewing.
Remember, like any craft, practice is the undeniable key to perfection. Don’t be discouraged if your first attempts aren’t flawless; consistency, speed, and elegance will naturally come with dedicated time and repetition. Experiment with different fabrics, thread colors, and stitch lengths to truly make this versatile technique your own, adapting it to your unique creative vision.
Now that you’ve unlocked the secret to superior hand sewing with the backstitch, go forth and create with confidence! Your hands are fully capable of producing stitches as strong and precise as any machine. We encourage you to share your creations and continue exploring the vast and rewarding world of hand sewing. Happy stitching!