
Unleash Your Creativity: The Ultimate Guide to DIY Personalized Gift Wrapping Paper
In a world saturated with mass-produced items, the act of giving a truly personal gift stands out. What could be more thoughtful and unique than presenting a meticulously chosen present wrapped in paper you’ve created yourself? DIY personalized gift wrapping paper not only adds an unparalleled layer of intimacy and care to your gifts but also offers a fantastic opportunity to unleash your creativity, save money, and contribute to a more sustainable lifestyle. Forget the generic store-bought rolls; it’s time to craft a memorable first impression with every present you give.
Why Choose DIY Gift Wrapping Paper? More Than Just a Pretty Package
The decision to make your own wrapping paper extends far beyond mere aesthetics. It’s a statement, a creative outlet, and a smart choice for a variety of reasons:
-
The Unmatched Personal Touch
Imagine a gift adorned with a design that reflects the recipient’s personality, their favorite hobby, or an inside joke. Store-bought paper, no matter how beautiful, can never achieve this level of personalization. Whether it’s a specific color palette, a hand-drawn motif, or a custom stamp, DIY wrapping paper transforms a simple package into an extension of the gift itself, telling a story even before it’s opened. It shows genuine effort and a deep understanding of the person you’re celebrating.
-
Eco-Friendly and Sustainable Gifting
A staggering amount of wrapping paper ends up in landfills each year, often because it’s non-recyclable due to glitter, foil, or plastic coatings. By choosing to make your own, especially from repurposed materials, you’re actively participating in sustainable practices. Old newspapers, paper bags, maps, and even children’s artwork can be given a beautiful second life, drastically reducing waste and offering a greener alternative to traditional wrapping.
-
Budget-Friendly Creativity
The cost of specialty wrapping paper can quickly add up, especially during peak gifting seasons. DIY gift wrap is incredibly cost-effective. Many of the base materials can be found around your home for free, and basic craft supplies like paints, markers, and stamps are often a one-time investment that can be used for countless projects. This allows you to allocate more of your budget to the gift itself, without compromising on presentation.
-
Limitless Design Possibilities
The only limit to your designs is your imagination. Unlike the finite patterns available in stores, homemade wrapping paper opens up an entire universe of creative expression. From abstract splatters to intricate patterns, from minimalist chic to vibrant explosions of color, you have complete control. This freedom means you can perfectly tailor the wrap to the occasion, the gift, and the recipient every single time.
-
A Therapeutic and Enjoyable Activity
Engaging in creative activities like crafting can be incredibly relaxing and therapeutic. The process of designing and making your own wrapping paper offers a wonderful way to unwind, tap into your artistic side, and even involve family members for a fun, shared experience. It’s a joyful journey from a blank canvas to a beautiful creation.
Getting Started: Essential Materials for Your DIY Wrapping Workshop
The beauty of DIY personalized gift wrapping paper lies in its accessibility. You don’t need a professional art studio to get started. Many of the materials are likely already in your home:
Base Materials: Your Canvas
- Brown Paper Bags: Repurpose grocery bags by cutting them open. Their natural, rustic texture is perfect for a charming, earthy look.
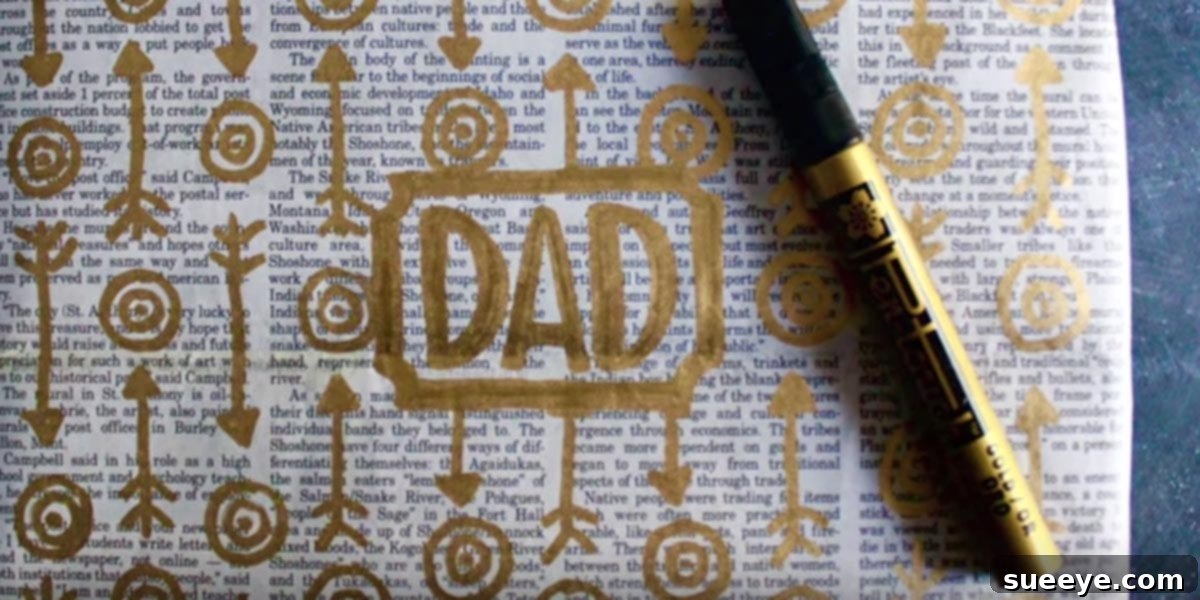
- Newspapers: Excellent for a vintage, graphic, or newsprint-themed wrap.
- Plain Craft Paper: Inexpensive and readily available in rolls, offering a clean, blank slate.
- Old Maps: Ideal for travelers or those with a love for geography.
- Sheet Music: Adds an elegant, artistic touch for music lovers.
- Discarded Calendars or Posters: Large, sturdy surfaces with pre-existing imagery.
- Plain White Butcher Paper or Packing Paper: Simple, clean, and versatile.
Decorating Tools: Your Creative Arsenal
- Paints: Acrylics, tempera, or even watercolors can be used. Consider non-toxic options if children are involved.
- Markers & Pens: Permanent markers, paint pens, glitter pens, and fine-point pens for intricate details.
- Stamps: Store-bought rubber stamps, or get creative with DIY stamps made from potatoes, erasers, or even leaves and household items.
- Stencils: Purchase pre-made stencils or cut your own designs from cardstock.
- Glitter, Sequins, Confetti: For a festive and sparkling finish (use sparingly for recyclability).
- Twine, Ribbon, Yarn: To tie up your beautifully wrapped gifts.
- Natural Elements: Dried leaves, small twigs, flowers for an organic touch.
- Adhesives: Glue sticks, craft glue, double-sided tape.
- Scissors & Craft Knives: For cutting and shaping.
Unleashing Your Inner Artist: Creative Techniques and Design Ideas
With your materials gathered, it’s time to explore the endless possibilities for design. The sky truly is the limit!
1. Stamping: The Art of Repetition and Pattern
Stamping is one of the easiest and most effective ways to create custom patterns. You can achieve sophisticated or playful looks with minimal effort.
-
DIY Potato Stamps
This classic technique is fun for all ages. Cut a potato in half, carve a simple design (like a heart, star, letter, or abstract shape) into the flat surface, and dab it into paint. Press firmly onto your paper to create a repetitive pattern. This is perfect for creating custom initials or themed shapes.
-
Rubber Stamps & Household Items
Utilize store-bought rubber stamps for intricate designs or get innovative with household items. Bubble wrap makes an interesting textured pattern, wine corks can create perfect dots, and sponges can be cut into various shapes for unique prints. Experiment with leaves dipped in paint for natural, organic motifs.
-
A Humorous Cautionary Tale: The Paw Print Incident
I once attempted to create a truly unique wrap for a dog-lover by using my own dogs’ paw prints on a paper sack. While the sentiment was certainly personal, the execution was… messy. Let’s just say my furry friends weren’t thrilled with having paint on their paws, and remnants lingered for days! While the idea of incorporating a pet’s ‘signature’ is adorable, I’d recommend drawing paw prints by hand or finding a pet-safe ink pad if you dare, rather than a full-on paint job!
2. Hand-Painting & Drawing: Pure Artistic Expression
For those who love to draw or paint, this method offers complete freedom.
-
Simple Patterns & Motifs
Don’t feel pressured to create a masterpiece. Simple patterns like polka dots, stripes, chevrons, or cross-hatching can be incredibly effective. Freehand draw abstract squiggles, geometric shapes, or even repetitive doodles for a unique, artful look.
-
Thematic Illustrations
Tailor your drawings to the occasion. For a child’s birthday, draw balloons, cakes, or cartoon characters. For a nature lover, sketch trees, flowers, or animals. My personal favorite is the red lips design – it’s become my signature and my friends go absolutely crazy over my personalized wrapping paper when I use it!
-
Calligraphy & Hand-Lettering
If you have a knack for beautiful handwriting, use it to create inspiring quotes, the recipient’s name, or a special message directly onto the paper. This adds an elegant and deeply personal touch.
3. Stenciling: Precision and Detail Made Easy
Stencils allow you to create intricate and consistent designs with ease.
-
Pre-Made Stencils
Purchase stencils in various themes (floral, geometric, seasonal) from craft stores. Simply place the stencil on your paper and dab paint over it with a sponge or brush.
-
DIY Stencils
Print a design onto cardstock and carefully cut out the negative space to create your own custom stencil. This is fantastic for creating specific logos, symbols, or personalized messages.
4. Collage & Mixed Media: Textured and Rich Designs
Combine various elements for a multi-layered effect.
-
Magazine Cutouts
Cut out interesting images, words, or colors from old magazines and glue them onto your base paper to create a themed collage. This is particularly engaging for recipients with specific interests.
-
Natural Elements
Carefully glue dried leaves, small pressed flowers, or even thin sprigs onto your paper for an organic, textured look. Perfect for gifts for nature enthusiasts.
Step-by-Step Guide to Crafting Your Masterpiece
- Prepare Your Workspace: Lay down newspaper or a protective sheet to prevent paint or ink from getting on your table. Ensure good ventilation.
- Choose Your Base Paper: Select your repurposed material (newspaper, craft paper, paper bag) and cut it to the appropriate size for your gift.
- Plan Your Design: Think about the recipient and the occasion. Sketch out a rough idea or choose your technique and colors.
- Execute Your Design:
- For stamping, dab your stamp in paint and press firmly, repeating the pattern across the paper.
- For drawing/painting, use markers or brushes to create your desired patterns or illustrations.
- For stenciling, secure the stencil and apply paint with a sponge or brush.
- For collage, arrange and glue your cutouts or natural elements.
- Allow to Dry Completely: This is crucial to prevent smudges. Depending on the paint and humidity, this could take anywhere from a few minutes to a few hours.
- Wrap Your Gift: Once dry, your personalized wrapping paper is ready to embrace its special gift! Add a coordinating ribbon, twine, or a handmade tag for the perfect finishing touch.
Thematic Ideas for Every Occasion
Part of the joy of personalized wrapping paper is tailoring it to specific events. Here are some ideas:
-
Father’s Day (or any special man in your life!)
Father’s Day is just around the corner, making it the perfect opportunity to try this out! Consider designs featuring tools, ties, golf balls, fishing lures, or even simple geometric patterns in masculine colors. If he’s a coffee lover, stamp little coffee cups. If he enjoys the outdoors, draw tiny trees or mountains. A personalized message like “Best Dad Ever” in bold lettering would also be a fantastic touch.
-
Birthdays
Balloons, confetti, candles, cakes, or the recipient’s age boldly displayed. For kids, their favorite cartoon characters or animals. For adults, elegant patterns or inside jokes.
-
Valentine’s Day / Anniversaries
Hearts (especially those iconic red lips!), intertwined initials, love notes, or romantic floral patterns.
-
Baby Showers
Sweet illustrations of baby bottles, pacifiers, tiny footprints (drawn, perhaps!), soft animals, or a gentle color scheme.
-
Christmas / Holidays
Snowflakes, festive ornaments, holly, stars, or simple stripes in red and green, silver and gold.
-
Weddings
Elegant monograms, subtle floral designs, abstract patterns in metallic colors, or a collage of romantic words.
Tips for Success and Enjoyable Crafting
- Start Simple: Don’t try to create an intricate masterpiece on your first attempt. Begin with basic patterns or simple stamps.
- Embrace Imperfection: The charm of handmade items often lies in their slight imperfections. Don’t strive for machine-like precision; celebrate the unique, organic feel of your work.
- Work in Sections: If you’re working with a large piece of paper, tackle one section at a time to prevent smudging.
- Experiment with Colors: Try different color combinations. Monochromatic schemes can be very chic, while contrasting colors add vibrancy.
- Involve the Family: This is a fantastic activity for kids. Let them draw, stamp, or paint to create truly unique and heartfelt wrapping paper.
- Store Supplies Smartly: Keep your paints, stamps, and paper organized so they’re ready for your next creative burst.
- Personalize the Extras: Don’t forget custom gift tags, handmade bows, or even attaching a small, themed trinket to the package.
Creating your own personalized gift wrapping paper is a truly rewarding endeavor. It transforms the act of giving into a full-fledged creative expression, making every present you offer a memorable experience from the moment it’s seen. It’s an inexpensive, eco-conscious, and incredibly personal way to show you care. So, grab your paper, your paints, and your imagination, and start crafting! Your friends and family will undoubtedly go crazy over your thoughtfulness and unique designs. Don’t forget to SHARE this fun tutorial and these ideas with your loved ones – inspire them to get creative too!