
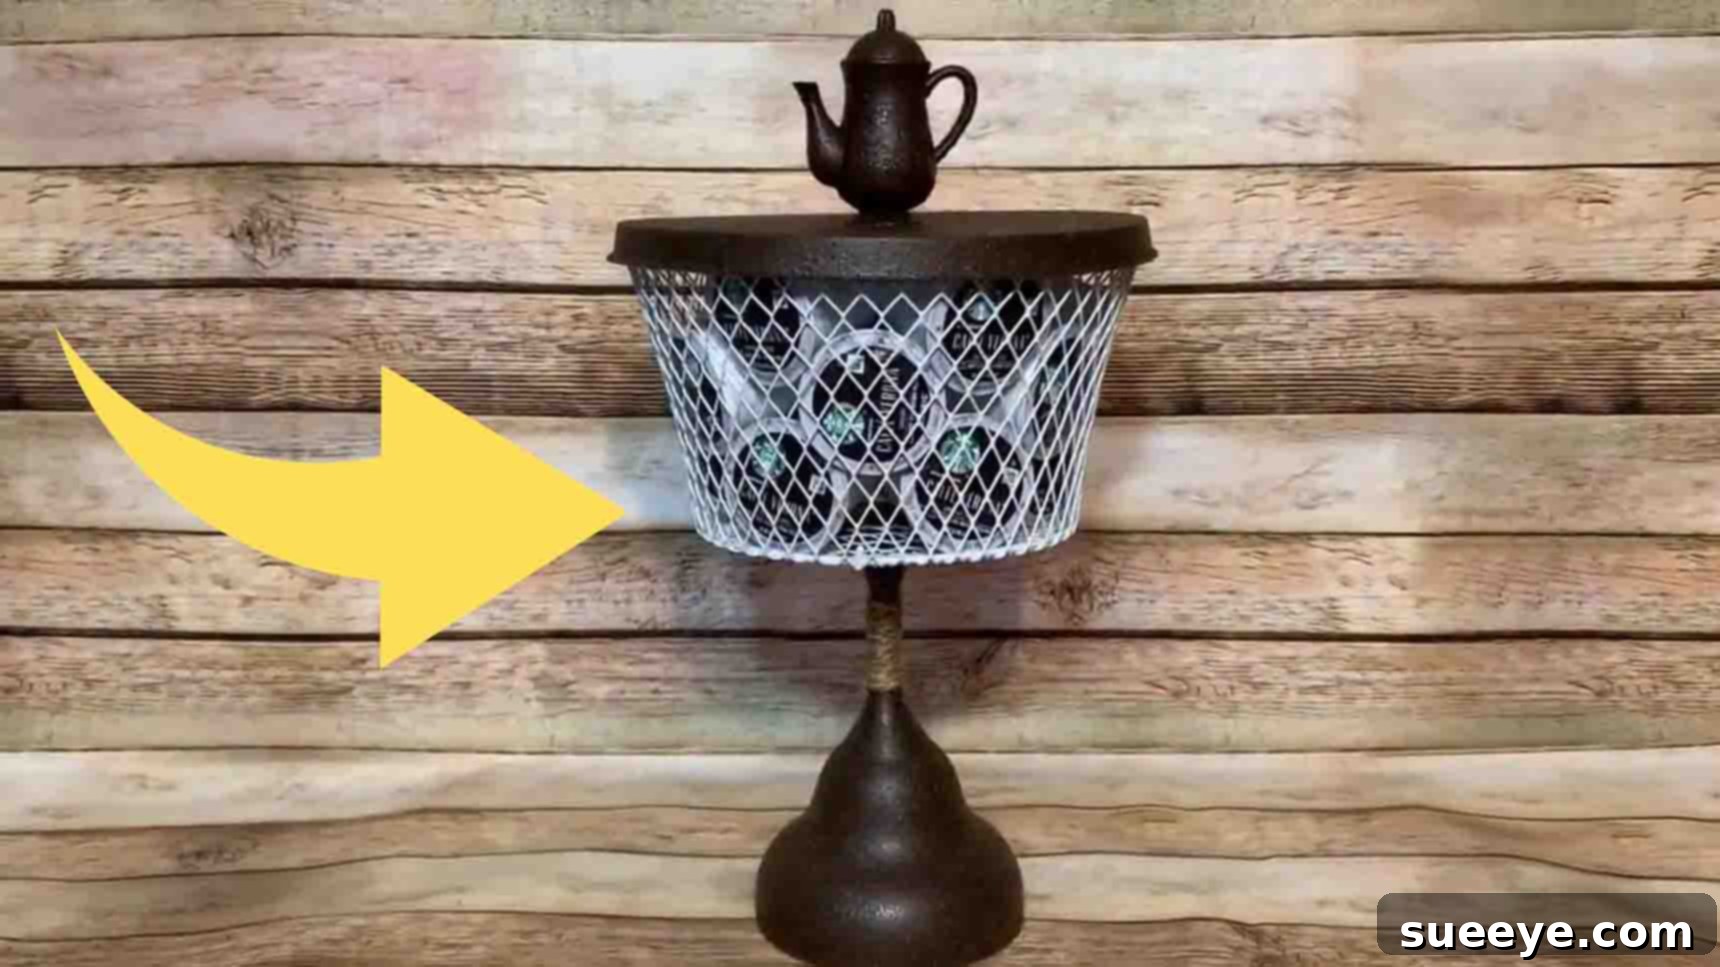
Are you tired of cluttered countertops and K-Cups scattered everywhere? Do you dream of an organized coffee station that’s both functional and aesthetically pleasing, without breaking the bank? Look no further! This ingenious DIY K-Cup holder project, inspired by the creative minds at This Southern Girl Can on YouTube, offers a brilliant solution. Using just a handful of inexpensive materials from your local Dollar Tree, you can craft a charming and highly functional coffee pod organizer that looks far more expensive than it is. This delightful craft is incredibly straightforward, making it an ideal weekend activity for crafters of all skill levels, even perfect for a family project. The end result is not just a practical storage solution but also a beautiful addition to your home décor, elevating your kitchen organization game.
In a world where specialized organizers can cost a small fortune, this Dollar Tree DIY stands out as a beacon of affordability and creativity. Imagine transforming ordinary household items into a custom piece that perfectly suits your style and needs. Not only will you save money, but you’ll also experience the satisfaction of creating something unique with your own hands. Get ready to de-clutter your coffee nook and display your favorite K-Cups in style!
Craft Your Own Chic K-Cup Holder: An Easy Dollar Tree DIY Project
Organizing your coffee pods doesn’t have to be a costly affair. With a little creativity and a trip to Dollar Tree, you can construct a K-Cup holder that is both functional and decorative. This project is not just about storage; it’s about adding a personalized touch to your kitchen while embracing the satisfaction of DIY. Let’s gather our supplies and transform some everyday items into a stylish coffee pod organizer.
Materials You’ll Need
The beauty of this project lies in its simplicity and the accessibility of its materials. Everything you need can be found at Dollar Tree, making it incredibly budget-friendly. Here’s a detailed list of the items required to bring your DIY K-Cup holder to life:
- A Small Wire Basket: This will form the main body of your K-Cup holder, providing ample space for your coffee pods. Look for one with a stable base.
- Burner Cover Set (Two Covers): These metal covers will serve as the top and bottom plates of your holder, offering a sturdy foundation and an elegant finish. A set typically includes two sizes, choose the ones that fit your basket best.
- A Glass (Wine Glass or Tumbler): A stemware glass, particularly a wine glass, will act as the central pillar, connecting the top and bottom components and adding height and elegance to the design. A sturdy tumbler can also work for a more modern, less delicate look.
- A Cooking Tea Time Play Set (Small Teapot): The miniature teapot from a children’s play set is a charming decorative element that crowns your holder, giving it a whimsical and personalized touch. This is a key detail that elevates the design.
- E6000 Glue: Known for its strong, permanent bond, E6000 is crucial for securing the teapot and glass to the metal burner covers, ensuring durability.
- Spray Paint (Your Choice of Color): A few cans of spray paint will unify all the components and allow you to customize the holder to match your kitchen decor. Consider matte, gloss, or metallic finishes.
- Twine: A roll of natural twine adds a rustic, textured detail, especially when wrapped around the glass stem.
- Hot Glue and Hot Glue Gun: Ideal for quick bonds, hot glue will be used to attach the basket to the glass, providing immediate stability while the E6000 cures.
Pro Tip: When selecting your materials at Dollar Tree, consider the overall aesthetic you want to achieve. A metallic spray paint can give a high-end look, while a neutral color can blend seamlessly with any decor. Don’t be afraid to mix and match textures and finishes!
Step-by-Step Instructions: Crafting Your K-Cup Holder
This project is designed for ease and enjoyment. Follow these clear, detailed steps to assemble your very own Dollar Tree K-Cup holder. Remember to work in a well-ventilated area when using spray paint and adhesives.
Step 1: Preparing and Assembling the Top Section
The first step involves preparing the metal components for painting and creating the decorative lid for your K-Cup holder. Attention to detail here will ensure a professional-looking finish.
- Prepare the Burner Covers: Start by lightly sanding your chosen burner covers. This step is vital as it creates a slightly abrasive surface, allowing the spray paint to adhere better and preventing chipping or peeling down the line. A fine-grit sandpaper will do the trick. Wipe them clean with a damp cloth afterward to remove any dust.
- Attach the Teapot Finial: Take the small teapot from the play set. Apply a small but generous amount of E6000 glue to the bottom of the teapot. Carefully center it on the larger of the two burner covers. Press down firmly and allow it to set for at least 15-30 minutes, or according to the glue’s instructions, to ensure a strong initial bond. The E6000 requires time to cure fully, but a preliminary set is enough for the next step.
- Spray Paint All Components: Once the teapot is somewhat set on the burner cover, it’s time to add color. Arrange both burner covers and the glass on a drop cloth or newspaper in a well-ventilated area. Apply several light, even coats of your chosen spray paint to all three items, allowing adequate drying time between coats. This layering technique prevents drips and ensures a smooth, consistent finish. Flip items as needed to coat all sides evenly.
- Decorate the Glass Stem: After the spray paint has completely dried on the glass, take your twine. Apply a small dab of E6000 glue at the base of the glass stem (where it meets the foot). Begin wrapping the twine tightly around the stem, working your way up. Apply small dots of E6000 glue intermittently as you wrap to secure the twine in place. Continue until the stem is fully covered or to your desired height. Secure the end with another small dab of glue. This adds a charming rustic texture and an interesting visual element.
Step 2: Assembling the K-Cup Holder Base and Final Touches
With the individual components prepped and painted, the final steps involve assembling the structure and ensuring everything is securely fastened. This is where your coffee pod holder truly takes shape!
- Attach the Glass to the Basket: Once the painted glass is completely dry and the twine is securely in place, prepare your hot glue gun. Apply a generous amount of hot glue to the bottom rim of the glass (the foot). Carefully center the glass onto the bottom of your wire basket. Press down firmly for about 30 seconds to allow the hot glue to set. Hot glue provides an instant strong hold, which is perfect for this structural attachment.
- Reinforce the Basket Connection: To ensure maximum stability and durability, apply an additional bead of hot glue from the top, around the base of the glass where it meets the basket. This reinforces the connection, making sure the basket is firmly fastened and can withstand the weight of multiple K-Cups. Let the hot glue cool and harden completely, which typically takes only a few minutes.
- Attach the Bottom Burner Cover: Take the smaller, unadorned burner cover (which also should be painted and dried) and apply E6000 glue around its rim. Carefully center it beneath the basket, pressing firmly to adhere it to the bottom of the basket. This provides a stable and aesthetically pleasing base for your entire holder. Allow the E6000 to cure for at least 24 hours for a permanent bond.
- Final Assembly of the Top Section: While the base cures, you can connect the top burner cover (with the teapot) to the top of the glass. Apply a ring of E6000 glue to the rim of the glass. Carefully place the burner cover (teapot side up) onto the glass, centering it perfectly. Press down gently and let this bond cure for 24 hours as well. This final connection completes the structural integrity and design.
- Allow Curing Time: For the most robust and long-lasting K-Cup holder, allow all E6000 glue points to cure for the recommended 24-72 hours before loading it with K-Cups or moving it extensively. This patience will pay off with a durable and beautiful organizer.
Why Choose This Easy Dollar Tree DIY K-Cup Holder?
Beyond its charming appearance and affordability, this DIY K-Cup holder offers numerous benefits that make it an outstanding addition to any kitchen or office coffee station:
- Cost-Effective Storage: Forget expensive store-bought organizers! This project uses items primarily from Dollar Tree, ensuring your total cost remains incredibly low, often under $10.
- Personalized Design: Unlike mass-produced items, your DIY holder can be customized to perfectly match your kitchen’s color scheme and decor. Choose any spray paint color and add your unique embellishments.
- Clutter-Free Countertops: Say goodbye to unsightly K-Cup boxes or loose pods. This holder keeps your coffee essentials neatly contained and easily accessible, freeing up valuable counter space.
- Easy to Make: The steps are straightforward, requiring no advanced crafting skills or specialized tools. It’s a rewarding project for beginners and seasoned DIY enthusiasts alike.
- Durable and Stable: With the robust E6000 glue and strategic use of hot glue, your K-Cup holder will be sturdy enough to hold a generous supply of coffee pods for everyday use.
- Engaging Family Activity: This project is simple enough to involve children (with adult supervision for painting and gluing), making it a fun and productive way to spend quality time together.
- Eco-Friendly Crafting: Repurposing common household items or affordable store-bought pieces into something new and useful is a great way to practice sustainable crafting.
- Great Gift Idea: Handmade gifts are always cherished. This K-Cup holder makes a thoughtful and practical present for coffee lovers in your life.
Customization Ideas to Make It Truly Yours
While the basic design is fantastic, feel free to unleash your creativity and personalize your K-Cup holder even further:
- Color Schemes: Experiment with two-tone paint jobs, ombre effects, or stencil designs. Consider metallic paints for a modern look or pastels for a softer vibe.
- Embellishments: Instead of twine, wrap the stem with ribbon, lace, or decorative beads. You could also add small decorative charms or even dried flowers to the basket.
- Decorative Topper: If a teapot isn’t your style, consider a small decorative finial, a faux succulent, or even a fancy knob from a craft store as the top accent.
- Distressed Look: After painting, lightly sand edges or areas to create a shabby chic or distressed appearance for a vintage feel.
- Themed Decorations: If it’s for a specific holiday or season, incorporate relevant colors or small ornaments.
Elevate Your Coffee Experience with a DIY Touch
Creating this Dollar Tree DIY K-Cup holder is more than just a craft project; it’s an investment in a more organized, aesthetically pleasing, and personalized coffee station. It demonstrates that you don’t need to spend a fortune to achieve a high-end look and practical functionality in your home. This simple yet effective design transforms humble Dollar Tree finds into a stylish centerpiece that will surely draw compliments. So, grab your materials, follow these easy steps, and enjoy the satisfaction of brewing your next cup of coffee with everything neatly in its place. Happy crafting!