
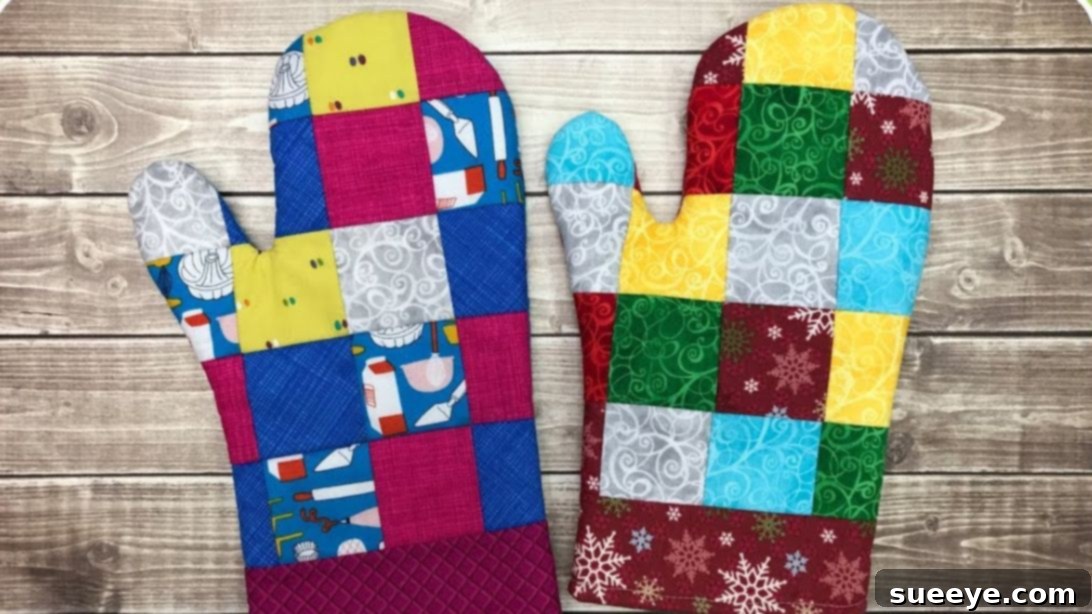
Transform your kitchen with a touch of handmade charm! Learn to create stunning and functional patchwork oven mitts with this revolutionary, simplified method. Gone are the days of laboriously piecing together tiny fabric squares one by one. Thanks to an ingenious technique introduced by TheCraftyGemini on YouTube, you can now achieve beautiful patchwork results faster and easier than ever before. This comprehensive tutorial will guide you through every step, allowing you to breathe new life into your collection of fabric scraps and craft unique, heat-protective kitchen essentials. Whether you’re a seasoned sewer or just starting your crafting journey, this project is perfect for adding a personalized touch to your home or creating thoughtful gifts for loved ones. Dive into the world of creative sewing and discover the joy of making your own patchwork oven mitts!
Why Craft Your Own Patchwork Oven Mitts?
Handmade oven mitts offer a delightful blend of practicality and personal style. Unlike mass-produced alternatives, your custom-made mitts will reflect your unique taste and add a cozy, homemade aesthetic to your kitchen. This project is not only incredibly satisfying but also an excellent way to:
- Utilize Fabric Scraps: If your stash is overflowing with small pieces of fabric, this is the perfect opportunity to turn those remnants into something useful and beautiful. It’s a fantastic way to minimize waste and maximize creativity.
- Personalize Your Kitchen: Match your oven mitts to your kitchen decor, create seasonal themes, or simply use fabrics that bring you joy every time you cook.
- Create Thoughtful Gifts: A pair of handmade patchwork oven mitts makes a wonderful, heartfelt gift for housewarmings, holidays, or any special occasion.
- Enhance Your Sewing Skills: This project introduces you to working with fusible grid interfacing, a technique that simplifies patchwork and can be applied to many other quilting projects.
- Ensure Quality and Protection: By choosing your own materials, you can ensure your oven mitts are made with high-quality, heat-resistant fabrics and batting for superior protection.
Essential Materials for Your Patchwork Oven Mitts
Gathering the right materials is the first step to a successful sewing project. For these patchwork oven mitts, you’ll need a combination of fabrics and specialized interfacings to provide both beauty and thermal protection. Ensure all fabrics are 100% cotton, as synthetic materials can melt under high heat.
- 5 to 8 Different Fabrics: Embrace variety! These will be used for your patchwork squares. Choose an array of patterns, colors, or coordinating solids from your fabric scrap bin. Remember, 100% cotton is crucial for heat resistance.
- Fusible Grid Interfacing: This is the secret weapon for easy patchwork. It has a grid printed on it and an adhesive on one side, allowing you to fuse your fabric squares precisely without tedious measuring and pinning.
- Insulated Batting (e.g., Insul-Bright): This specialized batting contains metallic fibers that reflect heat, providing superior thermal protection for your hands. It’s essential for a truly functional oven mitt.
- 100% Cotton Batting: Used in conjunction with insulated batting, cotton batting adds an extra layer of insulation, absorbency, and softness. It helps prevent scorching and adds structure to your mitt.
- Oven Mitt Pattern: A pre-designed template is vital for shaping your mitts accurately. You can download TheCraftyGemini’s pattern here, which is specifically designed for this project.
Pro Tip: Pre-wash and iron all your fabrics before cutting to prevent shrinking and ensure a smooth, professional finish.
Step-by-Step Guide to Crafting Patchwork Oven Mitts
Follow these detailed instructions to construct your beautiful and functional patchwork oven mitts. This method simplifies the traditional patchwork process, making it enjoyable and accessible.
Step 1: Prepare Your Patchwork Squares
Accuracy in cutting is paramount for neat patchwork. Begin by preparing your individual fabric squares that will form the vibrant design of your oven mitt.
Cut out 20 squares, each measuring 2.5 inches by 2.5 inches, from your chosen variety of colored fabrics. Use a rotary cutter and a cutting mat with a ruler for the most precise cuts. This ensures that all your squares are uniform, which is key for a seamless patchwork design.
Step 2: Prepare the Fusible Grid Interfacing
The fusible grid interfacing is what makes this “easier way” so effective. It provides a temporary guide and stabilizes your fabric pieces before sewing.
Cut your fusible grid interfacing into a rectangle that is 4 squares across and 5 squares down. This will create a grid area large enough to accommodate your 20 fabric squares in a neat 4×5 arrangement. The exact dimensions will depend on the grid spacing of your interfacing, but ensure it leaves a small margin around your intended patchwork area.
Step 3: Arrange and Fuse Your Patchwork Design
This is where your creativity shines! The fusible grid eliminates the need for pinning individual squares, streamlining the assembly process.
Place the fusible grid interfacing on your ironing board with the scratchy, adhesive side facing up. Carefully arrange your 2.5-inch fabric squares on top of the grid. Position each square precisely within the grid lines. Take your time to design your block, experimenting with different color and pattern combinations until you achieve your desired layout. Once satisfied with your arrangement, gently press them with a hot iron. The heat will activate the adhesive on the fusible grid, securing the fabric squares in place. Hold the iron for a few seconds over each section to ensure a strong bond.
Step 4: Sew Your Patchwork Block Together
Now that your squares are fused, it’s time to stitch them permanently. This method utilizes the fused layout to guide your sewing, making it incredibly straightforward.
Using your sewing machine, stitch your squares together. Begin by sewing all the squares in each column together first. To do this, fold one column of squares onto the adjacent column, right sides together, along one of the vertical grid lines. Sew a precise quarter-inch seam allowance along this folded edge. Repeat this for all vertical seams, sewing column by column. Once all columns are joined, repeat the process for the rows. Fold one row of squares onto the adjacent row, right sides together, along a horizontal grid line, and sew a quarter-inch seam allowance. Continue until all rows are sewn. This technique ensures a perfectly aligned patchwork block. After sewing, carefully flip your entire patchwork piece with the right side facing down. You’ll notice the grid lines on the back. Where the seam lines meet the original grid’s “dash lines,” make small snips into the seam allowance. This helps the seams lie flatter when pressed, reducing bulk and creating a smoother finished surface.
Step 5: Shape Your Oven Mitt Exterior
With your patchwork block complete, it’s time to transform it into the distinct shape of an oven mitt.
Carefully place your oven mitt pattern template (downloaded from TheCraftyGemini) directly on top of your finished patchwork block. Position it strategically to capture the most appealing part of your patchwork design. Pin the template securely in place. Using sharp fabric scissors or a rotary cutter, meticulously cut around the perimeter of the template. This cut piece will form the front exterior of one of your oven mitts.
Step 6: Prepare All Layers and Mirror Images
To ensure a functional and attractive oven mitt, you’ll need several layers and a matching back piece.
First, cut one strip of coordinating fabric measuring 2.5 inches by 7 inches. This strip will form the bottom cuff of your oven mitt. Place this strip on the bottom edge of your freshly cut patchwork mitt piece, aligning the raw edges with right sides together. Sew with a precise quarter-inch seam allowance. Trim any excess fabric from the sides of the strip to match the mitt’s contour. Press the seam open or towards the dark fabric. This completed piece (patchwork top + cuff) will serve as your main template for cutting the remaining layers.
Now, using this assembled piece, cut out the following:
- One piece for the back exterior of the oven mitt (can be a solid coordinating fabric or more patchwork).
- Two pieces for the lining of the oven mitt.
- Two pieces of 100% cotton batting.
- Two pieces of insulated batting.
Crucially, for a pair of oven mitts, remember to cut mirror image pieces for one of the mitts! This means if you have a left-hand mitt piece, you’ll need to flip your template to cut a right-hand mitt piece for the lining, batting, and back exterior. This ensures you have a left and right mitt that fit comfortably.
Step 7: Assemble Your Oven Mitt Layers
The final stage involves layering and sewing all the components together to create a durable and protective oven mitt.
Start by assembling the main oven mitt body. Place one piece of cotton batting flat, then layer one piece of insulated batting on top of it. Finally, place your patchwork exterior piece (right side up) on top of the insulated batting. Repeat this for the back exterior piece. Baste these layers together around the edges, either by machine (with long stitches) or with basting spray/pins, to prevent them from shifting during sewing.
Next, work on the lining. Place the two lining pieces right sides together. Sew all the way around the raw edge with a quarter-inch seam allowance, but remember to leave an opening of about 3-4 inches along one of the straight edges (usually the bottom or side) for turning the mitt right side out later. Trim off any excess fabric or bulk from the seam allowances, especially around curves, to ensure a smooth finish once turned. Clip curves to help them lie flat.
Finally, you will attach the lining to the exterior piece. With the main mitt body (exterior + batting layers) still right side out, place it inside the lining piece (which should be wrong side out) so that their right sides are together. Align the raw edges of the cuff opening. Sew these layers together around the entire cuff opening with a quarter-inch seam allowance.
Once sewn, reach into the opening you left in the lining, and carefully pull the entire oven mitt right side out through that opening. Push out all the seams and corners gently with a point turner or a dull pencil. Press the entire mitt well, paying attention to the cuff seam. Hand stitch or machine stitch the opening in the lining closed. Tuck the lining inside the mitt, and give it one final press. Your beautiful patchwork oven mitt is complete!
Expert Tips for a Perfect Finish
Achieving a professional-looking finish on your patchwork oven mitts requires attention to detail. Here are some invaluable tips:
- Pressing is Key: Pressing your seams after every sewing step is just as important as the sewing itself. It helps your project lie flat, aligns pieces accurately, and gives a crisp, professional appearance. Use steam when pressing cotton.
- Accurate Seam Allowances: A consistent quarter-inch seam allowance is crucial for patchwork. Use a quarter-inch foot on your sewing machine or mark a guide on your machine bed with tape.
- Sharp Tools: Use sharp fabric scissors or a fresh blade in your rotary cutter. Dull tools can fray fabric and lead to inaccurate cuts.
- Matching Thread: Choose a good quality 100% cotton thread that matches your dominant fabric colors for a seamless look.
- Test Stitches: Before sewing on your actual project, always test your stitch length and tension on a scrap piece of fabric to ensure your machine is set correctly.
- Clip and Notch Curves: When sewing curved seams (like the thumb area of the mitt), clip into the seam allowance on convex curves and notch out wedges on concave curves. This allows the fabric to lie flat when turned right side out.
- Topstitching: Consider adding a line of topstitching around the cuff opening after attaching the lining. This adds a decorative touch and helps to keep the lining securely in place.
Caring for Your Handmade Oven Mitts
To ensure your beautiful patchwork oven mitts last for years to come, proper care is essential. Machine wash them in cold water on a gentle cycle with a mild detergent. Tumble dry on low heat or air dry to prevent shrinking and preserve the integrity of the batting. Avoid using bleach, which can damage the fabric and insulated batting. Regular washing will keep them fresh and ready for all your culinary adventures.
Customization and Variations
This tutorial provides a fantastic foundation, but don’t stop there! Feel free to customize your oven mitts to truly make them your own:
- Fabric Play: Experiment with different themes – holiday fabrics, novelty prints, or a specific color palette.
- Add a Hanging Loop: Before attaching the lining, fold a small strip of fabric (approx. 1″x4″) in half lengthwise, press, and topstitch the raw edges. Form a loop and baste it to the side seam of the outer mitt layer, near the cuff, so it can be hung on a hook.
- Embellishments: Consider adding a small patch, a piece of decorative trim, or even embroidery before assembly for an extra personal touch.
- Different Sizes: Adjust the pattern size slightly to create mitts for smaller or larger hands.
Conclusion
Congratulations! You’ve successfully learned how to sew patchwork oven mitts using an easy and efficient method. This project is a testament to how creative sewing can transform simple fabric scraps into cherished, functional items for your home. We hope this detailed guide has inspired you to dive into your fabric stash and create beautiful, heat-protective kitchen accessories that are as unique as you are. Enjoy the warmth, style, and satisfaction that come with your handmade creations!