
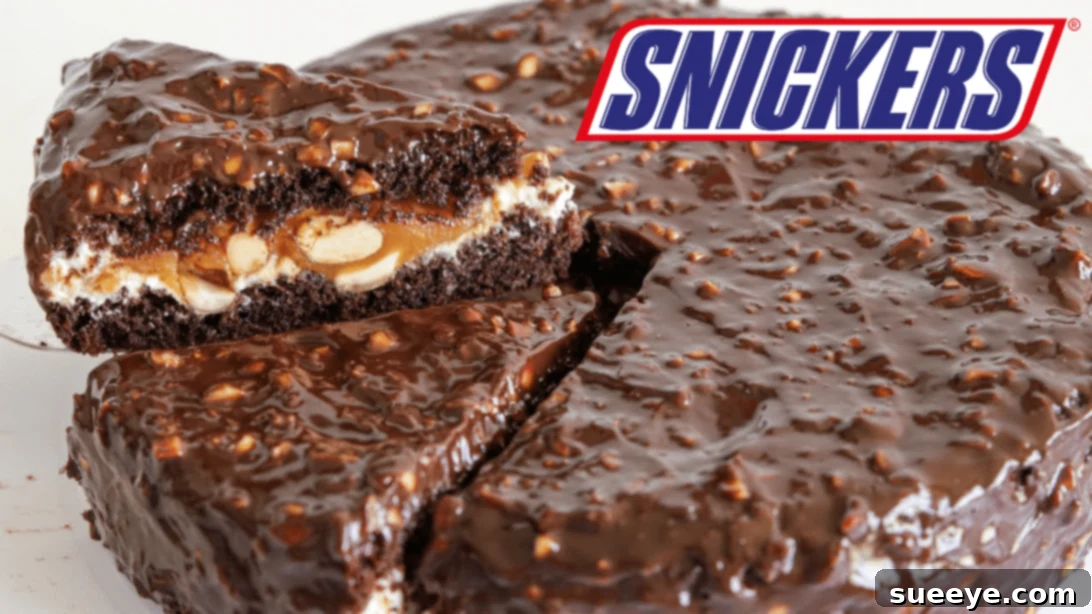
Do you ever find yourself reaching for just one more Snickers bar, wishing the delicious combination of chocolate, nougat, caramel, and peanuts would never end? What if we told you that you could transform this iconic candy bar into an extraordinary cake, offering abundant servings of that irresistible flavor? This homemade Snickers Cake recipe delivers all the beloved elements of your favorite treat in a show-stopping dessert that’s surprisingly simple to create. Imagine slicing into layers of moist chocolate sponge, luscious cream filling, gooey homemade caramel, and toasted peanuts, all enveloped in a rich chocolate glaze. It’s a dream come true for any sweet tooth!
Whether you’re celebrating a special occasion, hosting a party, or simply craving a decadent dessert, this Snickers cake is guaranteed to be a crowd-pleaser. Both kids and adults alike will find themselves coming back for seconds, eager for another taste of this magnificent creation. Forget store-bought desserts; this recipe empowers you to bake a masterpiece that tastes incredible and looks impressive. Below, you’ll find a detailed guide, carefully crafted to help you achieve Snickers cake perfection, inspired by the fantastic work of The Cooking Foodie on YouTube. Get ready to bake a cake that will undoubtedly earn you rave reviews!
RELATED: Explore Another Fantastic 6-Minute Chocolate Snickers Cake Recipe!
This recipe is designed with simplicity in mind, ensuring that even novice bakers can achieve a professional-looking and tasting cake. We’ve streamlined the process, removed any unnecessary complexity, and focused on clear, actionable steps. The result is a dessert that’s not only incredibly delicious but also a joy to make. Serve it after dinner, as a delightful snack, or as the star of your next family gathering. Prepare to impress everyone with your baking prowess!
Ingredients for Your Dream Snickers Cake:
Crafting this incredible Snickers cake requires a few straightforward ingredients, divided into four key components: the moist chocolate cake layers, the fluffy cream filling, the rich homemade caramel, and the decadent chocolate glaze. Using fresh, quality ingredients will ensure the best possible flavor and texture for your masterpiece.
For the Velvety Chocolate Sponge Cake:
- 3 large eggs, at room temperature
- ¼ cup (50g) of granulated sugar
- 2 tbsp of vegetable oil (or any neutral-flavored oil)
- 50ml or approx. 3 tbsp of whole milk
- ¾ cup (90g) of all-purpose flour, sifted
- 2¾ tbsp (20g) of unsweetened cocoa powder, sifted
- ¾ tsp of baking powder
- A pinch of salt
For the Light and Fluffy Cream Filling:
- 1 cup (225g) of cream cheese or mascarpone cheese, softened
- ¼ cup (60ml) of heavy cream, well chilled
- ¼ cup (30g) of powdered sugar (confectioners’ sugar)
- 1 tsp of pure vanilla extract
For the Rich Homemade Caramel Layer:
- ½ cup (100g) of granulated sugar
- ¼ cup (56g) of unsalted butter, cubed
- 1/3 cup (80ml) of heavy cream, warmed slightly
- ¾ cup (100g) of roasted peanuts, toasted and roughly chopped
For the Decadent Chocolate Glaze:
- ¾ cup (130g) of dark chocolate (at least 60% cocoa), finely chopped
- 100ml or approx. ½ cup of heavy cream
- ¼ cup (35g) of roasted peanuts, chopped for garnish
Essential Tools for Baking Success:
Having the right equipment on hand will make your baking experience smoother and more enjoyable. For this Snickers cake, you’ll need a few common kitchen items:
- 8-inch round cake pan
- Parchment paper
- Mixing bowls (at least two: one large for batter, one medium for cream)
- Electric mixer (stand mixer or hand mixer)
- Whisk and rubber spatula
- Medium-sized saucepan (for caramel and glaze)
- Sifter
- Wire cooling rack
- Sharp serrated knife (for leveling cake)
How to Make Snickers Cake: A Step-by-Step Guide
Follow these detailed instructions carefully to bake a Snickers cake that will impress everyone with its layers of flavor and texture. Precision and patience are key to achieving the best results!
Step 1: Preparing the Velvety Chocolate Sponge Cake
Begin by preheating your oven to 350°F (175°C). Prepare an 8-inch round cake pan by lightly greasing it with nonstick cooking spray or melted butter, then lining the bottom with a circle of parchment paper. This ensures your cake will release easily. In a large mixing bowl, combine the eggs and granulated sugar. Using an electric mixer, beat them together on high speed for about 6 to 7 minutes. The mixture should become pale, thick, and very fluffy, almost tripling in volume. This aeration is crucial for a light cake. Next, gently fold in the vegetable oil, mixing just until incorporated. Pour in the milk and stir briefly. In a separate bowl, sift together the all-purpose flour, cocoa powder, baking powder, and a pinch of salt. Sifting removes lumps and ensures the dry ingredients are evenly distributed. Gradually add the sifted dry ingredients to the wet mixture, folding them gently with a spatula until *just* combined. Be careful not to overmix, as this can lead to a tough cake.
Step 2: Baking Perfection & Crafting the Luscious Caramel
Carefully pour the prepared cake batter into your greased and lined 8-inch round cake pan, spreading it evenly with your spatula. Transfer the pan to the preheated oven and bake for approximately 25 to 30 minutes. To check for doneness, insert a toothpick into the center of the cake; it should come out clean. Once baked, remove the cake from the oven and let it cool in the pan for 10-15 minutes before inverting it onto a wire rack to cool completely. While the cake cools, begin preparing the homemade caramel. Place ½ cup of sugar in a medium-sized heavy-bottomed saucepan over medium-high heat. Allow the sugar to melt and caramelize, stirring occasionally with a heat-proof spatula or wooden spoon to prevent burning. Watch it closely as it transforms into a beautiful amber color. Once fully melted and caramelized, immediately reduce the heat to low. Carefully add the cubed butter to the melted sugar, stirring continuously until the butter is completely melted and incorporated, forming a smooth, glossy mixture.
Step 3: Whipping Up the Silky Cream & Finishing the Caramel
Once the butter is fully melted into the caramel, slowly pour in the slightly warmed heavy cream, stirring vigorously. The mixture may seize up initially, but keep stirring over low heat until it becomes smooth and homogenous again. Remove the saucepan from the heat and set the caramel aside to cool slightly. As the caramel cools, it will thicken. Stir in the toasted peanuts, ensuring they are well coated. Now, prepare the cream filling. In a large mixing bowl, combine the softened cream cheese (or mascarpone), powdered sugar, and vanilla extract. Beat with an electric mixer until the mixture is smooth and lump-free. Gradually add the *cold* heavy cream to the cream cheese mixture. Continue to whip on medium-high speed until the cream is light, fluffy, and holds soft peaks. Do not overmix, or it may become grainy.
Step 4: Assembling Your Snickers Cake Layers
Once your chocolate sponge cake has completely cooled, it’s time for assembly. Using a sharp serrated knife, carefully slice off any domed top from the cake to create a flat, even surface. Then, horizontally slice the cake into two equal layers. Place the first cake layer onto your serving plate or cake stand. Spread about half of the prepared cream filling evenly over this bottom layer. Next, gently spoon and spread the peanut caramel mixture over the cream layer. The caramel should be spreadable but not too hot. Carefully place the second cake layer on top, gently pressing down to secure it. Spread the remaining cream filling over the top of this second layer. For best results and to allow the flavors to meld, place the assembled cake in the refrigerator and let it chill for at least 2 hours. This chilling time is crucial for the cake to set properly and makes applying the glaze much easier.
Step 5: The Grand Finale: Decadent Chocolate Glaze & Final Chill
While the cake is chilling, prepare the exquisite chocolate glaze. Finely chop the dark chocolate and place it in a heat-proof bowl. In a small saucepan, heat the heavy cream over medium heat until it just begins to simmer around the edges (do not boil). Immediately remove the cream from the heat and pour it directly over the chopped chocolate. Let it sit undisturbed for about 2 minutes to allow the residual heat to melt the chocolate. After 2 minutes, stir the mixture gently with a whisk or spoon until it becomes completely smooth, glossy, and lump-free, forming a rich ganache. Stir in the chopped peanuts for an added textural element, mimicking the Snickers bar crunch. Retrieve your chilled cake from the refrigerator. Carefully pour the warm (but not hot) chocolate ganache over the top of the cake, allowing it to drip down the sides in a beautiful cascade. You can use an offset spatula to gently encourage the glaze to cover the entire top and sides if desired. Once glazed, return the cake to the refrigerator for at least another 30 minutes to allow the chocolate glaze to set. Once set, your Ultimate Homemade Snickers Cake is ready to be sliced, served, and enjoyed!
Pro Tips for a Flawless Snickers Cake:
- Room Temperature Ingredients: Ensure eggs and cream cheese are at room temperature for smooth mixing and a consistent batter/cream.
- Don’t Overmix: When adding dry ingredients to the cake batter, fold gently until *just* combined. Overmixing develops gluten, leading to a tough cake.
- Caramel Caution: Caramelizing sugar requires attention. Don’t walk away! Use a heavy-bottomed pan to prevent burning and ensure even melting.
- Cold Cream for Whipping: For the cream filling, ensure your heavy cream is very cold. You can even chill your mixing bowl and whisk for a few minutes beforehand for extra fluffy results.
- Chill Time is Key: The recommended chilling times are not optional. They allow the layers to set, the flavors to meld, and make the cake much easier to handle and slice.
- Quality Chocolate: Use good quality dark chocolate for your glaze. It makes a significant difference in flavor and texture.
Serving Suggestions & Storage:
This Snickers cake is best served slightly chilled. Use a hot, sharp knife to cut clean slices; dip the knife in hot water and wipe it clean between each cut. It’s delightful on its own, but you could also serve it with a scoop of vanilla bean ice cream or a dollop of extra whipped cream for an even more indulgent experience. To store, keep the cake covered tightly in an airtight container in the refrigerator for up to 3-4 days. The flavors tend to deepen beautifully overnight, making it an excellent make-ahead dessert for parties or gatherings.
Now that you have all the instructions, tools, and tips at your disposal, there’s nothing stopping you from creating this magnificent Snickers cake. It’s a true celebration of chocolate, caramel, and peanuts, transformed into a sophisticated yet approachable dessert. Happy baking!
*All these images are credited to The Cooking Foodie via YouTube. We highly recommend visiting their channel and subscribing for more amazing culinary inspiration!