
The Ultimate Guide to Sanitizing Your Kitchen Sponge: Keeping Germs at Bay
It’s a common saying, startling yet true: your kitchen sponge can harbor more germs than a toilet seat. This unassuming cleaning tool, essential for scrubbing away food debris and grime, can quickly become a bustling metropolis for harmful bacteria and fungi. Far from aiding cleanliness, a contaminated sponge can inadvertently spread microscopic pathogens across your kitchen surfaces, posing a significant risk to your family’s health.
From the moment a sponge touches food particles and absorbs moisture, its porous structure transforms into an ideal breeding ground for microbes. The tiny micro fissures that make sponges so effective at cleaning also provide countless nooks and crannies where bacteria can thrive, shielded from air and light. This moist, nutrient-rich environment allows common culprits like E. coli, Salmonella, and Campylobacter to multiply rapidly, turning your cleaning tool into a potential source of cross-contamination.
The good news is that maintaining a hygienic kitchen doesn’t require expensive gadgets or harsh chemicals. With a few simple, everyday items and consistent practices, you can effectively sanitize your kitchen sponge, ensuring it remains a tool for cleanliness, not contamination. Inspired by practical tips shared by experts like The Domestic Geek, we’ll explore proven methods to keep those pesky pests at bay and make your kitchen a safer place. Let’s dive into how you can transform your sponge from a germ magnet into a powerful ally in your fight for a sparkling clean and healthy home.
Why Your Kitchen Sponge is a Microbial Hotspot
To truly appreciate the importance of regular sponge sanitization, it’s crucial to understand why these seemingly innocuous cleaning aids become such fertile ground for bacteria. Your kitchen sponge experiences a perfect storm of conditions that encourage microbial growth:
- Porous Structure: The intricate network of holes and fibers in a sponge traps food particles and moisture, creating a complex habitat for bacteria to settle and multiply. These tiny pockets are difficult to rinse thoroughly, allowing microbes to escape subsequent washes.
- Constant Moisture: Sponges are rarely completely dry. The persistent dampness, especially if left in a sink or flat on a counter, provides the essential water content that most bacteria need to survive and reproduce.
- Nutrient Rich Environment: Every time you wipe down a countertop or scrub a plate, your sponge picks up minuscule food residues. These organic materials serve as a readily available food source, fueling the rapid growth of bacterial colonies.
- Temperature Conditions: Kitchens typically operate at ambient temperatures that are ideal for bacterial growth. Unlike the extreme cold of a freezer or the boiling heat of a stovetop, room temperature offers a comfortable zone for pathogens to flourish.
The cocktail of bacteria commonly found in kitchen sponges includes some notorious names that are responsible for foodborne illnesses. E. coli, often associated with fecal contamination, can cause severe gastrointestinal issues. Salmonella and Campylobacter are leading causes of food poisoning, manifesting as fever, diarrhea, and abdominal cramps. Other less common but equally unwelcome guests can include Staphylococcus aureus and Listeria monocytogenes. Using a sponge laden with these microorganisms to wipe down surfaces or clean dishes risks spreading these pathogens directly onto food preparation areas, utensils, and ultimately, into your food.
This understanding underscores the vital need to regularly sanitize your sponges. Without it, you might unknowingly be doing more harm than good, inadvertently spreading contamination rather than cleaning it away.
Essential Materials for Effective Sponge Sanitization
The beauty of effective sponge sanitization lies in its simplicity. You don’t need a special trip to the store for exotic cleaning solutions. Most of what you need is likely already in your kitchen or pantry. Here are the key materials:
- Kitchen Sponge: Naturally, the item itself! Ensure it’s a sponge suitable for the methods you choose (e.g., avoid metal scrubbers in the microwave).
- Dishwasher: A modern convenience that offers high heat and detergent for thorough cleaning.
- Microwave: A quick and powerful tool for steam sterilization, leveraging the power of heat.
- White Vinegar: A natural, acidic solution with impressive antimicrobial properties, perfect for chemical-free disinfection.
- Binder Clip (or sponge holder): A simple tool to facilitate proper drying, a crucial step in preventing bacterial regrowth.
- (Optional) Bleach: For those seeking a powerful chemical disinfectant, but with important safety precautions.
These materials form the foundation of our sanitization strategies. Let’s delve into the specific directions for each method.
Detailed Directions for Sanitizing Your Kitchen Sponge
Now that we understand the problem and have our materials ready, let’s explore the most effective and accessible methods for sanitizing your kitchen sponge. Each technique leverages different principles to eradicate germs, offering flexibility based on your preferences and available appliances.
1. The Dishwasher Method: Heat and Detergent Power
One of the easiest and most effective ways to sanitize your kitchen sponge is by running it through a cycle in your dishwasher. This method leverages high temperatures and powerful detergents to kill a vast majority of bacteria and fungi.
How to Do It:
- Placement: Simply place your sponge (without any metal components) on the top rack of your dishwasher with a regular load of dishes. Avoid placing it where it might fall and block sprayer arms.
- Cycle Selection: Run the dishwasher on its hottest possible setting. Many modern dishwashers include a “sanitize” cycle, which is ideal, or a “heated dry” cycle. The key is to ensure the water temperature reaches at least 140 degrees Fahrenheit (60 degrees Celsius) to be effective against most common pathogens.
- Detergent: Use your standard dishwasher detergent.
Why It Works:
The intense heat of the hot water wash cycle, combined with the chemical action of the detergent, is highly effective at breaking down bacterial cell walls and denaturing enzymes essential for microbial survival. The heated dry cycle further assists by drying the sponge, inhibiting immediate regrowth of moisture-loving bacteria.
Benefits:
- Convenience: You can sanitize your sponge while cleaning your dishes, requiring minimal extra effort.
- Effectiveness: High heat and detergent provide robust disinfection.
- Multiple Sponges: Easily sanitize several sponges at once.
Considerations:
This method is not suitable for sponges with metallic scouring pads or those made of delicate materials that might degrade under high heat.
2. The Microwave Method: Quick Steam Sterilization
If you don’t have access to a dishwasher or need a quicker solution, your microwave can be a powerful ally in the fight against sponge germs. This method uses steam heat to destroy bacteria effectively.
How to Do It:
- Wet the Sponge: Crucially, make sure your sponge is thoroughly wet. A dry sponge can catch fire in the microwave. Wring out any excess water so it’s damp but not dripping.
- Microwave: Place the wet sponge in the microwave and heat on high power for one to two minutes. The exact time may vary depending on your microwave’s wattage; a minute for higher wattage (1000W+) or two minutes for lower wattage microwaves (700W).
- Cool Down: Allow the sponge to cool completely inside the microwave before removing it. It will be extremely hot and could cause burns.
Why It Works:
The microwave heats the water molecules trapped within the sponge, creating intense steam that effectively sterilizes the material. This rapid heating penetrates the sponge, killing bacteria and viruses.
Benefits:
- Speed: It’s one of the fastest methods available.
- Effectiveness: Studies have shown microwaving can kill up to 99.9% of bacteria and viruses in sponges.
- Accessibility: Most households have a microwave.
Safety Warnings:
- Never microwave a dry sponge: This is a serious fire hazard.
- Avoid sponges with metal: Any metallic elements can cause sparks and damage your microwave.
- Extreme Heat: The sponge will be very hot post-microwaving. Use tongs or allow ample cooling time before handling.
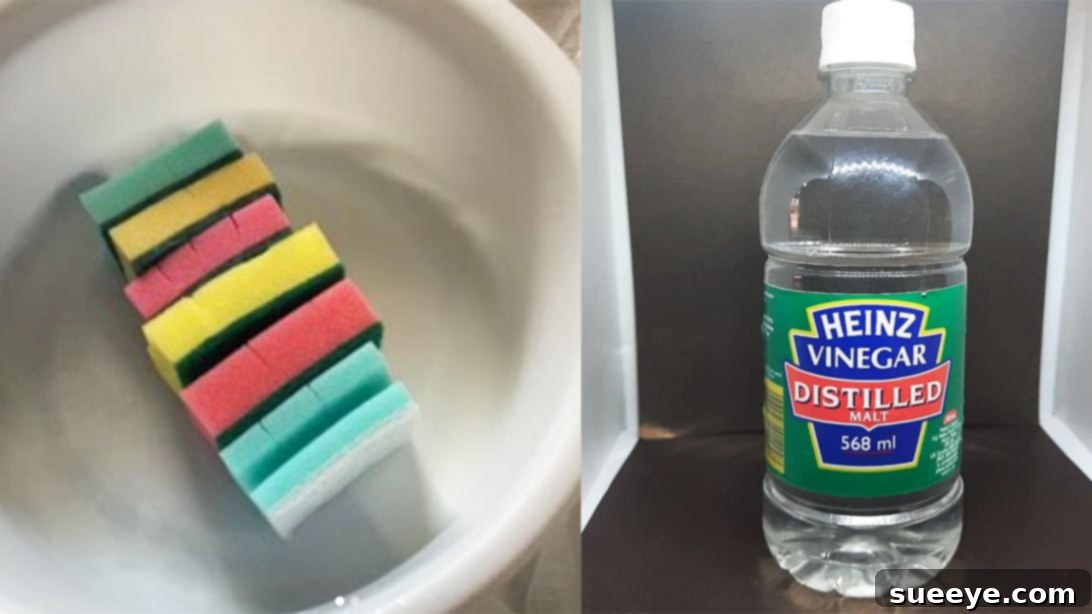
3. The White Vinegar Soak Method: Natural Disinfection
For those who prefer a natural, chemical-free approach, white vinegar is an excellent and readily available disinfectant. Its acetic acid content makes it effective against a range of bacteria and molds.
How to Do It:
- Preparation: Submerge your sponge completely in a bowl of pure, undiluted white vinegar.
- Soak Time: Let it soak for five to ten minutes. For a deeper clean or if your sponge is particularly grimy, you can extend the soaking time to 30 minutes to an hour.
- Rinse: After soaking, thoroughly rinse the sponge under running water to remove the vinegar smell.
Why It Works:
The acetic acid in white vinegar disrupts the cellular structures of many bacteria, yeasts, and molds, effectively killing them or inhibiting their growth. It’s a natural and non-toxic alternative to harsher chemicals.
Benefits:
- Natural: No harsh chemicals involved, making it environmentally friendly and safe for food contact surfaces after rinsing.
- Affordable: White vinegar is inexpensive and commonly found in most kitchens.
- Versatile: Can be used for most sponge types.
Considerations:
While very effective, vinegar might not kill *all* types of germs as thoroughly as high heat methods. Its strong odor also requires a good rinse afterward.
4. The Bleach Solution Method: Powerful Chemical Disinfection (Optional)
For a powerful chemical approach, a diluted bleach solution can effectively sanitize sponges. This method is highly effective but requires careful handling.
How to Do It:
- Prepare Solution: Mix ¾ cup of household bleach with 1 gallon of water in a clean bucket or basin. Always add bleach to water, not water to bleach.
- Soak: Submerge the sponge in the bleach solution for five minutes.
- Rinse Thoroughly: After soaking, rinse the sponge thoroughly under running water until the bleach smell is gone.
Why It Works:
Bleach (sodium hypochlorite) is a potent disinfectant that denatures proteins in microorganisms, effectively killing bacteria, viruses, and fungi on contact.
Safety Precautions:
- Ventilation: Use in a well-ventilated area.
- Gloves: Wear rubber gloves to protect your skin.
- Never Mix: Absolutely *never* mix bleach with other cleaners, especially ammonia-based products or vinegar, as this can create dangerous toxic fumes.
- Sponge Degradation: Regular bleach use can degrade sponge material over time.
Preventative Measures and Best Practices for Long-Lasting Hygiene
Sanitizing your sponge regularly is crucial, but implementing preventative measures can significantly extend its cleanliness and efficacy, reducing the frequency with which it becomes a germ haven. These simple habits contribute to overall kitchen hygiene and minimize bacterial growth.
1. Proper Drying: The Upright Advantage
After each use, simply rinsing your sponge isn’t enough; how you dry it plays a pivotal role in preventing microbial regrowth. Moisture is the lifeblood of bacteria and fungi, so minimizing its presence is key.
- The Binder Clip Trick: As recommended by experts like Coral, a simple binder clip can be a game-changer. Attach a binder clip to your sponge and stand it upright. This allows air to circulate around all surfaces, promoting rapid and thorough drying.
- Ventilated Holders: Alternatively, invest in a dedicated sponge holder designed with good drainage and ventilation. These often attach to the sink or counter and ensure the sponge isn’t sitting in a puddle of water.
- Why It Works: By preventing your sponge from sitting in its own moisture, you deprive bacteria of the damp environment they need to multiply. A dry sponge is a far less hospitable home for germs.
2. Regular Replacement: Knowing When to Let Go
Even with consistent sanitization, sponges don’t last forever. Their fibers break down, and some resilient germs can persist. Replacing your sponge regularly is an essential component of a truly hygienic kitchen.
- Frequency: Most experts recommend replacing your kitchen sponge every one to two weeks, especially if you use it daily.
- Warning Signs: If your sponge starts to smell foul, feels slimy, or is visibly degraded (tears, holes), it’s a clear sign it’s time for a new one, regardless of how recently you’ve sanitized it. These are indicators that bacteria have firmly established themselves or that the material is no longer effective for cleaning.
3. Multiple Sponges for Different Tasks: Preventing Cross-Contamination
Consider using different sponges for different tasks to prevent cross-contamination, especially between raw food preparation areas and ready-to-eat surfaces.
- Color-Coding: Designate specific colors for specific tasks – for example, one color for dishes, another for wiping down countertops, and perhaps a third for dirtier jobs like cleaning spills on the floor.
- Dedicated Uses: Avoid using the same sponge that cleaned up raw chicken juices to wipe down your child’s high chair.
4. Rinse Thoroughly After Each Use
While not a sanitization method, a quick and thorough rinse under hot water after every use helps remove loose food particles and debris, delaying the buildup of organic matter that feeds bacteria.
By integrating these relatively basic yet highly effective procedures into your daily and weekly routine, you can maintain a clean, germ-free sponge without needing pricey or specialized materials. Consistency is key – make these practices a habit, and your kitchen will thank you.
Conclusion: A Healthier Kitchen Starts with a Clean Sponge
The humble kitchen sponge, often overlooked, plays a disproportionately large role in the overall hygiene of our homes. Far from being a mere cleaning tool, an unsanitized sponge can quickly transform into a significant reservoir for harmful bacteria, threatening the health and safety of your family. The notion that a sponge can be dirtier than a toilet seat is not just a myth; it’s a scientific reality driven by the perfect storm of moisture, food particles, and porous materials that define this essential kitchen item.
Fortunately, the path to a healthier kitchen is both straightforward and accessible. As we’ve explored, you don’t need a pantry full of specialized products or complex routines to keep your sponges sparkling clean and germ-free. Simple household items and appliances—your dishwasher, microwave, and a bottle of white vinegar—offer powerful and effective solutions to eliminate the vast majority of pathogens lurking within those tiny micro fissures.
Moreover, consistent preventative measures, such as proper upright drying and timely replacement, are just as vital as periodic deep sanitization. These practices inhibit bacterial regrowth and ensure that your sponge remains an ally in cleanliness, rather than a harbinger of germs. By adopting these habits—whether it’s tossing your sponge in the dishwasher with your nightly load, giving it a quick zap in the microwave, or soaking it in natural vinegar—you actively contribute to a safer food preparation environment and a healthier living space.
Ultimately, a truly clean kitchen is one where every tool, including the most unassuming ones, is kept in optimal hygienic condition. Make these simple yet impactful sponge sanitization methods a consistent part of your routine. It’s a small effort with immense returns, safeguarding your family’s well-being and ensuring that your kitchen remains the heart of a healthy home.