
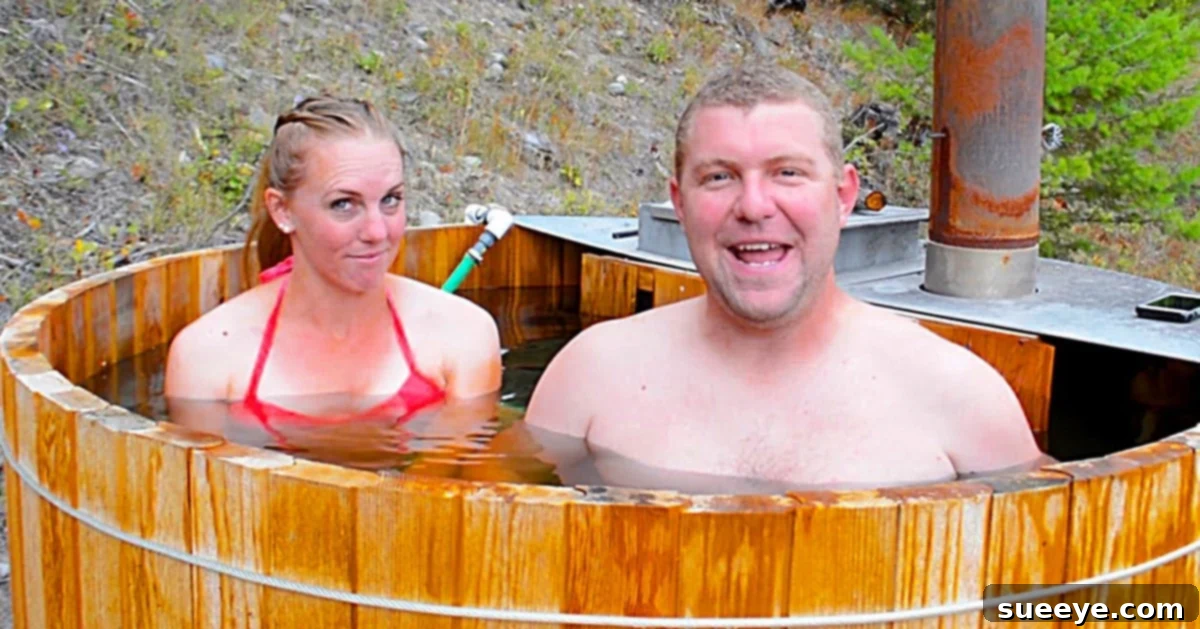
DIY Cedarwood Hot Tub: Craft Your Own Rustic Backyard Oasis
There’s an undeniable magic to an outdoor hot tub, especially after a long, demanding day. The simple act of submerging weary muscles into a vast pool of warm, swirling water offers an unparalleled sense of relaxation and rejuvenation. For many, including myself, the dream of having such a sanctuary becomes a tangible goal, a personal project to bring peace and tranquility right into the backyard. This dream felt even more attainable after discovering the exceptional video tutorial by Pure Living For Life on YouTube. What truly captivated me was the apparent simplicity and the sheer dedication demonstrated by the young couple in the video, who embarked on building their own “hillbilly hot tub” — a testament to self-sufficiency and resourcefulness.
This inspiring couple, having acquired five acres of untouched land, prioritized building their outdoor hot tub and a supporting deck even before constructing their main house. Their journey is a powerful narrative of passion, hard work, and an unwavering love for their land, capable of moving anyone who witnesses their efforts. Their project stands as a beacon for DIY enthusiasts everywhere, proving that with determination, a dream of a rustic, wood-fired hot tub can indeed become a beautiful reality. This guide aims to delve into the allure of such a project, providing insights into planning, materials, and the steps required to craft your very own cedarwood haven.
Why Build a DIY Wood-Fired Hot Tub? Embracing the Rustic Charm
Opting for a DIY wood-fired hot tub, particularly one crafted from cedar, offers a multitude of benefits that extend beyond mere relaxation. It’s a choice that reflects a desire for authenticity, sustainability, and a deep connection with nature. Here’s why this project is gaining immense popularity as a standout backyard addition:
- Cost-Effectiveness: Compared to pre-fabricated electric hot tubs that often come with hefty price tags, building your own can significantly reduce upfront costs. You invest in raw materials and your own labor, often saving thousands of dollars while gaining a customized, high-quality product.
- Authentic and Unique Experience: There’s something uniquely primal and deeply satisfying about heating your tub with a traditional wood fire. The gentle crackle of burning wood, the natural aroma of cedar, and the consistent, radiant warmth create an experience far removed from electric models. This fosters a true sense of connection to the outdoors and offers a serene, meditative soak.
- Sustainability and Off-Grid Potential: A purely wood-fired hot tub can operate entirely without electricity, making it an excellent option for remote properties, off-grid living, or simply reducing your household’s energy footprint. You harness readily available natural resources for heat, aligning perfectly with eco-conscious and sustainable lifestyle values.
- Customization and Personalization: Building it yourself means you dictate every aspect: the size, shape, depth, and specific features. You can design it to perfectly fit your available space, complement your existing outdoor aesthetic, and accommodate the exact number of users, ensuring it’s truly a bespoke backyard oasis tailored to your needs.
- Immense Sense of Accomplishment: The pride of stepping into a hot tub you’ve meticulously built with your own hands is an unparalleled feeling. It’s a tangible reward for your dedication and skill, fostering a deeper appreciation for your leisure space and boosting your confidence in DIY endeavors.
- Enhanced Health and Wellness Benefits: Beyond profound stress relief, hydrotherapy in a warm tub can effectively alleviate muscle soreness, improve circulation, and promote deeper, more restful sleep. The natural essence and warmth of cedarwood also contribute to a holistic sensory therapeutic experience.
- Timeless Aesthetic Appeal: Cedarwood, with its rich natural color variations, distinct grain patterns, and rustic charm, provides a beautiful and timeless aesthetic that complements almost any outdoor setting. It transforms your backyard into a visually stunning and inviting retreat.
Planning Your Dream Cedar Hot Tub Project: Essential Considerations
Before you begin gathering materials and cutting wood, meticulous planning is absolutely essential to ensure a successful, safe, and enjoyable build. Taking the time to consider these crucial aspects will save you time, money, and potential headaches down the line:
Site Selection and Preparation: The Foundation of Your Oasis
Choosing the right location is paramount. Look for a spot that offers ample privacy, good natural drainage, and is relatively level. Consider its proximity to your house for convenience (e.g., access to water), but also ensure it’s not too close to structures or flammable materials, especially given the presence of a wood stove. A solid, level foundation is critical for the stability and longevity of your hot tub. This could be a compacted gravel base, a poured concrete slab, or a robust, reinforced wooden deck, each offering different advantages in terms of cost and installation complexity.
Size, Shape, and Capacity: Tailoring Your Tub to Your Needs
Determine the ideal dimensions based on your available space and how many people you anticipate using the tub regularly. Traditional cedar tubs are often round due to the ease of constructing stave-based designs, but custom shapes are certainly possible with advanced carpentry skills. Consider the depth as well – will it be a shallower soaking tub designed for quick dips or a deeper vessel for full body immersion? Don’t forget to plan for comfortable, built-in benches if desired, which will occupy internal space.
Material Selection: The Enduring Qualities of Cedarwood
Cedarwood is the material of choice for traditional wooden hot tubs, and for excellent reasons. It boasts exceptional natural resistance to rot, decay, and insect infestation due to its inherent oils, making it ideal for constant moisture exposure. Furthermore, cedar is an excellent natural insulator, helping to retain heat efficiently and reduce fuel consumption for your stove. Its pleasant, aromatic scent, released when heated, also enhances the overall soaking experience. When sourcing cedar, opt for clear, knot-free lumber if possible, as knots can be points of weakness or potential leakage over time. Redwood and cypress are also viable alternatives with similar beneficial properties.
Heating System: Understanding the Wood Stove Heart
The heart of a “hillbilly” hot tub is its wood-fired stove, providing natural, radiant heat. These typically come in two main types: internal and external. Internal stoves sit directly within the tub, heating the water directly and often more efficiently, but they do occupy valuable soaking space. External stoves connect to the tub via circulation pipes, allowing for more room inside the tub and often easier refueling and ash management. Thoroughly research safety features, chimney requirements, and heat output to match your tub’s volume. Safety is paramount here; ensure proper installation and adequate clearance from all combustible materials to prevent fire hazards.
Comprehensive Materials List for Your DIY Cedar Hot Tub:
Here’s a comprehensive list of what you’ll need to gather for your cedarwood hot tub project, building upon the essential items highlighted in the inspirational video and incorporating best practices for a durable build:
- Cedarwood Planks: High-quality, kiln-dried cedar, typically 1.5 to 2 inches thick, for the staves (vertical walls) and bottom planks. Ensure you have enough linear feet based on your chosen dimensions, and it’s always wise to purchase a bit extra for potential mistakes or future repairs.
- Structural Wood for Base/Benches: Depending on your design and desired internal features, you might need additional cedar or pressure-treated lumber for a sturdy base frame, internal seating, or support structures.
- Stainless Steel Tension Bands/Airplane Cables: These are absolutely crucial for cinching the staves tightly together, creating the necessary compression for a watertight seal. Airplane cables (or similar high-strength metal banding) with robust turnbuckles or other tensioning mechanisms are ideal. You’ll typically need multiple bands (3-4 depending on the tub’s height) for uniform pressure.
- Wood Sealant/Finish: A marine-grade, non-toxic wood sealant or a natural oil (such as tung oil or linseed oil) specifically designed for outdoor wooden tubs. This step is vital to protect the wood from the elements, enhance its waterproofing capabilities, and ensure longevity.
- Hot Tub Wood Stove: A dedicated wood-fired hot tub heater, either an internal (submerged) or external unit, complete with a chimney, flue pipe, and all necessary connectors for water circulation.
- Drainage Valve and Plumbing: A heavy-duty brass or stainless steel drain valve with a spigot, plus any necessary piping and fittings for efficient and complete water drainage.
- Food-Grade Silicone Sealant: Crucial for ensuring watertight joints, particularly between the bottom planks and where the staves meet the base. Choose a sealant that is safe for prolonged water contact.
- Stainless Steel Fasteners: Screws, nails, or bolts made of stainless steel are essential for any structural connections, as they prevent rust, staining, and degradation in a moist environment.
- Gasket Material (Optional): For specific joints, a thin strip of gasket material or marine-grade caulk can provide an extra layer of leak prevention.
Essential Tools for a Successful DIY Hot Tub Build:
Having the right tools will make your construction process smoother, more precise, and ultimately safer:
- Circular Saw: Indispensable for making accurate and clean cuts on planks and staves. A miter saw or table saw can also be incredibly useful for precise angled and repetitive cuts.
- Router: Essential if you plan on creating tongue-and-groove joints or chamfered/rounded edges for a tighter fit and a more professional aesthetic finish.
- Drill/Impact Driver: A powerful corded or cordless drill, along with various drill bits for pilot holes and a robust impact driver for driving screws efficiently.
- Hammer & Mallet: A standard hammer for general use and a rubber mallet for gently tapping pieces into place without damaging the wood.
- Measuring Tape, Level, Square: Absolute necessities for ensuring accuracy, plumb lines, and perfectly level surfaces, which are critical for a watertight and stable tub.
- Clamps: Large bar clamps or durable strap clamps are invaluable for holding staves in place during initial assembly, ensuring they stay put until the tension bands are applied.
- Sandpaper/Orbital Sander: For smoothing rough edges and surfaces, preventing splinters, and preparing the wood for the sealant application, resulting in a comfortable and durable finish.
- Wrenches/Socket Set: Necessary for tightening the tensioning bands and securely connecting any plumbing or stove components.
- Safety Gear: Non-negotiable items include eye protection, hearing protection (especially when using power tools), sturdy gloves, and a dust mask to protect against wood dust and fumes.
Step-by-Step Construction: Bringing Your Vision to Life
While the excellent video tutorial by Pure Living For Life on YouTube offers a fantastic visual guide from start to finish, here’s a detailed breakdown of the general process involved in building your cedar hot tub, providing a solid framework for your project:
1. Prepare the Foundation and Site
Begin by meticulously ensuring your chosen site is perfectly level and has a solid, stable foundation capable of supporting the significant weight of a filled hot tub. This could be a compacted gravel base, a reinforced concrete pad, or a robust wooden deck. Crucially, establish proper drainage away from the tub area to prevent water pooling and potential damage to the surrounding landscape or tub base.
2. Construct the Tub Base (Floor)
Start by assembling the bottom of the tub. This typically involves fitting tongue-and-groove cedar planks together tightly. Apply a generous, continuous bead of food-grade silicone sealant in the grooves as you assemble each plank to enhance waterproofing. Secure these planks with stainless steel screws from below or within the base structure. At this stage, install the drain valve, ensuring a secure and leak-proof connection through the base.
3. Prepare and Assemble the Staves (Walls)
Cut your cedar planks into the individual staves that will form the vertical walls of your tub. Each stave will require precise angles cut along its edges to form the desired circular (or other) shape. Using a router to create interlocking tongue-and-groove joints or carefully beveled edges will result in a tighter, more robust, and more watertight seal. Begin standing the staves around the assembled base, holding them temporarily with strong straps or large clamps. A common technique is to assemble roughly half the staves, install them around the base, and then progressively add the remaining staves to complete the full circle.
4. Install the Tensioning Bands
Once all the staves are meticulously in place and forming a complete circle, carefully wrap the stainless steel bands or airplane cables around the exterior of the tub. Position them evenly – typically one near the bottom, one in the middle, and one near the top, ensuring they apply uniform pressure. Use the turnbuckles or other tensioning mechanisms to gradually tighten these bands. This crucial process draws the staves together, compressing them to create a strong, watertight seal. Tighten incrementally and uniformly to avoid warping the tub or creating uneven stress points.
5. Integrate the Wood Stove System
Install your chosen wood-fired hot tub stove meticulously according to the manufacturer’s instructions. If it’s an internal stove, carefully position it within the tub, ensuring proper clearances from the wood staves and adequate space for water circulation. For an external stove, connect it via appropriate heat-resistant plumbing to circulate water in and out of the tub. Install the chimney securely, ensuring it extends to a safe height above any surrounding structures and well away from any ignitable materials. Safety is paramount during this step; double-check all connections and clearances.
6. Apply Sealing and Finishing Touches
Apply your chosen wood sealant or natural oil to all exterior surfaces of the tub, and potentially the interior above the waterline, strictly following the product instructions. This step is crucial for protecting the wood from the elements, enhancing its water resistance, and ensuring the tub’s longevity. You might also want to lightly sand any rough edges inside the tub for maximum comfort during soaking. At this stage, construct and install any internal cedar benches, securing them firmly to the staves.
7. The First Fill and Curing Process
Slowly fill your newly constructed hot tub with water. As the cedarwood absorbs water, it will naturally expand and swell, further tightening the joints and sealing any minuscule gaps that might exist. This “curing” process is absolutely essential for creating a truly watertight tub. During this initial fill, carefully monitor for any leaks and be prepared to re-tighten the tension bands incrementally if necessary over the first few days or even weeks as the wood stabilizes. Once full and deemed watertight, you can carefully light your wood stove and begin the heating process, savoring the anticipation of your very first blissful soak.
Safety and Maintenance for Your Wood-Fired Hot Tub: Ensuring Lasting Enjoyment
Owning a wood-fired hot tub brings unique responsibilities, particularly concerning safety and consistent maintenance. Prioritizing these aspects will ensure years of enjoyable, worry-free use:
- Wood Stove Safety: Always operate the wood stove responsibly. Ensure proper ventilation around the stove and chimney, never leave a fire unattended, and maintain generous clearance between the stove, chimney, and any flammable materials. Be acutely mindful of carbon monoxide risks; consider installing a CO detector in the vicinity of the hot tub.
- Water Quality Management: Even without complex chemical filtration systems, basic water hygiene is crucial. Drain and refill the tub regularly, especially if it’s used frequently. For extended periods between refills, consider natural water purification methods like ozone generators or UV sterilizers, or even a small, robust filter to keep the water cleaner without relying on harsh chemicals.
- Wood Maintenance: Periodically inspect the cedar for any signs of wear, rot, mold, or algae growth. Reapply wood sealant or natural oil as needed, typically every 1-2 years depending on exposure and product type, to protect the wood from UV damage and moisture ingress, thus maintaining its structural integrity and aesthetic appeal.
- Tension Band Checks: Over time, wood can naturally expand and contract with changes in temperature and humidity. Regularly check the tension bands around your tub and tighten them if they feel loose. This maintains the tub’s structural integrity, prevents potential leaks, and keeps the staves tightly compressed.
- Winterization (if applicable): If you live in a freezing climate and do not plan to use the tub during winter months, it is absolutely essential to drain it completely. Ensure no water remains in the stove, pipes, or any other components to prevent freezing, expansion, and severe damage.
- Supervision and Responsible Use: As with any hot tub, always supervise children and individuals who are new to hot tub use. Be aware of safe soaking times and recommended temperature limits to prevent overheating or other health risks.
The Enduring Inspiration of Pure Living For Life
Revisiting the Pure Living For Life video, what truly stands out is the incredible energy, determination, and visionary spirit of the young couple. They didn’t just build a hot tub; they built a foundational element of their burgeoning off-grid dream, a powerful testament to living purposefully, independently, and in harmony with nature. Their project underscores the immense satisfaction that comes from creating something substantial with your own hands, especially when it directly contributes to a lifestyle you deeply cherish.
The time-lapse footage in their video beautifully captures the painstaking effort and the profoundly rewarding journey from raw materials to a fully functional, gorgeous hot tub. The culmination of their hard work, seen as they finally relax and share a celebratory toast in their hand-built oasis, is genuinely heartwarming and deeply inspiring. It’s a powerful reminder that with a clear vision, meticulous planning, and unwavering commitment, even ambitious DIY projects are well within reach. Their story is more than just a practical tutorial; it’s an inspiring example of building a life, one thoughtful, sustainable project at a time.
Embrace the DIY Spirit: Your Own Backyard Retreat Awaits
Building your own cedarwood hot tub is far more than just a construction project; it’s a significant investment in your personal well-being, your connection to nature, and your profound sense of accomplishment. It’s a unique opportunity to create a truly bespoke backyard oasis, a personal retreat where you can unwind, reflect, and enjoy the simple, yet profound, luxury of warm water under the open sky, far from the stresses of daily life.
The entire journey, from gathering the raw materials and engaging in meticulous planning, through the satisfying stages of assembly, to the ultimate reward of the first relaxing soak, is deeply gratifying. Embrace the challenge, draw valuable inspiration from pioneers like the Pure Living For Life couple, and know that with careful planning, dedicated effort, and a willingness to learn, you too can craft a beautiful, sustainable, and utterly relaxing wood-fired hot tub. Your dream of a rustic, peaceful sanctuary is just a well-executed build away – ready to provide countless moments of blissful escape and cherished memories for years to come.