
DIY Windshield Repair: A Simple Guide to Fixing Chips and Cracks at Home
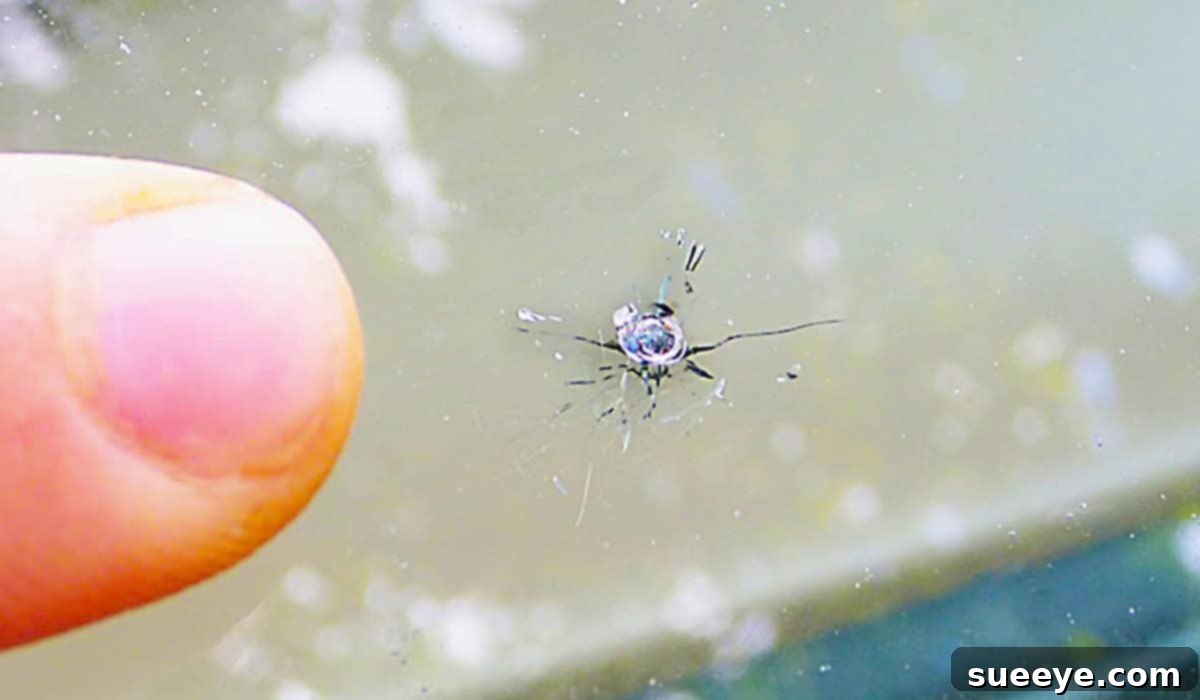
There’s nothing quite as frustrating as driving along, minding your own business, when a small pebble from the road ahead suddenly strikes your windshield. The immediate result: a tiny impact point that quickly blossoms into a dreaded “spider crack” or star-shaped chip. That familiar sinking feeling in your stomach quickly follows, often accompanied by the thought of an expensive full windshield replacement. Many assume that a small ding inevitably leads to a costly trip to the auto glass shop. However, this doesn’t have to be your reality. With the right approach and a little patience, you can effectively repair minor windshield damage yourself, saving significant money and maintaining your vehicle’s original glass integrity.
This comprehensive guide will walk you through the surprisingly simple process of DIY windshield repair, allowing you to tackle those annoying chips and cracks before they escalate into bigger, more hazardous problems. We’ll explore the ‘why’ and ‘how’ of home repair, providing detailed instructions, essential tips, and a list of materials you’ll need to achieve professional-looking results right from your driveway.
Why Repair Your Windshield Promptly?
Addressing windshield damage immediately offers multiple benefits beyond just aesthetics:
- Prevents Further Damage: Small chips and cracks are highly susceptible to spreading. Temperature fluctuations, road vibrations, and even washing your car can cause minor damage to grow rapidly into larger, irreparable cracks. Early intervention seals the damage, preventing its expansion.
- Cost Savings: A professional windshield replacement can cost hundreds of dollars, sometimes more, depending on your vehicle’s make and model, and whether it has advanced driver-assistance systems (ADAS) requiring recalibration. A DIY repair kit, on the other hand, typically costs less than $20-$30, offering substantial savings.
- Maintains Structural Integrity: Your car’s windshield is a crucial structural component, providing up to 45% of the cabin’s structural integrity in a frontal collision and preventing the roof from caving in during a rollover. A damaged windshield compromises this safety feature. Repairing it restores its strength.
- Restores Visibility: Even small chips can be distracting, especially when sunlight glares off them, impairing your view of the road. Repairing them ensures clear, unobstructed vision.
- Eco-Friendly Choice: Repairing instead of replacing reduces waste, keeping old windshields out of landfills.
- Preserves Original Seal: Keeping your factory-installed windshield ensures the original seal remains intact, which is generally superior to aftermarket seals in preventing leaks and maintaining structural integrity.
Understanding Windshield Damage: When to Repair vs. Replace
Not all windshield damage is repairable. It’s important to understand the limitations of DIY kits:
- Repairable Damage: Generally, chips smaller than a quarter (about 1 inch in diameter) and single cracks up to 3 inches long are good candidates for DIY repair. Star breaks, bullseyes, combination breaks, and spiderweb cracks within these size limits are often fixable.
- When Replacement is Necessary:
- Cracks longer than 3 inches.
- Damage directly in the driver’s primary line of sight that cannot be fully disguised by repair.
- Cracks that reach the edge of the windshield (these compromise the structural integrity more significantly).
- Multiple chips or extensive damage across the glass.
- Deep damage that penetrates both layers of the laminated glass.
If your damage falls into the “replace” category, it’s always best to consult a professional auto glass technician. For everything else, a DIY repair kit can be your hero.
Essential Materials for a Successful Windshield Repair
Before you begin, gather these simple and affordable materials. Most items, particularly the specialized tools, will come conveniently bundled in a basic windshield repair kit, readily available at any auto parts store or online retailer.
- A Microfiber Towel: Essential for lint-free cleaning of the affected area. Any residue can compromise the repair.
- Rubbing Alcohol (Isopropyl Alcohol): Used to thoroughly clean and degrease the windshield surface around the chip or crack. This ensures the repair resin adheres properly without contamination.
- A Safety Pin or Push Pin: Crucial for carefully clearing any loose glass fragments, dirt, or debris from the center of the chip. A clean cavity is paramount for the resin to penetrate effectively.
- A Basic Windshield Repair Kit: This all-inclusive kit is the heart of your DIY repair. While contents may vary slightly by brand, a typical kit will contain:
- Resin Injector/Applicator: A device that uses suction cups to adhere to the windshield, creating a sealed chamber over the damage. It then allows you to inject the specialized repair resin under pressure.
- Repair Resin: A clear, viscous liquid polymer designed to fill the chip or crack. It has a similar refractive index to glass, making the repair virtually invisible once cured. It cures and hardens when exposed to ultraviolet (UV) light.
- Curing Strips (or Mylar Films): Small, clear plastic strips placed over the resin after injection to keep it contained and allow it to cure evenly under UV light.
- Razor Blade: Used to carefully scrape away any excess hardened resin from the windshield surface once the repair is complete.
- Cleaning Wipe/Pad: Sometimes included for pre-cleaning.
- Instructions: Always refer to the specific instructions provided with your chosen kit, as procedures can vary slightly between manufacturers.
When selecting a kit, look for reputable brands and read reviews to ensure you’re getting a quality product. The effectiveness of your repair largely depends on the quality of the resin and the precision of the applicator.
Step-by-Step DIY Windshield Repair Guide
With your materials ready, let’s dive into the repair process. For a visual demonstration, consider watching a video tutorial, like the highly recommended one by Chris Fix on YouTube, which simplifies the steps significantly.
Step 1: Preparation and Cleaning
- Park in the Shade: Avoid direct sunlight during the initial application phase, as the resin can start to cure prematurely. Once the resin is applied, you will need sun for curing, but not yet.
- Clean the Damaged Area: Thoroughly wipe the area surrounding the chip or crack with rubbing alcohol and a microfiber towel. Ensure it’s completely free of dirt, dust, wax, or any other contaminants. Let it dry completely.
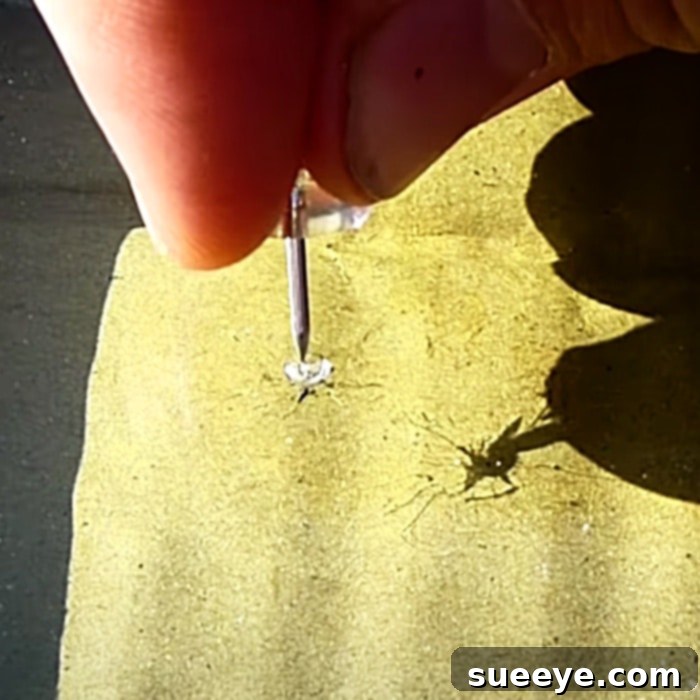
- Clear Debris from the Chip: Carefully use a safety pin or push pin to remove any loose glass shards or debris from the very center of the impact point. This step is crucial for allowing the repair resin to fully penetrate the damage. Be gentle to avoid creating further damage.
- Ensure Dryness: The windshield must be completely dry before applying the repair kit. Any moisture trapped in the crack will prevent proper adhesion.
Step 2: Attaching the Applicator and Injecting the Resin
- Assemble the Applicator: Follow your kit’s instructions to assemble the resin injector or applicator bridge. This usually involves attaching suction cups to a bracket.
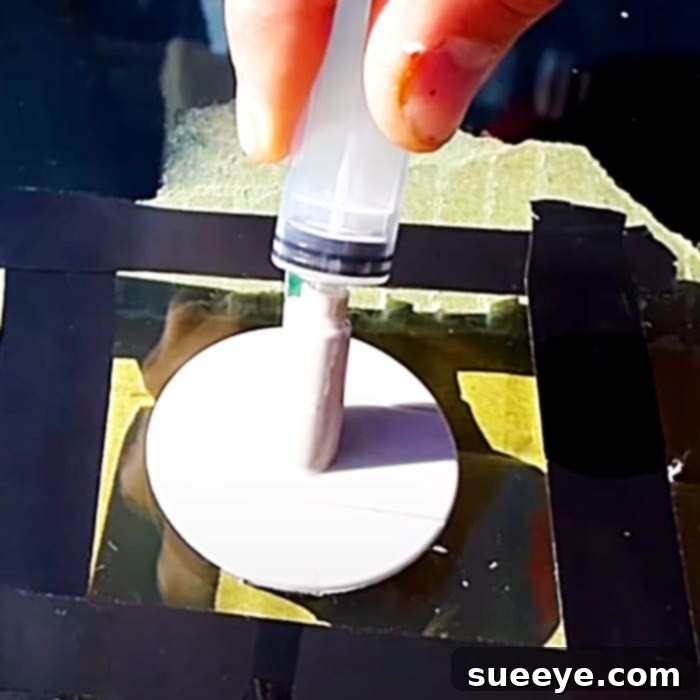
- Position the Applicator: Carefully center the applicator’s hole directly over the exact middle of the chip or the leading edge of the crack. Firmly press down on the suction cups to create a secure seal on the windshield. The goal is to create a closed chamber directly above the damage.
- Add the Repair Resin: Open the resin bottle and carefully dispense the specified amount (usually several drops, or enough to fill the chamber) directly into the applicator’s chamber. Avoid overfilling.
- Create Pressure and Vacuum Cycles: This is the most critical part. Attach the plunger or syringe to the applicator.
- Vacuum Phase: Pull the plunger up to create a vacuum within the chamber. This action helps to draw out any trapped air or moisture from the crack. Hold it for several minutes. You might see air bubbles rising.
- Pressure Phase: Push the plunger down to create pressure, forcing the resin deep into the tiny fissures of the chip or crack. Hold it for several minutes. Repeat these vacuum and pressure cycles multiple times (typically 5-10 minutes each) as per your kit’s instructions. Patience here is key to ensure the resin fully permeates the damage.
Step 3: Curing the Resin
- Remove the Applicator: Once you’ve completed the pressure/vacuum cycles and the damage appears filled, carefully remove the entire applicator assembly from the windshield.
- Apply Curing Strips: Immediately apply a small drop of additional resin directly onto the surface of the chip/crack, ensuring it covers the repair completely. Then, place a curing strip (or Mylar film) firmly over the fresh resin, pressing out any air bubbles from underneath. This creates a smooth, flat surface for curing.
- Cure with UV Light: Move your vehicle into direct sunlight. The UV rays from the sun will activate and harden the resin. Allow it to cure for at least 15-30 minutes, or longer in cooler, overcast conditions (some kits recommend up to an hour). If your kit includes a UV lamp, follow its specific curing time. The resin must be completely hardened.
Step 4: Finishing Touches
- Remove Curing Strips: Once the resin is fully cured and hard to the touch, carefully peel off the curing strips.
- Scrape Excess Resin: Hold the razor blade at a shallow angle (almost flat against the glass) and gently scrape away any excess hardened resin from the windshield surface. Be careful not to scratch the glass. This will leave a smooth, virtually invisible repair.
- Inspect the Repair: Examine the repaired area. While not every repair will disappear completely, a successful fix significantly reduces the visibility of the chip or crack and prevents it from spreading. The surface should be smooth to the touch.
Tips for a Flawless DIY Windshield Repair
- Act Fast: The sooner you repair a chip, the better the results. Dirt and moisture can get into the crack, making it harder to achieve a clear repair.
- Temperature Matters: Perform repairs in moderate temperatures (around 50-75°F or 10-24°C). Extreme heat can cure the resin too quickly, while extreme cold can prevent it from flowing properly.
- Cleanliness is Paramount: Any dust, oil, or debris will compromise the bond and clarity of the repair. Take your time cleaning the area.
- Patience, Not Haste: Don’t rush the process, especially the pressure/vacuum cycles and curing time. These steps are crucial for the resin to fully penetrate and harden correctly.
- Avoid Direct Sunlight Initially: As mentioned, direct sun during application can pre-cure the resin. Work in the shade until it’s time to cure.
- Read Kit Instructions: Always follow the specific instructions provided with your repair kit, as formulations and applicator designs can vary.
Conclusion
A small rock chip on your windshield doesn’t have to ruin your day or your budget. With a readily available, inexpensive DIY windshield repair kit and a little attention to detail, you can effectively fix minor damage yourself. This simple method not only saves you significant money compared to a full windshield replacement but also helps maintain your vehicle’s safety, structural integrity, and clear visibility. By acting quickly and following these steps, you can prevent minor damage from becoming a major, costly problem, ensuring your ride stays safe and pristine for years to come. Don’t let a tiny ding give you that sinking feeling – empower yourself to fix it!