
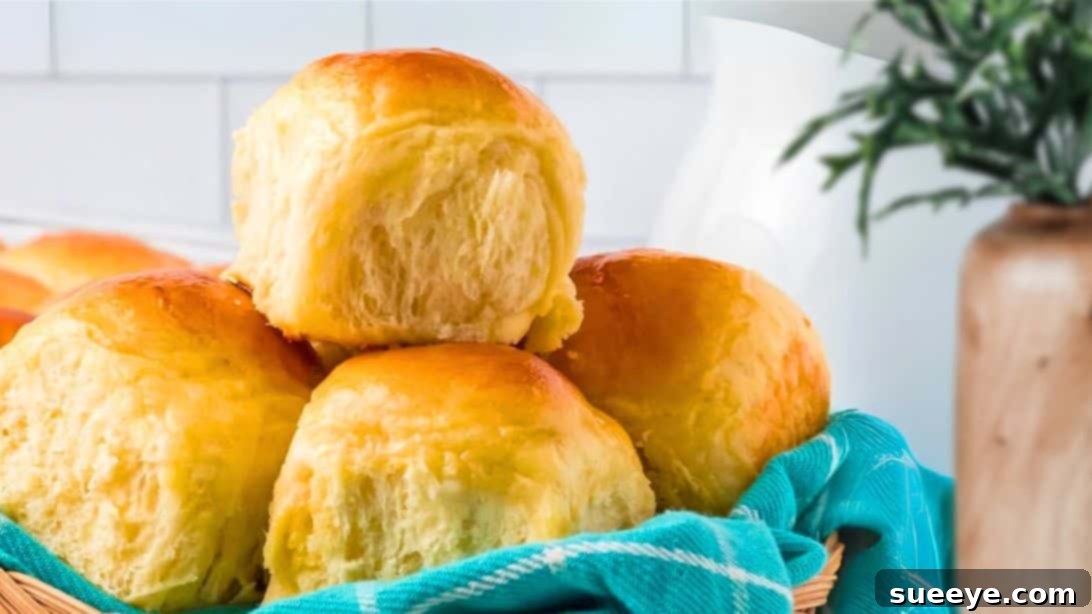
Irresistibly Soft Hawaiian Sweet Rolls: Your Ultimate Guide to Homemade Perfection
Imagine your kitchen filling with the warm, inviting aroma of freshly baked bread. Now, picture that bread as incredibly soft, subtly sweet, and wonderfully buttery – that’s the magic of homemade Hawaiian sweet rolls. These delightful treats are a true crowd-pleaser, boasting a tender texture and a unique flavor profile that makes them stand out from ordinary dinner rolls. Perfect for any meal or occasion, they’re surprisingly easy to master, even for those new to baking. With this comprehensive guide, you’ll learn how to create rolls that are so consistently perfect, they’ll become a staple in your home.
Our recipe simplifies the process, ensuring a smooth baking journey from start to finish. We’ll guide you through each step, from mixing the dough to achieving that beautiful golden-brown finish. What truly sets these rolls apart is the clever addition of crushed pineapple, which not only infuses them with a tropical hint but also contributes to the dough’s incredible moisture and ease of handling. Once you experience the unparalleled taste and texture of these homemade Hawaiian sweet rolls, you’ll wonder why you ever bought them from the store.
Why You’ll Fall in Love with Homemade Hawaiian Sweet Rolls
There are countless reasons why Hawaiian sweet rolls have captured hearts worldwide, and making them from scratch elevates the experience to a whole new level:
- Unmatched Freshness: Nothing compares to the taste and aroma of rolls straight from your oven. The freshness is simply undeniable.
- Perfect Texture: These rolls are renowned for their pillowy softness and delicate chewiness, making them melt in your mouth with every bite.
- Versatile Flavor: The subtle sweetness and hint of tropical pineapple make these rolls incredibly versatile. They pair beautifully with savory dishes, complement breakfast spreads, and can even be transformed into delectable desserts.
- Rewarding Experience: Baking can be a wonderfully therapeutic and satisfying activity. Watching your dough rise and transform into these golden masterpieces is incredibly rewarding.
- Simple for Beginners: Despite their impressive appearance, the process for making Hawaiian sweet rolls is quite straightforward, relying on simple techniques that even novice bakers can confidently follow.
Get ready to impress your family and friends with these magnificent rolls that are sure to become a cherished recipe in your culinary repertoire.
Essential Ingredients for Perfectly Buttery Hawaiian Sweet Rolls
The beauty of these rolls lies in a combination of simple, readily available ingredients that work harmoniously to create their signature taste and texture. Each component plays a crucial role in achieving that perfect balance of sweetness, richness, and softness. Understanding their function will help you appreciate the magic unfolding in your mixing bowl.
- Warm Milk (1/2 cup): Provides the liquid base for our dough and, crucially, helps activate the yeast. Ensure it’s warm (around 105-115°F or 40-46°C) – too hot will kill the yeast, too cold will hinder its activity.
- Crushed Pineapple (2/3 cup): This is the secret ingredient! Beyond contributing a subtle tropical flavor, the pineapple’s acidity helps tenderize the gluten in the flour, resulting in a softer, more pliable dough. It also adds moisture, keeping the rolls fresh longer.
- Yeast (1 tablespoon): The leavening agent that makes our rolls rise and become wonderfully airy. Instant or active dry yeast can be used; if using active dry, you might proof it in the warm milk first.
- Brown Sugar (1/4 cup): Adds a beautiful caramel-like sweetness and helps to tenderize the dough. Brown sugar also contributes to the rich golden-brown color of the crust and helps retain moisture.
- Salt (1 teaspoon): Essential for enhancing the overall flavor of the rolls and balancing the sweetness. It also helps to control yeast activity and strengthen the gluten structure.
- Softened Butter (4 tablespoons, plus 1 tablespoon for brushing): Incorporating butter into the dough contributes immense richness, flavor, and tenderness. Softened butter blends more easily into the dough. The melted butter brushed on top after baking provides a glossy finish and an extra layer of delicious buttery taste.
- Egg (1 large): Adds richness, helps with emulsification, contributes to the beautiful golden color of the crust, and provides structural support to the dough, making it more tender and light.
- All-Purpose Flour (3 cups, plus more as needed): The primary structural component of the rolls. Using all-purpose flour provides a good balance of protein for chewiness and starch for tenderness. Having extra on hand is important for adjusting the dough’s consistency.
These humble ingredients, when combined with care and attention, transform into truly extraordinary Hawaiian sweet rolls.
Step-by-Step Hawaiian Sweet Rolls Recipe: A Journey to Fluffy Perfection
Embark on your baking adventure with confidence. This detailed recipe breaks down the process into simple, manageable steps, ensuring delicious results every time. Remember, baking is a joyful process, so take your time and enjoy creating these wonderful rolls.
Step 1: Combining the Wet and Dry Ingredients
In the spacious bowl of your stand mixer, begin by adding the warm milk, crushed pineapple (undrained, to maximize flavor and moisture), the yeast, brown sugar, salt, the four tablespoons of softened butter, the egg, and finally, the initial three cups of all-purpose flour. It might seem like a lot at once, but trust the process. Using a stand mixer with a dough hook attachment will make this initial mixing phase incredibly easy and efficient.
Step 2: Mixing and Developing the Dough
Attach the dough hook to your stand mixer and start mixing on a low speed. Allow the ingredients to come together gradually until they form a shaggy, cohesive mass. This initial stage is crucial for hydrating the flour and beginning the gluten development. Once the ingredients are roughly combined, increase the speed to medium. Continue to mix, observing the dough’s consistency. The goal is a dough ball that is somewhat sticky but no longer adheres stubbornly to your fingers or the sides of the bowl. If the dough appears too wet and sticky, add a little more flour, one tablespoon at a time, allowing it to incorporate fully before adding more. Avoid adding too much flour, as this can result in tough rolls. The dough should be soft, supple, and slightly tacky to the touch, indicating proper hydration and gluten development.
Step 3: The First Rise – Proofing for Volume and Flavor
Once your dough has reached the desired consistency, lightly grease a large bowl with a neutral oil or cooking spray. Transfer the dough ball into the greased bowl, turning it once to ensure the entire surface is lightly coated. This prevents the dough from sticking as it rises. Cover the bowl snugly with a clean tea towel or plastic wrap. Place the covered bowl in a warm, draft-free spot in your kitchen. This provides the ideal environment for the yeast to work its magic. Let the dough rise for approximately one hour, or until it has visibly doubled in size. This first rise, also known as bulk fermentation, is crucial for developing the flavor and texture of your rolls.
Step 4: Shaping Your Hawaiian Sweet Rolls
Gently punch down the risen dough to release the accumulated gases. This step helps create a finer, more even crumb. Turn the dough out onto a lightly floured, smooth surface. To achieve uniformly sized rolls, which not only look professional but also bake evenly, it’s highly recommended to use a kitchen scale. Divide the dough into twelve equal portions, each weighing approximately 2.5 ounces (about 70-75 grams). Take each portion and, using your hands, roll it into a smooth, round ball. The goal is to create a taut surface on the outside of the ball, which helps the rolls maintain their shape during the second rise and baking. Ensure your surface is lightly floured to prevent sticking, but avoid over-flouring, which can dry out the dough.
Step 5: The Second Rise – Preparing for the Oven
Lightly grease a 9×13-inch baking pan. Carefully arrange the shaped dough balls in the prepared pan, leaving a small amount of space between each one. They will expand during this second rise and again in the oven, so don’t crowd them too much. Once all the rolls are in the pan, cover them again with a clean tea towel. Return the pan to a warm, draft-free location for the second rise, also known as proofing. Allow them to rise for another hour, or until they have doubled in size and look visibly puffy. This second rise is crucial for achieving that characteristic light and airy texture. While they are rising, you can begin preheating your oven.
Step 6: Baking to Golden Perfection and Finishing Touch
Preheat your oven to 375°F (190°C). Once preheated and your rolls have completed their second rise, carefully place the pan into the preheated oven. Bake for 12 to 15 minutes. Keep an eye on them; they are done when their tops are a beautiful light golden brown and they sound hollow when tapped lightly. Baking times can vary slightly depending on your oven, so trust your eyes and nose! As soon as the rolls come out of the oven, while they are still hot, immediately brush the tops with one tablespoon of melted butter. This simple step adds an extra layer of rich flavor, a lovely sheen, and helps keep the crust soft. Let the rolls cool slightly in the pan before serving warm.
Serving Suggestions and Culinary Pairings
The versatility of Hawaiian sweet rolls is one of their most appealing features. While absolutely divine on their own, they truly shine when paired with a variety of dishes:
- Breakfast Bliss: Serve them warm with scrambled eggs, crispy bacon, and a slice of cheese for a delightful morning meal. They are also fantastic for making French toast, absorbing the custard beautifully for an extra fluffy treat.
- Lunchtime Favorites: Their soft texture makes them ideal for sliders. Fill them with pulled pork, ham and cheese, or mini burgers for a crowd-pleasing lunch or party appetizer. They also make excellent small sandwiches for kids’ lunchboxes or a light picnic.
- Dinner Companions: These rolls are the perfect complement to a hearty dinner. Their sweetness balances savory roasts, grilled chicken, or even a robust chili. Use them to sop up delicious gravies and sauces.
- Sweet Endings: While not overly sweet, their subtle sugar content makes them suitable for dessert. Serve them with a fruit compote, a dollop of whipped cream, or simply a spread of your favorite jam.
Storage Tips for Maintaining Freshness
To enjoy your homemade Hawaiian sweet rolls at their best, proper storage is key:
- Room Temperature: Store cooled rolls in an airtight container or a resealable plastic bag at room temperature for up to 2-3 days.
- Refrigeration: While refrigeration can sometimes dry out bread, if you need to extend their shelf life slightly, store them in an airtight container in the refrigerator for up to 5 days.
- Freezing for Longer: For longer storage, freeze cooled rolls in a freezer-safe bag or container for up to 2-3 months. Thaw at room temperature and reheat gently in the oven or microwave for that fresh-baked taste.
Frequently Asked Questions (FAQs) About Hawaiian Sweet Rolls
Baking is full of questions, and we’re here to help you navigate them for perfect Hawaiian sweet rolls every time.
Can I use fresh pineapple instead of crushed?
While crushed pineapple is recommended for its consistent moisture and fine texture which blends seamlessly into the dough, you technically could use very finely minced fresh pineapple. However, fresh pineapple contains enzymes that can sometimes interfere with gluten development, potentially leading to a slightly tougher dough. If you opt for fresh, ensure it’s extremely finely chopped to avoid large chunks in the rolls.
What if my dough isn’t rising?
Several factors can affect dough rising. Ensure your yeast is fresh and active – expired yeast won’t work. The milk temperature is also critical; it should be warm (105-115°F), not too hot (which kills yeast) or too cold (which inhibits it). Your rising environment also needs to be warm and draft-free. If your kitchen is cool, try placing the covered bowl in a slightly warmed (but turned off) oven or near a sunny window. Give it enough time; sometimes dough just needs a little longer.
Can I make these rolls ahead of time?
Absolutely! You can prepare the dough up to the end of the first rise (Step 3). After the first rise, punch down the dough, shape the rolls, and place them in the greased baking pan. Instead of letting them rise for the second hour, cover the pan tightly with plastic wrap and refrigerate overnight (up to 24 hours). The next morning, remove the pan from the refrigerator and let the rolls come to room temperature and complete their second rise (which might take 1.5-2 hours) before baking as directed.
How can I ensure my rolls are extra fluffy?
The key to fluffy rolls lies in proper hydration, adequate kneading, and sufficient rising. Don’t add too much extra flour during mixing; a slightly sticky dough yields softer rolls. Ensure thorough kneading to develop the gluten, but don’t overmix. Most importantly, allow the dough to complete both rises fully. A warm, humid environment for rising helps maintain moisture and promotes a light texture.
Can I use a different type of flour?
All-purpose flour is ideal for these rolls, providing a good balance of structure and tenderness. Bread flour could be used for a slightly chewier roll, as it has a higher protein content. Whole wheat flour can be substituted for a portion of the all-purpose flour (e.g., 1 cup whole wheat to 2 cups all-purpose) for a healthier option, but be aware that it will result in a denser roll and may require slightly more liquid.
Conclusion: Enjoy Your Homemade Delights!
Baking homemade Hawaiian sweet rolls is a rewarding experience that fills your home with incredible aromas and your table with irresistible treats. With this detailed guide, even beginners can confidently create soft, buttery, and perfectly sweet rolls every time. Whether for a special occasion or simply to elevate an everyday meal, these rolls are sure to become a cherished favorite. So, gather your ingredients, follow these steps, and get ready to enjoy the ultimate comfort of homemade perfection. Happy baking!