
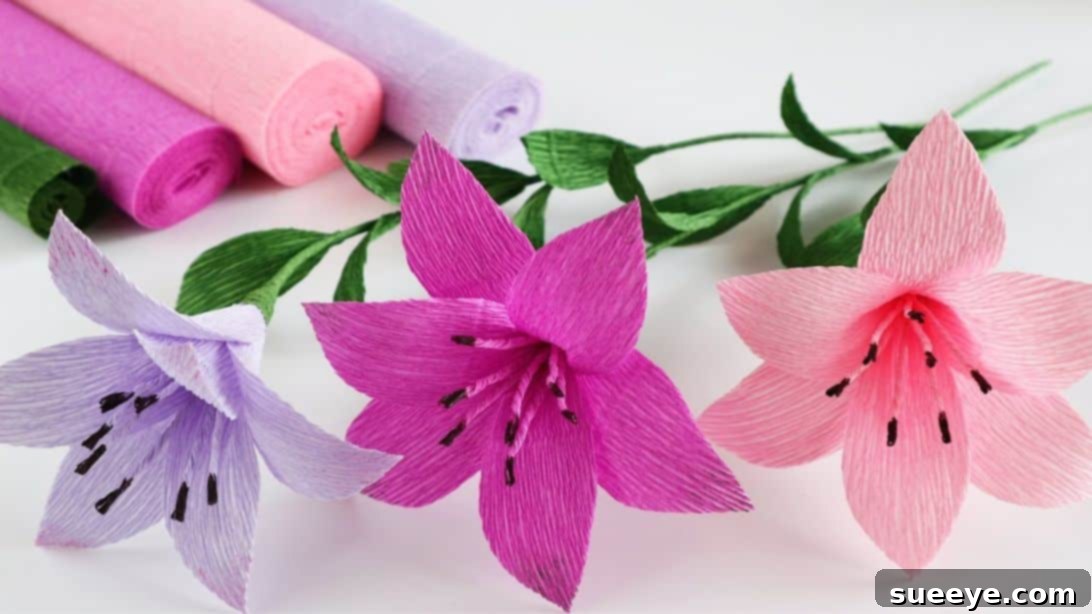
Craft Exquisite Crepe Paper Lily Flowers: Your Ultimate DIY Guide
Embarking on a creative journey, especially one that brings joy and beauty into your home, is always a rewarding experience. I was recently on the lookout for a captivating pastime project that I could share with my children, something that would spark their creativity and result in a tangible, beautiful creation. That’s when I stumbled upon the truly enchanting DIY lily crepe paper flowers tutorial by Amazing Super Craft. From the moment I saw them, I was utterly captivated by their elegance and charm. These aren’t just any paper flowers; they possess a lifelike quality and a delicate beauty that truly stands out.
The inspiration was immediate, and the excitement in our household was palpable. We quickly gathered the necessary materials, eager to transform simple sheets of crepe paper into a vibrant bouquet of lilies. The children, as expected, were thrilled at the prospect of choosing their favorite colors, which, predictably, led to us crafting a delightful assortment of lilies in various hues. We made them in a riot of colors—soft pinks, sunny yellows, pristine whites, and even bold purples—each one a testament to our shared creativity. Arranging them in vases around the house, watching them breathe new life into every corner, brought an immense sense of satisfaction. The final display was beyond our expectations, and the genuine, radiant smiles on my children’s faces as we admired our finished collection were truly priceless. This project isn’t just about making flowers; it’s about creating cherished memories, fostering artistic expression, and celebrating the simple joy of crafting together.
Why Choose Crepe Paper for Your DIY Flowers?
Crepe paper is an exceptional medium for crafting realistic and stunning paper flowers, especially when aiming for delicate details and vibrant colors like those found in lilies. Its unique texture, with fine wrinkles and stretchability, allows it to be shaped, curled, and manipulated to mimic the natural curves and folds of real flower petals. Unlike regular paper, crepe paper has a wonderful elasticity that enables you to gently stretch and cup the petals, giving them a three-dimensional, lifelike appearance that flat paper simply cannot achieve. This characteristic is particularly crucial for flowers like lilies, which possess elegantly curved petals.
Furthermore, crepe paper is available in an incredible spectrum of colors, from subtle pastels to rich, deep tones, offering endless possibilities for customization. This variety ensures that you can create lilies in any shade imaginable, perfect for matching specific decor, seasonal themes, or personal preferences. It’s also relatively inexpensive and widely accessible, making it an ideal choice for a budget-friendly yet highly impactful craft project. Working with crepe paper encourages fine motor skills, precision, and an eye for detail, making it an excellent material for both adult crafters and children learning to explore their artistic side.
Materials You’ll Need:
Before diving into the creative process of making your beautiful crepe paper lilies, it’s essential to gather all the necessary tools and supplies. Having everything at hand will ensure a smooth and enjoyable crafting experience.
- Crepe Paper: You’ll need two distinct colors – one for the vibrant petals of your lily flower (choose your favorite shade like white, pink, yellow, or orange) and a lovely shade of green for the realistic leaves and stem wrap. Opt for high-quality crepe paper, as it stretches better and holds its shape more effectively, contributing to a more professional finish for your DIY crepe paper lilies.
- Sharp Scissors: A good pair of sharp craft scissors is crucial for clean, precise cuts. This is especially important when shaping the delicate curves of the petals and leaves, ensuring smooth edges that enhance the overall realism of your handmade flowers.
- Hot Glue Gun and Glue Sticks: A hot glue gun is indispensable for quickly and securely assembling your flower. The fast drying time of hot glue allows for efficient construction, holding the petals and other components firmly in place. Always exercise caution when using a hot glue gun, especially if crafting with children.
- Marker: A black or dark brown marker will be used to add detail to the stamens, giving them a more authentic appearance, mimicking the pollen-dusted tips of real lily stamens.
- Thread: A sturdy thread, preferably in a neutral color like white or green, will be used to securely bind the stamens and attach the flower head to the wire stem. This provides a strong, discreet connection before the stem is fully wrapped.
- Green Floral Wire: This forms the sturdy yet flexible stem of your lily. Choose a gauge that is robust enough to support the flower head but still malleable enough to shape as desired. Floral wire can be found in various thicknesses; a medium gauge (around 18-22 gauge) is usually ideal for crepe paper flowers of this size.
Step-by-Step Instructions to Create Your DIY Crepe Paper Lily Flowers:
Follow these detailed steps carefully to craft your stunning crepe paper lilies. Each stage is designed to be straightforward, ensuring beautiful results even for beginner crafters.
Step 1: Preparing Your Petals
Begin by cutting six rectangular pieces of your chosen flower-colored crepe paper. Each piece should measure approximately 1.6 inches (4 cm) in width and 3.95 inches (10 cm) in length. These dimensions are carefully selected to create petals that are adequately sized for a realistic lily bloom. Precision in this initial cutting step is important for uniform petals. You might consider making a small cardboard template to ensure all six pieces are exactly the same size, which will contribute significantly to the symmetry and beauty of your finished DIY crepe paper flower.
Step 2: Shaping the Petals
Take one of your rectangular crepe paper pieces and fold it neatly in half lengthwise. With the folded edge as your guide, carefully cut a gentle curve along the unfolded side, starting from the top and tapering down towards the bottom. The goal is to create a graceful, elongated petal shape. Once cut, unfold the paper to reveal a beautifully symmetrical petal. Repeat this process for all six pieces of crepe paper, striving for consistency in shape and size. The natural stretch of the crepe paper allows for slight adjustments later, but a good starting shape makes a big difference.
Step 3: Assembling the Lily Bloom
Now, it’s time to bring your flower to life by assembling the petals. Start by taking three of your prepared petals. Apply a small dab of hot glue to the bottom side of one petal and overlap it slightly with the bottom side of another petal, pressing them gently together. Continue this with the third petal, forming a semi-circle. Next, carefully glue the first and last petals together, ensuring a slight overlap at their base, to form a three-petal flower core. This creates a foundational cup-like shape. Then, take your remaining three petals and carefully glue them in the gaps between the first three, alternating their placement. This staggered arrangement gives your lily a fuller, more natural appearance, mimicking the overlapping layers found in real lily blossoms. Ensure all petals are securely attached at their base, forming a cohesive and sturdy flower.
Step 4: Adding Natural Curvature to the Petals
To give your crepe paper lily a more lifelike and elegant appearance, it’s crucial to add a gentle curve to the tips of each petal. Take a pen, pencil, or even a thin paintbrush handle, and gently roll the tip of each petal around it. Apply light pressure and slowly pull the petal away, allowing it to curl slightly outwards. This subtle shaping technique creates a delicate, natural curve, mimicking how real lily petals gracefully unfurl. Be gentle during this step to avoid tearing the crepe paper. This small detail significantly enhances the realism and beauty of your handmade flower, transforming flat paper into a vibrant bloom.
Step 5: Crafting the Stamens and Attaching the Flower to the Stem
This intricate step focuses on creating the central part of the lily and securing it to its stem. First, cut a rectangle of crepe paper in the same color as your petals, measuring approximately 2 inches (5 cm) by 3.15 inches (8 cm). Now, carefully cut this rectangle into very thin strips, about 0.27 inches (0.7 cm) wide. These will form the delicate stamens of your lily. Take each strip and gently twist it from one end to the other, creating a narrow, cylindrical shape. To add a touch of realism, color about half an inch (approx. 1.25 cm) of one end of each twisted strip with a black or dark brown marker, mimicking the pollen-laden anthers of a real lily.
Next, gather these twisted and colored strips. Take your green floral wire, which will serve as the stem. Position the colored ends of your stamens around one end of the green wire. Using a strong thread, securely tie them tightly in place, ensuring they radiate outwards naturally. Once the stamens are firmly attached to the wire, carefully insert the wire with the attached stamens into the center of your assembled crepe paper flower. Push it through the base of the petals until the stamens emerge beautifully from the center of the bloom. Wrap the base of the flower and the wire with thread again to secure the flower head firmly to the stem, preventing any wobbling. Finally, gently arrange the stamens, moving them slightly away from each other so they are evenly spaced and not clustered together, enhancing the natural appearance of your exquisite crepe paper lily.
Step 6: Wrapping the Stem for a Seamless Finish
To complete the realistic look of your DIY crepe paper lily, you need to cover the exposed floral wire and the thread holding the flower in place. Cut a long, thin strip of green crepe paper, approximately 0.4 inches (1 cm) wide and 9.85 inches (25 cm) long (or longer, depending on your desired stem length). Starting just below the base of the flower where the thread is visible, apply a tiny dot of hot glue to secure the end of the green strip. Begin to tightly wrap the green crepe paper strip around the stem, working your way downwards. Overlap the edges slightly with each turn, ensuring complete coverage of the thread and the wire. The natural stretch of the crepe paper will allow you to create a smooth, consistent stem. Continue wrapping all the way down to the bottom of the wire, securing the end with another small dot of hot glue. This step not only makes the stem look more natural but also provides additional strength and durability to your finished lily.
Step 7: Adding Realistic Leaves
No lily is complete without its graceful leaves! Cut six pieces of green crepe paper, each measuring about 1 inch (2.5 cm) in width and 2.8 inches (7 cm) in length. These dimensions are suitable for creating well-proportioned leaves for your lily. Take one green rectangle and fold it in half lengthwise, just as you did with the petals. With sharp scissors, cut a gentle curve along the unfolded side to form a classic leaf shape, tapering slightly at both ends. Unfold the paper to reveal a symmetrical leaf. To add further realism, gently curve each leaf using a pencil or your fingers, giving it a natural bend and a slight cup, mimicking the way real leaves sit on a stem. Repeat this process for all six remaining rectangles. Once shaped, arrange and glue these beautiful green leaves onto the wrapped stem of your crepe paper lily. You can place them at varying heights and angles to create a very organic and authentic look, bringing your DIY crepe paper lily to full, vibrant life.
Tips for Success in Your Crepe Paper Flower Crafting
To ensure your DIY crepe paper lily flowers turn out beautifully and to make the crafting process as enjoyable as possible, consider these helpful tips:
- Patience is Key: Crafting paper flowers is an art that benefits from a steady hand and a patient approach. Don’t rush through the steps, especially when cutting and shaping the delicate crepe paper.
- Experiment with Colors: While traditional lilies come in specific shades, crepe paper offers a rainbow of possibilities. Don’t hesitate to experiment with unconventional colors like deep blues or vibrant purples to create unique and personalized blooms.
- Safety First with Hot Glue: If you’re crafting with children, always supervise them when using a hot glue gun. Teach them how to handle it safely, or handle the hot glue steps yourself to prevent burns.
- Use Templates for Consistency: For perfectly uniform petals and leaves, create small cardboard templates of your desired shapes. This ensures that every component of your flower is consistent in size, leading to a more polished final product.
- Embrace Imperfections: Remember that handmade items have a unique charm. Don’t stress over minor imperfections; they often add character and a personal touch to your DIY crepe paper flowers.
- Natural Stretching: When shaping petals, gently stretch the crepe paper along its grain. This property of crepe paper allows you to cup and curve the petals naturally, giving them volume and a realistic flow.
- Lighting Matters: Work in a well-lit area. Good lighting helps you see intricate details, ensuring precise cuts and accurate placement of glue.
Displaying Your Beautiful Crepe Paper Lily Creations
Once you’ve crafted your stunning collection of DIY crepe paper lilies, the next delightful step is to display them! These handmade beauties are incredibly versatile and can enhance almost any space or occasion. Consider arranging a vibrant bouquet in a stylish vase for a lasting centerpiece that never wilts. They make magnificent decorations for special events like weddings, birthdays, or baby showers, adding a touch of personalized elegance without the worry of allergies or wilting. Imagine gifting a meticulously crafted single lily or a small bouquet to a loved one; it’s a heartfelt gesture that speaks volumes about your care and creativity. Crepe paper lilies can also brighten up a home office, a child’s bedroom, or even be incorporated into larger craft projects like wreaths or decorative garlands. Their timeless beauty ensures they’ll be admired wherever they are placed, bringing a permanent touch of spring and artistry into your life.
Variations and Customization Ideas for Your Paper Lilies
The beauty of crafting with crepe paper lies in its endless possibilities for customization. Once you’ve mastered the basic lily, feel free to explore these variations:
- Different Lily Varieties: Research various lily types (e.g., Oriental, Asiatic, Trumpet lilies) and try to mimic their unique petal shapes and stamen arrangements.
- Ombre Petals: Use watercolors or pastels to gently tint the edges or centers of your petals, creating a soft, gradient effect for a truly artistic look.
- Sparkle and Shine: Add a touch of glitter or tiny adhesive pearls to the stamens or petal edges for a subtle sparkle, perfect for festive occasions or a touch of whimsy.
- Scented Flowers: Lightly spray your finished lilies with a floral essential oil or perfume for a sensory experience that mimics real flowers.
- Varying Stem Lengths: Create lilies with different stem lengths to build a dynamic and interesting bouquet arrangement, adding depth and visual appeal.
- Buds and Half-Blooms: Don’t just make fully open flowers. Experiment with creating closed buds or partially opened lilies to add diversity and realism to your floral arrangement.
Embrace the Art of DIY Crepe Paper Lilies!
Crafting these DIY crepe paper lily flowers has been an incredibly rewarding journey, transforming simple materials into objects of intricate beauty. It’s a project that goes beyond just creating a decoration; it’s an experience that fosters creativity, offers a wonderful opportunity for bonding with loved ones, and leaves you with stunning, lasting results. The detailed steps outlined above provide a clear path to success, but remember that the true joy lies in the process and the personal touches you add along the way.
Whether you’re looking for a peaceful solo craft, a fun activity to share with your children, or a unique gift idea, these crepe paper lilies are an ideal choice. They bring a splash of color and an elegant, handmade charm to any setting, proving that beauty can indeed bloom from paper. So, gather your materials, let your imagination take flight, and embark on this delightful crafting adventure. We encourage you to share your beautiful creations and inspire others to discover the magic of making their own exquisite crepe paper flowers!