
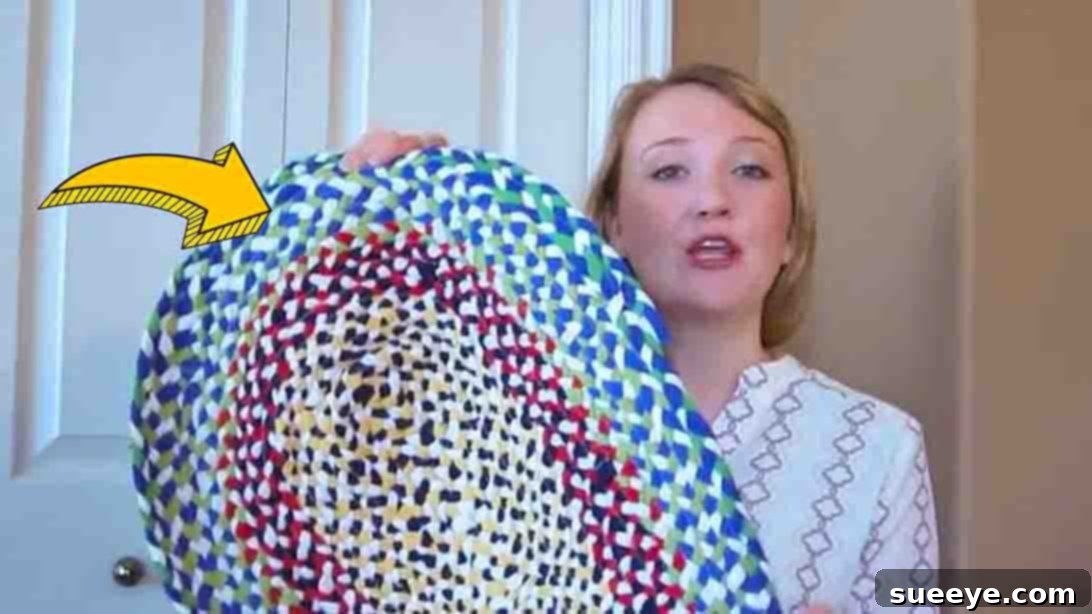
Are you searching for a rewarding weekend project that not only sparks your creativity but also helps you declutter your wardrobe and contribute to sustainable living? Look no further! This comprehensive guide will empower you to create your very own stunning DIY braided rug using old t-shirts. Inspired by the brilliant and accessible tutorial from MySewBliss on YouTube, this project is an ideal way to transform unused garments into a beautiful, functional, and eco-friendly piece of home decor. Whether you’re a seasoned crafter eager for a new challenge or a beginner looking for an easy-to-follow introduction to textile upcycling, this project offers endless possibilities for customization in terms of size, shape, and color. Dive into the world of sustainable crafting and turn those forgotten tees into a unique statement piece for your living space. Follow our detailed step-by-step instructions below to embark on your DIY rug-making journey today!
Craft Your Own Eco-Friendly Masterpiece: The Ultimate DIY Braided T-Shirt Rug
There is a unique and immense satisfaction in taking something old and unused and transforming it into a new, beautiful, and functional item for your home. This DIY braided t-shirt rug project perfectly embodies that spirit. Not only does it provide a fantastic, hands-on way to clear out your wardrobe of old t-shirts, but it also results in a durable, highly customizable, and incredibly stylish rug that can add warmth, texture, and personality to any room. From the vibrant color schemes you choose to the unique texture of the braids, every rug you create will tell its own story and reflect your individual aesthetic. This guide expands significantly on the core techniques, offering in-depth tips, crucial insights, and detailed instructions to ensure your crafting experience is smooth, enjoyable, and ultimately successful.
Why Upcycle Old T-Shirts into a Rug? A Sustainable Choice
Beyond the simple joy of crafting, creating a braided rug from old t-shirts offers numerous compelling benefits:
- Embrace Sustainable Living: By repurposing old clothes, you directly reduce textile waste that often ends up in landfills. This project is a fantastic step towards a more eco-conscious lifestyle, minimizing your environmental footprint.
- Budget-Friendly Home Decor: Instead of spending money on new rugs, you’re utilizing materials you already own. This makes it an incredibly cost-effective way to refresh your home decor or add a new accent piece without breaking the bank.
- Unique & Personalized Style: Mass-produced rugs can lack character. Your DIY t-shirt rug will be a one-of-a-kind creation, perfectly tailored to match your home’s aesthetic, color palette, and your personal style. No two handmade rugs are ever exactly alike.
- Durable & Easy to Clean: T-shirt fabric, typically cotton or a cotton blend, is generally robust and resilient. This makes for a long-lasting rug that can withstand daily use and is often machine washable, ensuring easy maintenance.
- Rewarding Craft Project: The therapeutic process of cutting, braiding, and sewing offers a calming escape. The sense of accomplishment and pride you’ll feel upon completing your own handcrafted rug is truly immense.
Essential Materials for Your DIY T-Shirt Rug
Gathering your supplies is the exciting first step in any creative project. For this braided t-shirt rug, you’ll be pleased to find that most items are likely already in your home or easily acquired. The type and quality of your t-shirts will significantly influence the final look, feel, and durability of your rug, so choose them thoughtfully!
- Old T-Shirts: These are the foundation of your rug! Aim for t-shirts made from cotton or cotton blends, as they are soft, flexible, easy to cut, and hold braids beautifully. Avoid highly stretchy or thin synthetic fabrics, which can be difficult to work with and may not hold their shape. The number of t-shirts needed will depend on the desired rug size; for a small bathmat-sized rug, you might need 10-15 adult-sized tees, while a larger area rug could require 30-50 or more. Consider a mix of colors and patterns to create a vibrant, eclectic design, or stick to a specific color palette for a coordinated look.
- Sharp Fabric Scissors: Absolutely essential for clean, efficient cutting of your t-shirt strips. A dull pair will not only make the process frustrating but will also result in uneven, frayed edges that can impact the quality of your braid. Investing in a good pair of fabric scissors is always worthwhile for any textile craft.
- Darning Needle or Large-Eye Needle: You’ll need a sturdy needle with a large eye to thread through the strong thread and pierce through multiple layers of braided fabric when assembling your rug. A curved upholstery needle can also be particularly helpful for this task.
- Strong Thread: Opt for heavy-duty polyester or a strong cotton thread. Choose a color that either blends seamlessly with your t-shirts (e.g., a neutral like gray or beige, or a color matching your dominant t-shirt shade) or a contrasting color if you want the stitches to be a visible design element. Durability is paramount here to ensure your rug holds together over time.
- Sewing Machine (Optional but Highly Recommended): While it is entirely possible to hand-sew your braided rug, a sewing machine will make the stitching process significantly faster, stronger, and more uniform, especially for larger rugs. Ensure your machine is fitted with a heavy-duty needle (e.g., a denim or upholstery needle) suitable for thick fabrics and multiple layers.
- Fabric Clips or Binder Clips: These are invaluable tools for keeping your braided strips tight and organized while you work, and for holding the coiled rug sections securely in place before you stitch them together. They prevent unraveling and shifting.
- Measuring Tape or Ruler: Useful for ensuring consistent strip widths during cutting and for measuring your rug as it grows, helping you maintain your desired dimensions.
Step-by-Step Guide to Crafting Your Braided T-Shirt Rug
Step 1: Prepare Your T-Shirt Strips – The Foundation
The success and final appearance of your rug largely depend on properly prepared fabric strips. This initial stage requires patience and consistency to ensure a smooth and even braiding process later on.
Begin by laying each t-shirt flat and smooth on your cutting surface. Using your sharp fabric scissors, start cutting the t-shirts into long, continuous strips. A consistent width, typically between 1 to 2 inches (2.5 to 5 cm), is absolutely vital for achieving an even, beautiful braid. Wider strips will result in a thicker, chunkier rug with a more prominent texture, while narrower strips will create a finer, more intricate, and often more flexible rug. As you cut, be sure to remove any bulky seams (such as those at the bottom hem, sleeves, or side seams) and any printed sections or tags that might affect the flexibility, uniform texture, or overall appearance of your strips. Continue this precise cutting process with all your chosen t-shirts until you have amassed a substantial pile of fabric strips.
Once you have a collection of strips, you’ll inevitably find that some are shorter than others. To create the long, continuous strands necessary for comfortable braiding, you’ll need to join these shorter pieces. The most durable and least bulky method is to sew them together using your sewing machine or a strong hand stitch. To do this, overlap the ends of two strips slightly (about 0.5 to 1 inch or 1.25 to 2.5 cm) and sew a straight seam across the overlap. Alternatively, for a quicker but slightly bulkier join, you can use a simple knotting technique where you cut small slits into the ends of two strips, interlock them, and pull tight. Aim to create strands that are as long as possible – several feet each is ideal to minimize joins within your braid.
To keep your newly joined strips neat, organized, and tangle-free, tie a small, secure knot at one end of each long strand. Then, starting from the knotted end, begin wrapping the strip tightly around itself to form a neat ball of fabric, much like a ball of yarn. This method is incredibly effective for preventing tangles, saving space, and making it significantly easier to handle your material during the braiding phase. Organize all your long strips into these individual fabric balls, perhaps grouped by color if you have a specific design in mind.
Step 2: Braiding Your T-Shirt Strands – The Heart of the Rug
With your fabric strips meticulously prepared, it’s time to bring your rug to life through the rhythmic process of braiding. This step is where the texture, pattern, and visual appeal of your rug truly begin to take shape.
Select three of your prepared fabric balls. Knot their starting ends together securely, or sew them together if you prefer a smoother, less bulky join. It’s crucial to anchor this knotted end to a stable surface to allow for consistent tension during braiding. You can use a strong safety pin to attach it to a heavy pillow, wrap it around a table leg, clamp it to a workbench, or even enlist a friend to hold it steady. Begin braiding the three strands, much like braiding hair, ensuring you keep the tension consistent and firm as you work. The tighter and more uniform your braid, the more cohesive, professional-looking, and durable your final rug will be. As you continue braiding along the length of your workspace, you might find it incredibly helpful to use fabric clips or binder clips to hold sections of the braid together, preventing it from unraveling or losing tension, especially if you need to pause or take a break.
Continue braiding until you have used up all your prepared strips, or until your braided length is sufficient for your desired rug size and shape. Remember, a longer initial braid will allow you to create a larger rug. If you run out of a strip of a particular color, simply knot or sew in a new strip from another ball of fabric. Try to make these joins discreetly within the braid. The continuous nature of the braid means these connections will be mostly hidden within the rug’s structure. Once you’ve completed your impressively long braid, loosely coil it up to prevent tangles and prepare it for the final assembly phase.
Step 3: Coiling and Sewing Your Rug into Shape – The Assembly
Now for the most exciting part: transforming your long, beautiful braid into a functional and aesthetically pleasing rug! This step requires careful coiling and strong, consistent stitching to create a lasting piece of home decor.
First, decide on the approximate shape and size of your rug. While the most common shapes are round or oval, you could experiment with a rectangular or even abstract design. To start a round or oval rug, take one end of your completed braid and begin coiling it tightly and flatly into a spiral. The initial few inches, forming the very center, are crucial for establishing the foundation of your rug’s shape. Lay this tightly coiled section flat on a clean, hard surface.
With your darning needle and strong thread (or your sewing machine), begin stitching the coiled braid together. Start from the very center of your spiral. The technique involves sewing through the side of one braid and into the side of the adjacent braid, effectively connecting each spiral row to the previous one. Aim to sew close to the edges of the braids to make your stitches less visible and to ensure a strong, secure hold. If using a sewing machine, a wide zig-zag stitch is often preferred, as it offers both flexibility and strength, allowing the rug to lay flat without puckering. If hand-sewing, a sturdy whipstitch or a mattress stitch works well.
As you continue to coil the braid outwards, carefully pinch the two adjoining sections of the braid together and sew them securely. Maintain an even tension as you coil and sew to prevent the rug from becoming lumpy, warped, or losing its desired shape. Periodically lay the rug completely flat and step back to check its shape and make any necessary adjustments. Keep going, coiling and sewing, until you’ve used up your entire braided length or reached your desired rug size and shape. To finish, neatly secure the very end of the braid by tucking it under the previous coil and stitching it firmly in place with several strong passes of your needle and thread.
Tips for a Successful DIY T-Shirt Rug
To ensure your handcrafted rug turns out beautifully and lasts for years, consider these helpful tips:
- Consistency is Key: The most crucial aspect of a professional-looking rug is consistency. Uniform strip width and even braiding tension throughout the entire process will yield the best results.
- Don’t Skimp on Stitching: Strong, consistent stitches are paramount for the rug’s durability and to prevent any unraveling or shifting of the coils over time. Take your time with this step.
- Experiment with Colors: Unleash your inner artist! Play with different color combinations. You can create vibrant stripes, elegant spirals, or random, eclectic patterns by strategically introducing new colors into your braid.
- Consider a Non-Slip Backing: For safety, especially if your rug will be placed in high-traffic areas or on smooth floors, consider adding a non-slip rug pad underneath or applying a liquid latex rug backing (available at craft stores) to the underside of your finished rug.
- Vary the Size: This versatile technique can be adapted to make anything from a small, charming bathmat or bedside rug to a substantial area rug. Simply adjust the amount of t-shirt material you prepare.
- Prepare in Batches: Cutting all your strips at once, then joining them, then braiding, can make the process more efficient and less overwhelming.
Caring for Your Upcycled T-Shirt Rug
One of the many great advantages of a t-shirt rug is its relative ease of care. Since it’s made from clothing fabric, it’s designed to be washable!
- Machine Wash: Most cotton or cotton-blend t-shirt rugs can be machine washed. Use a gentle cycle with cold water and a mild detergent to prevent shrinking or color fading. For larger rugs, you might need a commercial-sized washing machine.
- Drying: Air dry your rug flat to help maintain its shape and prevent stretching or warping. You can lay it on a clean sheet outdoors or on a drying rack. If using a tumble dryer, opt for a very low heat setting, and remove it while still slightly damp to finish air drying. Avoid high heat, which can damage the fabric and stitching.
- Regular Maintenance: Regularly shaking your rug outdoors or vacuuming it (using a low suction setting without a beater bar) will help remove loose debris, dust, and pet hair, keeping your rug looking fresh and extending its life.
Unleash Your Creativity and Make It Your Own!
This DIY braided t-shirt rug project is much more than just a simple craft; it’s a meaningful opportunity to express your creativity, contribute to a sustainable and eco-friendly lifestyle, and add a deeply personal, handmade touch to your home decor. Each rug you create will be wonderfully unique, bearing the distinct mark of its maker and carrying the repurposed stories of the t-shirts it once was. Embrace every step of the process, revel in the satisfying transformation, and take immense pride in your beautifully handcrafted, eco-conscious masterpiece. It’s a rug born from creativity, care, and a commitment to making the most of what you have.
For a clear visual walkthrough of the entire process, don’t forget to check out the original video tutorial from MySewBliss on YouTube, linked at the beginning of this comprehensive guide. Happy crafting, and enjoy your amazing new t-shirt rug!