
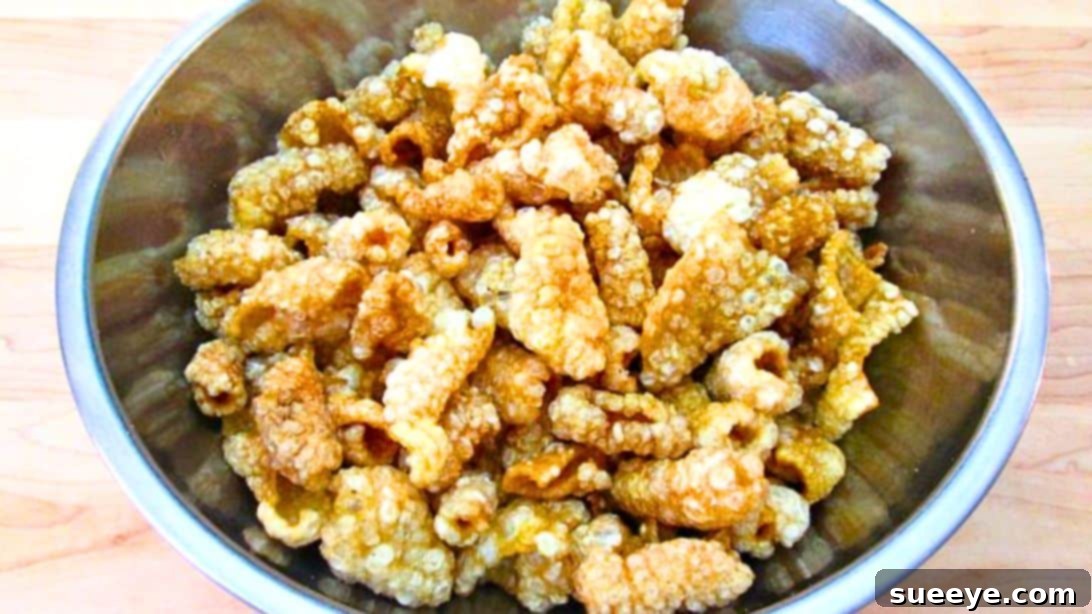
Ultimate Guide to Homemade Crispy Pork Rinds: Your New Favorite Snack
There’s nothing quite like the satisfying crunch and rich flavor of perfectly made pork rinds. Far from being just a simple snack, these crispy delights, often known as chicharrónes, can elevate any gathering, serving as an exceptional appetizer, a savory side dish, or the ideal accompaniment to a relaxed evening with friends. The process of making them at home might seem daunting, but with the right guidance, you can achieve an unparalleled crispiness and depth of flavor that store-bought versions simply can’t match.
Imagine biting into a golden-brown, airy piece of pork rind, seasoned exactly to your liking, exploding with savory notes. This comprehensive guide will walk you through every step, ensuring your homemade pork rinds are not just good, but truly unforgettable. If you’ve been searching for that perfect crunch and irresistible taste, your journey ends here. Get ready to transform humble pork skin into a gourmet snack that will have everyone asking for your secret. This incredible recipe and technique are inspired by the culinary expertise of Poor Man’s Gourmet Kitchen on YouTube.
Why Make Your Own Pork Rinds? The Benefits of Homemade Goodness
While packaged pork rinds are readily available, making them at home offers a multitude of advantages that enhance both flavor and dietary control. Here’s why you should embark on this culinary adventure:
- Unmatched Freshness and Flavor: Homemade pork rinds boast a superior, clean flavor and an incredible crispness that mass-produced versions often lack. You control the quality of the pork skin and the freshness of the ingredients, resulting in a taste experience that is truly second to none.
- Customizable Seasoning: This is where homemade truly shines! Forget generic salt and pepper. With your own batch, you can experiment with an endless array of spices and herbs. Craving a spicy kick? Add cayenne. Prefer a smoky barbecue flavor? Mix in some paprika and brown sugar. The possibilities are limitless.
- Healthier Alternative: For those following ketogenic (keto) or low-carb diets, pork rinds are an excellent, protein-rich snack. When made at home, you can ensure they are fried in high-quality oils and free from undesirable additives often found in commercial products. They offer a guilt-free crunch for various dietary needs.
- Cost-Effective: Pork skin is often an inexpensive cut, making homemade pork rinds a budget-friendly way to create a premium snack. You get a much larger quantity for a fraction of the price of specialty bags.
- A Rewarding Culinary Experience: There’s a deep satisfaction in creating something delicious from scratch. The process of transforming simple pork skin into a gourmet treat is both fun and rewarding, allowing you to master a unique cooking technique.
Understanding the Art of Crispy Pork Rinds
Pork rinds, or chicharrónes, are essentially fried or roasted pork skin. The magic behind their irresistible crunch lies in a two-stage cooking process. First, the pork skin is boiled to render some of the fat and soften the skin, making it pliable. This also helps to remove excess moisture. The second, and perhaps most crucial, stage involves a long, slow dehydration process (either in an oven or dehydrator) which completely removes all remaining moisture, transforming the skin into a brittle, airy base. Finally, a quick dip in hot oil causes these dried pieces to puff up dramatically, resulting in their characteristic light, airy, and shatteringly crispy texture.
Essential Ingredients for Perfect Pork Rinds
Crafting delicious pork rinds requires just a few key ingredients. Quality matters, so choose wisely!
- 2 pounds of Pork Skin: Opt for fresh pork skin from a butcher, ideally with minimal fat attached. While some fat is inevitable and contributes to flavor, excess fat can make the rinds greasy. Ensure it’s clean and free from hair.
- 2 quarts of Water: Used for boiling the pork skin, helping to soften it and prepare it for dehydration.
- ¼ cup of Salt: Essential for seasoning the boiling water and for the initial flavor of the pork rinds. You’ll likely use more for final seasoning.
- Cooking Oil: Choose a high smoke point oil suitable for deep frying, such as vegetable oil, canola oil, peanut oil, or lard. The quantity will depend on your frying vessel, but ensure enough to submerge the pork rinds.
- Your Favorite Seasoning: This is where you can truly customize! Beyond salt, consider garlic powder, onion powder, smoked paprika, chili powder, cumin, cayenne pepper for heat, or even a pre-made BBQ rub.
Tools You’ll Need for Pork Rind Perfection
Having the right equipment on hand will make the process smooth and enjoyable:
- Large Pot: For boiling the pork skin.
- Sharp Knife: Crucial for trimming fat and slicing the pork skin into uniform pieces.
- Cutting Board: A sturdy surface for preparation.
- Colander: For draining the boiled pork skin.
- Large Bowl: For rinsing and seasoning the pork skin.
- Baking Sheets: Lined with parchment paper or silicone mats for dehydrating the pork skin in the oven. You may need multiple sheets depending on the quantity.
- Oven or Food Dehydrator: An oven set to its lowest temperature (around 170°F or 77°C) works perfectly. A food dehydrator offers precise, consistent low heat.
- Deep Fryer or Deep Heavy-Bottomed Pot/Pan: Essential for safely deep frying the pork rinds.
- Thermometer: A deep-fry thermometer is highly recommended to maintain the optimal oil temperature.
- Slotted Spoon or Spider Skimmer: For safely adding and removing pork rinds from hot oil.
- Paper Towel-Lined Tray/Plate: To drain excess oil from the freshly fried rinds.
- Airtight Container: For storing your finished pork rinds.
Step-by-Step Directions to Unbelievably Crispy Pork Rinds
Follow these detailed instructions carefully to achieve the perfect texture and flavor.
Step 1: Preparing the Pork Skin with Precision
Begin by thoroughly washing and cleaning your pork skin under cold running water. This ensures any impurities are removed. The most critical part of this step is meticulously removing all visible fat from the underside of the skin. Use a sharp knife to scrape and trim away as much fat as possible. Excess fat will prevent the rinds from puffing up correctly and can result in a chewy, greasy product. Once cleaned and defatted, slice the pork skin into small, bite-sized pieces, roughly 1 to 1.5 inches square. While exact uniformity isn’t strictly necessary, try to keep the sizes relatively consistent for even cooking. Pay close attention to any parts or edges of the skin that appear dark or feel unusually tough; these sections should be cut off and discarded, as they tend to become hard and unpleasantly chewy after cooking.
Step 2: Boiling and Blanching for Optimal Texture
Next, fill a large pot with the measured water and add a generous ¼ cup of salt. Bring the salted water to a rolling boil over high heat. Carefully add the prepared pork skin pieces to the boiling water. Allow them to cook for approximately 30 minutes, ensuring you stir them consistently throughout the cooking process. This constant stirring prevents the pieces from sticking together and ensures they cook evenly. The goal here is for the pork skin to become very soft and tender, almost gelatinous. Once cooked to this desired softness, turn off the heat. Carefully strain the pork skin through a colander to remove all the cooking liquid. Immediately after draining, rinse the pork skin under cold running water for a quick minute. This stops the cooking process and further prevents sticking. Transfer the rinsed pork skin pieces onto a large cookie sheet or baking sheet, spreading them out in a single, even layer, making sure no pieces are overlapping.
Step 3: Seasoning and Dehydrating to Crisp Perfection
Now it’s time to impart some flavor! Lightly season the boiled pork skin pieces with additional salt and any of your chosen seasonings. Don’t be shy; a good initial seasoning sets the base flavor. Use your hands to thoroughly mix and gently massage the seasonings into the pork skin. This ensures an even coating and helps to distribute the flavors. Once seasoned, spread the pieces out again in a single, even layer on your baking sheets, ensuring they are not touching. Place the baking sheets in your oven, set to its lowest temperature, typically around 170°F (77°C). Let them bake for an extended period, approximately 3 to 4 hours. The goal here is to completely dehydrate the pork skin, making it hard and brittle. Alternatively, if you own a food dehydrator, arrange the seasoned pork skin pieces in the dehydrator trays and dry them until they are fully brittle. This dehydration step is absolutely crucial for the rinds to puff up correctly when fried.
Step 4: The Final Fry for Unforgettable Crispiness
Once your pork rinds are completely dehydrated and hard, it’s time for the final magical step. Preheat your cooking oil in a deep fryer or a deep, heavy-bottomed pan to a steady 350°F (175°C). Maintaining the correct oil temperature is vital for success. Once the oil is hot, carefully drop the dehydrated pork rinds into the oil in small batches. Avoid overcrowding the pan, as this will drop the oil temperature and result in soggy rinds. Fry each batch for about 1 to 2 minutes, or until they begin to puff up dramatically and become light, airy, and golden brown. You’ll observe them expanding and “popping out” as shown in instructional videos, indicating that the internal moisture is rapidly evaporating.
Ensure you gently move the pork rinds around in the oil every now and then using a slotted spoon or spider skimmer. This promotes even cooking and ensures the hot oil penetrates each piece uniformly. Once they are perfectly puffed and golden, carefully remove them from the hot oil. Transfer the freshly fried pork rinds to a plate, bowl, or tray generously lined with several layers of paper towels. The paper towels will absorb any excess oil, ensuring your rinds remain wonderfully crispy, not greasy. Proceed to cook the remaining batches of pork rinds using the same method. As a final touch, while the rinds are still warm, you can toss them with a bit more salt or your preferred seasoning for an extra flavor boost. Give them a good toss to distribute the seasoning evenly, then serve them immediately. Enjoy your homemade, irresistibly crispy pork rinds!
Expert Tips for Making the Best Pork Rinds
Achieving consistently perfect pork rinds can be made easier with a few insider tricks:
- Quality Pork Skin is Key: Always source fresh, high-quality pork skin from a reputable butcher. The fresher the skin, the better the final texture and flavor.
- Thorough Fat Removal: This cannot be overstated. Any significant amount of fat left on the skin will result in chewy spots and prevent the rinds from puffing up properly. Be patient and meticulous.
- Complete Dehydration is Essential: The skin must be absolutely bone-dry and brittle before frying. If there’s any moisture left, the rinds won’t expand and will be dense or chewy. Take your time with the baking/dehydrating step.
- Maintain Oil Temperature: Use a deep-fry thermometer to keep the oil at a consistent 350°F (175°C). If the oil is too cold, the rinds will be greasy; too hot, and they’ll burn before fully puffing.
- Don’t Overcrowd the Fryer: Fry in small batches to maintain oil temperature and ensure each piece has enough space to expand and cook evenly.
- Experiment with Seasonings: Don’t limit yourself to just salt! Try different spice blends, a squeeze of lime juice after frying, or even a sweet and spicy glaze for a unique twist.
- Store Properly: Once cooled, store your homemade pork rinds in an airtight container at room temperature. This will help them retain their crispness for several days.
- Safety First: Always exercise caution when working with hot oil. Use appropriate safety gear and ensure a clear, dry workspace. Never leave hot oil unattended.
Delicious Ways to Enjoy Your Homemade Pork Rinds
While irresistible on their own, homemade crispy pork rinds are incredibly versatile. Here are some ideas to enjoy them:
- Classic Snack: Simply grab a handful and enjoy that satisfying crunch!
- Dipping Companion: Serve them alongside fresh guacamole, a creamy cheese dip, tangy salsa, or a rich spinach dip.
- Keto “Breadcrumbs”: Crush them and use as a low-carb, gluten-free coating for chicken, fish, or vegetables.
- Salad Topping: Crumble them over salads instead of croutons for an extra layer of texture and savory flavor.
- Soup & Chili Garnish: Add a generous sprinkle to your favorite soups or chili bowls for a delightful crunch.
- Nacho Base: Use larger pieces as a base for low-carb nachos, piled high with cheese, jalapeños, and your favorite toppings.
- Breakfast Booster: Crumble them over scrambled eggs or breakfast bowls for a savory, crispy addition.
The Nutritional Edge: A Keto-Friendly Delight
For those mindful of their carbohydrate intake, pork rinds are a true dietary hero. Being almost entirely protein and fat (depending on the thoroughness of fat removal), they offer a fantastic, guilt-free crunch for individuals following ketogenic, Atkins, or other low-carb eating plans. They provide satiety and a satisfying texture without the carbs found in traditional chips or crackers, making them an ideal choice for a healthy, flavorful snack.
Conclusion: Master the Art of Homemade Pork Rinds
Making your own crispy pork rinds at home is a culinary endeavor that promises incredible rewards. From the deep satisfaction of crafting a gourmet snack from scratch to the sheer joy of biting into a perfectly crunchy, flavorful piece, this recipe offers an experience that far surpasses anything you can buy in a bag. With meticulous preparation, patience during dehydration, and careful frying, you’ll unlock the secret to restaurant-quality chicharrónes right in your own kitchen.
So, gather your ingredients, follow this ultimate guide, and prepare to impress your taste buds and your guests. These homemade pork rinds are more than just a snack; they’re a celebration of flavor, texture, and the simple pleasure of good food. Give this recipe a try, and get ready to discover your new favorite crispy indulgence!
All images are credited to Poor Man’s Gourmet Kitchen via YouTube. We highly recommend visiting their channel and subscribing for more fantastic culinary content!