
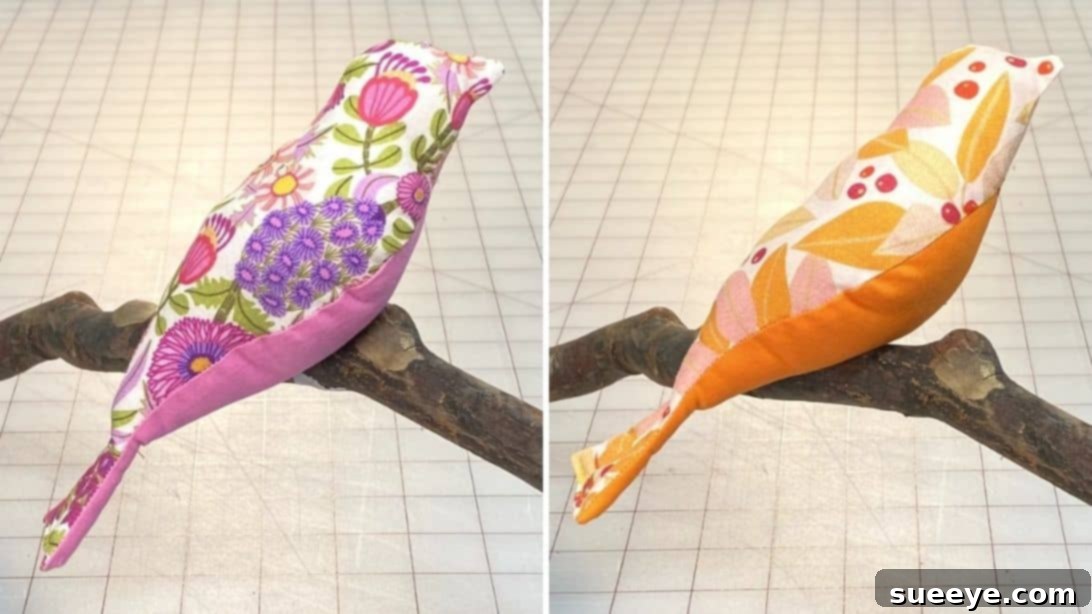
Easy Fabric Bird Sewing Tutorial: Perfect for Beginners
Are you searching for a delightful and straightforward sewing project that yields charming results? Look no further! This comprehensive guide walks you through creating adorable fabric birds, inspired by the fantastic tutorial from Notches Sewing on YouTube. Whether you’re a complete novice with a sewing machine or an experienced crafter looking for a quick and satisfying make, these little fabric birds are an absolute joy to create. They’re not only incredibly cute but also an excellent way to use up those precious fabric scraps that often accumulate in every sewer’s stash. No need for extensive materials or complex techniques; just a few basic sewing tools and a dash of creativity will bring these feathered friends to life.
This project is specifically designed with beginners in mind. It offers a wonderful opportunity to practice fundamental sewing skills such as cutting, pinning, stitching curves, pivoting, and stuffing. The instructions are broken down into easy, manageable steps, ensuring a smooth and enjoyable crafting experience. Imagine transforming simple pieces of fabric into unique decorative accents for your home, heartfelt handmade gifts, or even a whimsical addition to a nursery mobile. Let’s gather our supplies and embark on this fun fabric bird adventure!
Why Sew a Fabric Bird? The Benefits of This Easy Project
Beyond their undeniable cuteness, sewing fabric birds offers a multitude of benefits, especially for those new to the craft or looking for a relaxing creative outlet:
- Beginner-Friendly: The techniques involved are fundamental, making it an ideal first project or a gentle re-introduction to sewing. You’ll gain confidence in machine control, seam allowances, and turning fabric.
- Scrap Buster: Finally, a fantastic use for all those small, beautiful fabric remnants you’ve been holding onto! This project is perfect for sustainable crafting, reducing waste, and giving new life to forgotten textiles.
- Quick to Complete: Unlike larger projects that can take days or weeks, a fabric bird can often be sewn in an afternoon, providing instant gratification and a sense of accomplishment.
- Versatile Decoration: Once finished, these birds can be used in countless ways: perched on shelves, strung into garlands, used as pincushions, added to wreaths, or even given as charming little tokens of affection.
- Personalized Gifts: Hand-sewn items carry a special touch. A custom fabric bird made with love makes a thoughtful and unique gift for birthdays, baby showers, or just because.
- Stress-Relieving Craft: The rhythmic motion of sewing and the focus required can be incredibly meditative and calming, offering a wonderful escape from daily stresses.
- Develop Core Skills: You’ll practice precise cutting, marking, pinning, stitching curves, clipping seams, turning right side out, and hand-stitching a closing, all essential skills for future sewing endeavors.
Materials You’ll Need
Before diving into the sewing process, ensure you have all your materials ready. The beauty of this project lies in its simplicity and minimal requirements. Most of these items are standard in any sewing kit, and the fabric can easily be sourced from your scrap bin!
- Fabric Bird PDF Pattern: The essential blueprint for your bird. You can find the specific pattern used in the Notches Sewing tutorial here.
- Garment Pattern Notcher: A specialized tool for creating small V-shaped cuts on your pattern, aiding in accurate seam alignment. While very helpful, if you don’t have one, small snips with sharp scissors can work.
- Cardboard: For creating a durable, reusable template from your printed pattern. Cereal boxes or old folders work perfectly.
- Main Fabric (Approx. 9″x9″ / 23x23cm): This will be the primary body color of your bird. Choose a medium-weight cotton, linen, or even a soft flannel for best results. Consider colors and patterns that appeal to you.
- Contrasting Fabric (Approx. 6″x6″ / 15x15cm): For the bird’s belly, providing a lovely visual contrast. This is where you can have fun with different textures or vibrant prints to make your bird unique.
- Vanishing Ink Pen or Tailor’s Chalk: For precisely transferring pattern markings onto your fabric without leaving permanent traces.
- Sharp Fabric Scissors: Essential for clean, accurate cuts. A dedicated pair for fabric is always recommended to keep them sharp.
- Sewing Pins or Fabric Clips: To hold your fabric pieces securely in place before and during stitching.
- Polyester Fiberfill or Other Stuffing: To give your fabric bird its plump, three-dimensional form. You can also use small fabric scraps, rice (for weight), or even dried lavender for a scented bird.
- Matching Thread: High-quality polyester thread that matches or complements your fabric colors.
- Sewing Machine (or Needle for Hand Sewing): While a machine makes it quicker, this project can certainly be hand-sewn with a strong backstitch for durability.
- Iron and Ironing Board: For pressing seams, which is crucial for a professional finish.
- Point Turner or Chopstick: To help push out corners and curves neatly when turning the bird right side out.
Step-by-Step Directions to Sew Your Fabric Bird
Follow these detailed instructions carefully to craft your very own charming fabric bird. Precision in each step will contribute to a beautifully finished result.
Step 1: Preparing Your Pattern and Cutting Fabric Pieces
The journey begins with preparing your pattern. First, carefully print out the fabric bird PDF pattern provided by Notches Sewing. Once printed, meticulously cut out both pattern pieces along their solid lines. To ensure your pattern lasts for multiple projects and provides a stable tracing surface, transfer these paper pattern pieces onto a sturdy piece of cardboard. Trace around them accurately, making sure to include all the internal markings, such as dots, lines, and particularly the notches. These notches are crucial for aligning your fabric pieces later on.
Next, use your garment pattern notcher (or sharp snips, being careful not to cut too deeply into the pattern piece itself) to cut out the notches on your cardboard template. Label the straight edges of both pattern pieces that are intended to be placed “on a fold.” This label is important for cutting symmetrical fabric pieces.
Now, let’s prepare your main fabric. Take your chosen main fabric and fold it in half, ensuring the right sides of the fabric are facing each other. The fold should be straight and even. Position the straight edge of the ‘top’ pattern piece (the larger bird body piece) directly along this fold. This ensures that when cut, you will have one symmetrical, unfolded piece for the bird’s upper body. Using your vanishing ink pen or tailor’s chalk, meticulously trace around the entire pattern piece, paying special attention to marking all the notches accurately. Secure the pattern to the fabric with a few pins to prevent it from shifting while tracing.
Repeat this precise process for the ‘bottom’ pattern piece (the belly piece) using your contrasting fabric. Again, fold the contrasting fabric with right sides together, place the pattern piece along the fold, trace, and mark notches. Once both pieces are traced and marked, carefully cut out both fabric pieces using your sharp fabric scissors. When cutting the notches, snip into the seam allowance by about ⅛ inch (3mm), creating small V-shapes or straight cuts to match your pattern. These small cuts are vital for precise alignment later.
With your fabric pieces cut and notches marked, remove all the pins. You should now have one main body piece and one contrasting belly piece, each symmetrical and ready for the next step. Take a moment to appreciate the precise cutting, as it is the foundation of a well-sewn project.
Now, we move to the initial stitching. With your main fabric piece unfolded, right side facing up, begin stitching from the top-notch located just below the beak area. Use a consistent ¼ inch (6mm) seam allowance throughout. Carefully pivot your fabric around the delicate curve of the beak, ensuring a smooth, rounded shape. Continue sewing along the top of the head, and then gently curve down towards the main body of the bird. Maintain that ¼ inch (6mm) seam allowance consistently. This initial seam forms the top contour of your bird’s head and back. Use an iron to press this seam open gently, which will help create a crisper finish.
Step 2: Assembling the Bird and Finishing Touches
With the top seam of your bird completed, it’s time to attach the contrasting belly piece. Begin by opening up the main fabric piece, laying it flat with the right side facing up. Take your contrasting bottom piece and place it directly on top of the main fabric, ensuring their right sides are together. This is a crucial step for achieving a professional finish with hidden seams.
Carefully align the top point or corner of the belly piece with the corresponding point on the main bird body, which forms the bird’s chest/beak area. Then, match up the notches you meticulously cut earlier on the sides of both pieces. These notches serve as guides for perfect alignment, especially on curves. Pin the pieces together securely along the edges where they will be stitched, paying close attention to keeping the edges even.
Now, flip the entire assembly over so you are sewing on the wrong side of the main fabric. This allows you to see your initial stitch line and ensure the new seam runs smoothly. Begin stitching the first side, starting precisely at a side notch. Remember to back-tack at both the start and the finish of your seam. Back-tacking involves sewing a few stitches backward and then forward again, securing the seam and preventing it from unraveling. This is particularly important for areas that will endure stress, such as turning and stuffing. Continue sewing down one side of the bird’s belly until you reach the end notch. Do not sew the tail end closed yet; this opening is where you will turn and stuff your bird.
Once one side is sewn, pivot your fabric and carefully stitch up the other side of the belly, again starting from the corresponding side notch and back-tacking at the beginning and end of the seam. Ensure both seams mirror each other for a balanced bird shape.
With the main seams stitched, it’s time for some essential seam preparation. Using sharp scissors, carefully cut small notches (or V-shaped snips) into the seam allowance at all pivot points and along any significant curves, especially around the beak area and the gentle curve of the back. Be extremely careful not to cut through your stitching line. These notches allow the seam allowance to spread when turned right side out, preventing puckering and ensuring a smooth, defined curve. Additionally, trim the seam allowances around the beak area at an angle to reduce bulk. For the tail area, you might want to slightly trim down the seam allowance as well.
Now comes the magical part: turning your bird right side out! Gently push the fabric through the opening you left at the tail. Use a point turner, a chopstick, or even the blunt end of a pencil to carefully push out all the corners and curves, especially the beak and tail, ensuring they are nicely defined and smooth. Take your time with this step to avoid stretching or damaging the fabric.
With your bird turned right side out, it’s time to bring it to life with filling! Choose your desired stuffing material – polyester fiberfill is common, but you can also use fabric scraps, dried beans for weight, or fragrant lavender for a sachet bird. Begin stuffing your bird, starting with the beak and head, then moving to the body. Distribute the filling evenly, ensuring the bird is firm but not overly stiff. For the tail section, intentionally use less stuffing; this will allow the tail to lay flatter and give your bird a more elegant silhouette. Use a chopstick or your fingers to help guide the stuffing into all the nooks and crannies.
Finally, close the opening. Turn in the raw edges of the tail opening by about ¼ inch (6mm) to the inside of the bird. Fold the edges in a slightly curved way that naturally follows the bird’s tail shape. Use pins to hold the folded edges in place. Now, hand-sew the opening closed using a ladder stitch (also known as an invisible stitch) for a neat and professional finish. This stitch hides the thread, making the seam almost invisible. Once the opening is securely closed, you can add two even lines of topstitching on the tail. This not only adds a decorative touch but also helps to define the tail feathers and adds a lovely finished look to your fabric bird.
Tips for Sewing a Perfect Fabric Bird
Achieving a beautifully crafted fabric bird is easy with a few helpful tips:
- Pressing is Key: Don’t skip ironing. Pressing your seams open after stitching creates a flatter, more professional finish and makes subsequent steps easier.
- Choose Your Fabric Wisely: While scrap fabric is great, avoid anything too slippery (like silk) or too stretchy (like jersey) for your first attempt. Woven cottons are ideal for their stability and ease of handling.
- Use Sharp Tools: Sharp scissors and a fresh needle in your sewing machine make a huge difference in cutting accuracy and stitch quality. Dull tools can fray fabric and cause skipped stitches.
- Practice Your Curves: If you’re new to sewing curves, practice on some scrap fabric first. Slow down, keep your stitches even, and pivot frequently to maintain a smooth line.
- Don’t Rush the Stuffing: Stuffing is an art! Add small amounts of fiberfill at a time, gently pushing it into all areas. Overstuffing can distort the shape, while understuffing can make it floppy. Aim for a firm but soft feel.
- Consider Embellishments: Once your bird is complete, think about adding a tiny bead for an eye, a small ribbon loop for hanging, or some embroidery details.
- Stay Consistent with Seam Allowance: A ¼ inch (6mm) seam allowance is used for this project. Use a seam guide on your machine or mark a guide line with chalk to keep it consistent, as this impacts the final size and shape.
Creative Ways to Use Your Handmade Fabric Birds
Now that you’ve successfully sewn your adorable fabric bird, what’s next? These versatile little creations can bring charm and warmth to countless settings:
- Home Decor: Arrange them on shelves, mantelpieces, or windowsills to add a touch of whimsy to any room.
- Garlands and Mobiles: String several birds together with beads or pom-poms to create a festive garland for celebrations or a calming mobile for a nursery.
- Gift Toppers: Tie a fabric bird onto a wrapped present for an extra special, handmade touch that can be kept long after the gift is opened.
- Pincushions: A slightly larger, firmer fabric bird can make a delightful and functional pincushion for your sewing space.
- Scented Sachets: Stuff your bird with dried lavender, potpourri, or cedar chips to create a fragrant sachet for drawers or closets.
- Keychains or Bag Charms: Add a small loop and a keychain ring to personalize your bags or keys with a unique fabric bird.
- Seasonal Ornaments: Create birds in festive fabrics to hang on Christmas trees or seasonal branches.
- Playtime Pals: While not robust toys, softer birds can be gentle companions for imaginative play (ensure all parts are securely sewn if intended for children).
We hope this expanded and detailed tutorial inspires you to create a flock of fabric birds! This project is a fantastic blend of simplicity and satisfaction, perfect for anyone looking to add a handmade touch to their life or practice their sewing skills. Remember to visit Notches Sewing on YouTube for the original video tutorial and many more inspiring projects.
Happy sewing!
*All images provided are credited to Notches Sewing via YouTube. Be sure to visit her channel and subscribe for more amazing sewing tutorials!