
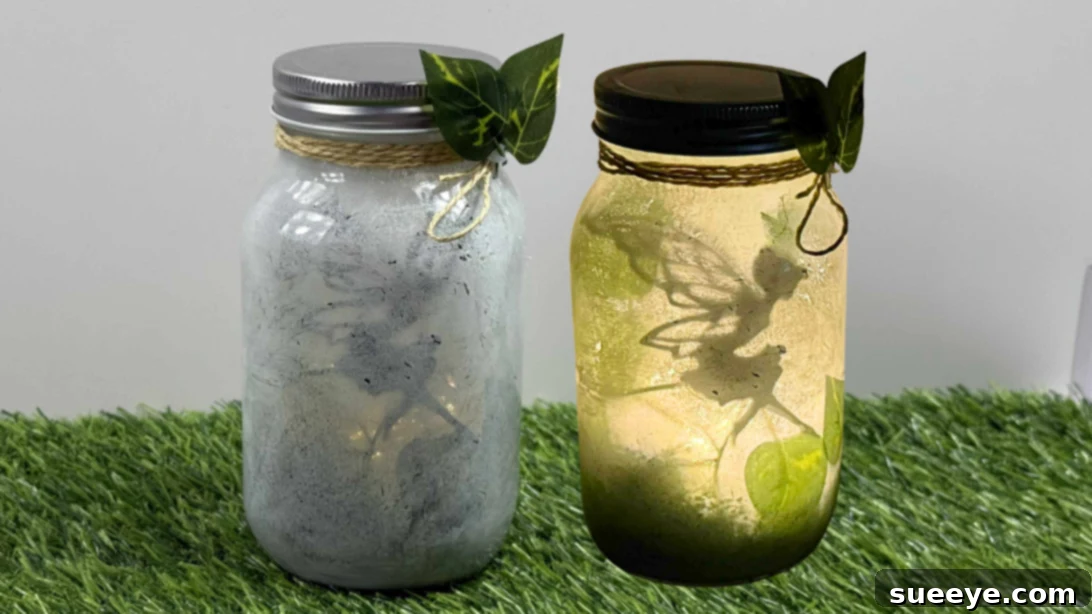
Embark on a delightful journey into the whimsical world of cottagecore crafting, where imagination takes flight and everyday objects transform into magical treasures. Recently, I found myself captivated by the sheer abundance of enchanting craft ideas online, particularly those infused with elements of fairies, magic, and nature’s charm. After countless hours of watching inspiring tutorials, one project shone brighter than the rest: the incredibly simple yet utterly captivating DIY fairy jar lamp.
My quest was for a night light that offered more than just illumination—I yearned for a warm, cozy glow that would soothe and comfort without being overly bright. And that, dear crafters, is precisely what this project delivers. What makes this craft even more appealing is its incredible accessibility. You don’t need expensive materials or advanced skills. In fact, you can effortlessly repurpose an old mason jar, a pickle jar, or any glass container you have lying around, transforming it into a beacon of gentle light.
These enchanting fairy light mason jars are incredibly versatile. They are perfect for adding a soft, dreamy ambiance to bedrooms, creating a welcoming glow in cozy corners of your home, or serving as heartfelt, handmade gifts. But why stop there? For those who wish to unleash their creativity further, these fairy lamps can easily be adapted into hanging lanterns. Imagine a collection of these glowing beauties suspended throughout your garden or yard, casting a magical spell as dusk settles—an utterly breathtaking display for outdoor gatherings or quiet evenings under the stars.
RELATED: Explore more creative ideas with Mason Jar Fairy Lights Featuring Pressed Flowers
Beyond their charming aesthetics and remarkable ease of assembly, what truly makes this project so endearing is the deeply personal touch each creation embodies. Every DIY mason jar fairy light turns out uniquely different, reflecting the individual style and creativity of its maker. You can experiment with a myriad of decorative elements: delicate sprinkles of glitter for a shimmering effect, real or dried flowers for a touch of nature’s elegance, or various cut-out silhouettes to depict fairies, whimsical creatures, or serene landscapes. The possibilities are truly limitless, ensuring that no two fairy lanterns are exactly alike. The gratifying end result? A stunning, homemade fairy light jar that radiates the perfect, gentle glow, ideal for a bedside table, a tranquil reading nook, a calming meditation corner, or even as a centerpiece for your dining table. Furthermore, this project serves as a wonderful, eco-conscious alternative to mass-produced lamps and offers a beautiful, sustainable way to upcycle glass jars you already possess, giving them a new lease on life.
Whether you affectionately call it a fairy jar lamp, a homemade fairy lantern, or a DIY fairy light jar, one thing is abundantly clear: you will undoubtedly become obsessed with the process of making them. It’s a craft that is simple, profoundly soothing, and endlessly customizable, inviting you to explore your artistic side with every creation. The therapeutic rhythm of crafting, combined with the anticipation of the final glowing masterpiece, makes it an incredibly rewarding experience.
So, if you’ve been on the lookout for a relaxing and engaging craft project that culminates in something genuinely useful and beautiful—a piece you’ll adore using yourself or be proud to present as a thoughtful gift—then look no further. This is it. Take the leap and try your hand at crafting your very own DIY night light fairy jar. You’ll soon discover how a little light, crafted with love and creativity, can truly make a significant and magical difference in your home and heart. It’s more than just a light; it’s a small piece of enchantment brought to life by your hands.
What You’ll Need for Your Enchanted Fairy Light Jar
Gathering your materials is the first exciting step on your crafting journey. The beauty of this project lies in its simplicity and the affordability of the supplies, many of which you might already have around your house. Here’s a comprehensive list to get you started on creating your very own magical glow:
- Mason Jar or Any Glass Jar: The star of your project! Clean, empty jars of various sizes and shapes can be used. Pickle jars, jam jars, or even old candle jars are perfect candidates for upcycling. The clearer the glass, the better the light diffusion.
- Twine: Natural jute twine or decorative ribbon for embellishing the jar’s neck. This adds a rustic, charming touch and helps secure any added decorations.
- Primer or Acrylic Paint (White): To create a frosted, ethereal look on the inside of your jar, allowing the light to diffuse softly. White is recommended for a classic fairy glow, but muted pastel acrylics can also create interesting effects.
- Scissors: For cutting out your chosen silhouette patterns and trimming twine or other decorative elements. A sharp pair will ensure clean edges.
- Silhouette Template: Pre-designed fairy, nature, or whimsical creature silhouettes. You can find countless free templates online, or unleash your inner artist and draw your own unique designs.
- Tea Light or Fairy Lights: The heart of your lamp! Battery-operated LED tea lights or strings of micro fairy lights are ideal as they are safe and produce minimal heat. Choose warm white lights for a cozy glow, or experiment with colored lights for a different mood.
- Fake Moss or Tissue Paper: To create a base layer at the bottom of the jar, adding texture and depth. Fake moss enhances the natural, enchanted forest aesthetic, while crumpled tissue paper offers a soft, cloud-like foundation.
- Paintbrush or Sponge: For applying paint evenly inside the jar. A small, angled brush can help reach tricky spots, while a sponge can create a textured finish.
- Artificial Leaves or Small Decorative Elements: To add more natural details and dimension inside the jar, enhancing the silhouette effect. Small dried flowers, tiny pinecones, or glitter can also be used.
- Hot Glue Gun and Glue Sticks: Essential for securely attaching your silhouette cutouts and other decorative embellishments inside and outside the jar.
With these items in hand, you’re all set to begin crafting your very own piece of magic. Each component plays a vital role in bringing your fairy jar lamp to life, allowing for both functionality and aesthetic beauty.
How to Make a DIY Fairy Light Jar: Your Step-by-Step Guide
Step-by-Step Instructions to Craft Your Enchanted Jar
-
Step 1: Choosing and Preparing Your Enchanting Pattern

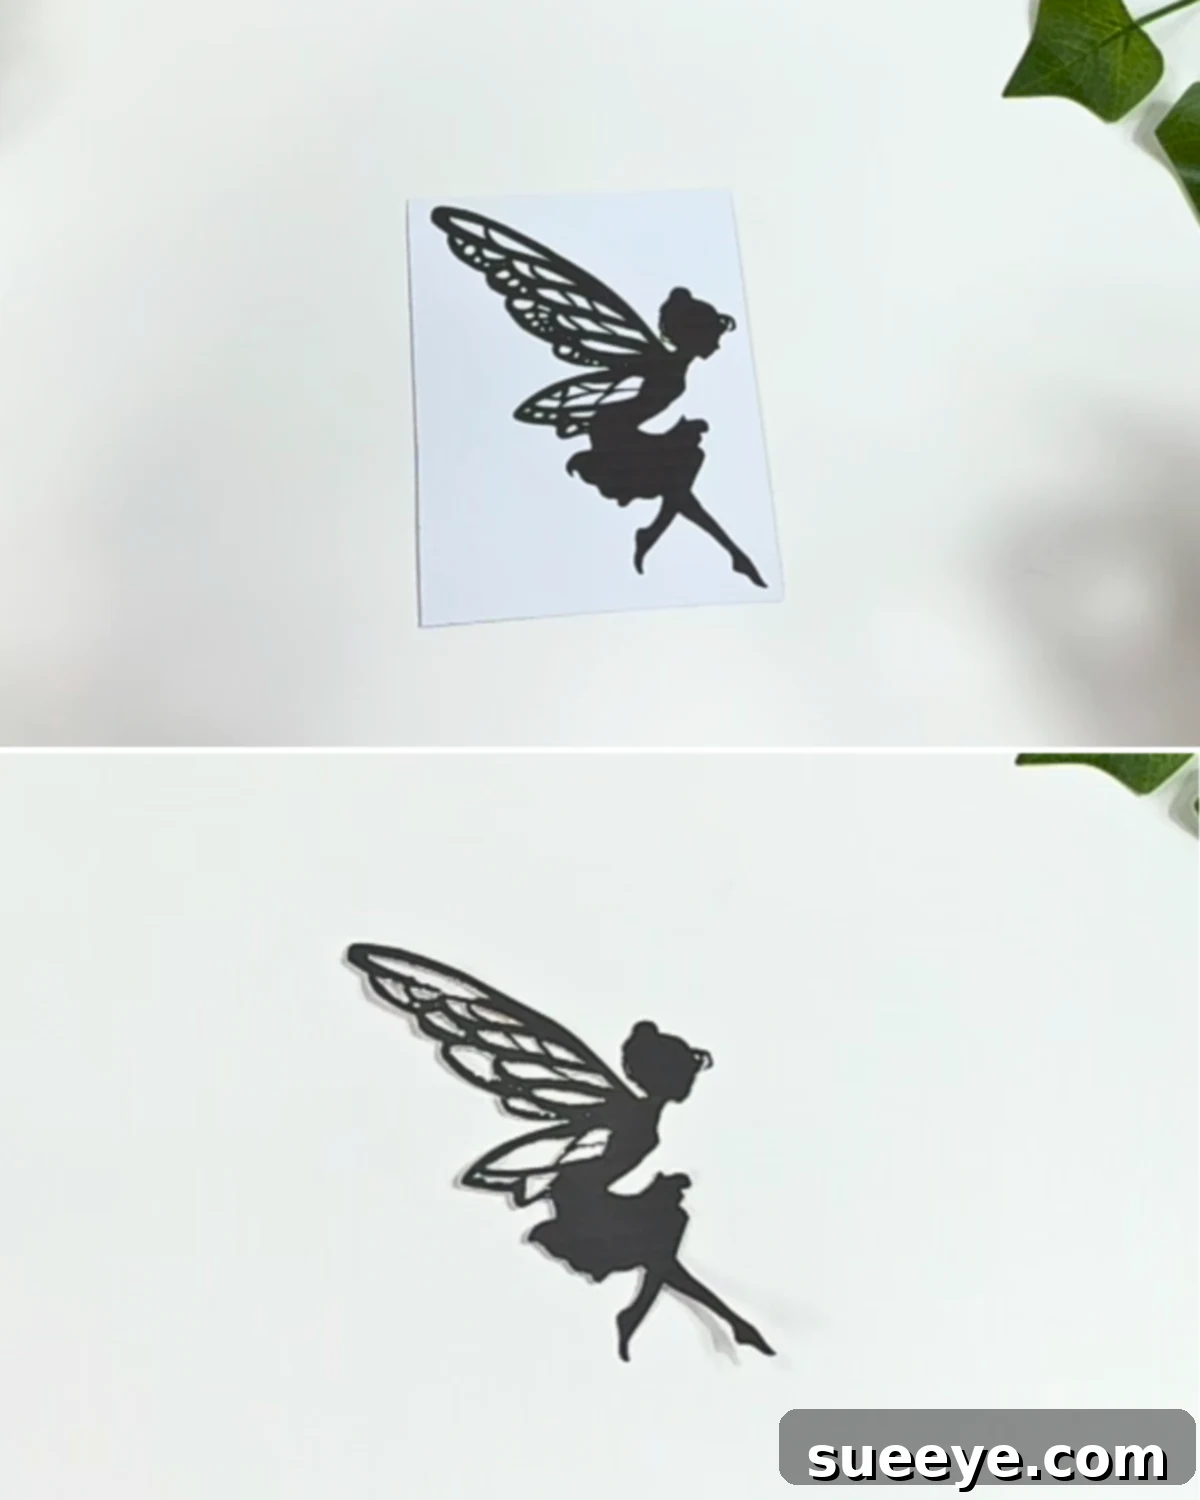
This is where your creative vision truly begins to take shape. Start by selecting a captivating fairy silhouette pattern, or choose any other whimsical design that resonates with your personal aesthetic. You could opt for graceful fairies, charming tree lines, quaint mushrooms, or even tiny house silhouettes – the choice is entirely yours! Once you’ve settled on a design, print your chosen pattern onto a piece of paper or slightly thicker cardstock. Precision is key here; carefully cut out the shape, ensuring you remove all white parts to create a clean, distinct silhouette. Consider printing a few different options to see which best fits the size and shape of your jar, adding an extra layer of personalization. -
Step 2: Preparing Your Jar with a Soft, Ethereal Coat of Paint
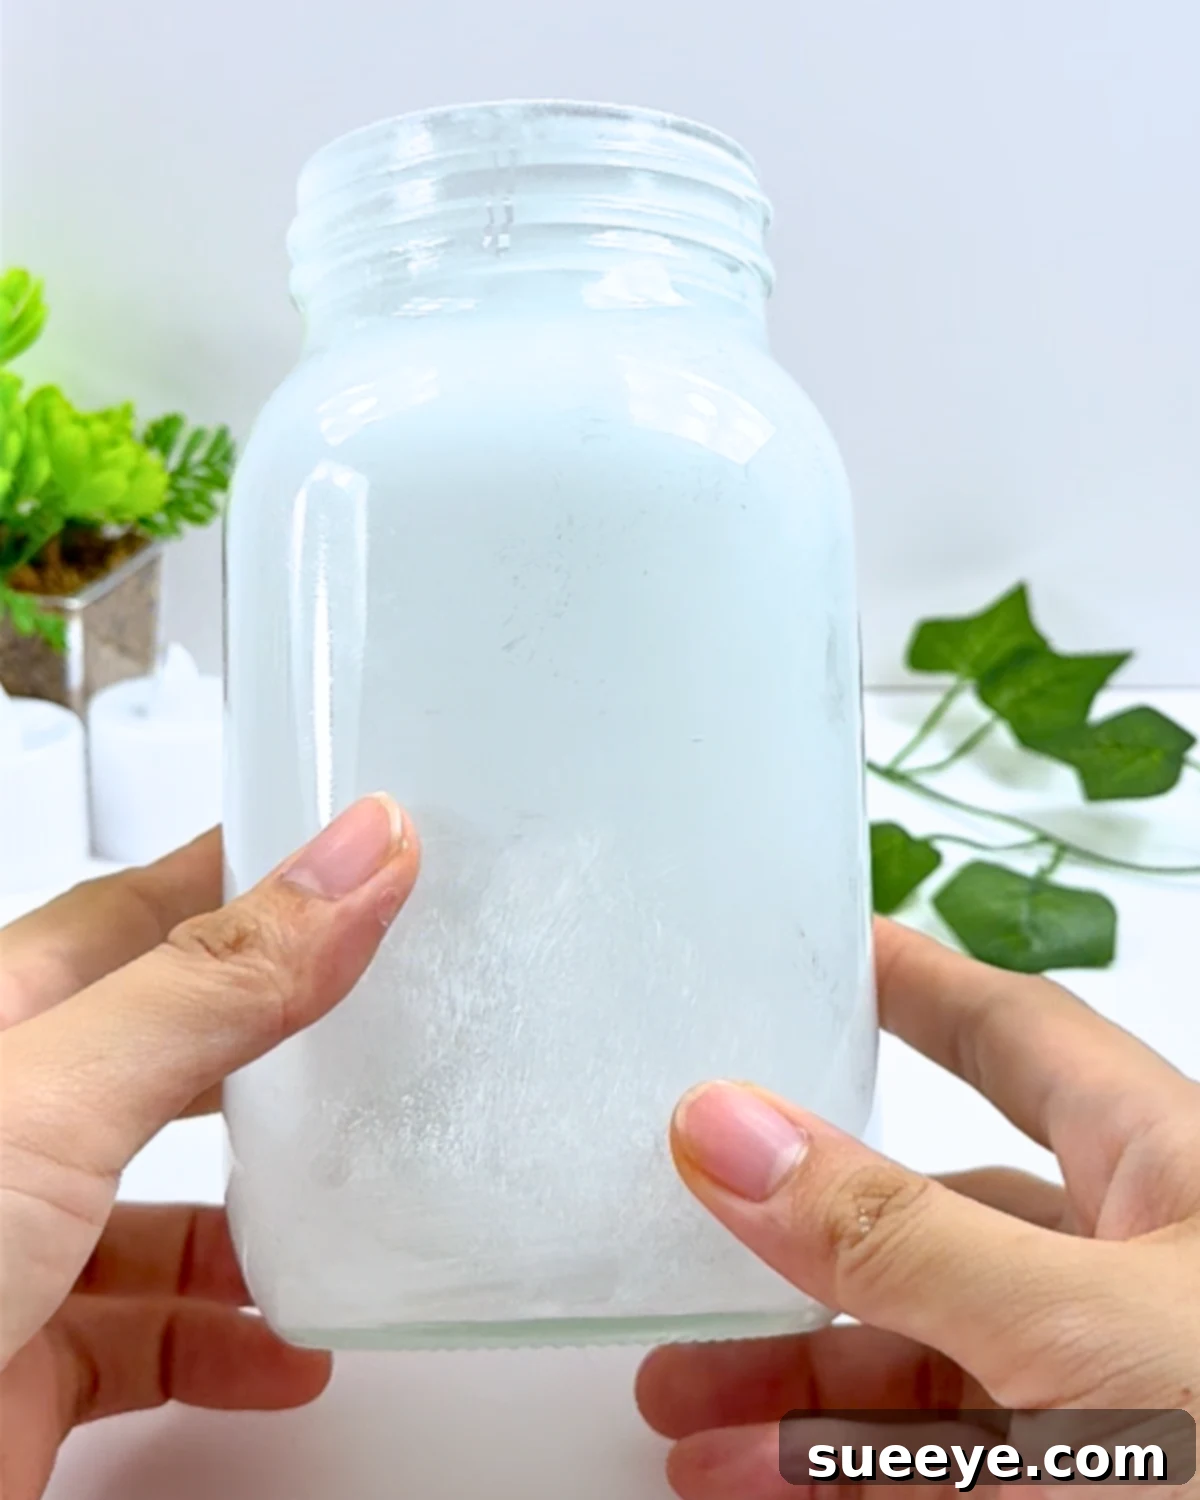
Next, prepare your jar for its magical transformation. Paint the inside of the glass jar with white acrylic paint. For a more opaque and durable finish, you can also use a primer paint, which often boasts a thicker consistency and provides superior coverage. You have a couple of options for application: either use a paintbrush for precise strokes or a sponge for a more textured, frosted effect. The goal is to achieve sufficient coverage that allows the light to diffuse softly and evenly, creating that desired warm, ethereal glow. You might need two thin coats for optimal effect, allowing each coat to dry completely before applying the next. -
Step 3: Bringing Your Scene to Life with Internal Details
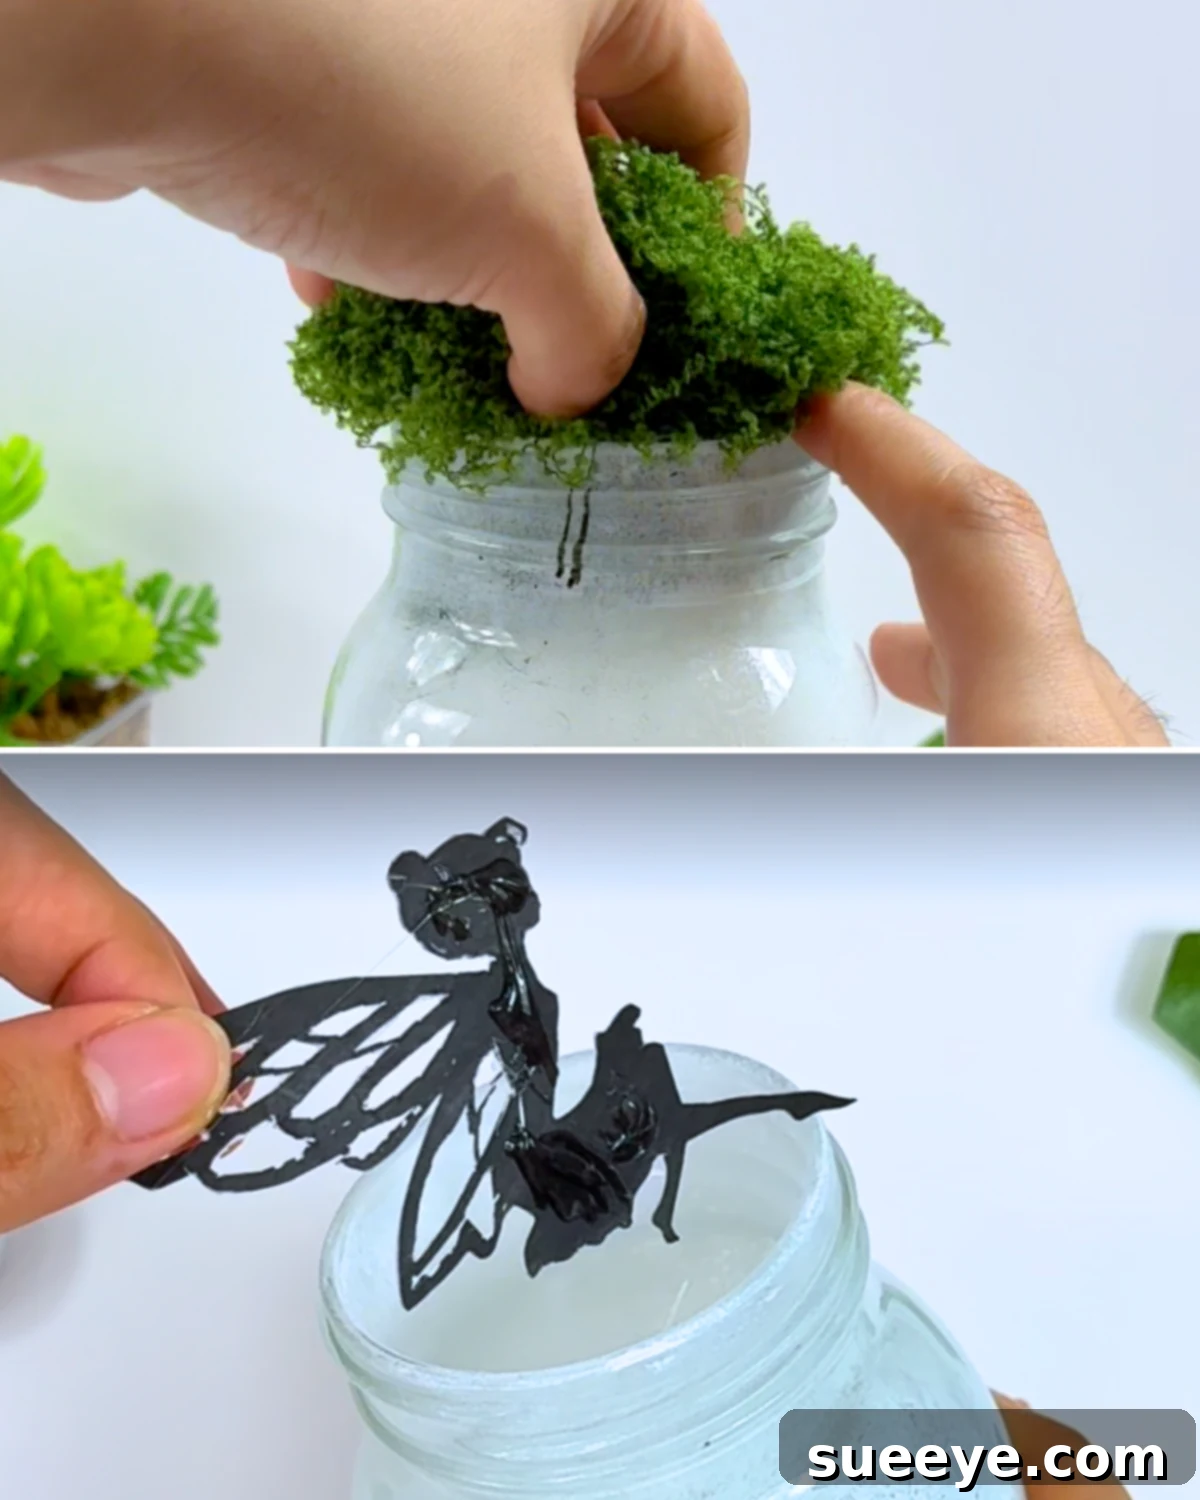
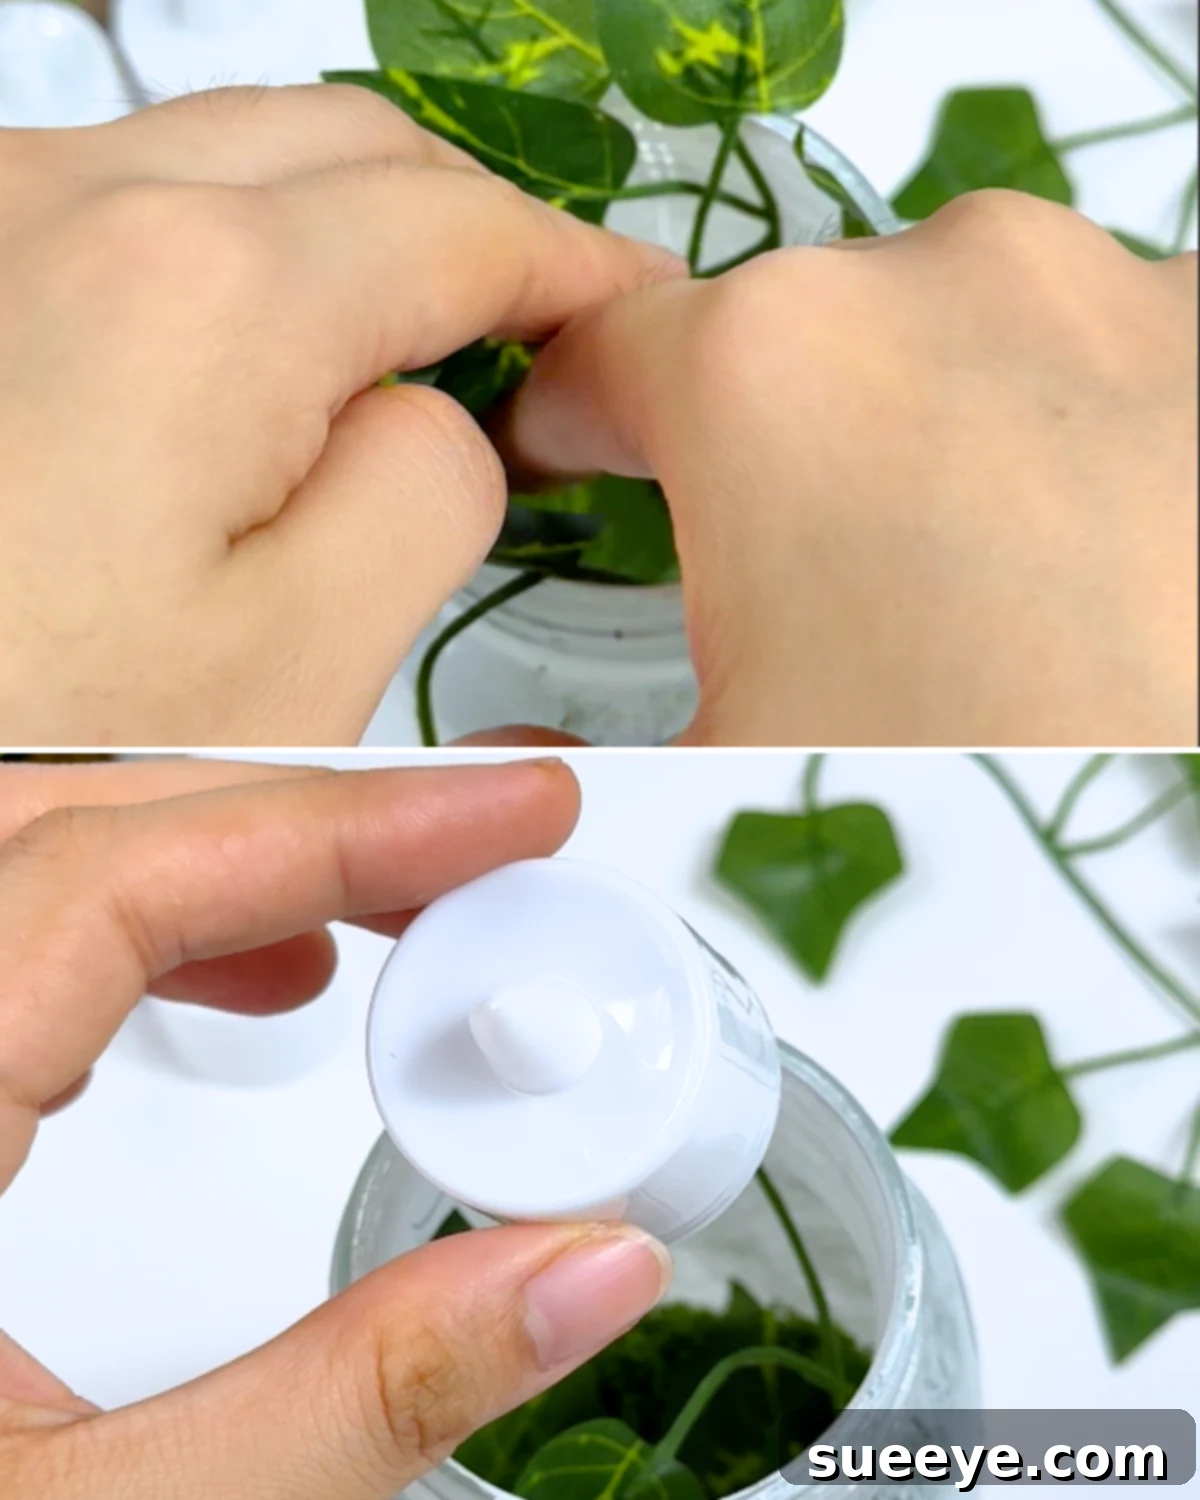
Now it’s time to add the foundational elements that will set the scene for your fairy tale. Begin by placing a layer of fake moss at the bottom of the jar. If you don’t have fake moss on hand, don’t worry—a small amount of crumpled tissue paper can create a similar soft, textured base. Once your base is in place, take your carefully cut silhouette. Apply a small amount of hot glue to the front (the side that will face outward) of your silhouette cutout, then carefully stick it to the inside wall of the jar. Position it strategically so it will be clearly visible when illuminated. This step truly starts to build the miniature world within your jar. -
Step 4: Enhancing the Magic with More Details and Lighting
To further enrich your enchanted landscape, consider adding a few artificial leaves or tiny dried floral elements inside the jar. These additional details will cast captivating shadows and silhouettes alongside your main fairy figure, adding depth and intrigue to your design. Once all your internal decorative elements are settled and securely in place, it’s time for the magical touch: the light source. Gently place a battery-operated tea light or a string of micro fairy lights inside the jar. If using fairy lights, try to discreetly tuck the battery pack behind some moss or near the back wall of the jar to keep the focus on the enchanting scene. -
Step 5: Decorating the Lid and Final Assembly
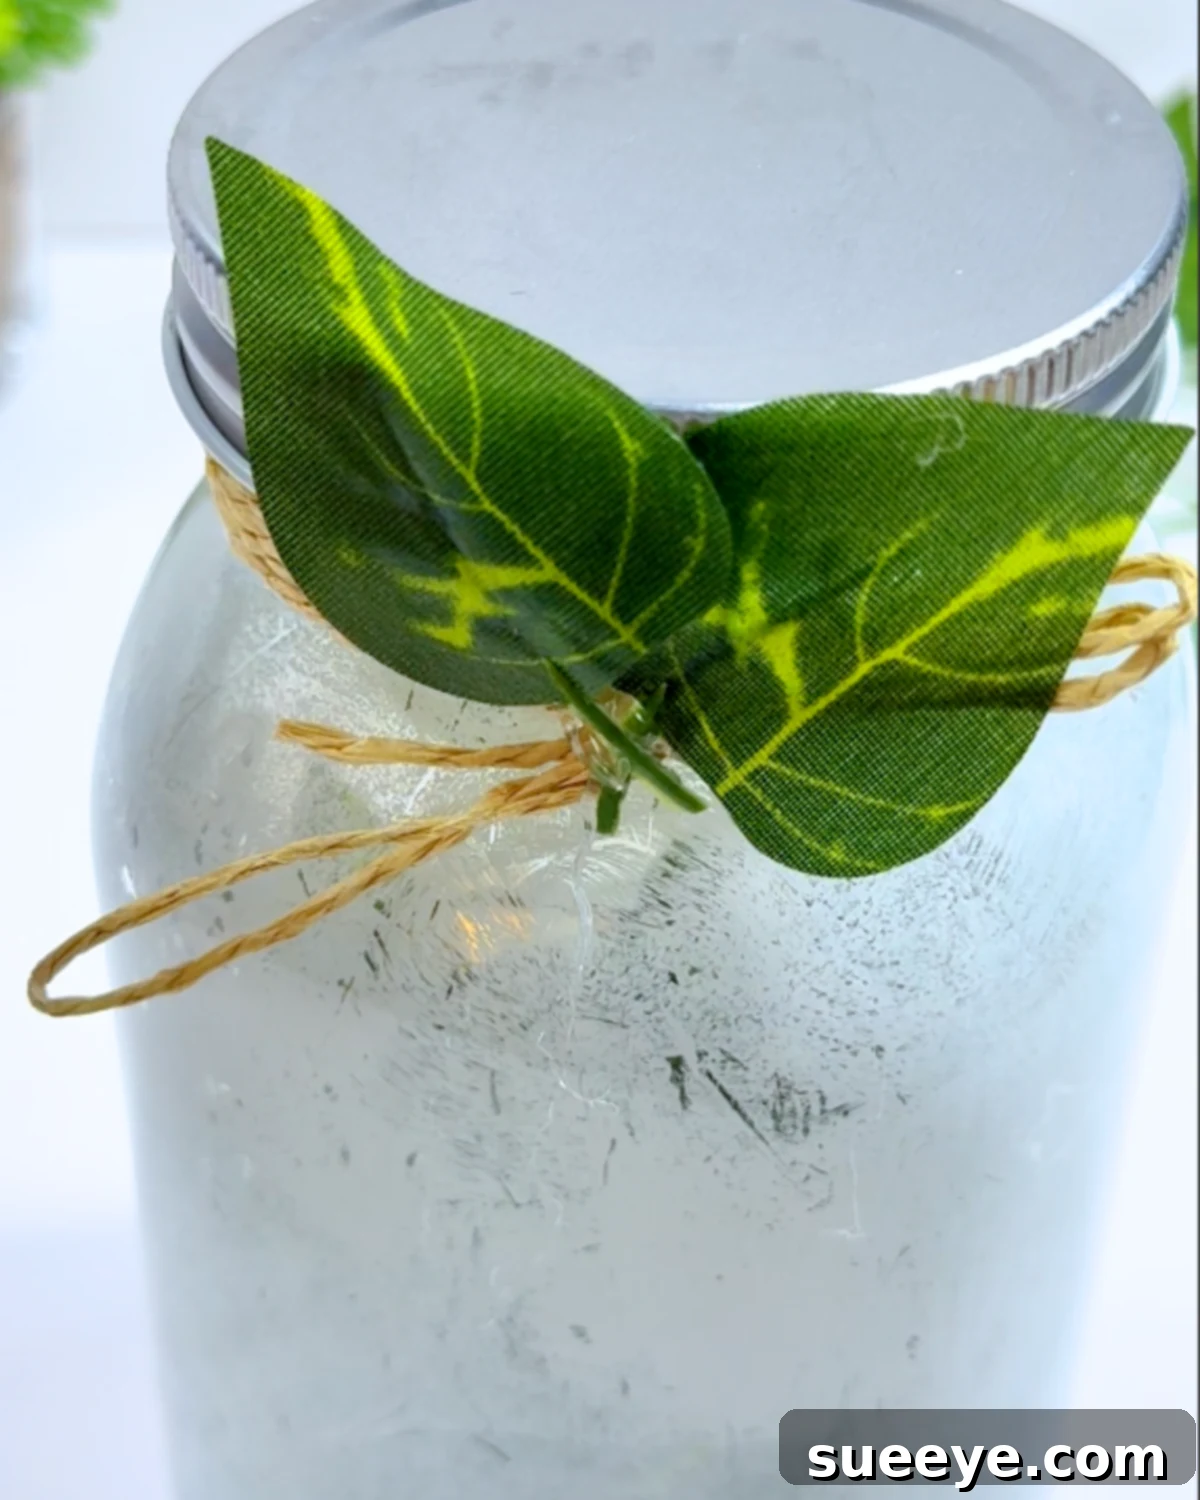
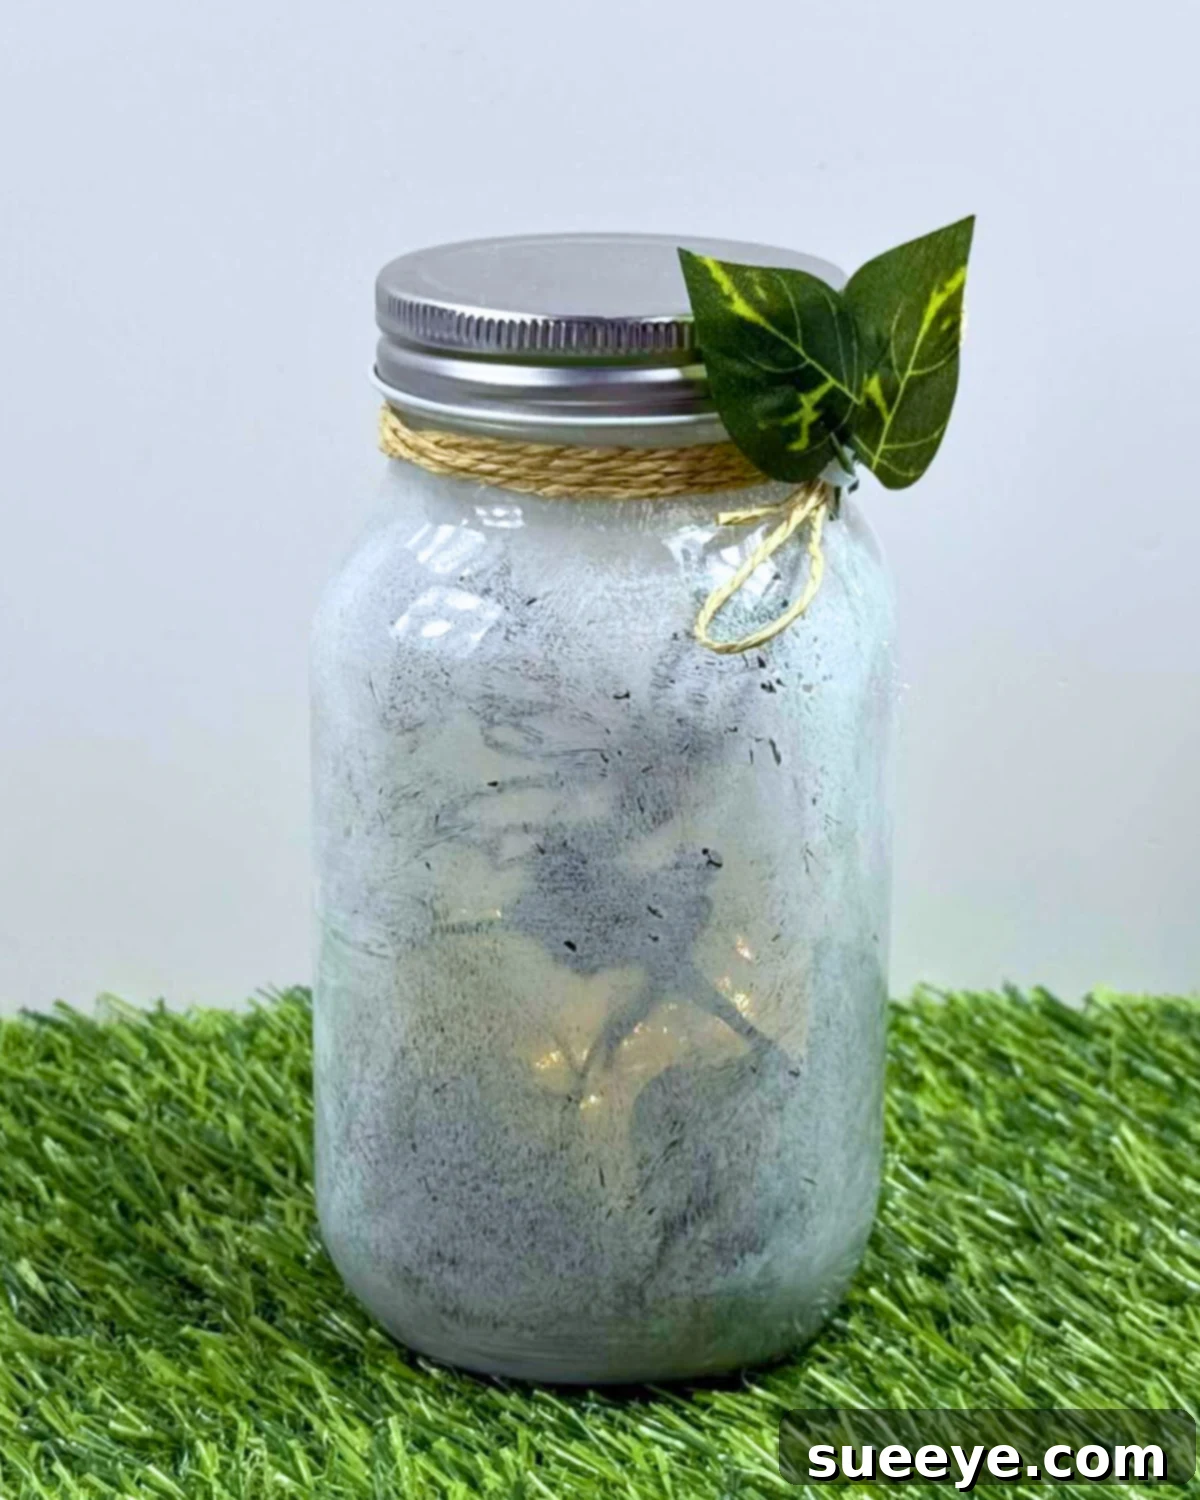
The exterior of your fairy jar lamp deserves just as much attention. Take a piece of twine and artfully wrap it around the neck of the jar. Tie it tightly, then create a decorative bow for a charming finish. For an extra touch of natural elegance, use your hot glue gun to attach a few artificial leaves or small berries to the twine. This embellishment complements the internal scene and adds to the overall cottagecore aesthetic. Once all decorations are secure and the lid is gently placed or screwed on, your fairy jar lamp is complete! Now, all that’s left to do is find the perfect spot, switch on the light, and watch as your creation begins to glow in the dark, bringing a gentle, magical warmth to any space. -
Your Enchanted Fairy Jar Lamp is Ready to Glow!
Marvel at the beauty you’ve created! Even in daylight, your fairy jar lamp is a delightful piece of decor, showcasing your artistic flair and attention to detail. But the true magic unfolds when the lights dim. Wait until you see it in the dark, radiating its soft, inviting glow. Each shadow and silhouette will come to life, transforming your space into a peaceful, enchanted haven. This isn’t just a lamp; it’s a handcrafted piece of art, a soothing night light, and a testament to the joy of DIY.
Materials List Recap
- Mason jar or any clean glass jar
- Twine or decorative ribbon
- Primer or white acrylic paint
- Sharp scissors
- Fairy silhouette or chosen pattern template
- Battery-operated tea light or micro fairy lights
- Fake moss or crumpled tissue paper
- Small paintbrush or sponge
- Artificial leaves or small decorative elements
- Hot glue gun and glue sticks

Why You’ll Absolutely Adore Crafting This Fairy Light Jar
Making this enchanting fairy light jar is the epitome of a satisfying DIY project that never feels overwhelming. It strikes the perfect balance between creativity and simplicity, making it accessible to crafters of all skill levels. This project is not only quick to complete but also incredibly affordable, requiring only a handful of inexpensive or repurposed materials. Its true charm, however, lies in its infinite adaptability. You can effortlessly tailor it to complement any style or theme imaginable—whether you’re aiming for a whimsical, rustic, modern, or even a festive holiday aesthetic. The design possibilities are limited only by your imagination, allowing each jar to become a unique reflection of your personal taste.
These delightful fairy jars make truly exceptional and thoughtful gifts for loved ones, adding a personal touch that store-bought items simply can’t replicate. They serve as ideal night lights, casting a gentle, comforting glow that helps create a serene atmosphere in any room. Beyond their practical uses, they are also lovely decorative additions to a bookshelf, a side table, or even a home office, infusing a sense of calm and magic into everyday spaces. And the absolute best part? You have complete freedom to make it in any size you desire, from petite jars perfect for a subtle accent to larger ones that become captivating focal points.
Furthermore, this fairy light mason jar project is a fantastic activity to share. It’s an engaging and rewarding craft to do with children, fostering their creativity and fine motor skills. It’s also a wonderful way to spend quality time with friends, making memories while creating something beautiful together. Or, if you prefer, it can be a perfectly quiet and mindful evening craft for yourself, offering a therapeutic escape from daily stresses. The beauty of this craft is its simplicity: it requires no intimidating power tools, no costly specialized supplies, and absolutely no stress. Just pure, unadulterated crafting joy leading to a magical outcome.
More Viral Craft Ideas to Inspire Your Creativity!
Seasonal
Make the Cutest DIY Christmas Ornament With a Tuna Can
Seasonal
DIY Christmas Ornaments | Glitter Foam
Crafts
Decorate Your Tree With Adorable 5 Minute Santa Gnome Ornaments
Seasonal
DIY Honeycomb Paper Christmas Tree Ornament
We hope this detailed guide inspires you to dive into the delightful world of DIY fairy jar lamps! They are truly more than just lights; they are little pockets of magic, handcrafted with love, ready to illuminate your home and warm your spirit. Embrace the joy of crafting, personalize each jar to your heart’s content, and watch as your unique creations bring a whimsical glow to every corner.
If you’ve enjoyed this enchanting craft tutorial, we invite you to explore more creative projects on our official website. Don’t forget to follow our Facebook page for daily inspiration and connect with a vibrant community of fellow crafters. For visual guides and even more DIY magic, subscribe to our YouTube channel. Happy crafting!
Easy DIY Fairy Jar Lamp: Your Gateway to Handcrafted Enchantment