
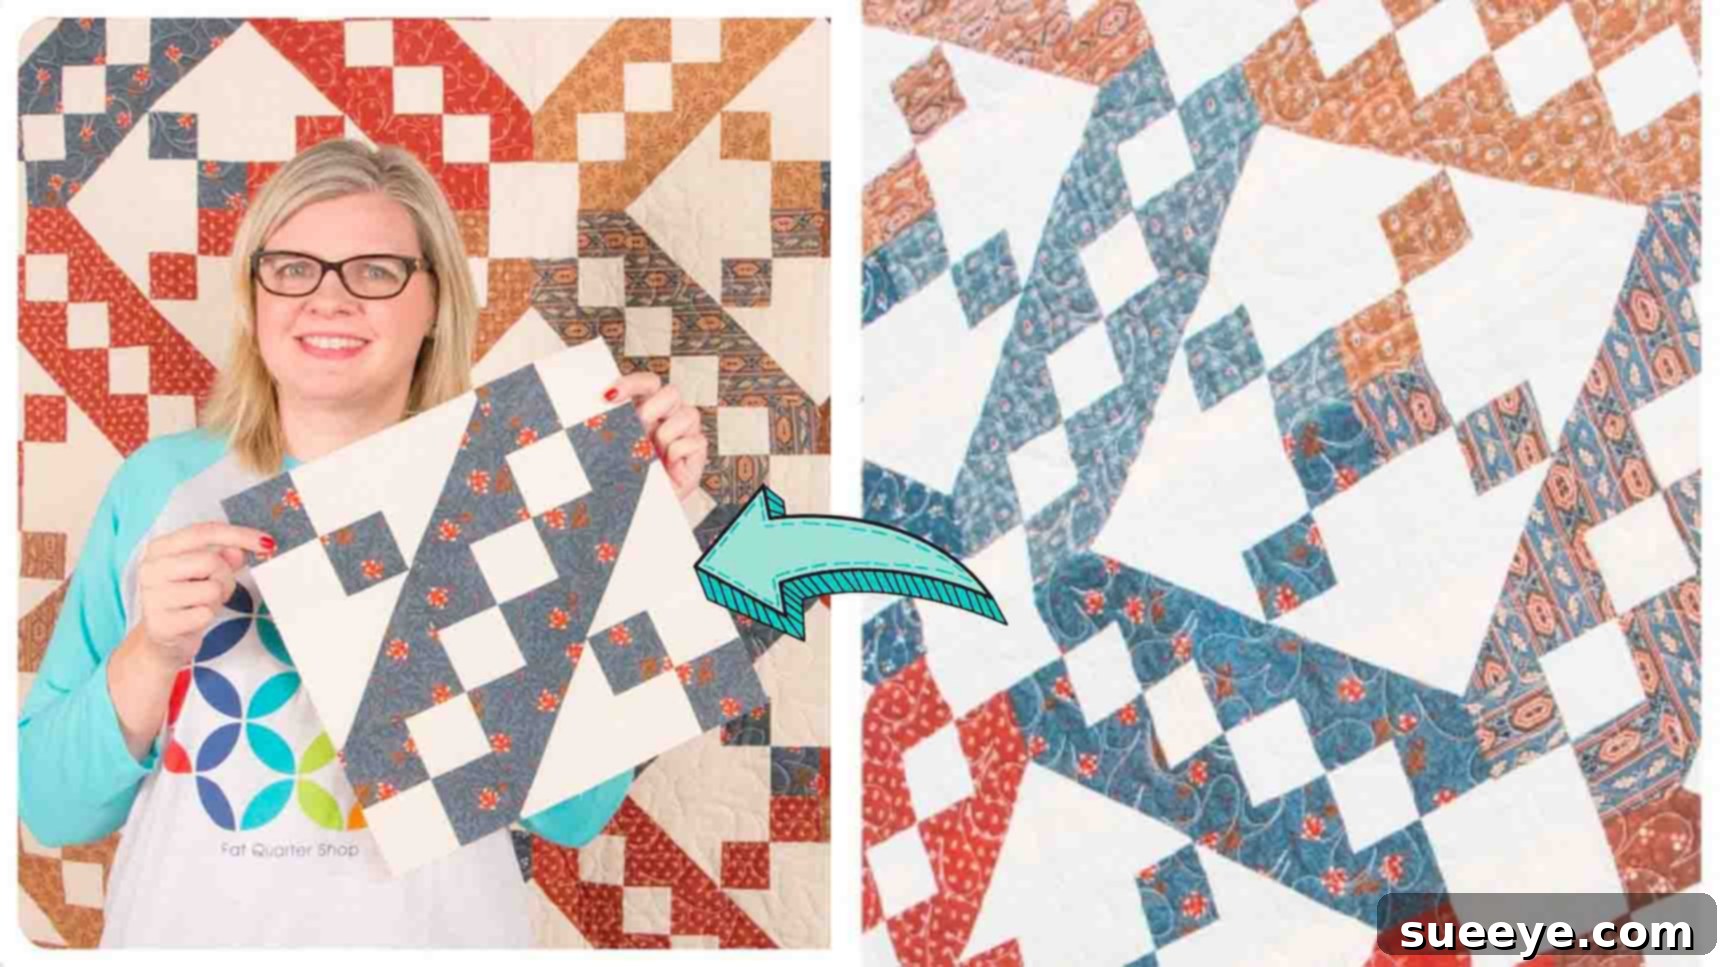
The Jacob’s Ladder quilt pattern stands as a beloved classic in the quilting world, admired for its intricate yet surprisingly simple design that creates a beautiful, dynamic flow. For enthusiasts of vintage quilt patterns, there’s an undeniable charm in its traditional appeal. However, what if we could infuse this timeless design with a fresh, contemporary spirit? This tutorial unveils an exciting approach to creating a modern twist on the iconic Jacob’s Ladder quilt block, perfect for adding a touch of updated elegance to your next project.
My journey into this specific block began when I stumbled upon an incredible guide from the talented team at Fat Quarter Shop on YouTube. Their innovative take on the Jacob’s Ladder immediately captivated me, transforming a familiar pattern into something new and exciting. This comprehensive guide will walk you through every step, ensuring you can replicate their fantastic design. Whether you’re a seasoned quilter or just starting your journey, this detailed tutorial provides all the insights you need to craft your own stunning Jacob’s Ladder quilt block today!
Why the Jacob’s Ladder Quilt Block Endures
The Jacob’s Ladder quilt block is celebrated for its distinctive visual impact, characterized by its interplay of diagonal lines that resemble a ladder, hence its evocative name. This pattern has a rich history, dating back to early American quilting traditions, where it often symbolized spiritual journeys or connections between heaven and earth. Its enduring popularity stems from its incredible versatility and adaptability. Depending on fabric choices and color placement, the Jacob’s Ladder can evoke vastly different moods – from rustic and traditional to bold and contemporary. It’s a fantastic pattern for developing fundamental quilting skills, particularly in mastering half-square triangles and four-patch units, which are building blocks for countless other quilt designs. By taking a modern approach, we breathe new life into this historical pattern, making it relevant and exciting for today’s quilters.
Essential Materials for Your Quilt Block
To embark on this creative journey, precise fabric cuts are key. We’ll be working with two primary fabric types: a “print” fabric for visual interest and a “background” fabric to make your design pop. Choosing high-quality quilting cotton is recommended for ease of sewing and durability. Consider how your print fabric’s pattern and color will interact with your background fabric. Contrasting colors or tones typically yield the most striking results for Jacob’s Ladder, highlighting its geometric beauty.
Print Fabric (Fabric A & B):
- 2 – 4 & 7/8″ squares (A): These squares will be instrumental in creating your dynamic half-square triangle units, forming the diagonal “ladder” effect. Precision in cutting these is crucial for perfectly matched points later on.
- 2 – 2 & 1/2″ x 15″ rectangles (B): These longer strips are designed for strip piecing, an efficient method for generating multiple smaller units quickly and accurately. They will form part of your four-patch blocks.
Background Fabric (Fabric C & D):
- 2 – 4 & 7/8″ squares (C): Identical in size to your print fabric squares (A), these background squares will pair with them to complete your half-square triangles, providing the necessary contrast.
- 2 -2 1/2″ x 15″ rectangles (D): Matching your print fabric rectangles (B), these strips will be sewn together to create the foundation for your four-patch units, giving structure to your block.
For a detailed visual guide and printable template, you can access the free pattern by clicking here. This pattern will provide additional guidance on measurements and layout, ensuring your block comes together flawlessly.
Tools You’ll Need for Quilting Success
Beyond your fabric, having the right tools makes all the difference in achieving precise cuts and stitches, which are paramount in quilting. Investing in quality tools will save you time and frustration, leading to a more enjoyable quilting experience and a professional-looking finish.
- Sewing Machine: A reliable machine with a good 1/4″ seam foot is essential for consistent seam allowances.
- Rotary Cutter: A sharp rotary cutter (45mm or 60mm) will ensure clean, accurate cuts through multiple layers of fabric.
- Self-Healing Cutting Mat: Protect your work surface and prolong the life of your rotary blade with a good quality cutting mat.
- Quilting Rulers: A variety of acrylic rulers, particularly a 2.5″ x 18″ or 6.5″ x 12.5″ ruler, are indispensable for accurate measuring and trimming.
- Fabric Scissors: Keep a pair of sharp scissors exclusively for fabric to ensure clean cuts when needed.
- Iron and Pressing Mat: A hot iron and a flat pressing surface are critical for setting seams and maintaining block integrity.
- Quilting Pins or Clips: Essential for holding fabric pieces together securely before stitching.
- Thread: High-quality 100% cotton thread that matches or blends with your fabric colors.
- Seam Ripper: Every quilter needs one! It’s better to unpick and redo than to live with an inaccurate seam.
Step-by-Step Guide to Your Modern Jacob’s Ladder Block
Preparation for Quilting
Before you begin cutting and sewing, take a moment to prepare your fabric. While not always necessary, pre-washing your fabric can prevent shrinkage and dye bleeding, especially for darker colors. Always press your fabric thoroughly to remove any wrinkles or creases before cutting. This ensures your measurements are accurate and your cuts are precise. Set up your workspace with your cutting mat, rotary cutter, and rulers easily accessible, and your sewing machine ready with the correct foot and thread. Safety first: always be mindful when using your rotary cutter.
Step 1: Crafting the Four-Patch Units
Our journey begins with creating the building blocks of the Jacob’s Ladder: the four-patch units. These seemingly simple squares are crucial for the overall pattern’s success, so accuracy here is paramount.
Start by taking one fabric B strip (print) and one fabric D strip (background). Align their long edges precisely, right sides together. Stitch them together using a consistent 1/4″ seam allowance. This measurement is standard in quilting and ensures all your pieces fit together perfectly. After stitching, gently press the seam open. Pressing open helps reduce bulk where seams meet later, leading to flatter blocks. Alternatively, you can press the seam towards the darker fabric to “hide” any potential show-through. Repeat this process to create a second identical strip set. You should now have two long strips, each comprised of a print and a background fabric section sewn together.
Next, it’s time to transform these strip sets into individual units. Grab your quilting ruler and rotary cutter. First, trim one short edge of each strip set to ensure it’s perfectly straight. Then, from each strip set, carefully cut five 2 & 1/2″ x 4 & 1/2″ rectangles. Accuracy in these cuts is vital for your blocks to square up correctly. By the end of this step, you will have a total of ten of these two-toned rectangles.
To complete your four-patches, take two of these newly cut rectangles. Place them right sides together, orienting them so that the print and background sections alternate. Pay close attention to the intersection where the previous seams meet; pin them precisely at this point to ensure your seams “nest” and your points match up perfectly. Stitch these two units together with a 1/4″ seam allowance. Once stitched, press the seam open (or to the side, consistently). Congratulations, you’ve just created your first complete four-patch unit! Repeat this process with the remaining rectangles until you have a total of five perfectly constructed four-patch units.
Step 2: Creating the Half-Square Triangles (HSTs)
Half-Square Triangles (HSTs) are the dynamic elements of the Jacob’s Ladder block, creating the diagonal movement that gives the pattern its characteristic look. For this block, you’ll need to make four HSTs.
Take one fabric A square (print) and one fabric C square (background), both cut to 4 & 7/8″. Place them right sides together, ensuring all edges align perfectly. Using a fabric marking pen or pencil, draw a diagonal line from one corner to the opposing corner across the top square. This line will serve as your cutting guide.
Now, to create your HSTs, stitch a 1/4″ away from this drawn center line on both sides. You will essentially sew two parallel lines, one on each side of your marked diagonal. This technique is efficient as it yields two HSTs from a single pair of squares. After stitching, carefully cut along the drawn center line. You will now have two triangular units. Press these open. For HSTs, it’s often recommended to press the seam towards the darker fabric to prevent the seam allowance from showing through lighter fabrics. Alternatively, you can press the seams open for less bulk, which is particularly useful when many seams converge.
Repeat this process with your remaining fabric A and C squares to create two more HSTs. In total, you should have four perfectly formed half-square triangle units. If desired, you can trim your HSTs at this stage to a specific measurement (e.g., 4 & 1/2″ square) using a dedicated HST ruler or a regular quilting ruler to ensure absolute precision, though the original tutorial doesn’t explicitly state this step, it’s good practice for advanced accuracy.
Step 3: Assembling the Jacob’s Ladder Block
With your five four-patch units and four half-square triangles ready, it’s time for the exciting part: bringing them all together to form the complete Jacob’s Ladder block. This is where the pattern truly comes to life.
Begin by laying out all your units on a flat surface, such as your design wall or a clean table. Visualize the 3×3 grid that will form your block. The Jacob’s Ladder pattern is achieved by carefully orienting your four-patch units and placing your HSTs strategically. For the modern twist, observe the pattern provided by Fat Quarter Shop carefully: all the dark sections within your four-patches should be oriented in the same general direction (e.g., top-left corner), and similarly, all the light sections should also point consistently. The half-square triangles will then be placed in between these four-patch units, creating the diagonal “ladder” effect.
Once you are satisfied with your layout, you’ll sew the units together row by row, and then sew the rows together to form the block. Start by sewing the units within each row together. Use a 1/4″ seam allowance and pins to keep your pieces aligned. Pay extra attention to where seams meet, ensuring they “nest” perfectly. Nesting seams means pressing adjacent seams in opposite directions so they interlock like puzzle pieces when sewn, helping to achieve perfectly matched points without bulk. Stitch each row together, and after each row is complete, press the seams according to the pattern’s guidance, or consistently in one direction, or open. Consistent pressing is crucial for a flat block.
After all three rows are sewn and pressed, align the rows, right sides together. Again, pin generously, especially at the seam intersections, to ensure all your points and lines meet up accurately. Stitch the rows together with a 1/4″ seam allowance. Once all rows are joined, give your completed Jacob’s Ladder block a final, thorough press. Squaring up your block at this stage (trimming it to a perfect 12.5″ x 12.5″ or whatever size your pattern indicates) will ensure all blocks in your quilt are uniform and fit together beautifully.
Tips for Achieving a Perfect Quilt Block
Quilting is an art that benefits greatly from precision and patience. Here are some tips to help you achieve beautiful results with your Jacob’s Ladder block:
- Accuracy is Key: From cutting to stitching, aim for utmost precision. Even a slight deviation in your 1/4″ seam allowance can compound over multiple pieces, leading to blocks that don’t square up correctly. Consider using a 1/4″ seam foot on your sewing machine.
- Pressing Matters: Don’t underestimate the power of a good press. Pressing after each seam helps set the stitches, creates crisp edges, and ensures your blocks lie flat. Always lift and press, rather than iron (which can stretch fabric).
- Chain Piecing: For repetitive units like the four-patch components or HSTs, consider chain piecing. This involves feeding multiple units through your machine without cutting the thread in between, saving time and thread.
- Pin Generously: When joining units, especially where seams meet, use plenty of pins. Pin directly at the seam intersections to ensure your points match up perfectly.
- Fabric Selection: Choose good quality quilting cotton. It’s easier to work with, less prone to fraying, and holds its shape better. High contrast between your print and background fabrics will make the Jacob’s Ladder design more prominent.
- Stay Organized: Keep your cut pieces organized by step or unit type. A design board or even just a tray can help keep your pieces in order and prevent mistakes.
- Practice Makes Perfect: Don’t be discouraged if your first block isn’t flawless. Quilting is a skill that improves with practice. Embrace the learning process!
Variations and Creative Explorations
The beauty of the Jacob’s Ladder block lies in its adaptability. Once you’ve mastered the basic construction, you can explore numerous variations to make the design uniquely yours:
- Color Play: Experiment with different color palettes. Using a monochromatic scheme can create a subtle, sophisticated look, while vibrant, contrasting colors will produce a bold and energetic quilt. Consider using scraps for a truly unique scrappy Jacob’s Ladder.
- Fabric Orientation: While this tutorial focuses on a modern orientation, explore traditional layouts where the four-patches might be angled differently, changing the overall flow of the “ladder.”
- Block Size: Adjusting the initial cut sizes will yield smaller or larger blocks. Be sure to recalculate all subsequent measurements accordingly to maintain the block’s proportions.
- Quilt Layouts: Once you have several Jacob’s Ladder blocks, how you arrange them can dramatically alter the final quilt. Setting them in rows and columns creates a traditional grid. Rotating alternate blocks by 90 degrees can create secondary patterns, such as stars or pinwheels, where the blocks meet. Adding sashing (strips of fabric between blocks) or cornerstones can also change the overall aesthetic.
- Beyond the Quilt: Don’t limit yourself to full quilts! A single Jacob’s Ladder block can be transformed into a charming cushion cover, a placemat, a table runner, or incorporated into a tote bag design.
Conclusion: Your Quilting Journey Awaits
Creating a Jacob’s Ladder quilt block, especially with a modern interpretation, is a deeply rewarding experience. It’s a chance to connect with a rich quilting heritage while infusing your own contemporary style. By following these detailed steps, from precise cutting and stitching of four-patch units and half-square triangles to the final assembly and pressing, you’ve gained valuable skills and produced a beautiful, intricate block.
This project, inspired by the fantastic resources from Fat Quarter Shop, is a testament to the endless creativity possible within the quilting community. We hope this comprehensive tutorial empowers you to confidently tackle this classic pattern and perhaps inspire further exploration into the vast and wonderful world of quilting. Don’t hesitate to share your finished Jacob’s Ladder blocks with fellow quilters and online communities – your unique creations are an inspiration to us all. Happy quilting!
Watch the Original Jacob’s Ladder Quilt Block Tutorial
For a visual walkthrough of this fantastic project, be sure to check out the original video tutorial from Fat Quarter Shop:
Watch the Jacob’s Ladder Quilt Block Tutorial on YouTube