
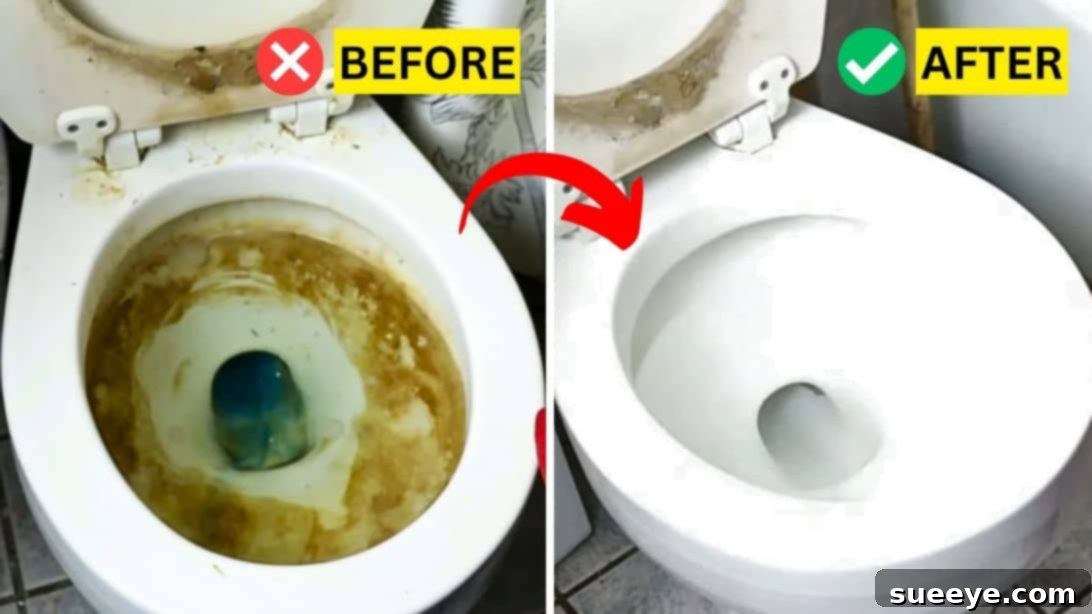
Restore Your Toilet: The Ultimate Guide to Deep Cleaning Rusty and Smelly Toilets
The bathroom, particularly the toilet, is often considered the heart of home hygiene. Yet, it’s also one of the most challenging areas to keep pristine, frequently succumbing to stubborn stains, rust, and persistent unpleasant odors. Many homeowners find themselves battling these issues, often feeling that their toilet is beyond saving and contemplating a costly replacement. However, before you consider tossing out your old commode, there’s good news! With the right approach and a few simple steps, you can effectively deep clean and restore your toilet to its original sparkling white condition, while also ensuring your bathroom smells fresh and inviting like never before.
This comprehensive guide, inspired by expert cleaning hacks from channels like Clean Freak & Germaphobe on YouTube, will walk you through a powerful cleaning regimen designed to tackle even the most entrenched grime. Say goodbye to unsightly rust rings, hard water stains, and lingering odors. Prepare to transform your toilet and elevate your entire bathroom experience with these proven techniques.
Why Toilets Get Rusty and Smelly: Understanding the Culprits
Before diving into the cleaning process, it’s helpful to understand what causes these common toilet problems. Knowledge of the enemy makes defeating it much easier!
- Rust Stains: These reddish-brown marks often originate from iron particles in your water supply (hard water) or from corroding internal tank components, like old pipes or bolts. As water evaporates, these iron particles oxidize and settle on the porcelain, creating difficult-to-remove rust rings and streaks.
- Hard Water Stains: Calcium and magnesium deposits from hard water leave behind chalky white, gray, or sometimes greenish rings and streaks. These mineral deposits build up over time, creating a rough surface that traps dirt and bacteria.
- Unpleasant Odors: The most common source of toilet odor is urine, especially if it splatters onto the floor, base of the toilet, or even under the seat hinges. Urine can seep into grout, flooring, and even the porous surfaces of the toilet bowl itself, fostering bacteria growth that produces strong, stale ammonia-like smells. Mold and mildew, often thriving in damp bathroom environments, can also contribute to musty odors, particularly around the tank and base.
- Bacterial Buildup: Toilets are naturally breeding grounds for various bacteria. Even with regular flushing, bacteria can cling to the bowl’s surface, particularly under the rim and in hard-to-reach crevices, leading to persistent smells and potentially unhygienic conditions.
Understanding these causes helps us target our cleaning efforts more effectively, ensuring we don’t just mask the problem but eliminate it at its source.
Essential Materials for a Deep Toilet Clean
Gathering the right tools and cleaning agents is the first step towards a sparkling clean toilet. For this comprehensive deep clean, you’ll need a combination of abrasive and chemical solutions to tackle different types of grime. Here’s your checklist:
- Plunger: Not just for clogs! A plunger is crucial for removing excess water from the bowl, allowing cleaning solutions to directly attack stains.
- High-Quality Toilet Bowl Cleaner: Choose a powerful cleaner specifically designed to cling to the bowl and dissolve tough stains like rust, lime, and hard water deposits. Gel formulas are often preferred for their ability to stick to vertical surfaces.
- Paper Towels or Microfiber Cloths: Use paper towels for the dirtiest tasks to minimize cross-contamination, especially for the exterior. Microfiber cloths are excellent for wiping down surfaces for a streak-free shine.
- Sturdy Toilet Brush: A good toilet brush with stiff bristles is essential for scrubbing away loosened grime. Consider one with an angled head to reach under the rim effectively.
- Pumice Stone with Handle: This natural volcanic rock is a miracle worker for stubborn hard water rings and rust stains that even chemical cleaners struggle with. Its abrasive yet gentle nature (when used correctly) can restore porcelain without scratching.
- Magic Eraser (Melamine Foam Sponge): An underrated tool for scrubbing off scuffs, light stains, and grime from the exterior porcelain surfaces. It works wonders on stubborn marks on the seat and tank.
- Urine Gone Stain Remover and Smell Eliminator (Enzyme Cleaner): This product is a game-changer for eliminating urine odors and stains from floors and around the base of the toilet. Enzyme cleaners break down organic matter, truly neutralizing odors rather than just masking them.
- Rubber Gloves: Essential for protecting your hands from harsh chemicals and bacteria.
- Ventilation: Ensure good airflow in your bathroom by opening a window or turning on the exhaust fan.
Step-by-Step Guide to a Sparkling, Odor-Free Toilet
Follow these detailed steps carefully to achieve a truly pristine and fresh-smelling toilet.
Step 1: Prepare the Bowl and Apply Initial Cleaner
The first critical step is to reduce the water level in your toilet bowl. This allows your cleaning agents to work directly on the stained surfaces rather than being diluted by excess water.
- Remove Excess Water: Grab your plunger. Place it firmly over the drain hole and push down several times, then pull up sharply. This action creates a vacuum effect that forces water out of the bowl and into the trap. Repeat this process until as much water as possible has been removed, exposing all the dirty and stained areas of the bowl.
- Apply Toilet Bowl Cleaner (Inside): Carefully lift the toilet lid and seat. Direct the nozzle of your chosen toilet bowl cleaner under the rim of the bowl, allowing the gel or liquid to coat the entire circumference. Squeeze the cleaner liberally, ensuring it drips down all sides of the bowl, covering all visible stains and the waterline. The clinging formula will begin to break down grime immediately.
- Apply Toilet Cleaner (Exterior): Don’t forget the outside! Rust and urine stains often accumulate on the exterior. Spray a generous amount of toilet cleaner (or an all-purpose bathroom cleaner if your toilet bowl cleaner isn’t suitable for exterior use) over all external surfaces of the toilet. This includes the entire tank, the seat cover (top and bottom), the lid, the flush handle, and all the way down to the base and floor connection. This pre-treatment helps loosen exterior grime.
- Let it Sit: Once the cleaners are applied, close the toilet lid. Allow the solution to sit and penetrate for at least 15-30 minutes. For heavily stained or rusty toilets, you might even consider letting it sit for a few hours or overnight for maximum effectiveness. This dwell time is crucial for the chemicals to dissolve and loosen stubborn deposits.
Step 2: Scrub, Rinse, and Tackle Stubborn Stains
After allowing sufficient dwell time, it’s time to put in some elbow grease and reveal the transformation.
- Clean the Exterior: While the interior cleaner is working, use a microfiber cloth or fresh paper towels (to prevent cross-contamination from the bowl) to wipe down the exterior surfaces of the toilet. Start from the tank and work your way down, thoroughly cleaning the lid, seat (both sides), flush handle, and the entire base. Pay close attention to hinges and crevices where grime often hides. Dispose of soiled paper towels immediately.
- Scrub the Interior: After at least 15-30 minutes, lift the lid. Grab your sturdy toilet brush and begin scrubbing the inside of the bowl vigorously. Focus on the areas under the rim, the waterline, and any visible stains. Use a circular motion and apply firm pressure to dislodge loosened dirt, rust, and mineral deposits. Ensure you reach all parts of the bowl.
- First Flush & Repeat (if needed): Once you’ve thoroughly scrubbed, flush the toilet. Observe the results. For exceptionally dirty or stained toilets, you might need to repeat Step 1 (apply cleaner) and Step 6 (scrub) to achieve the desired cleanliness.
- Address Tough Stains with a Pumice Stone: For those stubborn hard water rings or rust stains that persist even after scrubbing and flushing, reach for your pumice stone. Wet the pumice stone and gently rub it over the remaining stains. The fine abrasive quality of the pumice stone will physically abrade the mineral deposits and rust without scratching the porcelain (ensure the stone and surface are always wet during use). Apply gentle pressure and continue until the stains disappear. Flush again to rinse away any pumice residue.
- Detail with a Magic Eraser: For any remaining scuffs, marks, or light stains on the porcelain surfaces (especially the tank or exterior bowl) or even tough spots on the toilet seat, wet a Magic Eraser and gently rub. Its unique material works like an ultra-fine sandpaper to lift off grime.
- Eliminate Odors with Urine Gone: The final crucial step, especially for lingering odors. Spray Urine Gone (or a similar enzyme-based cleaner) generously all over the floor directly surrounding the base of the toilet. Also, spray it around the bottom perimeter of the toilet and any areas where urine splash or splatter is likely to occur, including behind the toilet. These enzyme cleaners break down the uric acid crystals that cause persistent odors, neutralizing them rather than just masking them. Allow it to air dry for maximum effectiveness. You’re done with the deep cleaning!
Maintaining a Pristine Toilet: Prevention is Key
A deep clean provides an excellent reset, but consistent maintenance is essential to prevent the return of rust, stains, and odors. Here are some tips for keeping your toilet fresh and clean between deep cleaning sessions:
- Regular Wiping: Quickly wipe down the toilet seat and exterior daily or every other day with a disinfecting wipe or an all-purpose cleaner.
- Weekly Bowl Cleaning: A quick scrub with toilet bowl cleaner and a brush once a week can prevent buildup.
- Address Splashes Immediately: If you notice any urine splashes, wipe them up immediately from the floor, wall, or toilet base to prevent odor absorption.
- Ventilation: Always use your bathroom exhaust fan during and after showers to reduce humidity, which contributes to mold, mildew, and lingering odors.
- Consider a Toilet Tank Drop-in (Use with Caution): Some products can help prevent mineral buildup, but be careful as some can damage internal rubber components over time. Read reviews and product descriptions thoroughly.
- Water Softeners: If you have extremely hard water, investing in a whole-house water softener can significantly reduce mineral and rust stains on all your fixtures, including your toilet.
- Natural Deodorizers: A small bowl of baking soda or activated charcoal can absorb odors in the bathroom. Essential oil diffusers can also help maintain a fresh aroma.
- Check for Leaks: A slow leak from the tank into the bowl can cause a constant flow of hard water, leading to more frequent staining. Address any leaks promptly.
Safety First: Important Considerations
When working with cleaning chemicals, always prioritize safety:
- Wear Gloves: Always wear rubber gloves to protect your skin from harsh chemicals and bacteria.
- Ensure Ventilation: Open windows and turn on exhaust fans to prevent inhaling fumes from cleaning products.
- Never Mix Chemicals: Especially avoid mixing bleach-based cleaners with ammonia-based cleaners (like some multi-surface sprays) or toilet bowl cleaners. This can create dangerous, toxic gases.
- Read Labels: Always follow the instructions and safety warnings on your cleaning product labels.
- Keep Out of Reach: Store all cleaning products safely out of reach of children and pets.
Conclusion: Enjoy Your Pristine Bathroom
Transforming a rusty and smelly toilet into a gleaming, fresh fixture might seem like a daunting task, but with this detailed guide, it’s entirely achievable. By dedicating a little time and using the right materials and techniques, you can not only eliminate unsightly stains and unpleasant odors but also restore a sense of freshness and hygiene to your entire bathroom. Remember, consistent maintenance is key to prolonging these results. So, roll up your sleeves, follow these steps, and prepare to enjoy a bathroom that truly sparkles and smells wonderfully clean. Your efforts will result in a more inviting and sanitary space for everyone in your home!
*All image credit belongs to Clean Freak & Germaphobe via YouTube. Follow and subscribe to her channel for more excellent cleaning tips and tricks!