
Embarking on your quilting journey is an exciting adventure, and nothing brings a handmade quilt to life quite like a beautifully finished binding. For many beginners, the idea of adding binding can seem daunting, a complex final hurdle after hours of careful piecing and quilting. However, with the right guidance and a clear, step-by-step approach, you’ll discover that binding your quilt is not only achievable but also incredibly rewarding. This comprehensive guide, inspired by expert tips from HeirloomCreations on YouTube, breaks down the process into six simple, easy-to-follow steps. We’ll walk you through everything you need to know, transforming intimidation into confidence as you learn to create a flawless, durable edge for your cherished quilts. Get ready to elevate your quilting skills and give your projects the professional finish they deserve.
Mastering Quilt Binding: Six Essential Steps for Beginners
#1 Cutting Your Binding Strips
The foundation of a beautiful quilt binding begins with precise cutting. Before you even think about stitching, you need to prepare your binding fabric. The standard width for quilt binding strips is typically 2 ½ inches, which, when folded and sewn with a ¼-inch seam, results in a clean ½-inch finished binding on both sides of your quilt. However, you can adjust this width based on your personal preference or the thickness of your quilt, remembering that a wider strip will result in a wider finished binding.
To determine the total length of binding you’ll need, measure the perimeter of your quilt (add up all four sides). Then, add an extra 10 to 12 inches to this measurement. This additional length accounts for seam allowances when joining strips, squaring up ends, and creating the final seamless join, ensuring you don’t run short. Using a rotary cutter, a self-healing mat, and a long quilting ruler is crucial for achieving straight, consistent strips. Lay your fabric flat, align your ruler, and make clean, even cuts. If your fabric isn’t wide enough for the entire length, don’t worry – you’ll be joining multiple strips together, which is part of the process. Always take your time during this initial step; accuracy here will save you frustration later on.
#2 Seamlessly Joining Binding Strips Together
Once you have all your binding strips cut, the next step is to join them into one continuous length. While you might be tempted to sew them straight across, the secret to a professional-looking binding lies in using diagonal seams. Diagonal seams distribute bulk more evenly across the binding, making the joins less noticeable and preventing them from creating lumpy spots that can wear out faster. This technique also helps the binding lie flatter and flow more smoothly around corners.
To create a diagonal seam, take two binding strips and place them right sides together, perpendicular to each other, forming an ‘L’ shape. Make sure the ends overlap where they meet. Using a fabric marker or pencil, draw a diagonal line from the top left corner of the overlap to the bottom right corner. This line will guide your stitching. Stitch precisely along this diagonal line. Once sewn, trim the excess fabric, leaving a ¼-inch seam allowance. Repeat this process for all your strips, forming one very long continuous piece of binding. When you’re done, gently pull the fabric to check that the seam is flat and that your binding forms a smooth, unbroken strip. This meticulous joining process is key to a beautiful final result.
#3 Expert Pressing for a Polished Look
Pressing is an often-underestimated step in quilting, but it’s absolutely critical for achieving a professional finish, especially with binding. After you’ve sewn all your binding strips together with diagonal seams, the first pressing task is to address these seams. Carefully open each diagonal seam flat with your fingers, then use a hot iron to press them open. Pressing seams open, rather than to one side, further reduces bulk and helps the binding lay perfectly flat against your quilt edge.
Once all seams are pressed open, the next crucial step is to prepare the entire binding strip. Fold the entire length of your binding strip in half lengthwise, with wrong sides together, and press firmly. This creates what’s known as “double-fold binding.” The goal here is to create a crisp, even fold along the entire length. Take your time, moving the iron smoothly along the strip, ensuring the raw edges are perfectly aligned before pressing. A good, strong crease will make attaching the binding to your quilt much easier and result in a neater finish. Using a bit of steam can help create a sharper crease, but be mindful not to stretch your fabric. This careful pressing lays the groundwork for a smooth, unwrinkled binding that frames your quilt beautifully.
#4 Attaching the Binding to Your Quilt Top
Now that your binding strip is perfectly prepared, it’s time to attach it to your quilt. This step requires precision and a few important setup considerations. First, ensure your quilt edges are neatly trimmed and squared, creating a clean foundation for your binding. For consistent stitching and to prevent fabric shifting, it’s highly recommended to use a walking foot on your sewing machine. A walking foot feeds all layers of fabric through the machine at the same rate, preventing puckering and uneven stitching.
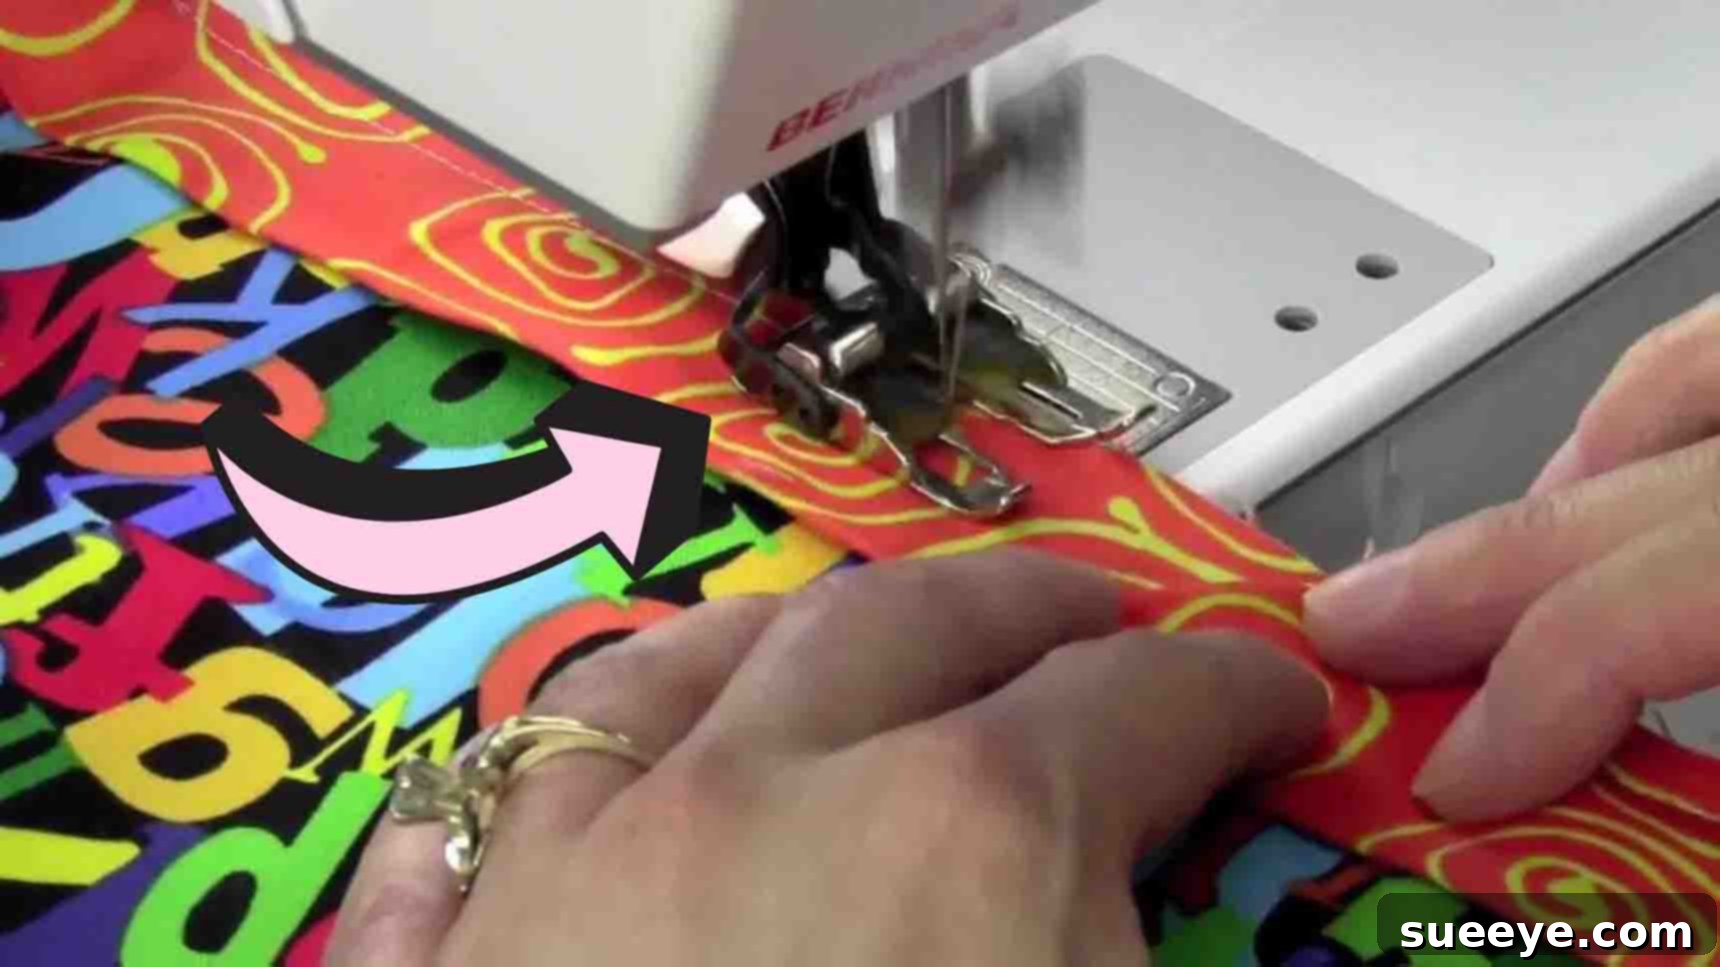
Start attaching your binding along one of the quilt’s longer sides, but not directly at a corner. Leave a “tail” of about 6-8 inches of unstitched binding at the beginning. Place the raw edge of your folded binding strip flush with the raw edge of your quilt top, ensuring right sides of the binding and quilt are together. Begin stitching with a consistent ¼-inch seam allowance. As you stitch, you’ll need to create a small “pocket” at the beginning for joining the ends later. To do this, at your starting point, unfold the binding tail, then fold it back diagonally, and then fold it forward again so the raw edge aligns with the quilt. This creates a small flap or “pocket” that you’ll tuck the other end into. Continue sewing around the quilt, maintaining that precise ¼-inch seam, until you approach the first corner.
#5 Mastering Mitered Corners for a Professional Finish
Mitered corners are the hallmark of a professionally finished quilt binding. They create a neat, angled fold that seamlessly wraps around the corner, enhancing the overall aesthetic of your quilt. As you stitch along the edge of your quilt, when you reach a corner, stop sewing exactly ¼ inch from the edge of the quilt. To secure your stitching, take a few backstitches before lifting your presser foot and cutting your threads. This leaves a small, unstitched segment at the very corner.
Next, remove the quilt from your machine. To create the mitered fold, first twist the binding fabric straight up, perpendicular to the quilt edge, forming a 45-degree angle. Finger-press this crease firmly. Then, take the entire binding strip and fold it back down along the next edge of the quilt, aligning its raw edge perfectly with the raw edge of the quilt. This action will create a clean, crisp fold at the corner of your quilt – a perfect miter. The binding should now be perfectly aligned for you to continue sewing along the next side. Bring the quilt back to your sewing machine, starting your stitch exactly at the quilt’s edge, continuing with your ¼-inch seam. Repeat this process for all four corners. When you arrive back at your starting point, you’ll have two binding tails. Neatly trim them so they overlap by about 1-1.5 inches. Then, tuck one end into the “pocket” you created at the beginning, fold the other tail neatly, and tuck it into the remaining opening, creating a smooth, continuous join. Stitch this final section to secure the join.
#6 Hand or Machine Stitching the Binding in Place
With the binding securely attached to the front of your quilt, the final step is to secure it to the back. This can be done either by hand for an invisible, traditional finish or by machine for a quicker, more durable result. Both methods yield beautiful results, and the choice often comes down to personal preference and the look you desire.
Hand Stitching for an Elegant Finish:
If you opt for hand stitching, carefully flip your quilt over so the back is facing up. Gently fold the binding over to the back side of the quilt, ensuring the folded edge extends just past your previous stitching line on the front. This will create a neat, rolled edge. Pin the binding in place, paying special attention to the mitered corners – these should naturally form a beautiful 45-degree angle on the back as well. Using a needle and a strong thread that matches your binding fabric, use a blind stitch or a whip stitch to secure the binding. The goal is to catch just a few threads from the quilt back and then go through the folded edge of the binding, creating tiny, almost invisible stitches. This method is meticulous and time-consuming but results in a beautiful, classic finish where the binding appears to float seamlessly against the quilt back.
Machine Stitching for Durability and Speed:
For those who prefer a faster or more durable finish, machine stitching is an excellent option. Again, fold the binding over to the back of the quilt, ensuring it covers the raw edge and the previous stitch line. Pin it securely in place. There are two primary ways to machine stitch:
- Stitching from the Front (Stitch-in-the-Ditch): Turn your quilt to the front. Stitch precisely in the “ditch” – the groove where your binding meets the quilt top. This line of stitching will catch the folded binding on the back, securing it in place. Using a matching thread color for your quilt top helps this stitch blend in.
- Stitching from the Back: Turn your quilt to the back. Stitch along the folded edge of the binding, about 1/8 inch in from the edge. This creates a visible stitch line on the binding itself. Again, matching your thread to the binding fabric will make this stitch less conspicuous.
Whichever method you choose, take your time, ensure your fabric is flat, and maintain a consistent stitch length. The mitered corners on the back should also be carefully folded and stitched to maintain their sharp angle, whether by hand or machine.
Congratulations! You’ve successfully navigated the steps to bind your quilt. From the initial precise cuts to the final securing stitches, each stage plays a vital role in creating a durable and visually appealing edge that frames your quilting masterpiece. While adding binding might initially seem like a complex task, with practice and patience, these techniques will become second nature, allowing you to confidently tackle any quilting project. Remember, every stitch adds to the unique story of your quilt, and a well-bound edge ensures that story lasts for generations. So, embrace the process, enjoy the journey, and revel in the satisfaction of completing a beautifully finished quilt that showcases your skill and passion. Happy quilting!