
Mastering Keurig Maintenance: Your Essential Guide to a Sparkling Clean Coffee Maker
For millions worldwide, the Keurig coffee maker is an indispensable part of their daily routine, delivering that much-needed caffeine boost with unparalleled convenience. But just like any frequently used appliance, regular maintenance is key to its optimal performance and longevity. Neglecting to clean your Keurig can lead to a less-than-perfect cup of coffee, machine malfunctions, and even potential health concerns. This comprehensive guide will walk you through an easy, effective Keurig cleaning process, ensuring every brew is as fresh and flavorful as intended.
You might be surprised to learn how quickly and simply you can revitalize your Keurig. Inspired by helpful demonstrations like the one by Angela Brown on YouTube, we’ll delve into a routine that takes minimal time and uses common household ingredients. By following these steps, you’ll not only extend the life of your machine but also significantly enhance the taste of your daily coffee. Let’s transform your Keurig from a functional appliance into a sparkling clean, high-performing coffee maker that consistently brews perfection.
Why Regular Keurig Cleaning Is Crucial
Maintaining a clean Keurig isn’t just about aesthetics; it’s fundamental to the quality of your coffee and the health of your machine. Over time, several factors contribute to buildup inside your Keurig, silently degrading its performance and your coffee experience:
- Mineral Deposits (Limescale): Water, especially hard water, contains minerals like calcium and magnesium. When heated, these minerals can solidify and accumulate on the internal heating elements and water lines. This limescale buildup restricts water flow, reduces heating efficiency, and can even cause your machine to stop working entirely. It’s the most common culprit behind a slow or malfunctioning Keurig.
- Coffee Residue and Oils: Each K-Cup brewed leaves behind tiny bits of coffee grounds and oils. These residues can cling to the K-Cup holder, the exit needle, and internal components. Over time, these oily deposits can become rancid, imparting a bitter, stale, or even muddy taste to your coffee. No one wants coffee that tastes like last week’s brew!
- Mold and Bacteria: The warm, damp environment inside a coffee maker is an ideal breeding ground for mold and bacteria. While often hidden from view, these microorganisms can thrive in the water reservoir, drip tray, and even the internal tubing. Regular cleaning is essential to prevent these unwanted guests from contaminating your brew and potentially posing health risks.
By understanding these common culprits, you can appreciate why consistent cleaning isn’t just a suggestion, but a vital part of owning a Keurig. A clean machine brews better, lasts longer, and provides peace of mind.
How Often Should You Clean Your Keurig?
The frequency of cleaning depends on your usage and water hardness, but a general routine will keep your Keurig in top shape:
- Daily Maintenance: After each use, empty and rinse the drip tray. If you leave water in the reservoir, make sure to replace it daily with fresh, filtered water. Wiping down the exterior with a damp cloth also helps prevent dust and spills from hardening.
- Weekly Deep Clean: At least once a week, remove all detachable parts (water reservoir, lid, K-Cup holder, drip tray) and wash them thoroughly with warm, soapy water. This prevents significant buildup of coffee oils and residues.
- Monthly or Quarterly Descaling: Descaling is the process of removing mineral deposits from the internal components. For optimal performance, descale your Keurig every 3 to 6 months. If you have particularly hard water or use your machine very frequently, consider descaling monthly. Your Keurig’s “descale” indicator light will also prompt you when it’s time.
Adhering to this schedule will ensure your Keurig operates efficiently, consistently delivering delicious coffee, and significantly extending its operational lifespan.
Essential Supplies for a Sparkling Keurig
Gathering your tools before you begin will make the cleaning process smooth and efficient. Most of these items are likely already in your kitchen or pantry:
- Large Bowl: Ideal for soaking removable parts.
- Dish Soap: A mild dishwashing liquid to cut through coffee oils and grime.
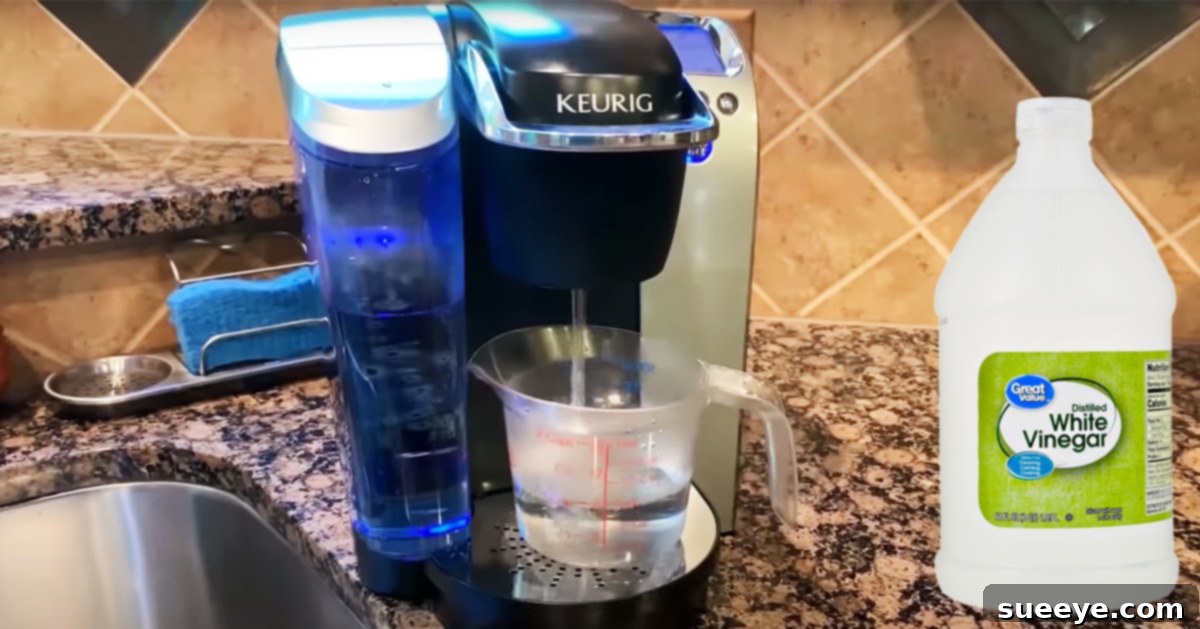
- Distilled White Cleaning Vinegar: The star of descaling! Its acidic nature effectively breaks down mineral deposits. Always use distilled white vinegar, not apple cider or other types.
- Measuring Cup: For accurately portioning water and vinegar.
- Gallon Bottled Water (Optional but Recommended): Especially useful for the final rinse cycles if your tap water is very hard.
- Bath or Large Towel: To protect your countertop from spills and for drying components.
- Dish Strainer: For air-drying the washed parts.
- Q-Tips (Cotton Swabs), Optional but Highly Recommended: Invaluable for reaching into tight crevices and around the brewing needles where gunk loves to hide.
- Paper Clip or Needle Cleaner Tool: Essential for clearing potential clogs in the entrance and exit needles.
- Soft Cotton Cloth: For wiping down exterior surfaces and drying parts without leaving lint.
- Soft Sponge or Non-Abrasive Scrubber: For gently cleaning removable parts and the machine’s exterior.
With these simple supplies, you’re well-equipped to give your Keurig the thorough cleaning it deserves.
Step-by-Step Keurig Cleaning Guide
Follow these detailed instructions to thoroughly clean and descale your Keurig coffee maker, ensuring it performs like new.
Step 1: Preparation and Disassembly
- Unplug the Machine: Safety first! Always ensure your Keurig is unplugged from the power outlet before you begin any cleaning.
- Empty the Reservoir: Remove the water reservoir and discard any remaining water.
- Remove Detachable Parts: Carefully remove the drip tray, the K-Cup holder (which usually lifts straight out), and the water reservoir lid.
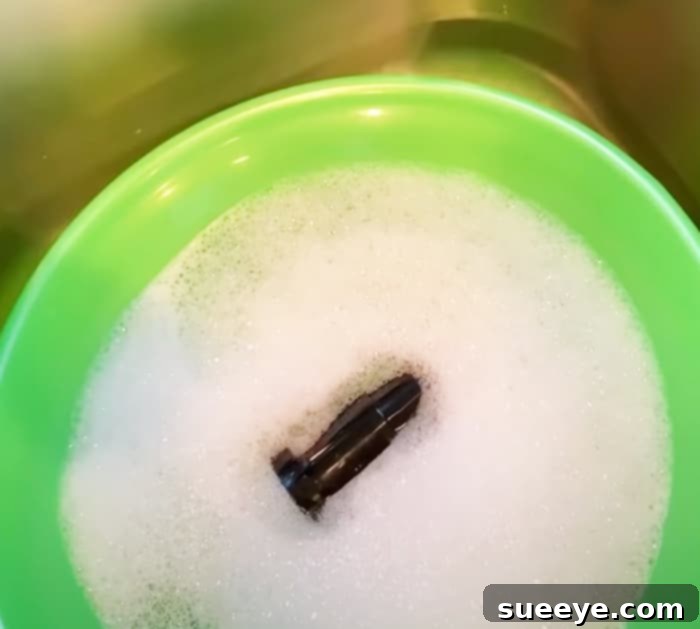
- Initial Soak: Fill your large bowl with hot water and add a few drops of dish soap. Place all the removed parts (drip tray, K-Cup holder, reservoir lid) into the soapy water to soak while you clean the rest of the machine. This allows the hot, soapy water to loosen coffee oils and mineral deposits.
Step 2: External and Internal Spot Cleaning
- Clean the Exterior: Dampen a soft cotton cloth or sponge with warm, soapy water. Gently wipe down the entire exterior of your Keurig, paying attention to the display, buttons, and any areas with splatters or fingerprints. Dry immediately with a clean, dry cloth to prevent water spots.
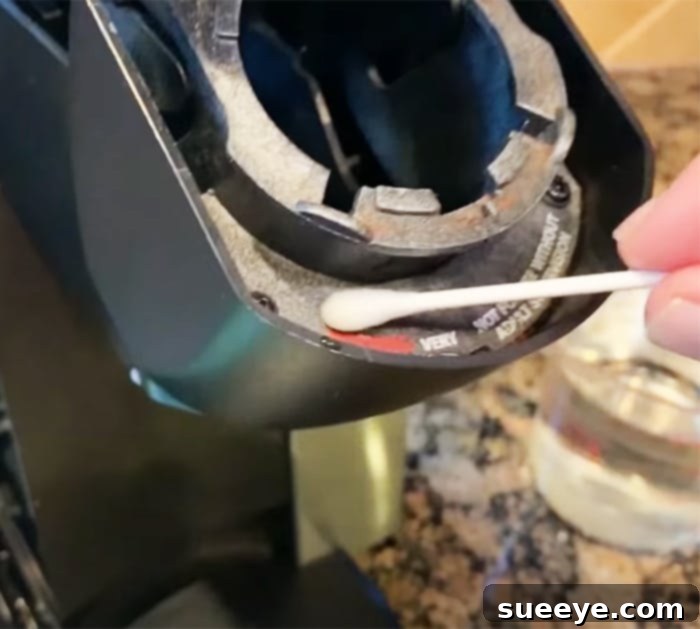
- Clean the K-Cup Holder Area: Dip a Q-tip into a small amount of distilled white vinegar. Carefully run the Q-tip around the inside of the K-Cup holder cavity, where the K-Cup sits. This area can accumulate coffee grounds, oils, and small mineral deposits. The Q-tip’s small size is perfect for getting into the tight corners and crevices.
- Address the Needles: The brewing needles are crucial and prone to clogging.
- Top Needle: This is inside the lid, above where the K-Cup sits. Unbend a paper clip and gently insert it into the hole of the top needle to dislodge any trapped coffee grounds.
- Bottom Needle (Exit Needle): This is at the base of the K-Cup holder. Remove the K-Cup holder from the soaking bowl, rinse it, and use the paper clip to clear the exit needle.
Be gentle to avoid damaging the needles. This step is vital for ensuring proper water flow and preventing future clogs.
- Wipe Down with Vinegar (Optional but Recommended): For any particularly stubborn spots inside the K-Cup housing or around the brew head, you can use a vinegar-dampened Q-tip or cloth to tackle mineral buildup before the main descaling cycle.
Step 3: The Descaling Process (Vinegar Flush)
This is the most critical step for removing internal mineral buildup.
- Prepare the Descaling Solution: Rinse the water reservoir thoroughly after its soak. Fill the reservoir with a mixture of equal parts distilled white vinegar and water (e.g., 16 ounces vinegar, 16 ounces water, or enough to fill the reservoir). If your water is very hard, you can use straight vinegar for the first descaling run.
- Run a Cleaning Brew Cycle (No K-Cup): Place a large ceramic mug on the drip tray (or a large bowl to catch the liquid). Do NOT insert a K-Cup. Close the brewer handle. Select the largest cup size available on your Keurig. Press the brew button. The Keurig will run a cycle, pumping the vinegar solution through its internal components.
- Repeat the Vinegar Flush: Empty the mug. Continue running brew cycles with the vinegar solution until the “add water” light illuminates, indicating the reservoir is empty. This ensures the vinegar has circulated through all internal tubing and heating elements, dissolving limescale.
- Allow to Stand: Once the reservoir is empty, turn off the Keurig and let it sit for at least 30 minutes, or even up to 4 hours. This allows the vinegar to work its magic on stubborn mineral deposits.
Step 4: Rinsing the System
Thorough rinsing is essential to remove all vinegar taste and odor from your Keurig.
- Rinse the Reservoir: After the soak time, thoroughly rinse the water reservoir multiple times with fresh water to remove any residual vinegar.
- Fill with Fresh Water: Fill the reservoir with clean, fresh water (preferably filtered or bottled water for the final rinses).
- Run Multiple Water-Only Cycles: Place a large mug on the drip tray. Run several brew cycles (again, without a K-Cup, using the largest cup size) with plain water. Empty the mug after each cycle. You’ll likely need to fill the reservoir with fresh water at least 3-4 times, running through a full reservoir each time, to ensure all traces of vinegar are gone. Continue until the water coming out is clear and odorless.
Step 5: Final Assembly and Wipe Down
- Clean and Dry Removable Parts: Retrieve the parts soaking in the dish soap solution. Scrub them gently with a sponge to remove any remaining coffee residue or buildup. Rinse them thoroughly under running water and dry them completely with a clean cotton cloth or allow them to air dry on a dish strainer.
- Reassemble the Keurig: Once all parts are dry, reattach the K-Cup holder, drip tray, and water reservoir.
- Final Exterior Wipe: Give the entire machine one last quick wipe-down with a clean, damp cloth to remove any smudges or water droplets, then dry.
Your Keurig is now sparkling clean, descaled, and ready to brew delicious, fresh-tasting coffee once again!
Tips for Ongoing Keurig Maintenance
To keep your Keurig running smoothly between deep cleans, consider these simple habits:
- Use Filtered Water: This significantly reduces mineral buildup, extending the time needed between descaling cycles.
- Empty and Rinse Drip Tray Daily: Prevents stagnant water and potential mold growth.
- Wipe Down After Each Use: A quick wipe of the exterior and around the K-Cup area can prevent sticky residue from accumulating.
- Leave Reservoir Lid Ajar: If you’re not using your Keurig for an extended period, leave the water reservoir lid slightly open to allow air circulation and prevent musty odors.
Troubleshooting Common Keurig Issues Related to Cleaning
Many common Keurig problems can be resolved with a good cleaning or descaling:
- “My Keurig isn’t brewing properly, or only brews a little.” This is almost always a sign of clogged needles or significant limescale buildup restricting water flow. Follow the needle cleaning and descaling steps.
- “My coffee tastes bitter or off.” Rancid coffee oils and mineral buildup can significantly alter coffee flavor. A thorough cleaning of all parts, especially the K-Cup holder and needles, followed by a descaling, usually resolves this.
- “My Keurig’s descaling light stays on.” This indicator means your machine needs descaling. The light should turn off after completing the full descaling and rinsing process. If it doesn’t, ensure you’ve followed all steps, particularly the rinsing cycles, as some models require multiple rinses to reset.
- “My Keurig is making strange noises.” Unusual gurgling or straining noises can indicate that the pump is working harder due to restricted water flow from limescale. Descaling can often alleviate this.
Enjoy a Better Brew with a Clean Keurig
Regular Keurig cleaning, though it might seem like a chore, is an investment in your daily coffee ritual and the longevity of your machine. By dedicating just a small amount of time to maintenance every few months, you safeguard against mineral buildup, prevent unpleasant tastes, and ensure your Keurig delivers optimal performance with every single cup.
Embrace these cleaning habits, and you’ll not only enjoy consistently delicious coffee but also prolong the life of your beloved Keurig. A clean machine is a happy machine, and a happy machine means a happier you, starting your day with the perfect brew.