
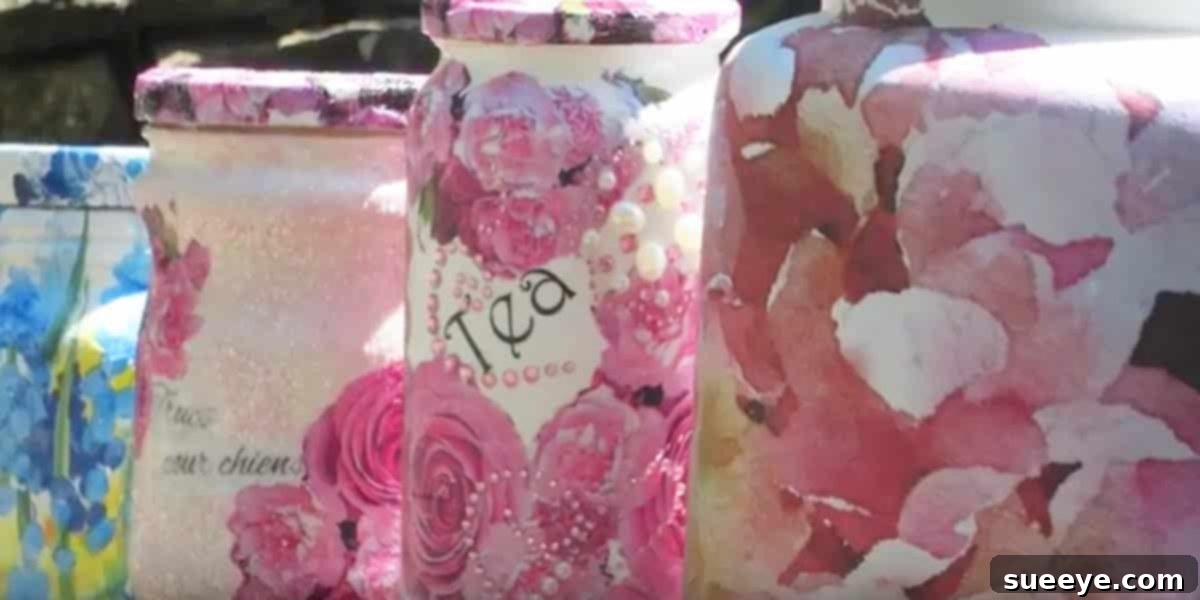
Transform Your Home: Exquisite DIY Decoupage Mason Jars Tutorial
There’s an undeniable charm and versatility that comes with a simple glass jar, particularly the beloved mason jar. From humble beginnings as a canning staple, these iconic vessels have ascended to the status of a DIY decorator’s dream. This comprehensive guide will walk you through an awe-inspiring project that elevates everyday jars into breathtaking works of art using the delightful technique of decoupage. Imagine turning plain glass into unique decorative accents, perfect for enhancing your living space or crafting heartfelt gifts for loved ones.
Our inspiration stems from a truly enchanting tutorial that showcases how ordinary jars can be adorned with the loveliest papers and a dash of creative embellishment. The result is consistently stunning, infusing any environment with a personalized touch of elegance and charm. Whether your aesthetic leans towards the romantic Shabby Chic, rustic farmhouse, or simply a desire for unique, handcrafted items, this project is designed to captivate and inspire. Its accessibility makes it perfect for crafters of all skill levels, promising exquisite results with minimal effort.
The Enduring Appeal of Mason Jar Crafts
Why do mason jars continue to capture our imaginations in the crafting world? Their simple, robust design offers a perfect canvas for countless DIY endeavors. They are readily available, affordable, and incredibly adaptable. For this particular decoupage project, their smooth surfaces and classic silhouette provide an ideal foundation for paper and fabric application. Beyond their functional origins, mason jars now symbolize creativity, sustainability through upcycling, and the joy of handmade goods.
This project celebrates the ability to repurpose and beautify, transforming something utilitarian into an object of desire. It’s not just about decorating a jar; it’s about infusing it with character, story, and a reflection of your personal style. The beauty of decoupage lies in its ability to take seemingly disparate elements – a plain jar, delicate paper, and a bit of glue – and weave them into a cohesive, visually appealing piece. The moment we discovered this technique, we knew it was something special, a creative spark that needed to be shared with fellow enthusiasts of floral, feminine, and utterly charming decor.
Why This DIY Decoupage Project Is a Must-Try
There are numerous compelling reasons to dive into the world of decoupage jar decoration:
- Unleash Your Creativity: This project offers endless possibilities for personalization. Choose papers, fabrics, and embellishments that truly resonate with your taste and existing decor.
- Budget-Friendly Decor: You can transform inexpensive jars and craft supplies into high-end looking decor pieces, saving money while achieving a unique aesthetic.
- Eco-Conscious Crafting: Embrace the spirit of upcycling by giving old jars a new lease on life, reducing waste and promoting sustainable living.
- Perfect for Any Decor Style: While exceptionally suited for Shabby Chic decor, the versatility of material choices means these jars can complement farmhouse, vintage, bohemian, modern, or even minimalist interiors.
- Thoughtful Handmade Gifts: Nothing says “I care” like a handcrafted gift. These decorated jars make exceptional presents for birthdays, holidays, housewarmings, or just because. They’re adored by friends and family alike.
- Quick Transformation: The actual crafting process is surprisingly fast. Most of the waiting time involves letting the decoupage medium dry, making it a satisfying project for those seeking instant gratification.
- Therapeutic & Relaxing: Engaging in creative activities like decoupage can be incredibly calming and meditative, offering a wonderful escape from daily stresses.
Essential Materials for Your Decoupage Jar Masterpiece
Gathering your supplies is the first exciting step in any DIY adventure. For this project, you’ll find that most items are easily accessible and often already on hand:
- Glass Jars: While mason jars are our top recommendation due to their classic appeal and sturdy build, feel free to experiment with any clean, empty glass jars. Upcycle old jam jars, pickle jars, or even glass bottles. Ensure they are thoroughly clean and dry before starting.
- Decoupage Medium: A good quality decoupage glue and sealer, such as Mod Podge, is crucial. It acts as both an adhesive and a protective topcoat, providing a durable finish.
- Decorative Papers/Fabrics: This is where your creativity truly shines!
- Tissue Paper: Offers a delicate, translucent effect, perfect for a subtle overlay or layered looks.
- Napkins: Craft napkins with beautiful patterns are an incredibly popular choice. Remember to separate the printed top ply for decoupage.
- Scrapbook Paper: Provides vibrant colors and intricate designs. Thicker than tissue paper, it requires a bit more care to smooth out bubbles.
- Fabric Scraps: Small pieces of lace, cotton, or other lightweight fabrics can add unique texture and a charming, rustic touch.
- Magazine Clippings/Book Pages: For a more vintage or personalized look.
- Brushes/Applicators: Foam brushes or soft-bristled paintbrushes work best for applying the decoupage medium smoothly and evenly.
- Scissors or Craft Knife: For precise cutting of your chosen papers or fabric.
- Embellishments (Optional, but Highly Recommended): This is where you add that extra layer of magic and personalization. Consider:
- Ribbons & Lace: For a delicate, feminine, or vintage touch around the rim or body of the jar.
- Twine & Jute: Perfect for rustic or farmhouse aesthetics.
- Artificial Flowers or Dried Botanicals: To complement floral patterns on your paper.
- Beads & Charms: For a subtle shimmer or personalized detail.
- Acrylic Paints or Stencils: To add painted accents or patterns before or after decoupaging.
- Glitter: For a touch of sparkle.
- Sponge or Craft Roller: Useful for smoothing out wrinkles and air bubbles.
- Protective Surface: Newspaper or a craft mat to protect your workspace.
Step-by-Step Guide to Crafting Your Decoupage Jars
While we highly recommend watching the full tutorial by Patio Elf for a visual guide, here’s a breakdown of the general steps involved in creating these exquisitely appointed jars:
- Prepare Your Jars: Start by thoroughly washing your glass jars with soap and water to remove any labels, grease, or dust. Rinse well and allow them to dry completely. A clean surface is essential for good adhesion.
- Select and Prepare Your Papers/Fabrics: Choose your desired papers or fabric scraps. If using napkins, gently peel away the unprinted layers until you’re left with just the thin, patterned ply. Cut your chosen material into desired shapes or strips – you can go for clean-cut shapes, tear edges for a softer look, or create a collage of different pieces.
- Apply the First Coat of Decoupage Medium: Using your brush, apply a thin, even layer of decoupage medium to a section of the jar where you want to place your first piece of paper. Don’t apply too much, as it can make the paper difficult to handle.
- Position and Adhere Your Material: Carefully place your cut paper or fabric onto the wet decoupage medium. Gently smooth it down with your fingers, a soft sponge, or a craft roller, working from the center outwards to push out any air bubbles or wrinkles. Be delicate, especially with thin papers like tissue or napkins.
- Seal with a Topcoat: Once the paper is positioned and smooth, apply another thin layer of decoupage medium over the top of the paper, completely sealing it to the jar and creating a protective layer. Ensure all edges are adhered.
- Repeat & Layer (Optional): Continue this process, overlapping pieces if desired, until your jar is covered to your satisfaction. You can create intricate patterns, simple blocks of color, or a beautiful collage.
- Allow to Dry Completely: This is a crucial step! Allow your decoupaged jars to dry thoroughly between coats and before adding embellishments. Drying time can vary depending on humidity and the thickness of your medium and paper. Typically, several hours or even overnight is best.
- Add Embellishments: Once completely dry, it’s time for the fun part – embellishing! Glue on lace, tie ribbons around the neck, attach charms, or add painted details. Let your imagination guide you in making each jar truly unique.
- Final Seal (Optional): For extra durability, especially if the jars will be handled frequently or exposed to moisture, you can apply a final, clear sealant spray designed for crafts.
The time it takes to complete this project is largely dictated by drying time. The hands-on work is swift and rewarding, making it a perfect weekend craft or a relaxing evening activity.
Creative Ideas and Uses for Your Decoupage Jars
Once your exquisite jars are complete, the possibilities for their use are endless:
- Vases: Perfect for holding fresh flowers or dried arrangements, adding a touch of elegance to any room.
- Candle Holders: Place battery-operated tea lights or small candles inside for a soft, ambient glow. Always be cautious with open flames and ensure proper ventilation.
- Bathroom Organizers: As seen in the example, these jars are ideal for organizing cotton swabs, bath salts, makeup brushes, or other toiletries, particularly complementing a Shabby Chic bathroom decor.
- Kitchen Storage: Store dry goods like pasta, cookies, or craft supplies in a stylish manner.
- Desk Organizers: Keep pens, pencils, scissors, and other office supplies tidy and beautifully displayed.
- Gift Packaging: Present small gifts, homemade treats, or a collection of craft supplies inside a decorated jar for an extra special touch.
- Party & Wedding Decor: Use them as centerpieces, table numbers, or decorative accents for special occasions.
- Seasonal & Holiday Decor: Tailor your paper choices to match specific holidays (e.g., fall leaves for Thanksgiving, festive patterns for Christmas) or seasons.
Tips for Decoupage Success
- Work in Thin Coats: When applying decoupage medium, thinner coats are always better. They dry faster and reduce the chance of wrinkles or bubbling.
- Patience is Key: Don’t rush the drying process. Incomplete drying can lead to stickiness or a less durable finish.
- Smooth Carefully: Use a light touch when smoothing paper, especially delicate ones, to avoid tearing.
- Experiment with Layers: Try layering different patterns or colors for a multi-dimensional effect.
- Clean Your Tools: Wash your brushes immediately after use to prevent the decoupage medium from drying on them.
- Consider Your Purpose: If your jar will hold food or be frequently washed, consider using a food-safe sealant or decorating only the exterior that won’t come into contact with contents.
This project is a testament to the fact that beautiful decor doesn’t have to be expensive or complicated. With a little imagination and a few simple supplies, you can transform ordinary items into extraordinary pieces that reflect your unique style and bring joy to your home. So, gather your jars, choose your favorite papers, and get ready to brighten up your home with these exquisitely appointed DIY decoupage jars. They are guaranteed to add a charming touch wherever they are placed!
Don’t wait to infuse your home with this delightful handmade charm. Watch how Patio Elf demonstrates this process in her easy-to-follow step-by-step tutorial, and embark on your own creative journey today!