
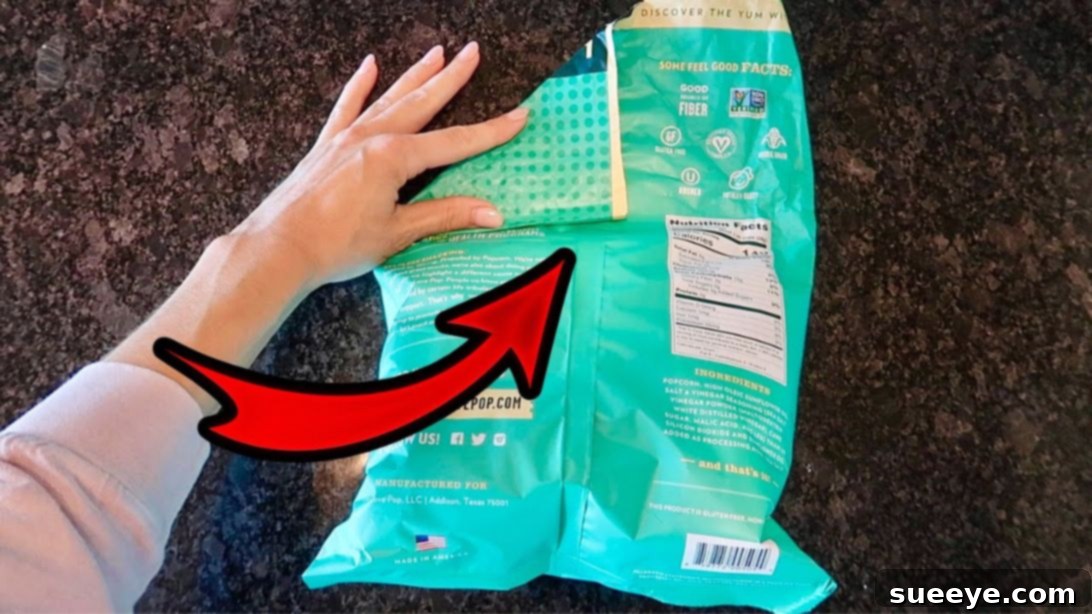
There’s a universal joy that comes with tearing open a fresh bag of your favorite chips – that distinct aroma, the anticipation of the first satisfying crunch. Whether you’re indulging during a movie night, looking for a quick pick-me-up, or adding a crispy side to your sandwich, chips are a beloved snack. However, this joy often leads to a common predicament: what to do with the leftovers. It’s rare to finish an entire family-sized bag in one sitting, and finding yourself with a half-eaten bag presents the challenge of preserving its pristine freshness. Many of us have experienced the frantic search for a chip clip, a rubber band, or even a piece of tape, only to come up empty-handed. The disheartening thought of those delicious chips succumbing to staleness overnight is a dilemma every snack enthusiast can relate to.
But what if you could effortlessly seal your chip bags without any external tools whatsoever? Imagine a world where your remaining snacks retain their delightful crunch and flavor, simply by utilizing the bag itself. This isn’t a fantasy; it’s a reality made possible by the ingenious tips from Andrea Jean Cleaning on YouTube. In her insightful video tutorial, she reveals three distinct yet incredibly simple and effective methods to secure chip bags, eliminating the need for any clips or ties. These brilliant kitchen hacks are not only practical but also remarkably easy to master, promising to revolutionize your snack storage habits. Prepare to bid farewell to stale chips and welcome long-lasting freshness into your pantry!
Why Properly Sealing Chip Bags Is Essential for Lasting Freshness
The act of sealing a chip bag goes far beyond mere neatness; it’s a critical step in preserving the quality of your snack. An unsealed or poorly sealed bag leaves your chips vulnerable to several environmental factors that rapidly degrade their appeal:
- Combating Staleness: Chips are highly susceptible to moisture absorption from the air. Exposure to oxygen and humidity quickly breaks down their delicate, crispy structure, transforming them into a soft, chewy, and utterly unappetizing snack. A secure seal acts as a protective barrier, locking out moisture and keeping the chips delightfully crisp.
- Preserving Flavor Integrity: Just as air can cause chips to go stale, it can also diminish their vibrant, original flavor profile. A properly sealed bag traps in the seasonings and taste, ensuring that every chip delivers the intended culinary experience from the first bite to the last.
- Ensuring Hygienic Storage: An open bag of chips is an unprotected food source. It’s susceptible to dust, stray crumbs, and even unwelcome household pests. Sealing your chip bag provides a hygienic shield, safeguarding your food from external contaminants and ensuring it remains safe and clean for consumption.
- Extending Shelf Life: While these tool-free methods are not a permanent solution like a vacuum seal, they significantly prolong the freshness of opened chip bags, allowing you to enjoy your favorite crisps over several days without any noticeable loss in quality. This means fewer wasted snacks!
- Reducing Food Waste: Chips that quickly become stale are often discarded, contributing to unnecessary food waste. By effectively keeping them fresh for longer, you not only save money but also contribute positively to reducing household waste, which benefits the environment.
- Enhancing Portability and Preventing Spills: A securely sealed bag is much less likely to accidentally spill its contents. This makes it considerably easier and safer to transport your snacks or store them in a cupboard or pantry without the risk of creating a messy situation.
These innovative clip-free methods are ideal for those instances when traditional sealing tools are unavailable, or when you simply prefer a more self-contained, elegant, and readily accessible solution for your snack storage needs.
What You’ll Need: The Simplest Tools Imaginable
One of the most remarkable aspects of these chip bag sealing techniques is their sheer simplicity. You won’t be asked to invest in any specialized gadgets, nor will you need to embark on a scavenger hunt through your kitchen drawers for elusive tools. Everything required is already at your disposal:
- A partially consumed bag of chips (any size or brand of flexible snack bag will work)
- Your own two hands – the ultimate versatile tools!
That’s truly all it takes! These methods ingeniously harness the inherent flexibility and design of the chip bag material itself to forge a secure, temporary seal that effectively locks in freshness.
Directions: Mastering the Art of the Clip-Free Chip Bag Seal
Before you begin any of the following methods, there’s one foundational step that applies to all: always gently push the remaining chips down towards the bottom of the bag. This action creates a crucial empty space at the top, which is essential for easily manipulating and folding the bag to achieve an effective and long-lasting seal.
Method #1: The Inverted Roll & Store Technique – Effortless Freshness
This technique stands out as perhaps the most straightforward and provides a surprisingly reliable seal, especially when the bag is stored thoughtfully. It smartly leverages the power of gravity to keep your beloved chips fresh and securely contained.
Step-by-Step Instructions for Method #1:
- Prepare the Bag for Rolling: Begin by carefully guiding all the remaining chips to settle at the very bottom of the bag. Aim to create a substantial empty section at the top, ideally about one-quarter to one-third of the bag’s total length, free from any contents.
- Flatten the Top Section: With the chips settled, gently but firmly flatten the entire empty upper portion of the bag. Smooth out any wrinkles, creases, or trapped air bubbles. A perfectly flat top section will ensure a tighter and more effective roll.
- Initiate a Tight Roll Downwards: Starting from the very top open edge of the bag, begin to roll it down firmly and neatly. Envision yourself rolling up a piece of paper or a small fabric item – consistency is key. Maintain even pressure across the entire width of the bag as you roll. The tighter this roll, the better it will prevent air infiltration. Continue rolling until the rolled section reaches the level of the chips inside.
- The Crucial Inversion: Once you have a tight, neatly rolled top section, the next critical step is to completely turn the entire chip bag upside down. This means the opening (now tightly rolled and sealed) is facing downwards. The natural weight of the chips inside will press against this rolled seal, effectively reinforcing it and creating a strong barrier against air entry.
- Optimal Storage: Store the inverted bag in an upright position within your pantry, cupboard, or any designated snack area. The inverted orientation is vital for maintaining the integrity of the seal through gravitational pressure.
- Thoughtful Retrieval Tip: When you’re ready for another serving of chips, remember this important detail: always turn the bag right side up *before* you begin to unroll the seal. This prevents any accidental spills or sudden shifts of the chips that could occur if you tried to access them while the bag is still inverted.
This method is exceptionally practical for quick storage needs and proves particularly effective for bags that will be stored upright and remain undisturbed. It’s a brilliant, no-fuss solution when you need to seal a chip bag in a pinch.
Method #2: The Double Fold & Tuck Technique – Maximum Spill Security
For individuals who prioritize absolute security and wish to prevent any potential spills, especially if the chip bag might be moved frequently or stored on its side, this method offers an unparalleled level of confidence. It skillfully creates a robust, self-contained package that securely traps the chips inside.
Step-by-Step Instructions for Method #2:
- Prepare and Flatten: Just as with the previous method, begin by gently pushing all the chips down to the bottom of the bag. Meticulously flatten the empty top portion of the bag, ensuring it’s as smooth and free of wrinkles as possible. This flat base is crucial for the subsequent folds.
- Initial Tight Roll: From the top edge, start rolling the bag downwards very tightly, mirroring the process in Method #1. Continue this tight roll until you reach the uppermost level of the chips. This initial roll forms the essential foundation for your secure, multi-layered seal.
- Fold Both Sides Backwards: Now, direct your attention to the rolled-down section. On both the left and right sides of this rolled portion, carefully fold the corners backwards, pressing them firmly against the reverse side of the bag. Visualize yourself creating neat, symmetrical triangular flaps on either side. These inward folds are key to narrowing the width of the rolled section and beginning to lock everything into place.
- Rotate the Bag: Once both side flaps are folded back, gently turn the entire bag around so that what was previously the “back” of the bag is now facing you. This provides a better angle for the final tuck.
- The Ultimate Tuck: With the bag rotated, you’ll clearly see the neatly folded side sections. Now, take the entire rolled and folded top section and carefully flip it *over itself*, tucking it firmly underneath the main body of the bag. This action creates a remarkably compact and self-locking seal. The inherent tension and friction of the bag’s material will effectively hold the tucked-in flap securely in position.
This “double fold and tuck” method offers an outstanding level of security and virtually eliminates the risk of spillage. It’s the perfect choice for chip bags that might endure a bit of jostling, or when you simply demand an extra layer of confidence that your cherished chips will remain perfectly pristine.
Method #3: The Origami-Inspired Triangle Fold & Pocket Seal – Compact & Clever
This particular technique is arguably the most visually sophisticated and results in a surprisingly compact and exceptionally secure package. It involves a slightly more intricate series of folds, reminiscent of traditional origami, but the outcome is a beautifully sealed bag that exudes a professional, well-maintained appearance.
Step-by-Step Instructions for Method #3:
- Prepare the Bag: As with all methods, ensure all the remaining chips are settled at the bottom of the bag. Carefully flatten the empty top section, making it as smooth and even as possible to facilitate precise folding.
- First Diagonal Triangle Fold: Take one of the top corners of the flattened bag (for instance, the top-left corner). Fold it diagonally inwards towards the center. Continue folding this side until the newly formed bottom edge of your folded section precisely aligns with the very top level of the chips within the bag. This action creates your initial, distinct triangular flap.
- Second Diagonal Triangle Fold: Repeat the exact same diagonal folding procedure with the other top corner (e.g., the top-right corner). Fold it inwards until its bottom edge also perfectly aligns with the top level of the chips, creating a mirror image of the first triangle. At this stage, the top of your bag should present a neat, pointed triangle or an arrow-like shape pointing upwards.
- Roll the Combined Bottom Edges to Form a Pocket: Now, focus your attention on the combined bottom edge of the newly formed triangular section – this is where it meets the chips. Begin to roll this entire combined edge upwards, tightly and evenly. As you roll, you’ll notice a natural “pocket” beginning to form where the layers of the folds meet. Continue rolling firmly until you have created a few good, tight turns, making the rolled section quite robust and well-defined.
- The Final Pointed Tuck: With your sturdy pocket formed, take the pointed top section of the chip bag (the very tip of your large triangle). Roll this pointed top downwards and tuck it firmly and neatly into the “pocket” you’ve just created by rolling the bottom edges. Push it in until it’s snug and secure. The inherent tension and clever interplay of the various folds will effectively hold it steadfastly in place.
This method yields a remarkably compact and aesthetically pleasing package. It’s especially useful for smaller bags or whenever you desire a highly secure and impeccably tidy seal that can confidently endure a bit more movement without compromising its integrity.
Benefits of These Clip-Free Methods: Unmatched Convenience and Cost-Effectiveness
Beyond the primary goal of keeping your chips fresh, mastering these ingenious techniques offers a multitude of practical advantages that enhance your daily life:
- Perpetually Prepared: You’ll never again be caught off guard without a specific chip clip or tie. Your hands are always available and ready for action!
- Remarkably Cost-Effective: There’s no need for any additional purchases of specialized clips, rubber bands, or dedicated storage containers. These methods are entirely free, relying only on the bag itself.
- Environmentally Responsible: By significantly prolonging the freshness of your snacks, you drastically reduce the likelihood of prematurely discarding perfectly good food. This directly contributes to minimizing food waste, a positive step for both your budget and the environment.
- Exceptional Versatility: These techniques are incredibly adaptable and work effectively with nearly any size or type of flexible snack bag, from potato chips and pretzels to even larger cereal bags (with slight modifications).
- Highly Portable: Especially Methods #2 and #3, which create a very secure and compact package, are ideal for on-the-go snacking. You can confidently toss your sealed bag into a lunchbox, backpack, or picnic basket without any fear of accidental spills.
- Boosts Practical Kitchen Skills: Learning and implementing these simple yet effective hacks empowers you with valuable practical life skills that can be creatively applied in various other household and food storage situations.
Tips for Maximizing Chip Freshness Beyond the Seal
While the clip-free sealing methods are remarkably effective on their own, a few additional best practices can help ensure your chips maintain their peak crispness and flavor for the longest possible duration:
- Store in a Cool, Dry Environment: Humidity is the sworn enemy of crispy chips. Always store your securely sealed bags in a cool, dry pantry or a dark cupboard. It’s crucial to keep them away from direct sunlight, which can prematurely stale them, and away from heat-emitting appliances like ovens and stovetops.
- Avoid Refrigeration: Counter-intuitively, the refrigerator is often too humid for chip storage. The cold, moist air can actually soften chips and alter their texture, leading to a less enjoyable snacking experience. Room temperature storage is generally best for chips.
- Consider an Airtight Container for Extended Storage: If you anticipate storing a very large bag of chips for an extended period (beyond a few days), or if you reside in a particularly humid climate, consider an extra layer of protection. After sealing the original bag using one of these methods, place the entire bag inside an actual airtight plastic container or a glass jar. This provides an additional robust barrier against air and moisture.
- Minimize Air Exposure During Access: Whenever you open your sealed bag to grab a handful of chips, try to do so swiftly. Immediately re-seal the bag using your chosen method to minimize the duration of air exposure. Every moment the bag is open allows more moisture to penetrate and begin the staleness process.
Conclusion: Savor Every Crunch with These Smart and Simple Hacks
The days of desperately searching for a chip clip or resigning yourself to the disappointment of a bag of half-stale chips are now firmly in the past. Thanks to the brilliant, practical insights shared by Andrea Jean Cleaning, you are now equipped with three fantastic, tool-free methods to effortlessly keep your most beloved snacks perfectly fresh, crunchy, and flavorful. Whether your preference leans towards the simplicity of the inverted roll, the robust security of the double-fold, or the elegant, compact finish of the origami-inspired tuck, these kitchen hacks are incredibly practical, remarkably easy to learn, and consistently highly effective.
We encourage you to embrace these smart and convenient solutions. By integrating them into your routine, you will not only significantly extend the life and deliciousness of your chips but also add a touch of ingenious simplicity and self-sufficiency to your everyday kitchen management. Experiment with them, share these valuable tips with your friends and family, and prepare to delight in that supremely satisfying, fresh crunch with every single serving, every single time. Happy snacking, and enjoy the lasting freshness!
*A special and heartfelt thank you goes to Andrea Jean Cleaning via YouTube for demonstrating these ingenious techniques and for providing the helpful images used throughout this comprehensive guide. We highly recommend visiting her channel for a wealth of other excellent cleaning, organizing, and clever household tips!