
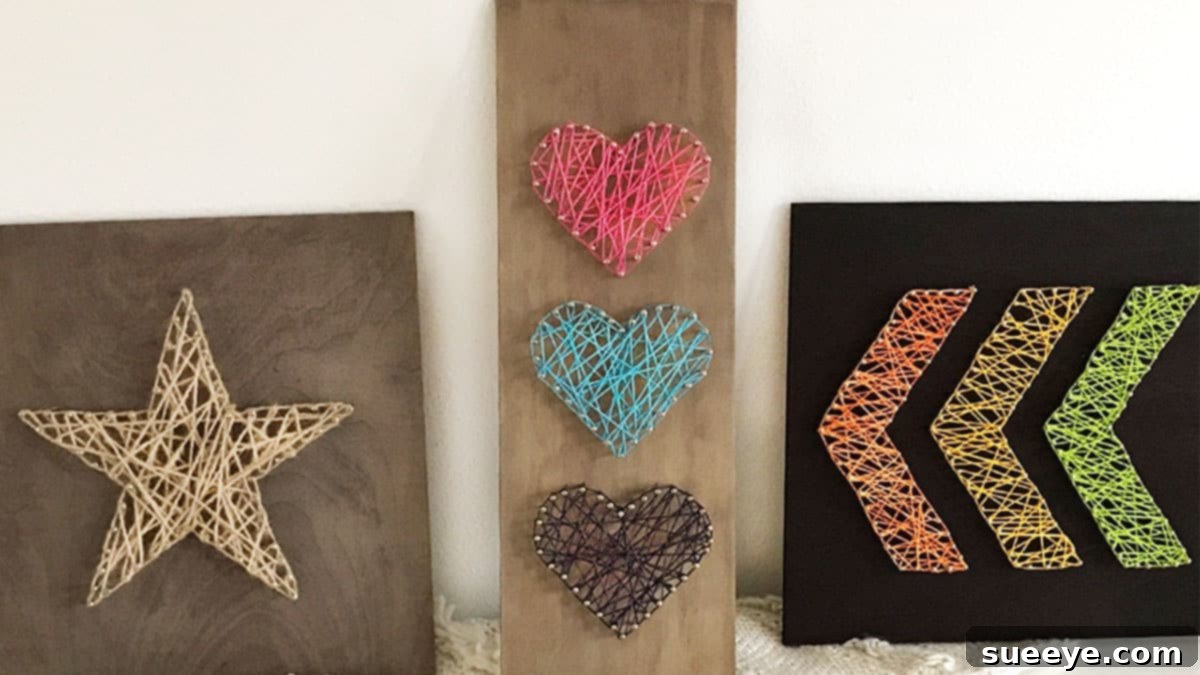
Have you ever marvelled at the intricate beauty of string art designs you’ve spotted on Pinterest or social media? Many people assume these stunning creations require advanced artistic skills, but the truth is, string art is a surprisingly accessible and rewarding craft for everyone, regardless of their artistic background. It’s an incredibly simple technique that allows you to transform basic materials into captivating visual pieces, perfect for enhancing your home decor or creating personalized gifts. If you’ve been searching for a fun, creative outlet that yields impressive results, string art is your answer.
In this ultimate guide, we’ll demystify the art of string and nails, providing you with everything you need to know to start your own projects. We’ll walk you through the essential tools, offer detailed step-by-step instructions, and inspire you with a variety of design ideas, including charming hearts, a rustic twine-wrapped star, and much more. The core techniques for all these projects are fundamentally the same, making it easy to adapt what you learn to an endless array of shapes and patterns. Follow along with our expert tips and watch our latest video tutorial to gain the confidence to create your own unique string art masterpieces right from the comfort of your home.
Why Dive into the World of DIY String Art?
Beyond its aesthetic appeal, string art offers a wealth of benefits that make it an ideal hobby for crafters of all ages. It’s not just about creating beautiful decor; it’s about the joy of making, the satisfaction of seeing your vision come to life, and the therapeutic process itself.
- Unleash Your Creativity: String art provides a fantastic canvas for self-expression. From choosing your design and colors to experimenting with different stringing techniques, every step allows for personal touches.
- Stress Relief and Mindfulness: The repetitive action of hammering nails and weaving string can be incredibly meditative and calming. It’s a wonderful way to unwind, focus your mind, and reduce stress after a long day.
- Affordable & Accessible: You don’t need expensive tools or exotic materials to get started. Most supplies are readily available at hardware stores and craft shops, making it a budget-friendly hobby.
- Customizable Home Decor: Tired of generic wall art? String art allows you to create truly bespoke pieces that perfectly match your home’s aesthetic, color scheme, and personal style.
- Unique Personalized Gifts: A handmade string art piece makes an incredibly thoughtful and personal gift for birthdays, anniversaries, weddings, or holidays. Imagine creating an initial for a newlywed couple or a beloved pet for a friend!
- Beginner-Friendly: Unlike painting or sculpting, string art doesn’t demand advanced drawing or artistic skills. If you can hammer a nail and wrap a string, you can create impressive art.
Essential Supplies for Your String Art Projects
Before you begin your creative journey, gathering the right materials is crucial. While the core items are simple, understanding the options and making informed choices will ensure a smoother and more enjoyable crafting experience. Here’s a detailed look at what you’ll need:
1. Hammer
A standard claw hammer is perfectly suitable for most string art projects. For smaller nails or more delicate work, a lighter-weight hammer or even a tack hammer might offer more control. Ensure it feels comfortable in your hand, as you’ll be doing a fair bit of hammering!
2. Nails
The type of nails you choose significantly impacts the final look of your string art. We often recommend small wire nails, such as linoleum nails or brad nails, for their slender profile and small heads, which allow the string to stand out. Consider the following:
- Size: Opt for nails that are typically 1/2 inch to 1 inch long. The length should be sufficient to firmly anchor into your wood plank without piercing through the back.
- Gauge: Thinner gauge nails (higher gauge number) are less intrusive and create a more delicate look.
- Head Type: Small, flat heads are ideal as they securely hold the string without being overly prominent.
- Quantity: Always buy more than you think you’ll need. It’s better to have extras than to run out mid-project.
3. Wood Plank (Your Canvas)
The wood plank serves as the foundation for your string art. Its appearance and quality will greatly influence the overall aesthetic. Consider these factors:
- Type of Wood: Pine, plywood, MDF, or even reclaimed wood can work. Pine is a popular choice due to its affordability and ease of hammering. Harder woods like oak might require pre-drilling holes.
- Size and Shape: Choose a plank size appropriate for your design. Standard rectangular or square boards are common, but you can also find or cut unique shapes.
- Surface Preparation: For a smooth finish, sand your wood plank thoroughly to remove splinters and rough edges. You can leave the wood natural, stain it for a rustic look, or paint it a solid color to make your string pop. Allow ample drying time if staining or painting.
4. Printed Graphics (Your Design Template)
This is where your chosen design comes into play. You’ll need a printed template to guide your nail placement.
- Design Selection: Search online for “string art patterns,” “silhouette images,” or “line art templates.” Hearts, stars, animals, initials, words, and geometric shapes are all popular choices.
- Scaling: Ensure your chosen graphic is scaled to fit perfectly on your wood plank. Print it on standard paper.
- Complexity: For beginners, start with simpler shapes that have clear outlines and fewer intricate details.
5. Twine, Cord, or Embroidery Thread (Your Art Medium)
The string is the star of the show! The type you choose will dictate the texture, thickness, and vibrancy of your finished piece.
- Embroidery Floss: Ideal for fine details and vibrant, multi-color designs. It comes in a vast array of colors.
- Craft Thread/Yarn: Thicker options like crochet thread or thin yarn can create a bolder, softer look.
- Twine/Jute: Perfect for rustic or farmhouse-style pieces, offering a natural, earthy texture. Our featured rustic star project utilizes twine beautifully.
- Metallic Thread: Adds a touch of sparkle and elegance.
- Color Choice: Select colors that complement your wood base and your intended decor scheme. Consider contrast to make your design stand out.
6. Scissors
A good pair of sharp scissors is essential for cleanly cutting your string. Avoid dull scissors, as they can fray the ends of your thread.
Additional Helpful Supplies:
- Masking Tape or Painter’s Tape: To secure your printed graphic to the wood plank while hammering.
- Sandpaper: Various grits (e.g., 120-grit for initial smoothing, 220-grit for a finer finish) for wood preparation.
- Wood Stain or Paint (Optional): To customize your wood base.
- Picture Hanger (Optional): To easily display your finished string art on a wall.
- Pencil: For marking nail points if not using a template, or for general use.
Step-by-Step Guide to Creating Your Own String Art
Now that you have all your supplies, let’s get down to the exciting part: making your string art! These steps provide a comprehensive framework, applicable to almost any design you choose to create.
Step 1: Prepare Your Wood Base
Begin by ensuring your wood plank is ready. If it’s raw wood, sand it thoroughly to create a smooth surface, wiping away any dust. If you desire a specific look, now is the time to apply wood stain or paint. For a rustic finish, a dark stain works wonders, while a light paint color can make colorful strings pop. Allow the wood to dry completely according to the product instructions before moving on.
Step 2: Choose and Secure Your Design
Print out your chosen graphic, scaled to the perfect size for your wood plank. Carefully position the template on your prepared wood, ensuring it’s centered and straight. Secure it firmly in place using masking tape or painter’s tape around all edges. This prevents the template from shifting while you hammer your nails.
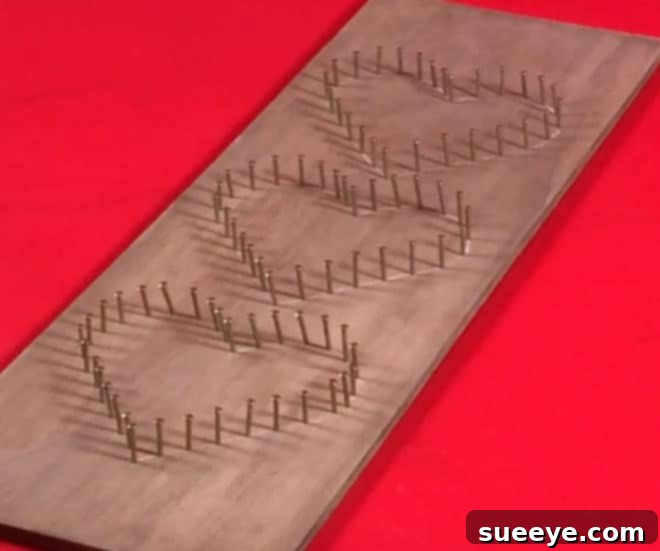
Step 3: Hammering the Nails
This is often considered the trickiest part, but with a bit of practice, you’ll master it! The key is consistent spacing and depth. Follow these tips:
- Outline First: Start by hammering nails along the outline of your design. For curves, place nails closer together (about 1/4 to 1/2 inch apart) to maintain the shape. For straight lines, you can space them slightly further apart (up to 1 inch).
- Consistent Depth: Aim to hammer each nail to roughly the same depth, leaving about 1/2 inch to 3/4 inch of the nail exposed above the wood. This ensures your string will wrap evenly.
- Safety First: Always hold the nail firmly between your thumb and forefinger, striking it gently a few times to get it started. Once it’s stable, remove your fingers and hammer with more force. Consider wearing safety glasses.
- Inner Details: If your design has inner details (like the center of a star or separate elements within a word), hammer nails around those outlines as well.
Step 4: Removing the Template
Once all your nails are securely in place, it’s time to carefully remove the paper template. Gently tear or peel away the paper from around and between the nails. If any small bits of paper get stuck, use tweezers or the tip of a nail to remove them. Be patient and gentle to avoid bending the nails.
Step 5: Stringing Your Art
This is where the magic happens and your design truly comes to life! There are various ways to string, but here’s a fundamental approach:
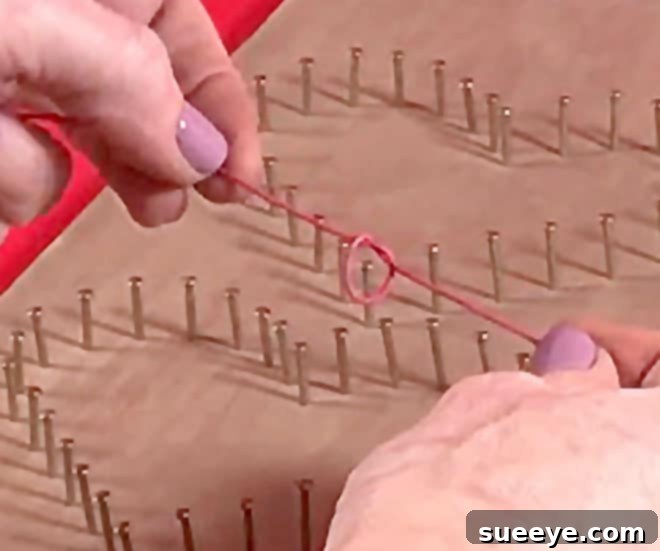
- Start with a Knot: Tie the end of your chosen string securely to one of the nails in your design. A double knot will prevent it from unraveling. You can hide the tail by trimming it close to the knot.
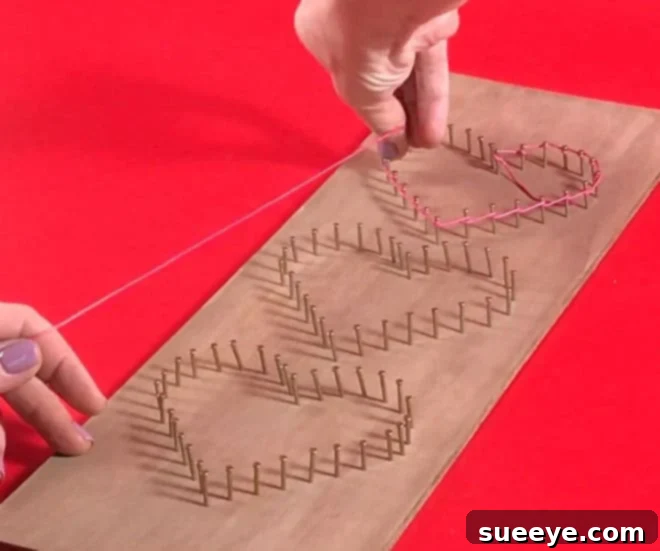
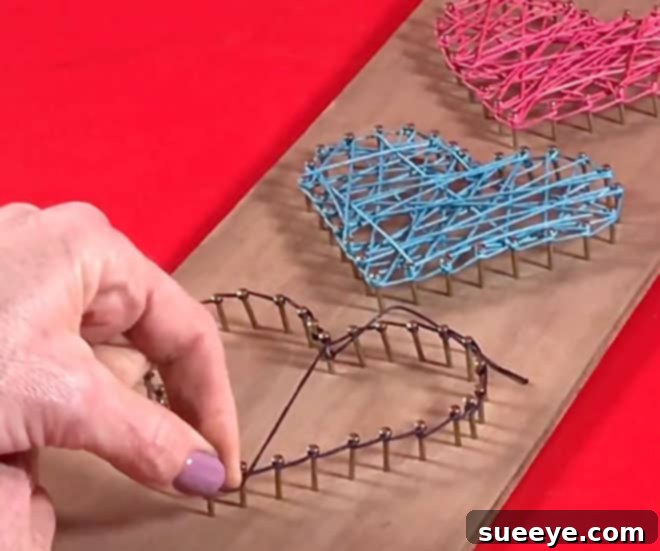
- Outline the Shape: Begin by wrapping the string around the outer perimeter of your design. This creates a clear boundary and gives structure to your piece. Wrap the string around each perimeter nail once or twice to define the shape.
- Fill the Design: Now, get creative with filling!
- Random Fill: This is the simplest and often most striking method. Simply criss-cross the string back and forth across the shape, wrapping it around various nails to create dense, overlapping lines. The more you wrap, the denser and more opaque your design will become.
- Geometric Patterns: For a more structured look, you can try radiating lines from a central point, or creating specific geometric patterns by connecting nails in a predictable sequence.
- Layering Colors: If using multiple colors, complete one color fill, tie it off, and then start with the next color. This adds depth and visual interest.
- Tightness: Keep the string taut but don’t pull so hard that you bend the nails.
- Ending Your String: When you’re happy with the density or run out of string, tie off the end securely to another nail, just as you began. Trim any excess string.
Step 6: Finishing Touches and Display
Take a moment to admire your handiwork! Check for any loose strings and trim them neatly. If you plan to hang your string art, attach a picture hanger to the back of the wood plank. Your unique, handmade string art is now ready to adorn your walls or be gifted to someone special.
Creative String Art Ideas and Variations to Inspire You
The beauty of string art lies in its versatility. Once you’ve mastered the basic techniques, the possibilities for design are truly endless. Here are a few ideas to spark your imagination:
- Heartfelt Creations: As mentioned, hearts are a classic and beloved string art design. Experiment with different shades of red, pink, or even multi-colored string for a gradient effect. A pair of interlocking hearts makes a lovely wedding or anniversary gift.
- Rustic Star Appeal: Our guide specifically mentions a rustic twine-wrapped star. The natural texture of jute or hemp twine beautifully complements unfinished or stained wood, creating a charming, country-chic aesthetic perfect for any season.
- Personalized Initials & Words: Create monograms for family members, spell out names, or inspirational words like “Love,” “Hope,” or “Dream.” This makes for highly personal decor or gifts.
- Geometric Wonders: Beyond simple shapes, explore complex geometric patterns, mandalas, or abstract designs. These can be incredibly striking and modern.
- Animal Silhouettes: From playful foxes to elegant birds or majestic elephants, animal outlines are a popular choice. Customize with string colors that match the animal’s natural hues or go bold with unexpected shades.
- Holiday & Seasonal Themes: Craft pumpkins for Halloween, snowflakes for winter, Christmas trees, or intricate Easter eggs. String art can be a delightful way to decorate for any holiday.
- Adding Embellishments: Elevate your string art by incorporating small beads onto the string before wrapping, or weave in tiny LED string lights for a magical glow.
- Multi-Board Displays: Create a series of smaller string art pieces that, when arranged together, form a larger image or tell a story.
- Ombre or Gradient Effects: Use multiple shades of string within the same color family, transitioning from light to dark to create a beautiful gradient effect.
Tips for String Art Success
To ensure your string art projects are enjoyable and result in beautiful pieces, keep these pointers in mind:
- Start Simple: If you’re new to string art, begin with an easier design like a single heart or a simple geometric shape. This allows you to get comfortable with hammering and stringing before tackling more complex projects.
- Patience is Key: Don’t rush the process. Hammering nails can be tedious, and stringing takes time. Enjoy the meditative aspect of the craft.
- Practice Hammering: If you’re not confident with a hammer, practice on a scrap piece of wood first. Aim for consistent depth and straight nails.
- Experiment with Stringing: Don’t be afraid to try different stringing patterns to fill your design. You can always unwrap and re-wrap if you’re not happy with the look.
- Lighting Matters: Work in a well-lit area so you can clearly see your nails and string, especially when working on intricate details.
- Secure Knots: Always double-knot your string at the beginning and end of each section to prevent it from coming undone.
- Consider Safety: Always use proper safety precautions when handling hammers and nails.
Embark on Your String Art Adventure Today!
String art is a wonderfully fulfilling and creative hobby that offers endless possibilities for personalized home decor and thoughtful gifts. From the satisfying thud of the hammer to the intricate patterns formed by the string, every step of the process is an opportunity for self-expression and relaxation. With the detailed guide and inspiration provided here, you now have all the knowledge and confidence to transform a simple piece of wood into a breathtaking work of art. So, gather your supplies, pick your favorite design, and get ready to create something truly special. Happy crafting!