
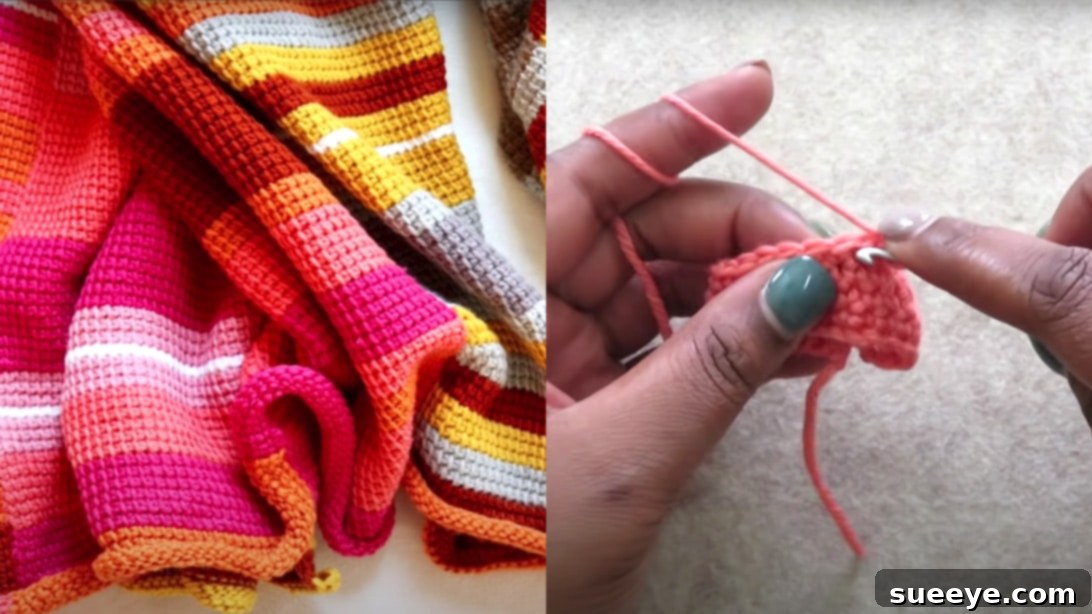
The world of crochet is a vibrant tapestry of creativity, offering endless possibilities for crafting beautiful and functional items. For both aspiring crafters and seasoned enthusiasts, the journey of learning and refining techniques is truly never-ending. Every so often, brilliant new hacks and clever shortcuts emerge, making the process smoother, more efficient, and infinitely more enjoyable. These insights can transform a challenging step into a simple one, or elevate a good project into a great one. Whether you’re just picking up a hook or looking to sharpen your skills, incorporating smart strategies can significantly enhance your crocheting experience.
In this comprehensive guide, we delve into a selection of essential crochet hacks specifically curated for beginners, though experienced crocheters will also find immense value in these tried-and-true tips. Inspired by the extensive collection shared by TL Yarn Crafts on YouTube, these hacks cover everything from clever tool organization to fundamental stitching techniques, ensuring a solid foundation for your crafting journey. We’ll explore practical solutions to common challenges, helping you to crochet with greater confidence, precision, and joy. Get ready to transform your approach to crochet and unlock new levels of creative potential!
Essential Materials for Every Beginner Crocheter
Before diving into the hacks, it’s crucial to ensure you have the right tools at your disposal. A well-equipped crochet kit makes all the difference, providing convenience and allowing you to focus purely on the craft. Here’s a breakdown of the materials mentioned, with insights into their importance:
- Different Types of Yarn Sizes: Yarn comes in various weights and fibers, from delicate lace to super bulky. Having a selection allows you to experiment with different project types and understand how yarn size impacts the final fabric and hook choice.
- Tapestry Needles: Also known as darning needles, these blunt-tipped needles with large eyes are indispensable for weaving in yarn ends, seaming pieces together, and adding finishing touches without splitting your stitches.
- Magnet: A simple yet powerful tool, especially for keeping track of small metallic items like tapestry needles or stitch markers.
- Crochet Hooks: The absolute heart of crocheting! Hooks vary in size (measured in millimeters or letters/numbers) and material (aluminum, steel, bamboo, plastic). A good range of sizes will allow you to work with different yarn weights and achieve various gauges.
- Makeup Organizer: A surprisingly effective solution for organizing small crochet tools, particularly hooks, thanks to its multiple compartments.
- Tape: Useful for labeling, marking, or even temporary fixes.
- Pen: For jotting down notes, pattern modifications, or marking your progress.
- Scissors: Sharp scissors are a must for cleanly cutting yarn tails and making neat finishes.
- Crochet Pouch: A dedicated bag or case to keep your projects and tools together, making them portable and organized.
- Tape Measure: Essential for checking your gauge (stitch and row count per inch), measuring project dimensions, and ensuring your work matches pattern specifications.
- Stitch Markers: Small clips or rings used to mark specific stitches, rows, or the beginning of a round. They are incredibly helpful for keeping track of your place in a pattern, especially for complex designs or when working in the round.
25 Crochet Hacks for Beginners: Mastering Your Craft with Smart Techniques
Now, let’s dive into some transformative crochet hacks that will simplify your projects and elevate your skills. While TL Yarn Crafts shares 25 fantastic tips, we’ll focus on a detailed exploration of some of the most impactful ones that beginners can immediately put into practice.
TIP #1: Storing Tapestry Needles Safely and Smartly
One of the most common frustrations for any crafter is misplacing small, essential tools. Tapestry needles, being thin and often dark-colored, are notorious for disappearing into projects or getting lost in the couch cushions. Since these needles are made of metal, a simple yet incredibly effective solution for storage is to utilize a magnet. A strong magnet, perhaps glued inside a small tin, attached to your project bag, or even a magnetic strip on your craft desk, can securely hold your needles in place. This not only prevents them from getting lost but also ensures they are always within easy reach when you need to weave in ends or join pieces. It’s a small change that saves a surprising amount of time and prevents frustration, keeping your workspace tidy and your needles safe from accidental pokes.
TIP #2: Organizing Crochet Hooks for Efficiency
As your crochet journey progresses, your collection of hooks is bound to grow. Different projects call for different sizes, and having an unorganized pile can slow down your creative flow. A brilliant hack for keeping your crochet hooks tidy and easily accessible is to repurpose a makeup organizer. These organizers, with their multiple compartments, are perfectly suited for holding hooks of various sizes. You can group them by material (aluminum, ergonomic, steel) or, more practically, by size. To take this organization a step further, use small pieces of tape to create clear labels for each compartment. Write down the hook size (e.g., 5.0mm, H/8) on the tape and stick it to the edge of the compartment. This way, you can quickly grab the exact hook you need without rummaging through a tangled mess, allowing you to focus more on your stitches and less on searching for tools. Proper organization can significantly enhance your crafting experience, making it more relaxing and enjoyable.
TIP #3: Curating Your Crochet Essentials Pouch
Crochet is a wonderfully portable craft, and having a dedicated “essentials” pouch ensures you’re always ready to work on your projects, whether you’re at home, traveling, or just waiting at an appointment. The key is to select a pouch that’s compact yet spacious enough to hold everything you truly need, preventing you from overpacking and keeping your core tools handy. This grab-and-go kit should include a small notebook for jotting down pattern notes, stitch counts, or project ideas; a pair of sharp scissors for clean cuts; your current project’s crochet hook or a versatile common size; a flexible tape measure for gauge checks and sizing; an assortment of stitch markers to keep track of critical points; a few tapestry needles for finishing; and your favorite pen for all your note-taking. Having these items organized in a single, accessible pouch makes it incredibly easy to pick up your project and crochet wherever and whenever inspiration strikes, ensuring you’re always prepared for a productive and enjoyable crafting session.
TIP #4: Doubling Yarn to Achieve Desired Thickness
One of the most ingenious hacks for crocheters, especially when faced with a pattern requiring a specific yarn weight that you don’t have on hand, is to double your yarn strands. This technique allows you to create a thicker yarn by holding two or more strands together as if they were one. Understanding how different yarn weights combine is crucial for successful substitution. For instance, two strands of delicate lace weight yarn held together can mimic the thickness of a fingering weight yarn. Similarly, combining two strands of fingering weight yarn can approximate a worsted weight, which is one of the most common yarn weights. If you’re working with worsted weight yarn and need something thicker, two strands of worsted can create a bulky weight effect. And finally, two strands of bulky yarn held together will result in a super bulky yarn. This hack is not only a fantastic way to adapt patterns but also allows you to use up smaller quantities of lighter weight yarns from your stash, opening up a world of creative possibilities without needing to buy new yarn for every project. Always remember to make a gauge swatch when doubling yarn to ensure your fabric has the desired drape and density.
- 2 strands of lace = 1 fingering weight
- 2 strands of fingering = 1 worsted weight
- 2 strands of worsted = 1 bulky weight
- 2 strands of bulky = 1 super bulky weight
TIP #5: The Effortless Method for Threading a Tapestry Needle
Threading a tapestry needle can be surprisingly frustrating, particularly when working with fuzzy or frayed yarn ends that seem to resist every attempt to pass them through the needle’s eye. This simple hack will make the process incredibly easy and quick. Instead of trying to push the yarn through directly, fold the very end of your yarn tightly over the needle itself. Create a sharp crease. Now, with the yarn firmly folded over the needle, pinch the folded yarn tightly between your thumb and forefinger, holding it as close to the needle’s eye as possible. While maintaining this tight grip on the yarn, carefully slide or flip the needle out from under the yarn. What you’re left with is a very stiff, fine loop of yarn compressed between your fingers. While still pinching the yarn, gently insert this firm, folded loop into the eye of the needle. Once the loop passes through, release your grip and pull the main yarn strand until the tail comes through. This technique creates a firm ‘leader’ out of the yarn itself, making it much easier to guide through the needle’s eye, even with the most unruly fibers. Say goodbye to split yarn ends and endless poking!
TIP #6: Crafting the Easiest Slip Knot Ever
The slip knot is the very first step in almost every crochet project, forming the foundation of your initial chain. A well-made slip knot is secure yet adjustable, and this hack offers an incredibly straightforward method, perfect for beginners who might find traditional methods a bit fiddly. To begin, grab the working end of your yarn (the tail coming from the skein) with one hand, letting a short tail dangle. With your other hand, wrap the yarn twice around your index finger, ensuring the first wrap crosses over the second wrap on your finger. You’ll now have two loops on your finger. Using your crochet hook or the thumb and forefinger of your other hand, bring the second loop (the one closer to your fingertip) over the first loop and then off your finger. Now, gently pull the working yarn (the strand connected to the ball) to snug the knot. You will see a small loop formed by the slip knot. Insert your crochet hook into this loop and gently pull the working yarn again to secure it onto your hook. Adjust the tension so the loop is snug around the hook but can still slide freely. This method creates a perfectly adjustable slip knot every time, allowing you to start crocheting with confidence and ease!
TIP #7: Achieving a Professional Finish by Working in the Starting Chain’s Back Bump
When crocheting a flat piece or the base of a project, the traditional method involves working your first row of stitches into the top “V” of the foundation chain. While effective, this often leaves a slightly uneven or bumpy edge, and it can be challenging to work into the chain stitches themselves. A fantastic hack for a much neater, more professional-looking edge, particularly for items like scarves or blankets where the edges are visible, is to work your first row of stitches into the “back bump” (also known as the back ridge) of your starting chain. If you look closely at a chain stitch, you’ll see a series of small “bumps” running along the back of the chain, opposite the “V” shapes. When you insert your hook into these back bumps, it creates a much cleaner, more defined edge that mirrors the top edge of your stitches. This not only provides a beautiful, symmetrical finish but also makes it much easier to work subsequent rows or to add a border later on, as you’ll have clear, evenly spaced loops to crochet into. This subtle shift in technique can significantly improve the overall aesthetic of your finished projects.
TIP #8: Mastering Foundation Stitches for Superior Stretch and Drape
For many beginners, creating a long foundation chain and then working the first row into it can be a cumbersome and frustrating process. The chain can be too tight, too loose, or simply difficult to work into, often resulting in a rigid or uneven starting edge. This is where foundation stitches (such as the Foundation Single Crochet – Fsc, or Foundation Half Double Crochet – Fhdc) come in as a game-changing hack. Foundation stitches essentially combine the chain and the first row of stitches into a single, more flexible unit. They create a starting edge that has the same elasticity and drape as the rest of your crocheted fabric, unlike a standard chain which often has less stretch. To begin a foundation single crochet, you start with a slip knot and chain two. Then, insert your hook into the first chain you made (the second chain from the hook). Yarn over and pull up a loop (two loops on hook). Yarn over and pull through one loop (this creates the “chain” portion of your foundation stitch). Yarn over and pull through both loops (this completes your “single crochet” portion). For the next stitch, insert your hook under the two strands that form the “chain” at the bottom of the stitch you just made. Repeat the process of yarn over, pull up a loop, yarn over, pull through one, yarn over, pull through two. This technique is incredibly versatile for various projects, from garments to blankets, providing a neat, stretchy, and professional-looking start that truly makes a difference in the final product’s comfort and appearance. It’s a skill worth investing time in for any serious crocheter.
Embarking on your crochet journey is an exciting adventure, and these hacks are designed to make it as smooth and enjoyable as possible. By incorporating these smart strategies into your crafting routine, you’ll find yourself crocheting with greater confidence, efficiency, and a newfound appreciation for the art. Remember, practice makes perfect, and every stitch brings you closer to mastering this beautiful craft. Happy crocheting!