
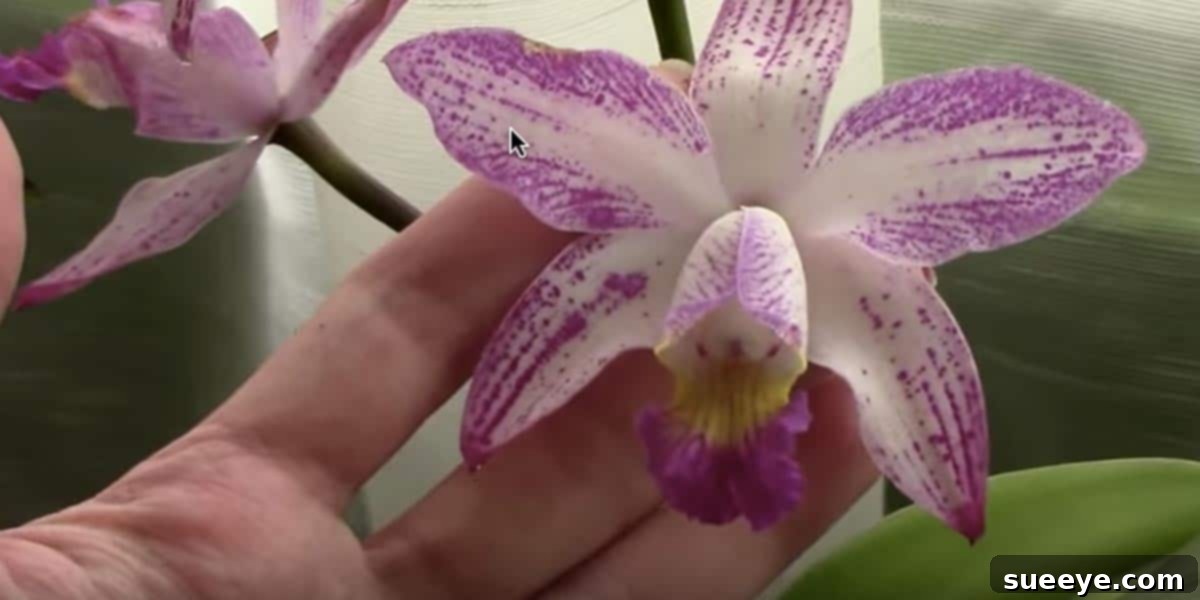
Mastering Orchid Care: A Comprehensive Guide to Thriving Blooms and Healthy Plants
The allure of a vibrant orchid sitting elegantly in a grocery store is often too strong to resist. Their exotic beauty and delicate flowers can instantly brighten any space, promising a touch of tropical paradise. Yet, for many of us, this initial joy is quickly followed by a common frustration: how do you keep these stunning plants alive and encourage them to rebloom? If you’ve ever felt a pang of guilt watching your once-glorious orchid slowly fade, you’re certainly not alone. I, too, have walked that path, purchasing countless beautiful specimens only to see them languish.
The good news is that growing orchids successfully is not an exclusive club for green-thumbed experts. It’s a skill that can be learned, primarily by understanding and avoiding a few common missteps. My own journey from orchid novice to confident grower began with recognizing what I was doing wrong. Once I corrected those mistakes, I found myself with a thriving, healthy orchid – a stark contrast to my previous struggles. In fact, I now have the delightful ‘problem’ of an inability to get rid of my scraggly supermarket orchid, even after it has stopped blooming, because it just keeps growing!
The perception that orchids are notoriously difficult to grow is widespread, but it’s often rooted in a lack of specific knowledge rather than inherent difficulty. Unlike many common houseplants that thrive on consistent, straightforward care, orchids have unique requirements that, once understood, make them surprisingly resilient and rewarding. This guide is designed to demystify orchid care, transforming your approach from guesswork to informed cultivation, leading you towards a vibrant, blooming collection.
Debunking Common Orchid Myths: What NOT to Do (and What to Do Instead)
To cultivate beautiful orchids, it’s essential to understand their natural habitats and replicate those conditions as closely as possible. Much of what we commonly assume about plant care doesn’t apply to orchids, especially the popular Phalaenopsis (moth orchid). Let’s delve into the top mistakes to avoid and the correct practices to adopt, turning your orchid struggles into triumphs. As even respected orchid enthusiasts like MissOrchidGirl emphasize, understanding what not to do is often the first step to success.
1. The Art of Watering: Avoiding the Most Common Pitfall
Watering is arguably the most critical aspect of orchid care, and also where most growers make their biggest mistakes. Incorrect watering is the leading cause of orchid demise.
What NOT to Do:
- Overwatering: This is the cardinal sin. Orchids in their natural environment are typically epiphytes, meaning they grow on trees, not in soil. Their roots are exposed to air and dry out quickly. Potting them in dense media and constantly keeping their roots soggy leads to root rot, which is often fatal. Signs of overwatering include yellowing leaves, blackening roots, and a general droopy appearance.
- Watering from the Top with a Cup: Pouring water directly over the plant and into the pot until it drains out often doesn’t allow the roots to properly absorb enough moisture, especially if the potting medium is very dry or compacted. It also increases the risk of water sitting in the crown of the plant, leading to crown rot.
- Using Ice Cubes: While some commercial growers promote this method for convenience, it’s generally not recommended. Orchids are tropical plants, and the sudden chill of ice cubes can shock their roots, leading to stress and damage over time. It also doesn’t provide consistent, thorough hydration.
- Watering on a Strict Schedule (e.g., every 7 days without checking): Orchid watering needs vary significantly based on temperature, humidity, light, potting medium, and pot size. A fixed schedule can lead to either overwatering or underwatering.
What to Do Instead:
- The Soaking Method: This technique, which I personally swear by, mimics how orchids absorb moisture in their natural habitat. Every one to two weeks (depending on conditions), I remove my orchid from its decorative pot and place it in a bowl of room-temperature water. I let it soak for about an hour. This allows the roots and potting medium to fully hydrate. After soaking, it’s crucial to let it drain thoroughly. I ensure no standing water remains at the bottom of the decorative container before returning the orchid. This method prevents root rot and ensures deep hydration.
- Feel the Pot, Check the Roots: Before watering, lift the pot to gauge its weight (a dry pot is much lighter than a watered one). Observe the roots through clear pots – healthy roots are plump and green; silvery or white roots indicate thirst. Stick a finger or a wooden skewer into the potting medium; if it feels dry, it’s time to water.
- Use Good Quality Water: Rainwater or distilled water is ideal, as tap water can sometimes contain high levels of salts or chlorine that can accumulate and harm your orchid over time. If using tap water, let it sit out for 24 hours to allow chlorine to dissipate.
2. Illuminating Their World: Light Requirements for Happy Orchids
Proper lighting is crucial for orchid health and, most importantly, for encouraging them to rebloom.
What NOT to Do:
- Direct, Intense Sunlight: Placing an orchid in a south-facing window with unfiltered, direct sun will quickly lead to scorched leaves. The leaves will turn yellow, then brown or black, indicating severe burn.
- Too Little Light: While they don’t like direct sun, orchids are not low-light plants. Insufficient light is a common reason why orchids fail to rebloom. The plant might look healthy but will never produce flower spikes.
What to Do Instead:
- Bright, Indirect Light: Orchids thrive in bright, filtered light. An east-facing window is often ideal, providing gentle morning sun. A north-facing window can work if it’s consistently bright. A west or south-facing window can also be suitable if the light is diffused by a sheer curtain or if the plant is placed a few feet away from the window.
- Observe the Leaves: Healthy orchid leaves should be a medium green. Dark green leaves might indicate too little light, while yellowish-green leaves (without sunburn spots) could suggest too much light.
- Rotate Your Plant: To ensure even growth and prevent the plant from leaning towards the light source, rotate your orchid occasionally.
3. Potting Perfection: Choosing the Right Home and Medium
The medium and pot an orchid lives in are fundamental to its health, especially concerning drainage and air circulation.
What NOT to Do:
- Using Standard Potting Soil: This is a death sentence for most orchids. Standard soil compacts easily, retains too much moisture, and suffocates the orchid’s roots, leading to rot.
- Leaving in the Original Nursery Pot Indefinitely: While okay for a short period, nursery pots (often clear plastic with many holes) often contain a peat moss plug that can hold excessive moisture, or the medium can break down quickly.
- Potting in an Opaque Pot Without Drainage Holes: This prevents you from observing the roots and dramatically increases the risk of waterlogging.
What to Do Instead:
- Specialized Orchid Potting Mix: Opt for a chunky, well-draining medium like orchid bark, sphagnum moss, charcoal, perlite, or a mixture of these. This provides the necessary air circulation and drainage.
- Clear Pots with Drainage: Many experienced growers prefer clear plastic pots with ample drainage holes. This allows you to monitor root health and moisture levels easily. These clear pots can then be placed inside a decorative ceramic pot.
- Repot When Necessary: Repot your orchid every 1-2 years, or when the potting medium starts to break down (becoming fine and muddy) or when the roots are overflowing the pot. Always repot after blooming.
4. The Breath of Life: Humidity and Air Circulation
Orchids, being tropical plants, thrive in environments with good humidity and gentle air movement.
What NOT to Do:
- Placing Orchids in Bone-Dry Environments: Low humidity (common in heated or air-conditioned homes) can lead to wrinkled leaves, dry aerial roots, and dropped buds.
- Stagnant Air Conditions: Lack of air movement can encourage fungal diseases and prevent proper drying of the potting medium after watering.
What to Do Instead:
- Increase Humidity: Place your orchid on a pebble tray filled with water (ensuring the pot doesn’t sit directly in the water). Grouping plants together can also create a microclimate with higher humidity. A room humidifier is another excellent option.
- Gentle Air Movement: Ensure good air circulation around your orchid. A ceiling fan on a low setting or an open window (avoiding cold drafts) can be beneficial. This helps prevent fungal issues and ensures roots can breathe.
5. Fueling the Bloom: Fertilization Wisdom
Fertilizing provides the necessary nutrients for robust growth and plentiful blooms, but moderation is key.
What NOT to Do:
- Over-Fertilizing: Applying too much fertilizer can burn the roots and leaves, leading to damage or even death. More is not better.
- Using the Wrong Type of Fertilizer: Standard houseplant fertilizers may not have the correct nutrient balance for orchids.
- Fertilizing a Dormant or Unhealthy Plant: Only fertilize actively growing orchids.
What to Do Instead:
- Use a Balanced Orchid-Specific Fertilizer: Look for a fertilizer formulated for orchids, often with a balanced N-P-K ratio (e.g., 20-20-20).
- “Weakly, Weekly”: A popular and effective method is to dilute your fertilizer to a quarter or half strength and apply it every time you water during the active growing season (spring and summer).
- Flush Regularly: Every month or so, water your orchid thoroughly with plain water to flush out any accumulated fertilizer salts from the potting medium.
6. Temperature Taming: Finding the Ideal Climate
Orchids appreciate stable temperatures without extreme fluctuations.
What NOT to Do:
- Exposing to Extreme Cold or Heat: Cold drafts from open windows in winter or direct heat from radiators can severely damage orchids. Similarly, scorching summer temperatures can stress them.
What to Do Instead:
- Maintain Moderate Temperatures: Most common orchids (like Phalaenopsis) prefer daytime temperatures between 65-80°F (18-27°C) and nighttime temperatures slightly cooler, around 60-65°F (15-18°C). A slight drop in nighttime temperature can actually encourage blooming.
- Avoid Drafts: Protect your orchid from sudden temperature changes and strong drafts.
7. The Post-Bloom Puzzle: What to Do After the Flowers Fade
Many people discard their orchids once the blooms drop, mistakenly thinking the plant is dead. This is a huge mistake!
What NOT to Do:
- Throw Away a Healthy Plant: A non-blooming orchid is not a dead orchid. With proper care, most orchids will rebloom year after year.
- Cut the Flower Spike All the Way Down Immediately: While tempting for aesthetics, it’s not always the best approach for reblooming.
What to Do Instead:
- Observe the Flower Spike: After the last flower drops, examine the spike. If it remains green, it might produce new flowers from a node further down the spike. You can cut the spike just above the second or third node (the small triangular bumps) from the base. This can encourage a new branch to form and rebloom sooner. If the spike turns yellow or brown, it means it’s dying back and should be cut all the way to the base.
- Provide a Rest Period: After blooming, some orchids appreciate a slight reduction in watering and fertilization for a few weeks to rest before their next growth cycle.
8. Spotting Trouble: Pests and Diseases
Vigilance can prevent minor issues from becoming major problems.
What NOT to Do:
- Ignore Suspicious Spots or Bugs: Pests and diseases can spread quickly and severely damage your plant.
What to Do Instead:
- Regular Inspection: Periodically check the undersides of leaves, flower spikes, and the potting medium for common pests like mealybugs, scale, or spider mites.
- Prompt Treatment: Isolate infected plants and treat immediately with appropriate organic or chemical solutions, such as neem oil or insecticidal soap, following product instructions carefully.
Cultivating Patience and Observation: The True Keys to Orchid Success
Beyond specific care techniques, the most valuable tools for any orchid grower are patience and observation. Orchids communicate their needs through their leaves, roots, and overall vigor. Learning to read these signals – a silver root indicating thirst, a yellowing leaf suggesting overwatering, or a lack of blooms pointing to insufficient light – is what truly transforms a novice into an expert. Don’t be afraid to experiment slightly and adjust your care routine based on your specific environment and your orchid’s response.
Remember the lady mentioned earlier, who simply “ignored” her orchids on a windowsill, only for them to bloom again in a desperate bid for attention? While intentional neglect isn’t recommended, her story highlights the orchid’s incredible resilience. They often need less intervention than we think, especially when it comes to constantly fussing over them. Sometimes, finding that sweet spot of care involves stepping back and allowing the plant to do its thing, provided its basic needs are met.
Your Journey to a Flourishing Orchid Collection
From the personal satisfaction of nursing a struggling plant back to health to the sheer joy of witnessing a new flower spike emerge, growing orchids is an incredibly rewarding experience. What once seemed like an impossible feat, keeping these beauties alive, has now become a source of immense pleasure. By understanding and implementing these straightforward care principles, you too can move past the initial frustrations and cultivate a magnificent collection of orchids that will grace your home with their enduring elegance for years to come.
Don’t feel bad if your previous attempts have faltered; many people talk about their initial incompetence at growing orchids. Hopefully, this detailed guide, expanding on the things not to do with orchids, will empower you to become a successful and confident orchid grower. Embrace the journey, observe your plants, and soon you’ll be enjoying beautiful, healthy orchid blooms like never before!