
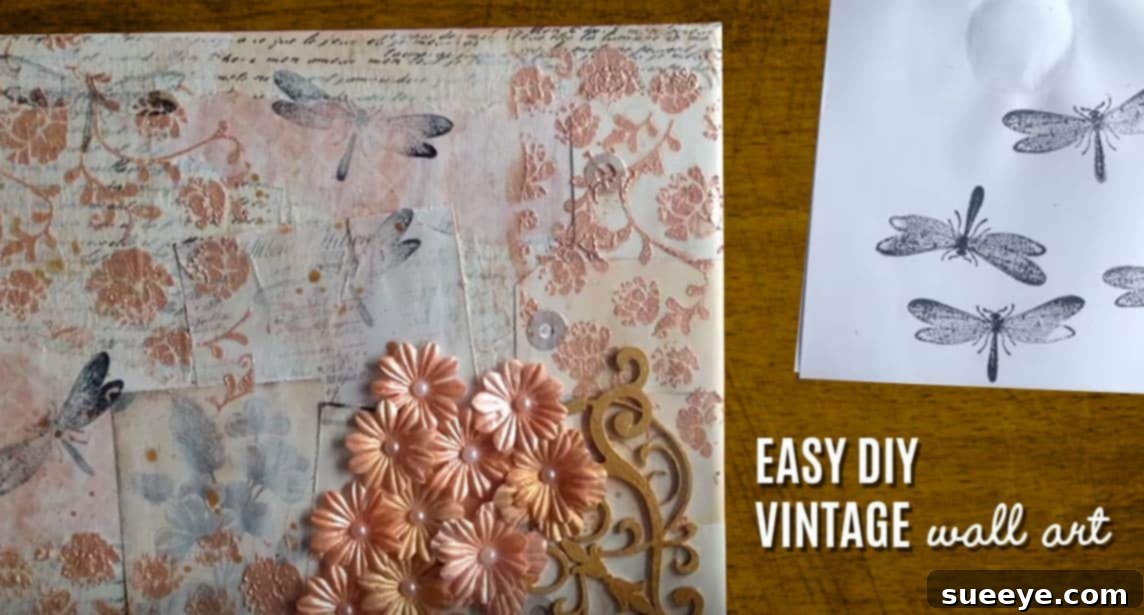
Do you find yourself holding onto a treasure trove of craft notions, sentimental scraps, and intriguing odds and ends, unable to part with them but unsure how to give them new life? If your creative spirit yearns for an outlet and you have a blank canvas paired with some empty wall space, then prepare to be inspired! This guide unveils an extraordinary mixed media canvas project – one of the most captivating and achievable DIY art ideas I’ve encountered recently. The moment I discovered its simple construction and the charm of its upcycled components, I was completely captivated, and I’m confident you will be too.
This art form is a beautiful fusion of memories, textures, and personal history, transforming those “too pretty to throw away” remnants from past projects into a cohesive and stunning display. Gather your cherished scraps, from elegant doilies and sparkling beads to vintage buttons and flat pearls. Alongside these, you’ll need essential crafting supplies like Mod Podge, various tissue papers, and an assortment of paper scraps. The beauty of mixed media lies in its boundless creative freedom. Imagine incorporating dried flowers, cutouts from old CD cases, beloved magazine photos, printed family pictures, or even a collection of old buttons. The possibilities extend to plane tickets from memorable trips, concert stubs from favorite bands, cherished wedding invitations, heartfelt love letters, mementos from a baby’s birth, festive Christmas cards, worn playing cards, or even treasured family recipe cards. The list truly is endless, with your imagination being the sole limit.
Creating a memory canvas makes for an incredibly thoughtful and personalized gift for a special someone, encapsulating shared experiences and beloved moments. And why stop there? Treat yourself to the joy of crafting one for your own home, reflecting your journey and passions. This guide will walk you through every step, ensuring a smooth and enjoyable creative process, resulting in a unique piece of art that tells a story.
Transform Your Treasured Keepsakes into Stunning Mixed Media Canvas Art
Why Mixed Media Art is Your Next Favorite DIY Project
Mixed media art isn’t just a craft; it’s an experience. It’s the delightful process of combining various materials and textures onto a single surface, resulting in a rich, multi-dimensional piece that’s bursting with character. What makes this specific mixed media canvas project so appealing is its focus on upcycling and personalization. Instead of buying new materials, you’re encouraged to delve into your existing collection of craft supplies, sentimental trinkets, and even everyday ephemera that might otherwise be discarded. This approach not only makes the project budget-friendly and environmentally conscious but also imbues your artwork with profound personal meaning. Each button, ticket stub, or snippet of lace becomes a tiny narrative, contributing to a larger visual story. The process itself is incredibly therapeutic, allowing for a free-form creative expression where there are no mistakes, only unique artistic choices. It’s an opportunity to relax, experiment, and let your intuition guide you, making it perfect for both seasoned crafters and absolute beginners looking for a rewarding DIY adventure.
How To Create Easy Vintage Wall Art: A Comprehensive Guide
Your Ultimate Mixed Media Wall Art Tutorial
Gathering Your Essential Supplies
Before you embark on your artistic journey, ensure you have all the necessary components. The beauty of this project is that many items can be found around your home or in your existing craft stash. Think of this list as a starting point, feel free to adapt and expand based on what inspires you and what treasures you uncover.
- Mod Podge Matte: This all-in-one glue, sealer, and finish is the cornerstone of mixed media art. The matte finish is often preferred for a vintage or subtle look, reducing glare and allowing the textures of your layers to truly shine. You could also opt for a gloss finish for a brighter, more polished appearance, or even a satin finish for something in between. Make sure you have enough for multiple layers and a final protective coat.
- Canvas: Choose a blank canvas in a size that suits your wall space and artistic ambition. Stretched canvases are popular, providing a ready-to-hang piece, but canvas panels or even sturdy wooden boards can also work beautifully. Consider buying a multi-pack if you plan to make several pieces.
- Tissue Paper: This forms a delicate and often translucent base layer, adding subtle color and texture. You can use plain white or cream tissue paper for an understated background, or experiment with specialty printed patterns for added visual interest. Crinkled, torn, or layered tissue paper creates wonderful depth.
- Craft Notions: Dive into your collection of small embellishments.
- Beads: Flat-backed beads are easiest to adhere, but small round beads can be added for three-dimensional accents.
- Buttons: A diverse collection of old buttons in various sizes, colors, and materials (wood, plastic, metal) can add a charming, rustic, or vintage feel.
- Coins: Old or foreign coins can bring an intriguing historical or travel element.
- Flat Pearls: These mimic the elegance of real pearls without adding excessive bulk, perfect for a touch of sophistication.
- Small Metal Charms: Keys, gears, tiny lockets – these can evoke curiosity and narrative.
- Doilies, Gift Tags, or Other Mixed Papers:
- Doilies: Paper doilies, especially vintage lace patterns, introduce a romantic and delicate texture.
- Gift Tags: New or old, these can be layered for visual interest, often featuring charming designs or spaces for personalized text.
- Old Book Pages: The aged look and classic typography of old book pages or sheet music add an instant vintage aesthetic.
- Maps: Sections of old maps can evoke a sense of adventure and journey.
- Fabric Scraps: Small pieces of lace, burlap, or patterned fabric can add a soft tactile element.
- Scrapbook Paper Scraps: These come in an endless array of patterns, colors, and textures, providing excellent material for layering. Look for designs that complement your chosen theme or color palette.
- Stamps and Ink (Optional): Rubber stamps with vintage motifs, encouraging words, or decorative patterns can be used with archival ink to add subtle details, quotes, or background textures.
- Additional Items for Enhanced Creativity:
- Acrylic Paints/Gesso: For priming your canvas, adding washes of color, or creating textured backgrounds.
- Brushes: Various sizes for Mod Podge and paints.
- Scissors/Craft Knife: For precise cutting.
- Palette Knife/Spatula: Useful for applying thicker mediums or creating textured surfaces.
- Stencils: To add repetitive patterns or shapes.
- Found Objects: Small twigs, dried leaves, pressed flowers, feathers – anything natural that sparks your interest.
- Photos: Printed photos, either current or historical, that hold special meaning.
- Old Jewelry Pieces: Broken earrings, single pearls, small pendants that can be repurposed.
Step-by-Step Guide to Crafting Your Masterpiece
Step 1: The Foundation – Preparing Your Canvas
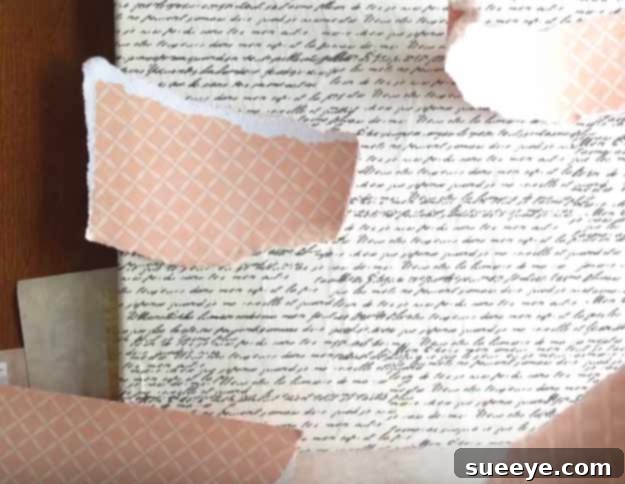
Begin by laying down the fundamental layers that will give your canvas depth and an aged, ethereal quality. On your blank canvas, apply a generous, even layer of Mod Podge. Don’t be shy; you want a good adhesive base. While the Mod Podge is still wet, carefully place pieces of tissue paper over it. You can tear the tissue paper into organic shapes or use full sheets, allowing them to overlap slightly. Press the tissue paper down gently with your fingers or a soft brush, smoothing out major wrinkles but embracing the smaller ones, as they contribute to the vintage aesthetic. Allow this layer to dry for a few minutes until it’s tacky but not fully hardened. Next, introduce torn paper scraps over the tissue paper layer. These could be from old books, newspapers, scrapbook paper, or even patterned gift wrap. Adhere them by brushing more Mod Podge over the top as you go. Remember, there’s no “right” or “wrong” way to do this; the beauty lies in the organic, imperfect layering. Spread your pieces out, ensuring a balance between areas of intricate detail and simpler backgrounds to achieve the best visual effect. Let your intuition guide your composition, focusing on creating a harmonious base.
Step 2: Building Layers with Paper & Ephemera
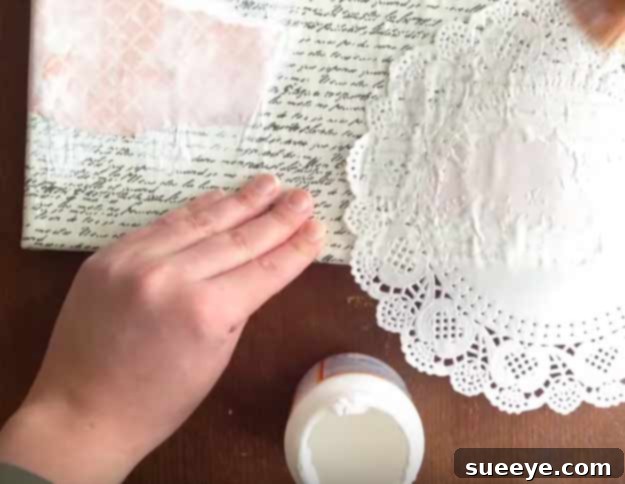
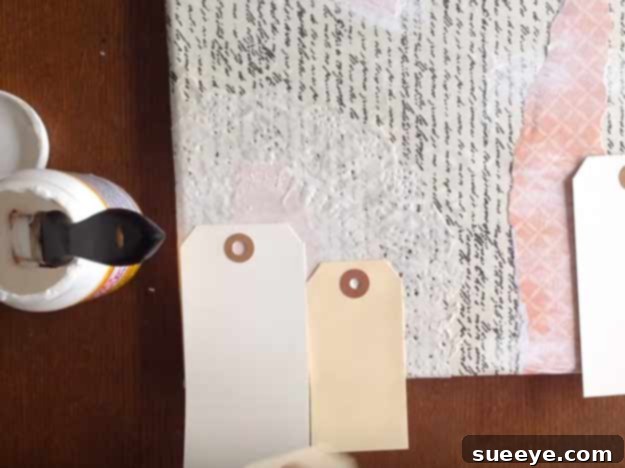
Now, it’s time to infuse your artwork with romantic charm and intriguing elements. Doilies are perfect for this! Select one or more paper doilies and glue them strategically onto your canvas. Don’t worry if they wrinkle a little; this adds to their authentic, antique feel. You can even wrap portions of a doily around the canvas corners and fold them underneath for a seamless edge, or let them hang slightly off the edge for an artistic flourish. Think about other interesting paper textures you could add—perhaps corrugated cardboard scraps, embossed paper, or even fine sandpaper for a gritty touch. Experiment and see what beautiful contrasts you can create! Please share your ideas in the comments below; I’m always eager to discover new textures and techniques as we plan to make a few more of these. Integrating gift tags is another fantastic way to add layers and visual interest. Whether you use crisp new tags or weathered old ones, their varied sizes, shapes, and colors can create delightful focal points. For an extra polished look, wrap any tag portions that extend over the canvas edge to the back, securing them with Mod Podge for a clean finish.
Step 3: Integrating Personal Mementos & Embellishments
This is where your mixed media canvas truly becomes a personal narrative. Seek out vintage inspiration in unexpected places and thoughtfully incorporate it. Old CD cases, for instance, often feature fantastic artwork or intriguing textures that can be cut out and integrated. While I no longer need the physical cases, I love repurposing their graphic elements into wall art. Carefully cut out sections that appeal to you and adhere them firmly. Similarly, favorite magazine photos, printed personal photos, or even small antique buttons can be nestled among your paper layers, each telling a piece of your story. Remember to consider the visual weight and placement of each item, aiming for a balanced yet dynamic composition. Use Mod Podge to secure all these elements, ensuring they are thoroughly coated and protected.
The beauty of this project is in incorporating tangible memories. Plane tickets from an unforgettable journey, train tickets from a scenic route, or concert ticket stubs from a cherished live performance can evoke powerful feelings. Wedding invitations, heartfelt love letters, tiny mementos from a baby’s birth, festive Christmas cards, classic playing cards, or even cherished family recipe cards – each item acts as a tiny time capsule, embedded in your art. Consider also adding dried flowers, fabric scraps, old jewelry pieces, or even small shells collected from a beach trip. These personal additions elevate your canvas from mere decoration to a deeply meaningful work of art. The possibilities are truly infinite, making each creation utterly unique and reflective of its maker.
Step 4: Adding Depth and Texture
Once your primary layers and mementos are securely in place, you can further enhance your canvas with additional depth and texture. This step allows for even more artistic expression. Consider adding light washes of acrylic paint in complementary or contrasting colors to highlight certain areas or unify different elements. A thin wash of watered-down brown or sepia paint can instantly give your entire piece an aged, antique look. You can also experiment with stencils, applying paint or even a thin layer of texture paste through them to create repeating patterns. Use a dry brush technique to gently brush paint over raised areas, making textures pop. Inking the edges of your paper elements or adding a touch of distress ink can further enhance the vintage feel. If you have any small, flat natural elements like pressed leaves or tiny dried flowers, now is the time to carefully place and adhere them, ensuring they are well-sealed with Mod Podge to preserve them. The goal here is to build up visual interest and create a tactile surface that invites closer inspection.
Step 5: The Finishing Touches
With all your layers and embellishments carefully arranged and adhered, the final step is to seal and protect your masterpiece. Apply several thin, even coats of Mod Podge over the entire surface of your canvas, allowing each coat to dry completely before applying the next. This not only ensures that all elements are permanently affixed but also creates a durable, protective layer that guards against dust, moisture, and UV damage. The matte finish of Mod Podge will maintain the subtle, vintage aesthetic you’ve worked to create. For an even more robust finish, you could consider a clear acrylic spray sealant or varnish once the Mod Podge has fully cured. Once completely dry, your mixed media canvas is ready to be admired! If your canvas is stretched, it can often be hung directly using the wooden frame. For canvas panels or heavier pieces, attach appropriate hanging hardware to the back. Take a moment to step back and appreciate the unique story you’ve woven, a beautiful tapestry of memories and creativity.
Unleashing Your Creativity: Endless Inspiration for Your Mixed Media Art
The true magic of mixed media lies in its ability to tell a personal story. Beyond the examples already mentioned, consider these additional sources of inspiration for your next project:
- Travel Mementos: Beyond tickets, think maps, brochures from destinations, foreign currency, postcards, or even small sand samples sealed in a tiny plastic bag.
- Family History: Old family photos, handwritten notes from relatives, copies of birth or marriage certificates, swatches of fabric from antique garments, or even pressed flowers from a grandparent’s garden.
- Nature’s Bounty: Small, ethically gathered natural elements like delicate pressed leaves, thin bark pieces, tiny pinecones, or dried seed pods can add an organic touch.
- Artistic Endeavors: Small sketches, watercolor swatches, poetry snippets, or even tiny paint chips that resonate with you.
- Everyday Objects with Character: Worn fabric from an old shirt, a faded recipe card, labels from vintage bottles, or even small, broken pieces of costume jewelry.
- Thematic Canvases: Create a canvas around a specific theme – a “love story” canvas using letters and wedding details, a “travel journal” canvas, a “garden” canvas with dried botanicals, or an “abstract texture” canvas focusing purely on visual and tactile elements.
Each item you choose has the potential to add another layer of meaning and visual intrigue. Don’t be afraid to mix and match styles, textures, and eras. The juxtaposition of old and new, smooth and rough, vibrant and muted, often creates the most compelling art. This journey of discovery and creation is not just about making a piece of art; it’s about celebrating your memories, your experiences, and your unique artistic voice.
Caring for Your Mixed Media Art
Once your stunning mixed media canvas is complete and fully dry, proper care will ensure its longevity. Display your artwork in a location that avoids direct sunlight, as prolonged exposure can fade colors and potentially degrade some materials over time. Keep it away from areas with high humidity or extreme temperature fluctuations, which could affect the adhesive and paper elements. For cleaning, a light dusting with a soft, dry brush or a lint-free cloth is usually sufficient. Avoid using any liquid cleaners or abrasive materials, as these could damage the delicate surface or react negatively with the Mod Podge or other components. With a little care, your personalized mixed media art will remain a cherished focal point in your home for years to come, continually inspiring and reminding you of the stories it holds.