
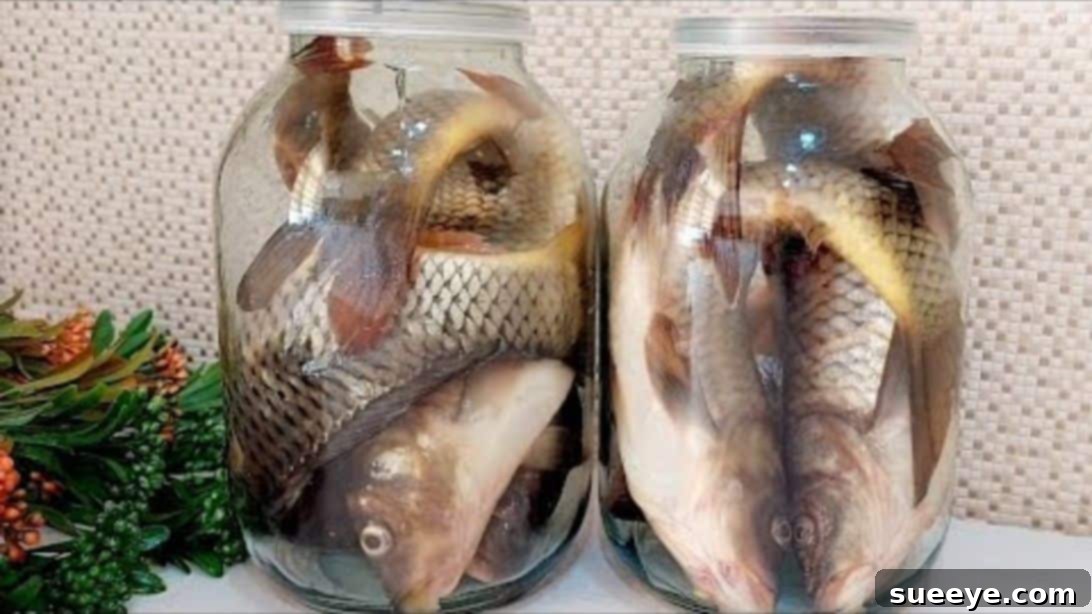
There’s immense satisfaction in preparing and preserving your own food, and when it comes to fish, a well-executed canning method can transform fresh catches into a delicious, shelf-stable delicacy. When I first discovered the brilliant video tutorial by Melissa Mir on YouTube, my interest was immediately piqued. The promise of an effective way to preserve fish that also enhanced its flavor seemed too good to pass up. Upon trying it, I was genuinely impressed. Not only did this technique prove to be a highly effective method for keeping fish fresh and edible for an extended period, but the resulting taste was simply phenomenal. This isn’t just about preservation; it’s about elevating the fish to a new culinary level, making it so incredibly flavorful that you’ll want to keep a steady supply on hand.
The Art of Preserving Fish: Why Homemade Canning Is a Game Changer
In a world where convenience often comes at the expense of quality and fresh ingredients, learning to preserve your own food offers a rewarding alternative. Canning fish at home, using a proven method like the one shared by Melissa Mir, brings a multitude of benefits:
- Unforgettable Flavor Enhancement: Beyond simply preserving, this method infuses the fish with a depth of flavor that’s hard to achieve otherwise. The marination and slow cooking process tenderize the fish and allow the spices to truly penetrate, creating a uniquely delicious profile.
- Extended Shelf Life: The primary advantage of canning is its ability to extend the freshness of food significantly. With this technique, you can enjoy your fish for up to a year, providing a convenient and ready-to-eat protein source whenever you need it.
- Food Security and Preparedness: Having a pantry stocked with homemade canned fish means you’re always prepared. It’s an excellent way to utilize seasonal catches or bulk purchases, ensuring you have a healthy, homemade option available, reducing reliance on store-bought alternatives.
- Cost-Effectiveness: Buying fish in season or in larger quantities when prices are favorable, then preserving it yourself, can lead to significant savings over time compared to buying pre-canned or fresh fish year-round.
- Complete Control Over Ingredients: When you can at home, you know exactly what goes into your jars. This eliminates unwanted additives, preservatives, or excessive salt often found in commercial products, allowing you to tailor the ingredients to your taste and dietary needs.
- Ultimate Convenience: Imagine having perfectly cooked, seasoned fish ready to be added to salads, sandwiches, pasta dishes, or enjoyed straight from the jar. It’s a fantastic solution for quick meals, camping trips, or busy weeknights.
This comprehensive guide will walk you through Melissa Mir’s simple yet effective fish canning process, ensuring you can replicate her delicious results in your own kitchen.
Essential Ingredients for Delicious Canned Fish
The beauty of this recipe lies in its simplicity, utilizing common ingredients to create extraordinary flavor. Here’s what you’ll need to get started:
- Fresh Fish: While the video features a specific type of fish, this method is versatile. Oily fish like mackerel, sardines, or tuna often work wonderfully for canning due to their rich flavor and texture. However, feel free to experiment with your preferred white fish as well. The key is freshness.
- Yellow or White Onion: Onions contribute a crucial aromatic base, adding sweetness and a savory depth to the marinade. Roughly chopped, they release their flavors slowly during the cooking process.
- Paprika: This spice not only adds a beautiful color but also a smoky, sweet, or mild peppery flavor, depending on the type you choose (sweet, hot, or smoked paprika).
- Black Pepper: Freshly ground black pepper provides a pungent, spicy kick that complements the fish and other seasonings perfectly.
- Salt: Essential for both flavor and preservation. Using a non-iodized salt (like canning salt or sea salt) is often preferred for canning as iodine can sometimes discolor food. Adjust the quantity to your taste, remembering that it’s also a key preserving agent.
- 40ml (approx. 3 tbsp) of Vinegar (4% acidity): Vinegar is a critical component. Its acidity not only enhances the flavor but also plays a role in the preservation process, contributing to a safe canning environment. Ensure your vinegar is at least 4% acidity for optimal results.
- Bay Leaves: Aromatic bay leaves impart a subtle, herbal, slightly floral note that elevates the overall flavor profile of the canned fish. One leaf per jar is usually sufficient.
- 50ml (¼ cup) of Vegetable Oil, for each glass jar: Vegetable oil serves multiple purposes: it helps preserve the fish by creating a protective layer, contributes to a rich texture, and carries the flavors of the seasonings. Neutral oils like sunflower, canola, or grapeseed oil are ideal.
Step-by-Step Guide to Homemade Fish Canning
Follow these detailed steps carefully to ensure a safe and delicious batch of homemade canned fish:
Step 1: Preparing Your Fish
The foundation of any great preserved fish lies in proper preparation. Begin by thoroughly cleaning each fish. Using a sharp knife or kitchen shears, carefully cut off the fins and tail. Next, scale the fish under running water to minimize mess. Slice open the stomach cavity from vent to gills and meticulously remove all the guts and gills. This is a crucial step for both hygiene and taste. Once the innards are removed, wash the fish exceptionally well under cold running water, ensuring every part is clean. Pat them thoroughly dry with paper towels, both inside and out, as excess moisture can affect the canning process. Finally, cut off the heads. These can be set aside and used later to make a rich fish stock for soups or other recipes, minimizing waste. Cut the body of each fish into approximately three uniform parts. The exact size will depend on the fish and the size of your canning jars, but aim for pieces that fit snugly without being overly packed. Place all the prepared fish pieces into a large, clean mixing bowl.
Step 2: Marinating and Jar Preparation
With your fish ready, it’s time to infuse it with flavor. Take a large onion (yellow or white works well) and roughly chop it. There’s no need for fine dicing here, as the onion’s primary role is to impart flavor during the extended cooking process. Add the chopped onion to the bowl with the fish. Now, season generously with paprika, black pepper, and salt. While the video tutorial suggests using 3 teaspoons of salt for 3 kilograms (approximately 6.6 pounds) of fish, adjust this to your personal preference and the specific weight of your fish. Remember that salt is also a preservative. Pour the measured vinegar over the seasoned fish and onions. Using your hands, gently but thoroughly toss all the ingredients together until the fish pieces are evenly coated with the spices, salt, and vinegar. This marinating step is essential for flavor penetration. Set the mixture aside to allow the flavors to meld while you prepare your jars. Gather clean, dry 50ml (or 1.7-ounce) glass jars. Sterilization is paramount in canning, so ensure your jars and lids are clean and free from any cracks or defects. Place one bay leaf at the bottom of each jar; this will impart its aromatic qualities throughout the canning process.
Step 3: Packing the Jars and Setting Up for Processing
Now, carefully begin filling your prepared glass jars with the marinated fish and onion mixture. It’s important to pack them tightly, but avoid over-packing. Leave a small amount of headspace (about 1/2 inch or 1 cm from the rim) to allow for expansion during heating and to ensure a proper seal. Once the fish is in, measure 50ml (or ¼ cup) of vegetable oil and pour it into each jar. The oil will cover the fish, helping to create an anaerobic environment and contribute to the rich final texture. Clean the rims of the jars thoroughly with a damp cloth to remove any food particles, which could prevent a good seal. Place the lids on each jar and close them tightly. For the cooking process, prepare a large stockpot. Line the bottom of the pot with a cloth or a clean towel; this is crucial to prevent the glass jars from rattling against each other or directly touching the bottom of the pot, which could cause them to crack or break during boiling. Carefully place the filled and sealed jars on top of the cloth, ensuring they don’t touch each other. Fill the pot with cold water, making sure the water level completely covers the jars up to their lids. Finally, place the pot on your stove and cover it with its lid.
Step 4: The Canning Process and Storage
With the pot on the stove, turn the heat to medium and bring the water to a rolling boil. Once boiling vigorously, reduce the heat to low, maintaining a gentle simmer. Allow the jars to simmer steadily for approximately three hours. This long, slow cooking process is vital for proper preservation and to tenderize the fish to perfection. After three hours, carefully remove the pot from the heat. Keep the lid on the pot and allow it to cool down completely and naturally. This gradual cooling is essential for creating a strong vacuum seal in the jars, which is the cornerstone of safe canning. Once the pot and its contents have cooled to room temperature, you can safely remove the lid. Take the jars out of the water, wipe them dry with a clean cloth, and inspect the seals. The center of the lid should be concave and not flex when pressed. Store your freshly canned fish in a cool, dark place. For optimal freshness and safety, ensure they are stored at a temperature not exceeding 10°C (50°F). When stored correctly, your homemade canned fish can be safely kept and enjoyed for about one year. Ensure the jars remain sealed until you are ready to consume them.
Tips for Successful and Safe Homemade Fish Canning
While the process is straightforward, following these tips will help ensure your fish canning venture is both successful and safe:
- Prioritize Freshness: Always start with the freshest fish available. The quality of your raw ingredients directly impacts the final taste and safety of your canned product.
- Impeccable Hygiene: Cleanliness is non-negotiable in canning. Ensure your hands, all utensils, work surfaces, jars, and lids are scrupulously clean and sanitized. Any contaminants can compromise the safety and shelf life of your canned fish.
- Inspect Jars and Lids: Before use, carefully inspect all glass jars for chips, cracks, or imperfections, especially around the rim. Discard any damaged jars. Use new canning lids for each batch, as old lids may not create a reliable seal.
- Accurate Measurements: Pay close attention to ingredient measurements, especially the vinegar, which contributes to the acidity levels crucial for safety in water bath canning.
- Mind the Headspace: Proper headspace is vital. Too little, and the jar might not seal correctly; too much, and the food at the top may discolor. Aim for about 1/2 inch (1 cm).
- Water Bath Canning Safety: This recipe utilizes a water bath canning method. While vinegar adds acidity, it’s generally recommended that low-acid foods (like most fish) be processed using a pressure canner for ultimate safety against botulism. However, this specific recipe from Melissa Mir, with its vinegar content and long processing time, is presented as a water bath method. If you have concerns or wish to adapt the recipe, always consult reputable canning guides (like those from USDA Extension Services) for tested recipes and methods.
- Checking Seals: After cooling, check all jar seals. A properly sealed lid will be concave and won’t flex when pressed in the center. If a jar doesn’t seal, refrigerate its contents and consume within a few days.
- Proper Storage: Store canned goods in a cool, dark, dry place. Avoid extreme temperature fluctuations, which can compromise the seal and food quality.
Serving Suggestions for Your Homemade Canned Fish
Once you’ve mastered this preservation technique, you’ll have a versatile ingredient ready for countless culinary creations. Here are a few ideas to enjoy your delicious homemade canned fish:
- Simple & Savory: Enjoy it straight from the jar with some crusty bread and a squeeze of lemon.
- Elevated Salads: Flake it into a fresh green salad, potato salad, or pasta salad for a protein-packed meal.
- Quick Sandwiches & Wraps: Mix with a little mayonnaise, fresh herbs, and a dash of pepper for a classic fish sandwich or wrap filling.
- Appetizer Delight: Serve on crackers or toasted baguette slices, perhaps with a dollop of cream cheese or a sprinkle of fresh dill.
- Pasta Perfection: Toss with hot pasta, olive oil, garlic, chili flakes, and a sprinkle of parsley for a quick and flavorful dinner.
Conclusion: Embrace the Flavor of Homemade Preservation
Preserving fish at home is a rewarding journey that connects you more deeply with your food. Melissa Mir’s method provides a fantastic entry point for beginners, yielding not just a preserved product, but a truly delicious one. The rich flavors, tender texture, and incredible convenience of having homemade canned fish on hand make this technique an absolute must-try for any food enthusiast. Give this recipe a go, and prepare to be amazed by the incredible taste and long-lasting freshness you can achieve right in your own kitchen.
All image credit belongs to Melissa Mir via YouTube. Follow and subscribe to her channel for more inspiring tutorials!