
Crafting Christmas Joy: Your Guide to an Adorable DIY Santa Pillow
As the holiday season draws near, transforming our homes into festive havens becomes a cherished tradition. While store-bought decorations offer convenience, there’s an unparalleled warmth and charm that comes from adding handmade touches to your Christmas decor. Among the myriad of DIY projects, creating a DIY Santa pillow stands out as a delightful and surprisingly easy way to infuse your space with holiday cheer. If your home currently lacks one of these whimsical creations, get ready to add a truly special piece to your Christmas collection!
Imagine a plump, jolly Santa Claus face peeking out from your sofa, instantly drawing smiles and spreading a palpable sense of joy. These festive cushions are more than just decorative items; they’re conversation starters, comfort providers, and tangible expressions of holiday spirit. They add that perfect pop of color and a whimsical touch that makes your space feel truly festive. When we first discovered a tutorial for one, we knew immediately it was a project we had to undertake!
Why a DIY Santa Pillow is a Must-Have This Christmas
The magic of Santa Claus is an undeniable cornerstone of the Christmas experience, especially for young children. His jolly demeanor and the promise of festive surprises captivate hearts worldwide. A Santa pillow brings this beloved character right into your living space in a soft, huggable form. Our grandchildren, for instance, were absolutely enchanted by this pillow. It was the very first thing they noticed upon walking into our home, a testament to its immediate visual appeal and the universal excitement Santa evokes. Nothing new or festive ever gets past their keen eyes!
Beyond captivating the little ones, a handmade Santa pillow offers several compelling reasons to become a staple in your holiday decorating:
- Unmatched Personalization: Unlike mass-produced items, a DIY pillow allows you to choose every fabric, every stitch, and every embellishment, making it uniquely yours.
- Instant Festive Ambiance: The vibrant reds, whites, and cheerful expression of Santa instantly elevate the holiday mood of any room, from the living room to a cozy reading nook.
- Comfort and Coziness: More than just decor, these pillows provide actual comfort, inviting family and guests to relax and soak in the festive atmosphere.
- Building Traditions: Creating a Santa pillow can become an annual tradition, a project to anticipate and enjoy, fostering a deeper connection to the holiday season.
- A Timeless Keepsake: Handmade items carry sentimental value that grows with each passing year, potentially becoming a cherished heirloom passed down through generations.
With children being so young in our home right now, Santa is a particularly big deal around Christmas time. We love to play it up, creating an atmosphere brimming with wonder and excitement. However, we’ve always made sure to balance this delightful fun with teaching the kiddos the real, profound meaning of Christmas, emphasizing love, generosity, and compassion.
The Enduring Benefits of Embracing DIY for Your Holiday Decor
Opting for DIY Christmas decor goes far beyond simply saving money; it’s an enriching experience that offers a wealth of benefits:
1. Unleash Your Creativity and Personal Style
DIY projects provide an incredible outlet for personal expression. You’re not limited by what’s available in stores. Want a Santa with a sparkling beard? Or a hat made from a whimsical patterned fabric? With DIY, your imagination is the only limit. This allows you to create decor that truly reflects your unique taste and complements your home’s aesthetic, making your holiday setup genuinely one-of-a-kind.
2. Cost-Effective and Sustainable Decorating
Holiday decorating can quickly become expensive. Crafting your own items, like a Santa pillow, often proves to be significantly more budget-friendly. You can utilize leftover fabric scraps from other projects, repurpose old clothing, or find inexpensive materials at craft stores. This approach not only saves money but also promotes sustainability by reducing waste and encouraging resourcefulness.
3. Create Cherished Family Memories and Bonding Experiences
Inviting family members, especially children, to participate in DIY holiday crafts turns a simple project into a memorable bonding experience. The laughter, shared effort, and collective pride in a finished piece become part of your family’s Christmas story. These are the moments that children remember and cherish long after the holiday lights are packed away.
4. The Deep Satisfaction of Accomplishment
There’s an immense sense of pride and satisfaction that comes from looking at something you’ve created with your own hands. This feeling is amplified when that creation brings joy to others, particularly your loved ones during the festive season. A handmade Santa pillow isn’t just a decoration; it’s a testament to your effort and creativity.
5. A Mindful and Relaxing Pastime
In the hustle and bustle of the holiday season, taking time for a craft project can be a wonderfully calming and mindful activity. Focusing on cutting, sewing, and embellishing can serve as a meditative break, allowing you to de-stress and truly immerse yourself in the spirit of the season without the pressures of holiday shopping or extensive party planning.
I must admit, I’ve got a lot of kid in me, so I genuinely enjoy all of the Santa decorations and festivities. I’ll probably be like that as long as I live! The great thing about having children around is that we can live vicariously through them, rediscovering the pure wonder and excitement of Christmas through their innocent eyes.
Essential Materials for Your Adorable Santa Pillow Project
Before you dive into crafting, gathering the right materials is crucial. Most of these items are readily available at craft stores, fabric shops, or even within your own home. Here’s a comprehensive list to get you started on your DIY Santa pillow journey:
1. Fabric Choices for a Cozy Santa
- Main Pillow Fabric: This will be the base of your pillow. Consider durable yet soft options like cotton, canvas, or even an old, clean throw blanket.
- Santa’s Face: A cream, tan, or light pink fabric works best for the skin tone. Soft felt or cotton are excellent choices.
- Santa’s Hat & Suit: Vibrant red fabric is essential. Fleece or felt are popular choices for their ease of use (minimal fraying) and soft texture.
- Santa’s Beard & Hat Trim: White faux fur, fleece, or even a fluffy white felt will create that iconic Santa beard and hat trim.
- Belt & Buckle: Black fabric (felt or cotton) for the belt, and gold or yellow felt/fabric for the buckle.
- Eyes, Nose, Cheeks: Small scraps of black for eyes, red or pink for a jolly nose, and a touch of rosy pink for the cheeks (can be fabric, paint, or embroidery).
2. Stuffing Options for a Plump Pillow
- Polyester Fiberfill: The most common and recommended choice for its loft, resilience, and softness.
- Cotton Batting: Offers a flatter, firmer feel.
- Repurposed Stuffing: Environmentally friendly option using stuffing from old pillows or clean fabric scraps.
3. Tools of the Trade
- Sewing Machine (Optional but Recommended): Speeds up the process, but hand-sewing is perfectly fine for a cozy, rustic look.
- Hand Sewing Needles & Thread: Strong, all-purpose thread in coordinating colors (red, white, black).
- Fabric Scissors: Sharp scissors are vital for clean cuts.
- Pins: To hold fabric pieces in place before sewing.
- Measuring Tape or Ruler: For accurate sizing and cutting.
- Fabric Marker or Chalk: To trace patterns onto your fabric.
- Iron and Ironing Board: For pressing seams and ensuring crisp edges.
- Santa Pillow Pattern/Template: You can find numerous free patterns online, or draw your own simple design on paper.
4. Embellishments to Bring Santa to Life
- Buttons: For eyes, or a larger decorative button for the belt buckle.
- Faux Fur Trim: For an extra luxurious beard or hat trim.
- Ribbon: To add details or a decorative hanging loop.
- Glitter Fabric Paint: For a touch of sparkle on Santa’s hat or suit.
- Embroidery Floss: For adding stitched details like rosy cheeks or a mouth.
- Fabric Glue: Useful for securing small embellishments before sewing, or for no-sew projects.
Your Step-by-Step Journey to a Festive Santa Pillow
Creating a Santa pillow is a fun and rewarding process that can be tailored to various skill levels, from beginner to experienced crafter. While we highly recommend seeking out visual guides like “The Nutty Crafter’s” excellent step-by-step tutorial (as mentioned in the original inspiration!), here’s a general outline to guide you through the process:
Step 1: Design and Gather Your Inspiration
Before cutting any fabric, decide on the style of your Santa pillow. Will it be a full Santa face, a partial Santa peeking over a traditional pillow, or a more abstract design? Sketch out your vision or print a template from an online source. Gather all your chosen fabrics, threads, and tools as per the materials list. Pre-wash any fabrics you are using to prevent shrinking later.
Step 2: Precisely Cut Your Fabric Pieces
Lay your chosen fabrics flat and use your pattern or template to cut out all the individual components. This includes the main pillow front and back, Santa’s face, hat, beard, mustache, eyes, nose, belt, and buckle. Accuracy in this step will ensure a clean, professional-looking finished product. Remember to add a seam allowance if your pattern doesn’t include it.
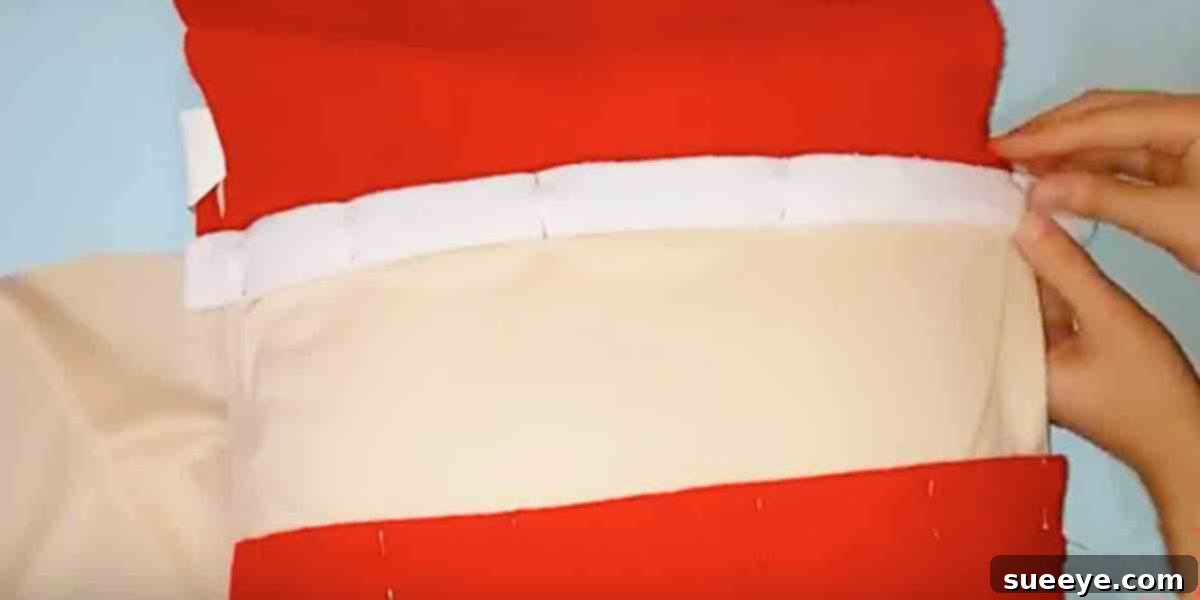
Step 3: Assemble Santa’s Face and Outfit (Appliqué)
This is where Santa truly comes to life! Carefully pin or temporarily glue the smaller fabric pieces (face, hat, beard, eyes, nose, belt, buckle) onto the main front fabric piece of your pillow. Once positioned correctly, machine sew or hand-stitch each piece into place using a tight stitch (like a zigzag or appliqué stitch). Add any embroidered details like a mouth or rosy cheeks during this stage.
Step 4: Construct the Pillow Cover
Once all of Santa’s features are securely attached to the front piece, place the front and back fabric pieces of your pillow right sides together. Pin around the edges, leaving a gap of about 4-6 inches along one side. This opening will be used for stuffing. Sew around the pinned edges using your sewing machine or a strong hand stitch, ensuring you backstitch at the beginning and end of your open gap for reinforcement.
Step 5: Stuffing and Finishing Touches
Carefully trim the corners of your pillow cover to reduce bulk, then turn the cover right side out through the opening you left. Use a blunt tool (like a chopstick) to gently push out the corners so they are nice and sharp. Begin stuffing your pillow with fiberfill, distributing it evenly to create a plump and smooth finish. Don’t overstuff to the point of stretching the seams, but make sure it’s firm enough to hold its shape. Once adequately stuffed, hand-stitch the opening closed using an invisible ladder stitch for a seamless finish. Add any final embellishments, like sewing on buttons or applying glitter paint, if desired.
And just like that, you’ll have a heartwarming, handmade Santa pillow ready to bring smiles and holiday spirit to your home!
Creative Santa Pillow Variations and Styling Ideas
While the classic jolly Santa face is undeniably charming, there’s a world of creativity waiting to be explored when it comes to DIY Santa pillows. Don’t be afraid to experiment with different styles and incorporate them seamlessly into your existing holiday decor:
1. Exploring Different Santa Expressions
- Winking Santa: Add a playful touch with one eye winking.
- Sleeping Santa: A peaceful Santa with closed eyes and a “Zzz” embroidered beside him is perfect for a cozy bedroom.
- Jolly Laughing Santa: Emphasize wide, happy eyes and a big, open mouth for a truly cheerful expression.
- Abstract Santa: Use geometric shapes and contrasting colors for a more modern, minimalist take on Santa.
2. Shape and Size Variations
Beyond the typical square or rectangular pillow, consider:
- Santa Hat Pillow: A pillow shaped like Santa’s iconic hat, complete with a fluffy pom-pom.
- Full-Bodied Santa: A larger, cut-out pillow shaped like Santa from head to toe, perfect for a child’s room.
- Ornament-Sized Santas: Mini pillows to hang on the tree or use as gift toppers.
3. Personalization and Custom Touches
- Embroider Names or Dates: Add the year or a family member’s name to make it a personalized gift or keepsake.
- Fabric Textures: Combine velvet for the suit, faux fur for the beard, and a soft cotton for the face to add tactile interest.
- Themed Santas: Create a “Cookie Santa” with embroidered cookies, or a “Toy Shop Santa” with tiny toy embellishments.
4. Integrating Your Santa Pillow into Your Home Decor
- Living Room Focal Point: Place your Santa pillow prominently on your main sofa or armchair, surrounded by other festive cushions in complementary colors.
- Children’s Room Delight: A Santa pillow makes a magical addition to a child’s bed or reading nook, encouraging sweet dreams of Christmas morning.
- Entryway Welcome: Position it on a bench or chair in your entryway to greet guests with immediate holiday cheer.
- Shelf or Mantel Decor: A smaller Santa pillow can add charm when propped up on a festive shelf, mantelpiece, or even as part of a centerpiece.
- Thoughtful Gift: A handmade Santa pillow is a truly unique and heartfelt gift for friends, family, or even as a hostess gift during holiday gatherings.
Keeping the “Real Meaning” of Christmas Alive
While the fun and excitement surrounding Santa are undoubtedly a cherished part of the holiday season, it’s also a wonderful opportunity to gently remind ourselves and our children about the deeper significance of Christmas. Beyond the gifts and decorations, it’s a time for reflection, gratitude, and embodying the spirit of giving, love, and compassion. Our DIY Santa pillow project can be a beautiful symbol of this balance – a handmade creation born of love, joy, and the desire to create lasting memories, all while keeping the true message of the season at heart.
Embrace Your Inner Child This Holiday Season
There’s something truly special about the holidays that allows us to reconnect with our inner child. The joy of simple pleasures, the wonder of twinkling lights, and the excitement of festive traditions become heightened when we allow ourselves to fully embrace them. This DIY Santa pillow project is an invitation to do just that – to tap into that playful, imaginative spirit, to enjoy the process of creation, and to revel in the pure delight it brings. As the original inspiration noted, the great thing about having kids around is that we can live vicariously through them, experiencing the magic anew. But even without little ones present, allowing ourselves to be joyful and creative is a gift we can give ourselves.
So, whether you’re a seasoned crafter or picking up a needle and thread for the first time, don’t hesitate to embark on this heartwarming project. Watch how the skilled artisan, like the Nutty Crafter, makes this adorable Santa pillow in her step-by-step tutorial, empowering you with the confidence to get busy making one for your home too!
Happy crafting, and warmest wishes for a wonderfully festive holiday season filled with handmade joy!