
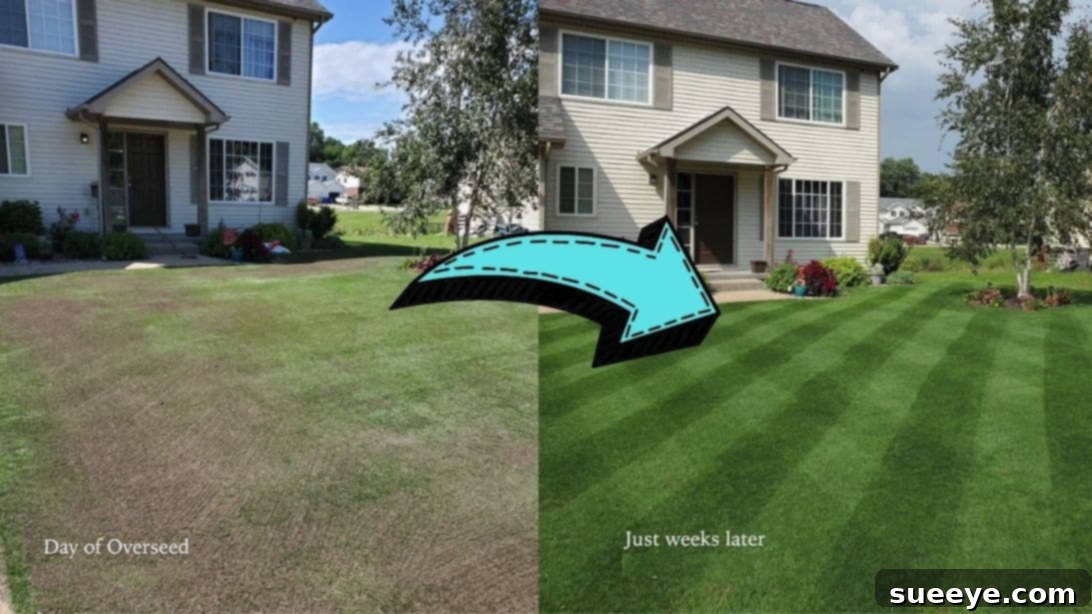
Transform Your Lawn: The Ultimate Spring Overseeding Guide for a Lush Yard
Spring awakens a desire in many of us to refresh and beautify our surroundings, and for enthusiasts of green spaces, this often means focusing on the lawn. There’s a unique satisfaction that comes from cultivating a thick, vibrant carpet of grass, and this spring, I’m embarking on an exciting journey to renovate our lawn. Thankfully, the process has been made significantly clearer and more achievable thanks to the invaluable insights from Ryan Knorr Lawn Care on YouTube. His practical and expert advice has turned what seemed like a daunting task into a manageable and rewarding project.
Why Overseed Your Lawn in Spring?
Overseeding is a vital practice for maintaining a healthy, dense, and resilient lawn. It involves planting new grass seed directly into existing turf, which helps to fill in bare spots, improve turf density, and enhance the lawn’s overall color and texture. While many lawn care professionals often recommend fall for overseeding due to ideal soil temperatures and less weed competition, spring overseeding can still be highly successful with the right approach and careful management.
A well-timed spring overseeding can:
- Increase Density: Thicken your lawn, making it more resistant to weed invasion and disease.
- Improve Color: Introduce new, vibrant grass varieties that can refresh the lawn’s appearance.
- Repair Damage: Help repair areas that have been thinned by winter stress, heavy traffic, or minor pest damage.
- Enhance Durability: Create a more robust lawn capable of withstanding the summer heat and activity.
The key to success in spring is managing weed competition and ensuring consistent moisture for germination before summer stresses arrive. By following these detailed steps, you can give your lawn the best possible start for a season of lush, green growth.
Essential Materials for Successful Overseeding
Before you begin your lawn renovation project, gathering all necessary materials is crucial. Having everything on hand will ensure a smooth and efficient process. Here’s a breakdown of what you’ll need and why:
- High-Quality Grass Seed: Choose a seed variety suitable for your climate and specific lawn conditions (e.g., sun-tolerant, shade-tolerant, drought-resistant). Quality seed ensures better germination rates and a healthier lawn.
- Tenacity Herbicide: This specialized herbicide is unique because it can be safely applied at the time of seeding without harming new grass seedlings, while still controlling many common broadleaf and grassy weeds.
- Liquid Starter Fertilizer: Essential for providing new seedlings with the vital nutrients they need for strong root development and initial growth. Liquid formulas often ensure more even distribution and quicker absorption.
- Sprayer’s Surfactant for Herbicides: A wetting agent that helps the herbicide spread more evenly on leaf surfaces and adhere better, enhancing its effectiveness.
- Lawn Spraying Machine: A backpack or pump sprayer is necessary for precise application of liquid herbicides and fertilizers.
- Seed Spreader: A broadcast or drop spreader ensures uniform distribution of grass seeds across your lawn, preventing clumping and bare spots.
- Peat Moss: Used as a light top dressing after seeding, peat moss helps retain moisture around the seeds, protects them from birds, and aids in germination.
- Personal Protective Equipment (PPE): Gloves, long sleeves, long pants, safety glasses, and closed-toe shoes are essential when handling chemicals to protect your skin and eyes.
Step-by-Step Directions for Overseeding Your Lawn
Step 1: Preparation and Initial Treatment
The foundation of a successful overseeding project lies in thorough preparation. Begin by accurately measuring the area you intend to renovate. Multiply the length of your lawn by its width to determine the total square footage. This measurement is critical for calculating the correct amounts of grass seed, fertilizer, and herbicide needed, ensuring optimal application rates.
Next, prioritize your safety. Before handling any chemicals, change into appropriate personal protective equipment (PPE). This includes long-sleeved shirts, long pants, gloves, eye protection, and closed-toe shoes. Chemicals like herbicides and fertilizers can stain clothes and irritate skin, so protection is paramount. Always read and follow the manufacturer’s instructions for all products you use.
With your safety assured, prepare your lawn spraying machine for the initial application. You’ll be applying the liquid starter fertilizer. This fertilizer is specifically formulated to provide young grass seedlings with the necessary nutrients for robust early growth and root development. Using a liquid starter fertilizer is often more practical for smaller lawns compared to purchasing large bags of granular products, and it offers better immediate nutrient availability.
Begin spraying the entire area with the liquid starter fertilizer, maintaining a steady, even pace as you walk. Overlap your passes slightly to ensure complete and uniform coverage. Once the fertilizer is applied, allow it to dry completely. This waiting period is crucial because it allows the nutrients to be absorbed and, more importantly, prepares the lawn for the subsequent weed killer solution to be most effective without immediately washing away or reacting negatively with other treatments.
Step 2: Seeding and Post-Treatment
Once the initial fertilizer application has dried, it’s time to introduce the star of the show: your new grass seed. Fill your seed spreader with the chosen grass seed, ensuring it’s set to the appropriate rate for overseeding as recommended by the seed manufacturer. Begin walking across your lawn, distributing the seeds in a uniform pattern. The goal is to achieve even coverage without piling up seeds in any one spot, which can lead to patchy growth. Pay extra attention to bare or thin areas, applying a slightly heavier hand there to encourage denser growth.
Next, prepare your second spray solution. This mix will contain the Tenacity herbicide along with a surfactant. Tenacity is exceptional for overseeding because it acts as both a pre-emergent (preventing new weeds from sprouting) and a post-emergent (killing existing young weeds) without harming your newly sown grass seeds. Mix approximately ½ teaspoon of Tenacity solution with 1 gallon of water. Then, add 1-2 teaspoons of a sprayer’s surfactant. The surfactant is vital as it helps the herbicide adhere better to weed foliage, increasing its efficacy. Stir the mixture thoroughly.
If you’re new to using a lawn sprayer, it’s highly recommended to practice with plain water on a hard surface like a driveway or patio. This will allow you to see the spray pattern and get a feel for maintaining a consistent walking speed and overlapping passes, which are crucial for even application and avoiding streaks or missed spots.
Now, spray your entire lawn with the Tenacity and surfactant mixture, again walking at a consistent pace to ensure uniform coverage. After spraying, apply a thin, even layer of peat moss over the newly seeded areas. Peat moss serves several important functions: it helps to retain moisture around the seeds, protects them from being washed away by rain or irrigation, and deters birds from eating them. Break up any large clumps of peat moss to ensure an even blanket.
Finally, begin your watering regimen. New grass seeds require consistent moisture to germinate successfully. Water the area daily, or even multiple times a day in lighter applications, to keep the top inch of soil consistently damp. Avoid heavy watering that could wash away the seeds. The duration of germination can vary; typically, grass seeds take anywhere from 7 to 21 days to sprout. If soil temperatures are on the lower side, patience is key, as germination may take longer. Monitor the soil moisture closely and adjust your watering schedule as needed to prevent the seeds from drying out.
Post-Germination and Ongoing Care
Once your new grass seeds begin to sprout, the journey towards a lush lawn continues with proper aftercare. Continue the consistent, light watering schedule until the seedlings are well-established and approximately 2-3 inches tall. At this stage, you can gradually transition to deeper, less frequent watering to encourage roots to grow deeper into the soil, making the lawn more drought-resistant.
The first mow should be done carefully when the majority of the new grass reaches about 3-4 inches in height. Ensure your mower blades are sharp to make clean cuts and avoid tearing the delicate new blades. Set the mower to its highest setting (typically 3 inches or more) to avoid stressing the young grass. Avoid removing more than one-third of the grass blade length at any given time.
For several weeks after overseeding, try to minimize heavy foot traffic on the newly renovated areas. This allows the young grass to develop a strong root system without disturbance. As your lawn matures, continue with a regular fertilization program tailored to your grass type and soil conditions. Consider a slow-release granular fertilizer a few weeks after the initial starter fertilizer has been depleted to sustain healthy growth throughout the season.
Pro Tips for a Lush and Healthy Lawn
- Soil Testing: Consider conducting a soil test before overseeding. This will provide valuable insights into your soil’s pH and nutrient levels, allowing you to amend the soil and choose a fertilizer that precisely meets your lawn’s needs.
- Aeration: For compacted lawns, aeration prior to overseeding can significantly improve seed-to-soil contact and promote better germination and root growth. This can be done with a core aerator.
- Choose the Right Seed: Not all grass seeds are created equal. Select a blend that thrives in your local climate and specific conditions (e.g., amount of sun, foot traffic). Cool-season grasses like fescue and ryegrass are common choices for spring overseeding in many regions.
- Monitor Weather: Keep an eye on the weather forecast. Avoid overseeding just before a heavy rainstorm, which could wash away seeds, or during extreme heat or cold spells, which can hinder germination.
- Patience is Key: Growing a beautiful lawn takes time and consistent effort. Don’t get discouraged if results aren’t immediate. Adhere to the watering and care schedule, and your patience will be rewarded.
Conclusion: Your Path to a Picture-Perfect Lawn
Overseeding your lawn in spring is an investment that pays dividends in the form of a denser, healthier, and more vibrant yard. By following this comprehensive guide, utilizing the right materials, and dedicating consistent care, you can transform your outdoor space into the lush, green oasis you’ve always envisioned. The expert tips from sources like Ryan Knorr Lawn Care prove that with a clear plan, achieving a professionally manicured look is well within reach for any dedicated homeowner. Embrace the season, roll up your sleeves, and watch your lawn thrive!
These amazing images are all credited to Ryan Knorr Lawn Care via YouTube. We highly recommend checking out his other content and following for more exceptional lawn care insights!