
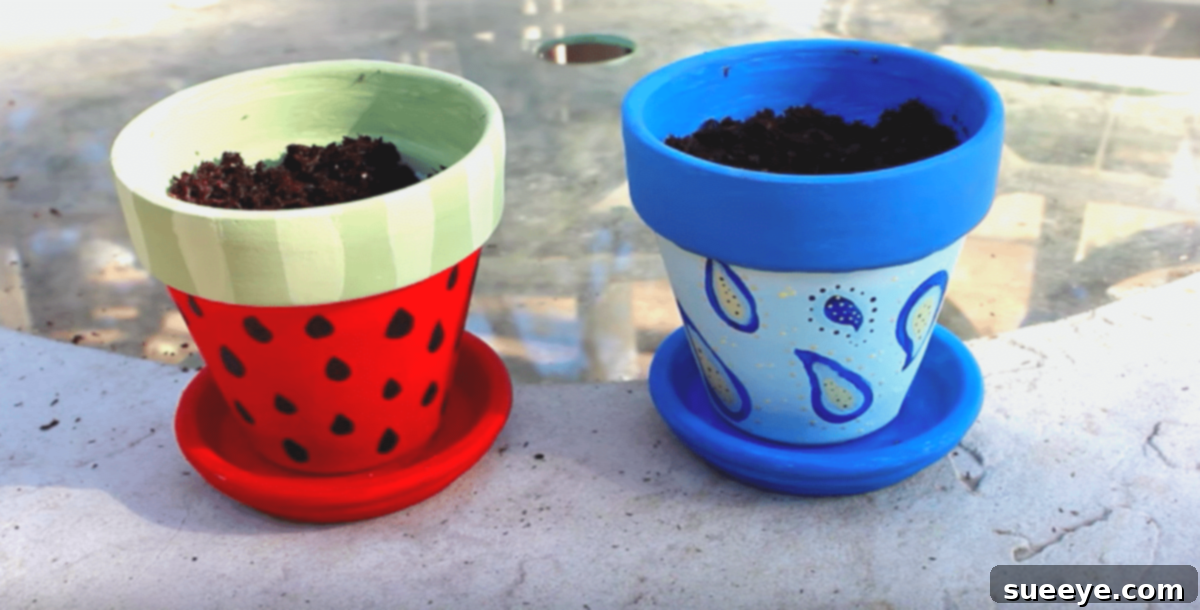
Transform Your Garden: The Ultimate Guide to Hand-Painted Flower Pots for Stunning Outdoor Decor
Springtime ushers in a symphony of natural beauty, with flowers blooming and gardens bursting with life. Yet, amidst this splendor, there’s a simple, creative act that can elevate your outdoor space from beautiful to truly breathtaking: hand-painting your flower pots. Imagine complementing your vibrant hydrangeas or fragrant herbs with unique, personalized planters that tell a story, reflecting your individual style and adding an unparalleled visual appeal to your garden.
A beautiful garden is more than just an aesthetic asset to your home; it’s a sanctuary that promotes well-being and brings joy. This comprehensive guide will walk you through the delightful process of painting flower pots, a DIY project that not only enhances your garden’s charm but also captivates onlookers, inspiring compliments and sparking conversations about your artistic flair. Discover how to infuse your garden with personality, making it a true extension of your home and a testament to your creative spirit.
Why Hand-Painted Flower Pots Are an Irresistible Addition to Any Garden
Beyond their undeniable visual appeal, hand-painted flower pots offer a multitude of benefits that make them a must-have for any gardening enthusiast or home decorator. They are a celebration of individuality and a vibrant expression of art. Here’s why you should embark on this rewarding journey:
- Unleash Personal Creativity: Mass-produced pots often lack character. Painting your own allows for boundless creativity, enabling you to design pots that perfectly match your home’s aesthetic, your favorite colors, or even the specific plants they’ll hold.
- Enhance Garden Aesthetics: Different looking pots truly are eye-catching. They can transform a monotonous patio or a simple flowerbed into a dynamic focal point, adding layers of texture, color, and interest.
- Cost-Effective Garden Makeover: Instead of purchasing expensive decorative planters, you can revive old, faded, or plain pots with a fresh coat of paint. This budget-friendly approach allows for a high-impact transformation without breaking the bank.
- Craft Unique and Thoughtful Gifts: Struggling for gift ideas, especially for those who ‘have everything’? A hand-painted flower pot, perhaps filled with a favorite plant, is a deeply personal and cherished present. It’s a gift that speaks volumes about your care and effort, far surpassing any store-bought item.
- Boost Your Well-being: Engaging in creative activities like painting is therapeutic. It’s a wonderful way to relax, de-stress, and connect with your inner artist, all while creating something beautiful for your environment.
- Eco-Friendly & Sustainable: Give new life to existing pots, diverting them from landfills. This sustainable practice reduces waste and promotes a more environmentally conscious approach to gardening.
Selecting the Perfect Canvas: Choosing Your Flower Pots
The type of pot you choose will influence your painting process and the durability of your design. Understanding the characteristics of different materials is key to a successful project:
- Terracotta Pots: These classic, porous pots are excellent for painting because their texture allows paint to adhere well. However, their absorbency means they often require priming to prevent moisture from the soil seeping through and affecting the paint over time.
- Plastic Pots: Lightweight and durable, plastic pots are economical. Their smooth, non-porous surface can be challenging for paint adhesion, so a specialized plastic primer is highly recommended to ensure long-lasting results.
- Ceramic Pots: Often glazed, ceramic pots offer a smooth surface. Like plastic, they might benefit from a light sanding and a primer to create a better grip for the paint, ensuring a vibrant and durable finish.
- Concrete Pots: Sturdy and robust, concrete pots provide a unique, rustic canvas. Ensure they are thoroughly clean, dry, and consider using a masonry primer for optimal paint adhesion and protection.
Consider the size and shape of your pots. Larger pots offer more space for intricate designs, while smaller pots might lend themselves better to simpler patterns or bold color blocking. Ensure they have drainage holes to keep your plants healthy.
Essential Supplies for Your Hand-Painted Pot Project
Having all your materials ready before you begin will make the process smooth, enjoyable, and mess-free. Here’s a comprehensive checklist:
- Flower Pots: Your chosen canvases, new or old, ready for transformation.
- Paints:
- Outdoor Acrylic Paints: These are ideal as they are formulated to withstand the elements, offering UV resistance and waterproof qualities. Available in a vast spectrum of colors.
- Multi-Surface Acrylics: Good for various pot types, but always seal them with an outdoor varnish.
- Spray Paints: Excellent for achieving quick, even base coats or gradient (ombre) effects. Look for formulations suitable for your pot material (e.g., plastic-specific spray paint).
- Chalk Paint: For a matte, vintage look. It adheres well with minimal prep but absolutely requires a durable outdoor sealant.
- Paint Brushes: A variety of sizes for different tasks: large flat brushes for base coats, medium brushes for general designs, and small detail brushes for intricate work.
- Primer: (Highly Recommended) An outdoor-grade primer suitable for your pot material. This improves paint adhesion and durability, especially on porous terracotta or slick plastic.
- Outdoor Sealant/Varnish: This is CRUCIAL. A clear, waterproof, UV-resistant sealant (spray-on or brush-on) protects your artwork from fading, chipping, and water damage.
- Cleaning Supplies: Dish soap, warm water, a scrub brush, and old rags to thoroughly clean your pots.
- Protective Gear: Gloves to protect your hands, and a drop cloth or old newspapers to shield your workspace from paint spills.
- Design Aids (Optional):
- Painter’s Tape: For creating crisp lines, stripes, and geometric patterns.
- Stencils: To apply consistent patterns or lettering.
- Sponges: For textured effects or applying paint through stencils.
- Pencil: For lightly sketching designs before painting.
Step-by-Step Guide: Bringing Your Flower Pots to Life
Follow these detailed steps to ensure a beautiful and long-lasting finish for your hand-painted flower pots:
-
Step 1: Thorough Cleaning and Preparation
The longevity of your paint job starts here. Scrub your pots rigorously with soap and water to remove all dirt, dust, mineral deposits, and any loose paint. For older pots, a stiff wire brush can be helpful. Rinse thoroughly and allow them to dry completely for at least 24-48 hours. Moisture trapped within porous pots can cause paint to peel later. For plastic or glazed ceramic pots, a light sanding with fine-grit sandpaper (around 220-grit) creates a ‘tooth’ for the paint to grip onto.
-
Step 2: Apply Primer (Essential for Durability)
If using, apply a thin, even coat of appropriate primer to the entire exterior of the pot, including the rim. Primer acts as a barrier, preventing terracotta from absorbing too much paint and ensuring better adhesion on non-porous surfaces. It also helps your chosen paint colors appear more vibrant. Allow the primer to dry completely according to the manufacturer’s instructions, typically 1-2 hours.
-
Step 3: Lay Down Your Base Coat
Once the primer is dry, apply your chosen base color. Use a larger brush or spray paint for even coverage. It’s better to apply two or three thin coats rather than one thick one, as this prevents drips, ensures smooth coverage, and allows for thorough drying. Allow each coat to dry completely before applying the next – patience is crucial here!
-
Step 4: Unleash Your Artistic Vision
This is where the fun begins! Once your base coat is thoroughly dry (give it at least 24 hours), start adding your decorative elements:
- Freehand Designs: Lightly sketch your design with a pencil, then carefully paint over your lines.
- Stenciling: Secure stencils with painter’s tape to prevent bleeding. Apply paint with a sponge or a dedicated stencil brush, using a dabbing motion.
- Geometric Patterns: Use painter’s tape to mask off areas for stripes, chevrons, or color blocks. Press the tape down firmly to prevent paint from seeping underneath. Remove the tape carefully once the paint is dry to the touch.
- Textural Effects: Experiment with sponging, splattering, or dry brushing for unique textures.
Allow each color or layer of your design to dry sufficiently before moving on to adjacent areas to avoid smudging and blending where not intended.
-
Step 5: Apply Protective Sealant (The Key to Longevity)
After all paint layers are completely dry (this could take 24-48 hours depending on paint thickness and humidity), apply 2-3 coats of a clear, outdoor-grade sealant. This step is vital for protecting your artwork from UV rays, water, and general weathering. A spray sealant often provides the smoothest, most even finish. Ensure you cover all painted surfaces, including the top rim and slightly into the interior of the pot. Allow each coat to dry completely as per the product’s instructions before applying the next.
-
Step 6: Cure and Enjoy!
Once the final coat of sealant is dry to the touch, allow the pot to “cure” for several days (e.g., 3-7 days) before filling it with soil and plants. This curing period allows the sealant to fully harden and achieve maximum durability. Now, your uniquely hand-painted flower pot is ready to beautifully showcase your favorite plants and flowers!
Inspiring Design Ideas to Ignite Your Creativity
The canvas of a flower pot is ripe for imaginative designs. Here are some ideas to help you get started:
- Bold Geometrics: Think crisp stripes, chevron patterns, polka dots, or a mosaic of colorful shapes. Use painter’s tape for clean, sharp lines.
- Nature’s Embrace: Paint delicate leaves, blooming florals, whimsical insects like bees or butterflies, or even tiny garden gnomes.
- Ombre & Gradient Effects: Blend colors seamlessly from dark to light, or transition between complementary hues for a sophisticated look.
- Personalized Messages: Stencil or freehand inspiring quotes, family initials, important dates, or simple welcoming phrases.
- Themed Collections: Create a cohesive set of pots around a specific theme – perhaps coastal blues and whites, rustic farm designs, or vibrant bohemian patterns.
- Distressed & Vintage Charm: Apply a base coat, then a contrasting top coat. Once dry, lightly sand areas to reveal the undercoat or the original pot material for an aged, chic look.
- Metallic Accents: Use gold, silver, or copper paints for shimmering details, elegant borders, or to highlight certain elements of your design.
- Children’s Masterpieces: Let your kids express their creativity! Provide them with outdoor-safe paints and let them decorate pots. These make incredibly sentimental and unique pieces for your garden.
Tips for Achieving Professional-Level Results
- Work in Thin Layers: Always apply multiple thin coats of paint rather than one thick one. This prevents cracking, peeling, and ensures a smoother finish.
- Patience Pays Off: Allow ample drying time between each coat of primer, paint, and sealant. Rushing can lead to smudges, uneven textures, and reduced durability.
- Ventilation is Key: Work in a well-ventilated area, especially when using spray paints or sealants, to ensure proper air circulation and safety.
- Test Your Design: If you’re attempting a complex pattern, practice on a piece of paper or cardboard first to refine your technique.
- Clean Brushes Promptly: Rinse your brushes immediately after use with warm, soapy water to keep them in good condition for future projects.
- Consider the Weather: For outdoor pots, ensure your chosen paints and sealants are rated for UV resistance to prevent fading under harsh sunlight and are waterproof to withstand rain.
Maintaining Your Beautifully Painted Flower Pots
To ensure your hand-painted treasures remain vibrant and cherished for years, a little care and attention will go a long way:
- Gentle Cleaning: When cleaning your pots, use a soft cloth, mild soap, and water. Avoid abrasive sponges, harsh chemicals, or high-pressure washers that could damage the paint and sealant.
- Inspect and Re-seal: Over time, environmental exposure can wear down the sealant. Periodically inspect your pots for any signs of fading, chipping, or dullness. A quick reapplication of clear outdoor sealant can restore their protective layer and vibrancy.
- Winter Protection: In colder climates, bringing terracotta or plastic pots indoors during winter months can significantly extend their lifespan, preventing freeze-thaw cycles from damaging the paint or the pot itself.
- Proper Drainage: Ensure adequate drainage holes are not blocked. While sealant protects the exterior, constant internal moisture can still affect the structural integrity of porous pots and potentially compromise the paint from within.
The Heartfelt Joy of Gifting Hand-Painted Creations
Remember the dilemma of finding that perfect, meaningful gift for a loved one? Hand-painted flower pots are an unparalleled solution. Just as the author’s mother found immense joy in her custom-painted birdhouses and pots, your thoughtful, handcrafted gifts will be treasured. These aren’t just objects; they are expressions of love, creativity, and the unique bond you share, destined to bring lasting smiles and beautiful memories to any garden.
Armed with this ultimate guide, you are now ready to embark on your own journey of transforming ordinary flower pots into extraordinary works of art. Embrace the creative process, enjoy the satisfaction of crafting something truly unique, and watch as your garden flourishes with unparalleled charm and personality. Get ready to receive a flurry of compliments and inspire others to embrace the wonderful world of hand-painted garden decor!