
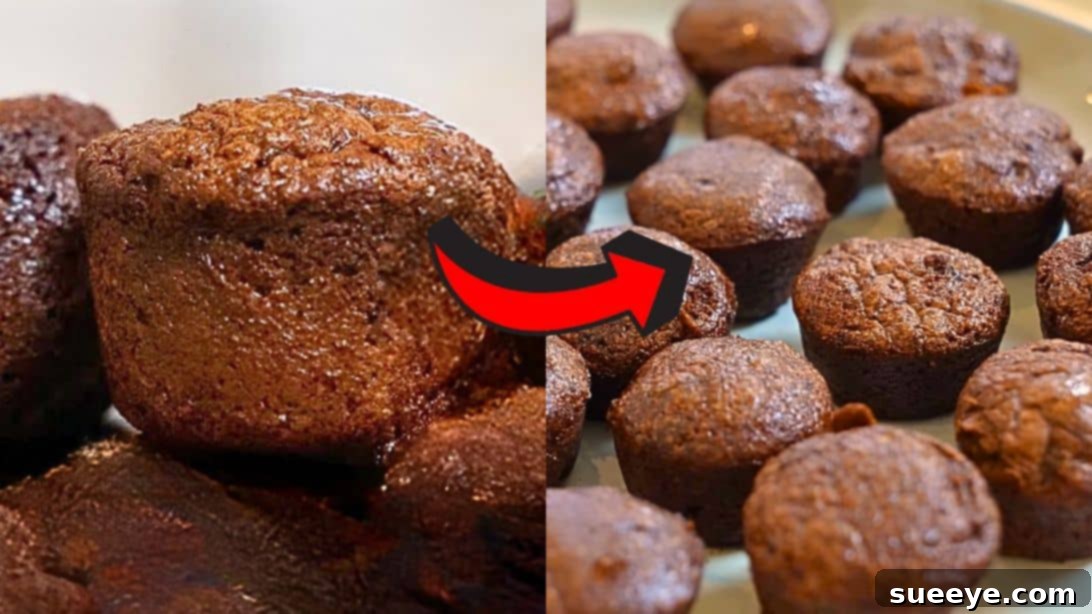
Indulge Guilt-Free: The Ultimate 2-Ingredient Low-Carb Brownie Bites Recipe
Are you a devoted chocolate lover who often finds themselves battling the urge to indulge in sweets, especially when watching your carb intake or following a ketogenic lifestyle? The struggle is real – but the good news is, you no longer have to sacrifice flavor for fitness! Thanks to innovative and straightforward recipes, enjoying decadent treats without the guilt is now easier and more accessible than ever. We’re about to dive into a truly remarkable creation: a 2-Ingredient Low-Carb Brownie Bite recipe that promises to satisfy your deepest chocolate cravings while keeping your dietary goals perfectly on track.
These aren’t just any brownie bites; they are intensely chocolatey, incredibly fudgy, and surprisingly satisfying, all while maintaining a minimal carb count. Imagine grabbing a small, rich portion of pure bliss whenever the craving strikes – a perfect, guilt-free snack that won’t derail your diet. This simple yet brilliant recipe, inspired by the creative culinary minds at Low Carb Love, is poised to become your new go-to for effortless, guilt-free indulgence. Get ready to enjoy every single bite of these delightful low-carb treats!
Why These 2-Ingredient Low-Carb Brownie Bites Are a Game-Changer for Your Diet
In a world full of complex recipes and restrictive diets, finding a dessert that’s both genuinely delicious and perfectly diet-friendly can often feel like searching for a unicorn. This particular recipe, however, breaks through those barriers, offering several compelling reasons why it stands out as an absolute game-changer for anyone on a low-carb or keto journey:
- Unbelievable Simplicity: The ultimate appeal of this recipe lies in its minimalist approach. Requiring just two core ingredients, it dramatically minimizes prep time and effort, making it the ideal choice for busy individuals, novice bakers, or anyone seeking a quick, satisfying treat.
- Low-Carb & Keto-Friendly: Specifically crafted for those adhering to low-carb or ketogenic diets, these bites allow you to indulge your sweet tooth without the dreaded carb spike. The ingenious combination of sugar-free chocolate chips and eggs completely eliminates the need for traditional flour and sugar, making them a perfect fit for your lifestyle.
- Rich, Fudgy Texture: Despite their astonishing simplicity, these brownie bites boast an unbelievably fudgy, moist, and dense texture that can easily rival their high-carb counterparts. The careful emulsification of melted chocolate with egg yolks, combined with the gentle folding in of whipped egg whites, creates a luxurious mouthfeel that will surprise and delight you.
- Perfect for Portion Control: Baked in a mini muffin pan, these treats are naturally portion-controlled. This makes it incredibly easy to manage your intake and avoid overindulgence, ensuring you stick to your dietary goals while still enjoying a delightful dessert. They’re the ideal size for a quick pick-me-up or a light, satisfying ending to a meal.
- Versatile & Easily Customizable: While utterly delicious on their own, these brownie bites also serve as a fantastic, neutral base for various additions and flavor enhancements. This versatility allows you to personalize them to your liking, experimenting with nuts, extracts, or other low-carb friendly ingredients.
- Truly Guilt-Free Indulgence: Finally, a chocolate treat you can genuinely enjoy without an ounce of remorse. These low-carb brownie bites empower you to stay firmly on track with your health and wellness goals while still satisfying that undeniable craving for something sweet and chocolatey.
Essential Ingredients for Your Low-Carb Brownie Bites
The magic of this recipe truly lies in its minimalist approach. You genuinely only need two primary components to bring these delectable treats to life. However, choosing the right quality of each ingredient makes all the difference in achieving the perfect flavor and texture.
The Stars of the Show:
- 1.5 cups of Choczero Milk Chocolate Chips (or preferred high-quality sugar-free chocolate chips): The very foundation of our brownie bites is, of course, chocolate. Choczero is highly recommended here for its exceptional taste and unwavering commitment to using natural sweeteners like monk fruit and erythritol. This ensures a genuinely sugar-free experience without compromising on the rich, creamy flavor you expect from milk chocolate. If Choczero isn’t readily available, opt for another reputable brand of sugar-free or low-carb chocolate chips that melts smoothly and tastes great. Always double-check that your chosen brand is sweetened with erythritol, stevia, or monk fruit, and pay close attention to the net carb count to ensure it aligns perfectly with your specific dietary needs. Feel free to experiment with sugar-free dark chocolate chips for a more intense cocoa flavor, or even a blend of both milk and dark varieties.
- 4 large eggs: Eggs play a truly crucial dual role in this ingenious recipe. The egg yolks contribute significant richness and a beautiful golden hue, and they are essential in helping to emulsify with the melted chocolate, creating a smooth, cohesive, and deeply flavored batter. The egg whites, when meticulously whipped to soft peaks, incorporate a substantial amount of air. This air provides the necessary lift and a delicate, airy structure that is vital for preventing the brownies from becoming overly dense and instead gives them that signature light, fudgy texture. Using large eggs is important for consistent results, as their volume directly impacts the batter’s overall consistency and the final texture of the bites. For optimal whipping of the whites, always ensure your eggs are at room temperature.
Essential Equipment You’ll Need for Baking Success
While the ingredient list is refreshingly minimal, having the right tools readily available will make the baking process smooth, efficient, and ultimately more enjoyable, leading to perfect results every time:
- Microwave-safe bowl: Ideally glass or ceramic, for melting the chocolate chips quickly and safely.
- Electric hand mixer: An absolute must-have for efficiently whisking the egg whites to soft peaks. This step is fundamental to achieving the light and airy texture of the brownie bites.
- Two small, clean bowls: Essential for the careful separation of egg yolks and whites.
- Silicone spatula: Perfect for gently folding the delicate whipped egg whites into the chocolate mixture without deflating them, preserving the crucial air.
- Mini muffin pan: The ideal choice for creating those delightful, perfectly portion-controlled brownie bites. While a standard muffin pan can be used, be aware that baking times will need to be adjusted accordingly.
- Cooking spray or butter: To generously grease your muffin pan, ensuring that your precious brownie bites release easily without sticking.
- Measuring cups and spoons: For precise and accurate measurement of your ingredients, ensuring consistency in your recipe.
- Toothpicks: Your reliable tool for checking doneness during the baking process, helping you avoid overbaking.
Step-by-Step Instructions: Crafting Your Perfect Low-Carb Brownie Bites
Follow these detailed instructions carefully to achieve perfectly fudgy, light, and utterly delicious low-carb brownie bites every single time. Precision in each step contributes significantly to the final outcome.
Step 1: Prepare Your Oven for Optimal Baking
Begin by preheating your oven to 325°F (160°C). This step is not to be rushed; proper preheating is absolutely crucial as it ensures the oven reaches and maintains the correct temperature from the moment your brownies enter, promoting even baking and preventing them from becoming either dry or undercooked. Allow at least 15-20 minutes for your oven to fully preheat to the specified temperature before proceeding.
Step 2: Gently Melt the Sugar-Free Chocolate Chips
Retrieve your microwave-safe bowl and add the 1.5 cups of Choczero milk chocolate chips. Place the bowl inside the microwave and melt the chocolate in short, controlled bursts of 20-second increments. After each increment, remove the bowl and stir the chocolate thoroughly with your silicone spatula. This gentle, incremental melting process is vital; it prevents the delicate chocolate from burning, seizing, or becoming grainy, ensuring a wonderfully smooth, glossy, and fully melted consistency. Continue this process patiently until the chocolate is completely smooth with absolutely no lumps remaining. As an alternative, for a more controlled melt, you can use a double boiler method, placing the bowl over simmering water and stirring frequently until melted.
Step 3: Carefully Separate and Whip Egg Whites to Soft Peaks
Take two small, impeccably clean bowls. Carefully separate the egg yolks from the whites, exercising extreme caution to ensure absolutely no trace of yolk gets into the whites – even a tiny drop of fat can prevent the whites from whipping properly and reaching their full volume. Place the egg whites in one bowl and the yolks in the other. Using your electric hand mixer, whisk the egg whites on medium-high speed until they transform into soft, fluffy peaks. This means when you lift the beaters, the peak of the egg white will gently droop over, rather than standing stiffly. Sufficiently whipping the whites effectively incorporates air, which is absolutely vital for the light, airy, and ultimately fudgy texture of the finished brownie bites.
Step 4: Combine Egg Yolks with the Melted Chocolate
Once your chocolate is smoothly melted and your eggs are separated, add the separated egg yolks directly to your bowl of melted chocolate. Using your silicone spatula, stir the mixture gently but thoroughly until the egg yolks are fully incorporated, and the entire mixture is well combined, presenting a uniform color and texture. This step not only adds richness to the batter but also helps to bind all the flavors together effectively before the delicate introduction of the whipped whites.
Step 5: Gently Fold in the Whipped Egg Whites (The Key to Fudginess)
This is a delicate but absolutely crucial step that determines the final light and airy texture of your brownie bites. Add approximately one-third of the whipped egg whites into the rich chocolate-yolk mixture. Using your silicone spatula, gently fold them in using a motion that lifts from the bottom and folds over the top, taking care not to aggressively stir or deflate all the precious air you worked hard to whip in. Continue this process by adding about half of the remaining whipped whites and fold again with the same gentle, deliberate motion. Finally, add the very last portion of whipped egg whites and carefully fold until they are just combined, and no visible streaks of egg white remain. The mixture should appear light and airy. Overmixing at this stage is a common pitfall and will result in dense, rather than wonderfully fudgy, brownies.
Step 6: Prepare Muffin Pan and Evenly Pour the Batter
Generously grease your mini muffin pan with cooking spray. This seemingly simple step is incredibly important to ensure your delicate brownie bites release easily and cleanly after baking, preventing any frustrating sticking. As an alternative, you can also use mini paper liners if preferred. Using a spoon or a small cookie scoop, carefully and evenly pour the brownie batter into the prepared muffin cups. Aim to fill each cup about 3/4 full. Remember, these bites will rise slightly during baking due to the air incorporated into the egg whites, so leaving a little room at the top is essential to prevent overflow and ensure they bake into a perfect, domed shape.
Step 7: Bake to Golden Perfection and Check for Doneness
Carefully place the mini muffin pan into your preheated oven and bake for approximately 12 to 15 minutes. It’s wise to begin checking for doneness around the 10-minute mark, as oven temperatures can vary significantly. You absolutely want to avoid overcooking, which is the quickest way to turn wonderfully fudgy brownies into dry, cake-like disappointments. To accurately check if they are done, insert a clean toothpick into the very center of a brownie bite. If the toothpick comes out clean or with only a few moist crumbs attached (but no wet batter), they are perfectly ready. If the toothpick comes out with wet batter, bake for another 1-2 minutes and recheck.
Step 8: Cool and Serve Your Guilt-Free Treats
Once baked to perfection, remove the mini muffin pan from the oven. Resist the urge to immediately remove the brownies; allow them to cool in the pan for a few minutes. This initial cooling period in the warm pan allows the brownies to set further and enhances their fudgy texture. After a few minutes, carefully transfer them to a wire rack to cool completely. Cooling is crucial as it allows the brownies to firm up and reach their optimal fudginess. Once fully cooled, gently remove them from the muffin pan. Serve these delightful 2-ingredient low-carb brownie bites and savor every guilt-free, intensely chocolatey moment! Enjoy your effortlessly delicious creation!
Pro Tips for Achieving the Best Low-Carb Brownie Bites Every Time
Achieving bakery-quality low-carb brownie bites is not just possible, it’s easier with these expert tips and tricks:
- Room Temperature Eggs are a Must: Always strive to use room-temperature eggs. They separate more easily, and crucially, egg whites whip up to a significantly greater volume and stability when they are not cold. This extra volume translates directly into lighter, airier, and more tender brownies.
- Immaculate Bowls and Tools: When whipping egg whites, ensure your mixing bowls and whisk attachments are immaculately clean and completely grease-free. Even a tiny trace of fat or yolk can prevent the egg whites from stiffening properly, compromising the texture of your brownies.
- The Art of Gentle Folding: After incorporating the egg whites, resist the strong urge to overmix the batter. The key to maintaining that light, airy texture is gentle folding. Overmixing will deflate the air you’ve so carefully whipped into the whites, resulting in dense, heavy brownies.
- Quality Chocolate Elevates Everything: The flavor of your brownie bites hinges almost entirely on the quality and taste of your sugar-free chocolate chips. Invest in a brand that you genuinely enjoy the taste of, such as Choczero, for the absolute best and most satisfying results.
- Monitor Baking Time Closely: Keep a very close eye on your brownies while they are in the oven. Low-carb baked goods, especially those without traditional flour, can dry out remarkably quickly if overbaked. The toothpick test is your most reliable friend here to ensure perfect fudginess.
- Adjust Sweetness to Your Liking: If you find that your specific brand of sugar-free chocolate isn’t quite sweet enough for your personal preference, you can discreetly add a tiny pinch (1/4 to 1/2 teaspoon) of a powdered erythritol-based sweetener to the melted chocolate mixture before you fold in the whipped egg whites.
Delicious Variations to Explore and Customize Your Bites
While truly fantastic on their own, these 2-ingredient low-carb brownie bites are also a wonderfully versatile canvas for creative additions. Just be mindful that incorporating additional ingredients may slightly alter the carb count, depending on your choices.
- Nutty Crunch: For a delightful textural contrast, fold in a handful of finely chopped walnuts, pecans, or almonds with the last addition of whipped egg whites. Toasting them lightly beforehand can enhance their flavor.
- Extra Chocolatey Burst: If you’re a true chocoholic, stir in a few extra sugar-free chocolate chips (mini chips work great) into the batter just before baking for wonderful bursts of melty chocolate goodness in every bite.
- Aromatic Flavor Extracts: A few drops of high-quality pure vanilla extract, peppermint extract (for a refreshing mint chocolate twist), or almond extract can significantly elevate the flavor profile. Add these with the egg yolks to the melted chocolate mixture.
- Coffee Infusion: For a rich mocha depth, dissolve 1/2 to 1 teaspoon of instant espresso powder or finely ground coffee into the melted chocolate. The coffee will enhance the chocolate flavor without making it taste distinctly like coffee.
- Flaky Sea Salt Sprinkle: A light sprinkle of flaky sea salt (such as Maldon) over the top of the batter just before baking can beautifully enhance and balance the sweetness of the chocolate.
- Tropical Coconut Delight: For a touch of the tropics, gently fold in some unsweetened shredded coconut into the batter. This adds a lovely texture and subtle flavor.
Creative Serving Suggestions for Your Low-Carb Brownie Bites
These versatile bites can be enjoyed in a multitude of ways, making them perfect for any occasion or craving:
- Simply Delicious, Plain: They are perfectly satisfying on their own, especially paired with a warm cup of coffee, tea, or your favorite low-carb beverage.
- Cloud of Whipped Cream: Elevate them with a dollop of freshly made sugar-free whipped cream for an elegant and light touch.
- Berry Bliss Pairing: Serve alongside a handful of fresh, low-carb friendly berries such as raspberries, strawberries, or blueberries for a burst of freshness and color.
- Keto Ice Cream Dream: For an truly indulgent dessert experience, serve a slightly warmed brownie bite with a scoop of your favorite low-carb, sugar-free ice cream. The warm and cold contrast is divine!
- Elegant Dusting: For a professional and appealing finish, dust your cooled brownie bites lightly with unsweetened cocoa powder or a fine powdered erythritol.
Optimal Storage Recommendations to Maintain Freshness
To keep your precious low-carb brownie bites fresh, fudgy, and delicious for as long as possible, follow these simple storage guidelines:
- Countertop Storage: For immediate enjoyment, store your brownie bites in an airtight container at room temperature. They will remain wonderfully fresh and fudgy for up to 2-3 days.
- Refrigerator Storage for Extended Freshness: To significantly extend their shelf life, store them in an airtight container in the refrigerator. Here, they will stay fresh and moist for up to 5-7 days. Be aware that they might become a bit firmer when cold, but will quickly soften up when allowed to come to room temperature.
- Freezer Storage for Long-Term Enjoyment: These brownie bites freeze beautifully! To freeze, first place them in a single layer on a baking sheet and freeze until solid. Once frozen, transfer them to a freezer-safe bag or an airtight container. They will keep perfectly in the freezer for up to 2-3 months. When ready to enjoy, thaw them at room temperature for an hour or two, or gently warm them in the microwave for a few seconds for a freshly baked feel.
Final Thoughts: Your Ultimate Guilt-Free Chocolate Solution Awaits
There you have it – a remarkably simple, yet incredibly satisfying and truly indulgent recipe for 2-Ingredient Low-Carb Brownie Bites. This recipe stands as a testament to the fact that adhering to a low-carb or ketogenic lifestyle absolutely does not mean giving up on the pure joys of delicious, comforting desserts. With minimal effort, an unbelievably short ingredient list, and a few expert tips, you can effortlessly whip up a batch of fudgy, intensely chocolatey treats that will delight your taste buds without ever compromising your health and wellness goals. Whether you’re craving a quick, satisfying snack, a delightful evening dessert, or simply want to impress guests with a ‘healthy’ treat, these brownie bites are the perfect, versatile solution. So go ahead, gather your ingredients with confidence, and prepare to indulge guilt-free in these little squares of chocolate heaven. Happy baking, and enjoy every single delightful bite!