
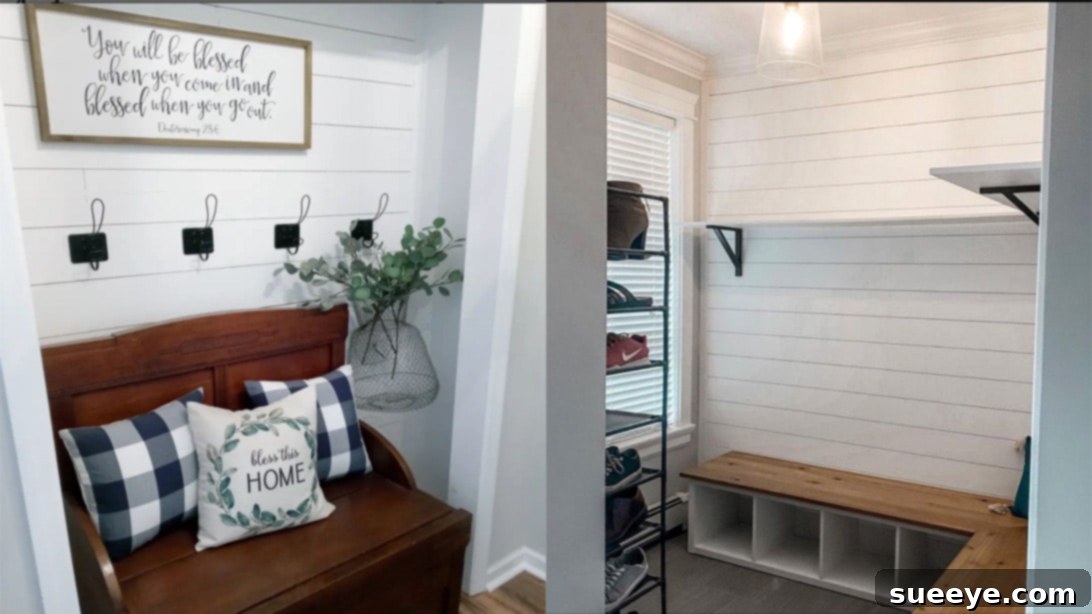
DIY Shiplap Wall: Transform Your Home for Under $20
For many of us, the past few years have brought an unprecedented amount of time spent within the comforting walls of our homes. This shift, while initially challenging, has also presented a wonderful opportunity to focus on home improvement projects that we’ve always dreamed of tackling. If you’re looking for a cost-effective, stylish way to upgrade your living space, a DIY shiplap wall is an excellent choice.
Shiplap has surged in popularity, offering a timeless aesthetic that can range from rustic farmhouse charm to sleek modern minimalism. The best part? You don’t need to break the bank or hire a professional to achieve this look. We’re excited to share a fantastic, low-cost DIY shiplap project, inspired by The Daily DIYer, that allows you to customize your wall anew for under $20!
Why Choose a DIY Shiplap Accent Wall?
Opting for a DIY shiplap wall isn’t just about saving money; it’s about infusing your home with character and personality. Here’s why this project is a homeowner’s dream:
- Unbeatable Affordability: Traditional shiplap can be expensive, but using readily available and inexpensive underlayment boards drastically cuts down the cost. This project proves you can achieve a high-end look without the high-end price tag.
- Timeless Aesthetic: Shiplap offers a versatile design element. It can instantly evoke a cozy farmhouse feel, add a coastal vibe, or bring a clean, contemporary touch, depending on your paint choice and styling. It’s a design trend with staying power.
- Enhanced Texture and Depth: Flat walls can sometimes feel uninspiring. Shiplap introduces beautiful texture and visual interest, making a room feel more inviting and thoughtfully designed.
- Increased Home Value: Thoughtful home improvements, especially those that add character and modern appeal, can contribute positively to your home’s market value.
- Personalized Touch: As a DIY project, you have complete control over every detail—from the width of your boards and the spacing between them to the final paint color. This allows you to truly tailor the wall to your unique style and existing decor.
- Sense of Accomplishment: There’s immense satisfaction in stepping back and admiring a beautiful feature wall you’ve created with your own hands. It’s a tangible representation of your hard work and creativity.
Materials You’ll Need for Your Budget Shiplap Project
Before you dive into the transformation, gathering all your materials is crucial. This helps ensure a smooth and efficient workflow. Here’s a comprehensive list of what you’ll need, along with a few considerations:
- Stud Finder: Essential for locating wall studs, ensuring your shiplap is securely fastened and won’t sag over time.
- Pencil: For marking studs, cut lines, and level lines.
- Sandpaper or Wood Sander Machine: To achieve smooth edges on your cut underlayment strips, preventing splinters and providing a professional finish for painting.
- Woodcutter Machine (Circular Saw or Table Saw): Necessary for precisely cutting the underlayment into strips. Safety first! Ensure you’re comfortable operating this tool or seek assistance.
- Underlayment (e.g., Lauan Plywood or Birch Plywood): This is the secret to the low cost! Look for thin (1/4 inch or less) plywood sheets at your local hardware store. They are typically inexpensive and cut easily.
- Level Bar (Spirit Level): Crucial for ensuring your shiplap strips are perfectly horizontal or vertical, creating a professional and aesthetically pleasing result.
- Nails and Hammer (or Nail Gun): Nails specifically designed for trim work or brad nails with a nail gun will work best for discreet fastening.
- Dry Time Spackling: For filling nail holes and minor imperfections, creating a seamless surface before painting.
- Latex Caulk Plus Silicone: Used to seal any gaps along the edges of the wall and between boards, providing a neat, finished look and preventing dust accumulation.
- Painter’s Tape: For clean caulk lines and to protect adjacent surfaces during painting.
- Paint: Choose a durable, washable paint in your desired color and finish. Matte or eggshell finishes are popular for shiplap as they hide imperfections well.
- Paintbrush and Roller: A small brush for edges and a roller for the flat surfaces of the boards will ensure even coverage.
- Safety Glasses and Gloves: Always wear safety glasses when cutting and hammering, and gloves to protect your hands from splinters.
Step-by-Step Guide: Creating Your Own Shiplap Wall
With your materials ready, let’s get started on transforming your wall! Follow these detailed steps for a smooth and successful installation.
1. Prepare Your Wall for Installation
Preparation is the foundation of any successful DIY project. Begin by clearing the wall area you intend to shiplap. This means removing any existing frames, shelves, brackets, hooks, or outlet covers. Give the wall a good cleaning to ensure it’s free of dust and grime.
Next, and perhaps most importantly, locate the studs within your wall using a stud finder. These are the sturdy wooden (or metal) frames behind your drywall that will provide a secure anchor for your shiplap boards. Mark each stud lightly with your pencil from the top to the bottom of the wall. Once all studs are marked, use a long ruler or a level bar to draw a continuous straight line down the center of each stud. These lines will be your guide for nailing, ensuring your shiplap is securely fastened.
2. Measure, Cut, and Sand Your Underlayment Strips
Now comes the cutting! Carefully measure the exact width of your wall where the shiplap will be installed. If your wall is very long, you might need to use multiple pieces, so plan for seams that can be strategically placed. Using your woodcutter machine, cut the large sheets of underlayment into individual strips. A common width for shiplap strips is 6 to 8 inches, but you can choose any width that suits your aesthetic.
Once your strips are cut, it’s vital to test their fit. Hold a few strips against your wall to ensure they are the correct length. They should fit snugly but not be so tight that they bow or are difficult to install. Remember, wood can expand and contract with changes in humidity and temperature, so leaving a tiny bit of wiggle room is beneficial.
After confirming the fit, use sandpaper or a wood sander machine to smooth down all the edges of each strip. This step is crucial for two reasons: firstly, it prevents painful splinters during handling and installation. Secondly, it creates a cleaner, more professional finish, especially important for painting. Smooth edges also help caulk and paint adhere better.
3. Install Your Shiplap Boards
Installation begins from the bottom of your wall. Take your first underlayment wood strip and use your level bar to ensure it is perfectly level. This first board sets the foundation for the entire wall, so precision here is paramount. Once it’s level, securely nail the strip into the wall, targeting the stud lines you marked earlier. Use nails that are long enough to penetrate the shiplap and firmly embed into the studs.
For the subsequent boards, you’ll want to create consistent spacing to achieve that classic shiplap look. A popular trick is to use nickels or specific spacers (you can find plastic spacers at hardware stores) placed between each board as you install them. This ensures a uniform gap. Layer each successive underlayment wood strip slightly on top of the prior one, resting it on the spacers. Double-check the level of each strip with your level bar before nailing it into place. Continue this process, working your way up the wall, until the entire area is covered.
4. Apply Finishing Touches for a Professional Look
Once all your shiplap strips are nailed to the wall, it’s time for the finishing touches that truly elevate the project. Using dry time spackling, carefully fill in all visible nail holes and any minor imperfections or gaps between the boards. Allow the spackling to dry completely according to the product instructions, then lightly sand it smooth for a seamless surface.
For the sides of the shiplap (where it meets an adjacent wall or corner) and along the top and bottom edges, apply latex caulk plus silicone. To achieve perfectly straight, clean caulk lines, first apply two parallel strips of painter’s tape, leaving a narrow gap where you want the caulk to be. Apply the caulk smoothly into this gap, then immediately remove the painter’s tape before the caulk sets. This technique creates crisp, professional-looking edges.
5. Paint Your Shiplap Wall
The final and most transformative step is painting! This is where your creative vision comes to life. Begin by using a thin paintbrush to get into the gaps between the boards and along the caulked edges. Once these areas are covered, use a paint roller for the larger, flat surfaces of the shiplap boards. Apply thin, even coats, allowing sufficient drying time between each coat. You might need two or three coats, especially if you’re going for a drastic color change.
Consider your desired aesthetic: classic white for a bright, airy feel; a soft gray for modern sophistication; or a bold color for a dramatic statement. Once the paint is dry, reinstall any outlet covers, light fixtures, or decor items you removed earlier. Step back and admire your beautiful, custom-made shiplap wall!
Tips for Success and Common Pitfalls to Avoid
To ensure your DIY shiplap project goes off without a hitch, keep these expert tips in mind:
- Measure Twice, Cut Once: This age-old adage holds true. Precision in measuring saves material and frustration.
- Patience is a Virtue: Don’t rush the process, especially during prep, cutting, and finishing. Taking your time will result in a much better outcome.
- Don’t Skimp on Prep: Properly locating studs and leveling your first board are critical for the entire project’s success.
- Consider Your Room Environment: For bathrooms or other high-humidity areas, ensure your underlayment and paint are suitable for moist conditions to prevent warping or mildew.
- Safety First: Always wear appropriate safety gear, especially eye protection and gloves, when using power tools or handling raw wood. Ensure good ventilation when painting.
- Dealing with Obstacles: If you have outlets or light switches on your shiplap wall, you’ll need to carefully measure and cut openings in your underlayment strips. Always turn off the power at the breaker before working around electrical outlets.
- Embrace Imperfections: While striving for perfection is good, remember that a DIY project often has unique character. Minor imperfections can add to its charm.
Conclusion: A Stunning Shiplap Wall, Under Budget
Creating a DIY shiplap accent wall is an incredibly rewarding project that offers a dramatic transformation to any room without a hefty price tag. For under $20, you can achieve a sophisticated, custom look that will impress friends and family, and most importantly, bring you immense satisfaction.
This project is accessible to beginners with basic tools and a willingness to learn. By following these steps and taking your time, you’ll not only enhance your home’s aesthetic appeal but also gain valuable DIY experience. So, roll up your sleeves, gather your materials, and get ready to create a beautiful, personalized shiplap wall that reflects your unique style!
We hope this detailed guide empowers you to tackle this project with confidence. Happy DIYing!