
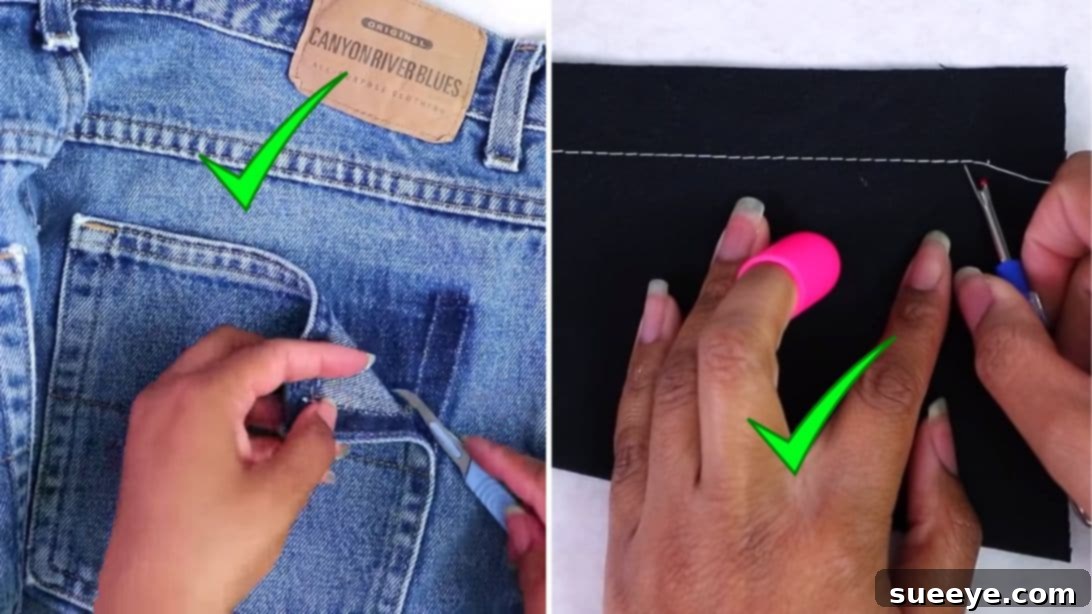
For many passionate sewists, the craft offers immense joy, creativity, and the satisfaction of transforming fabric into something new. Whether it’s crafting an original garment, making alterations, or breathing new life into old clothes through upcycling, sewing is a rewarding journey. However, every sewer eventually encounters the inevitable — the need to unpick seams. What often starts as a minor correction or a step in a larger upcycling project can quickly devolve into a frustrating, time-consuming ordeal. The daunting task of carefully dismantling stitches, especially on complex seams, can make even the most seasoned sewer dread this necessary step.
But what if seam ripping didn’t have to be a chore? What if, armed with the right techniques, you could approach this task with confidence, speed, and even a sense of satisfaction? This guide aims to transform your perspective on seam ripping, turning it from a dreaded hurdle into an efficient and enjoyable part of your sewing process. We’ll dive into proven methods that save you time and preserve your fabric, making your sewing journey smoother and more productive. Prepare to discover how to rip seams way faster and easier, potentially turning this once-tedious activity into something you actually look forward to! We’ve gathered insights, including brilliant tips demonstrated by BlueprintDIY on YouTube, to help you master this essential skill.
RELATED: 3 Brilliant Sewing Tips Using Tweezers That All Seamstresses Should Know!
Why Master Seam Ripping? An Essential Sewing Skill
Seam ripping is far more than just undoing mistakes; it’s a fundamental skill that underpins many aspects of sewing. Understanding how to efficiently and safely remove stitches opens up a world of possibilities for your projects. Here’s why mastering this often-overlooked technique is crucial:
- Correcting Errors: Even experienced sewers make mistakes. A crooked seam, a misaligned pattern piece, or an incorrect stitch length often requires unpicking. Knowing how to do this quickly and without damaging the fabric is invaluable.
- Making Alterations: Customizing ready-to-wear clothing, resizing garments, or adjusting patterns almost always involves taking apart existing seams. Efficient seam ripping allows for precise alterations, ensuring a perfect fit.
- Upcycling and Repurposing: Transforming old garments into new creations is a sustainable and creative endeavor. Upcycling projects frequently begin by deconstructing existing items, making effective seam ripping a cornerstone of the process.
- Learning and Experimentation: Sometimes, you need to dissect a garment or a technique to understand its construction. Seam ripping allows you to carefully examine how different seams are formed, aiding in your learning process.
- Saving Fabric: When done correctly, seam ripping preserves the integrity of your fabric, allowing you to reuse pieces or correct errors without wasting material. This is particularly important for expensive or cherished fabrics.
While the goal is always to sew perfectly, the reality is that seam ripping is an inevitable part of the journey. Approaching it with skill and confidence can save you hours of frustration and improve the overall quality of your finished projects.
3 Fast & Easy Ways to Rip Seams: Techniques Unveiled
Forget the slow, tedious method of picking out one stitch at a time. These expert-level seam ripping strategies will revolutionize how you approach unpicking, allowing you to tackle different types of seams with remarkable speed and ease.
- How to Use a Seam Ripper for Straight Stitches
- How to Take Apart a Chain Stitch or Jean Hem
- How to Take Apart a Serger Seam (3-Thread)
Method 1: Mastering the Seam Ripper for Straight Stitches
The seam ripper is a small yet mighty tool in any sewer’s kit, designed specifically for unpicking stitches. However, many people use it inefficiently, picking individual stitches which is slow and can damage fabric. The trick to speed and safety lies in utilizing its unique design, particularly the small ball at one end of the fork.
Understanding Your Seam Ripper:
- The Sharp Point: Used for initially piercing small stitches or starting a seam.
- The Blade/Sharp Edge: Located between the point and the ball, this is the cutting part.
- The Ball: This safety feature allows the seam ripper to slide under stitches without snagging the fabric. This is key to fast ripping.
- The Handle: Provides grip and leverage.
The Fast & Easy Seam Ripper Technique:
Instead of painstakingly picking out one stitch at a time, employ this efficient method for straight stitches, which are the most common type of seam in garment construction:
- Expose the Seam: First, gently open up your fabric so that the seam is clearly exposed and lying flat. This gives you a clear view and easy access.
- Locate the Ball: Position the seam ripper with the small ball end *underneath* the seam. The ball should be directly against the fabric, and the sharp part of the blade should be facing upwards, ready to cut the stitches.
- Glide and Rip: With steady, gentle pressure, push the seam ripper forward, allowing the ball to guide smoothly along the fabric, and the sharp blade to effortlessly slice through multiple stitches at once. Work from one end of the seam to the other. You’ll feel and hear the stitches snapping.
- Clean Up: Once you’ve ripped through the entire length of the seam, the threads will be loose. Pull the two fabric pieces apart, and the remaining thread segments should fall away easily. You might need to use your fingers, a lint roller, or a small brush to remove any lingering thread pieces.
Tips for Success with Your Seam Ripper:
- Sharpness Matters: A dull seam ripper will snag and pull fabric rather than cut stitches cleanly. Replace your seam ripper periodically or sharpen it if possible.
- Fabric Tension: Keep the fabric slightly taut as you rip. This helps the stitches stand up, making them easier for the blade to catch.
- Test First: If you’re working with a delicate or unfamiliar fabric, test the technique on a less visible area first to ensure it doesn’t damage the material.
- For Curves and Corners: While the “glide” method is fantastic for straight seams, for tight curves or corners, you may need to revert to picking individual stitches or using the sharp point more carefully to avoid cutting the fabric.
- Beyond Straight Stitches: This method works beautifully for most standard straight machine stitches. However, for zig-zag or decorative stitches, you might need a more careful approach, picking out stitches individually as they are wider and more complex.
By adopting this ball-first technique, you’ll find that what once took minutes to unpick a straight seam can now be accomplished in mere seconds, leaving your fabric intact and ready for re-stitching.
Method 2: The Magic of the Chain Stitch: Unraveling Jean Hems
The chain stitch is a unique type of stitch, often found on the hems of ready-to-wear jeans, some t-shirts, and decorative elements. Unlike a lock stitch (the most common straight stitch), a chain stitch is formed by a single thread looping back on itself, resembling a crochet chain. This unique construction allows for incredibly fast and satisfying unpicking – if you know the secret!
Identifying a Chain Stitch:
On one side of the fabric, you’ll see a series of loops that look like a chain. On the other side, you’ll see a straight line of stitches. The magic lies in finding the correct end and pulling the right thread.
How to Take Apart a Chain Stitch or Jean Hem:
- Locate the “Running” Thread: Start at one end of your chain stitch. Carefully examine both sides. You’ll typically find a “looser” thread tail at one end, or one side where the loops seem to feed into the fabric more directly. The key is to find the end where the chain will unravel.
- Pick Out the First Stitch (Carefully): Using your seam ripper’s sharp point or a small pair of snips, gently pick out one or two stitches on the side where the chain looks most pronounced. The goal is to loosen the very first loop so you can identify the working thread.
- Identify the “Unraveling” Thread: Once you’ve loosened a bit, you should be able to see a thread that, when gently tugged, starts to pull through the loops, causing them to unravel. This is the thread you want to pull. If one side seems to create more knots, switch to the other end or try pulling the opposite thread tail.
- Pull and Watch the Magic: Once you’ve found the correct thread, gently but firmly tug it. The entire chain stitch will quickly and satisfyingly unravel, much like pulling a loose thread from a sweater. Continue pulling until the entire seam is completely undone.
- Troubleshooting Knots: If the chain stitch starts to create knots or resists unravelling, you’ve likely picked the wrong end or the wrong thread. Stop, re-examine the seam, and try the other end or re-identify the working thread carefully. Sometimes, a slight snip in a tight loop can help release the tension.
Why This Technique Is So Satisfying:
Watching a long chain stitch unravel in seconds is one of the most gratifying experiences in sewing. It saves a tremendous amount of time, especially when altering jeans or other garments that utilize this strong yet easily reversible stitch.
Method 3: Demystifying the Serger Seam: Unpicking a 3-Thread Overlock
Serger seams, also known as overlock stitches, are common in professional garment construction, especially on knit fabrics, because they provide a clean, durable, and stretchable finish. A 3-thread serger seam is one of the simpler overlock types, formed by two loopers and one needle thread. While they look intimidating, unpicking them can be surprisingly straightforward with the right approach.
Understanding the 3-Thread Serger Seam Structure:
A 3-thread serger seam has two distinct sides:
- The Loopy Side: This side has a dense series of interlocking loops, often appearing like a thick blanket stitch along the edge of the fabric.
- The Swirl/Teardrop Side (Needle Thread Side): This side typically shows a straighter line of stitches, often with small “teardrop” shapes or swirls formed by the needle thread intersecting the looper threads. This is the side you’ll focus on for unpicking.
How to Take Apart a Serger Seam (3-Thread):
- Identify the Needle Thread Side: As mentioned, look for the side with the straighter stitches, often with a subtle teardrop or swirl pattern. This is your primary target.
- Locate and Rip the First Straight Stitch: Usually, within the teardrop shape on the swirl side, you’ll find a straight stitch running through the center. This is the needle thread. Use your seam ripper’s point to carefully snip and pull out this first needle thread stitch. Be precise to avoid cutting the fabric.
- Continue Removing Needle Stitches: Once you’ve removed the first one, carefully snip and pull out the next straight stitches that run between the little loops along that same side. Continue this process, removing the needle thread stitches one by one.
- Separate the Fabric: As you remove enough of the needle thread, the tension holding the looper threads together will release. You’ll then be able to gently pull the two pieces of fabric apart. The looper threads, which were intertwined, should now be loose.
- Pull Away Looper Threads: Once the fabric pieces are separated, the remaining looper threads will often pull away cleanly from the fabric edges. You might need to give them a gentle tug or use your fingers to brush them off.
Important Considerations for Serger Seams:
- Patience is Key: While faster than picking a complex zig-zag by hand, unpicking a serger seam still requires a bit more care than a straight stitch or chain stitch.
- Sharp Tools: Use a very sharp seam ripper or small embroidery scissors to ensure clean cuts without fraying the fabric.
- Working with Different Thread Counts: This method focuses on a 3-thread serger. A 4-thread serger will have an additional needle thread, and a 5-thread even more, requiring slightly different strategies (often focusing on removing the needle threads first).
Mastering the unpicking of serger seams adds another valuable skill to your repertoire, allowing you to confidently alter or upcycle professionally finished garments.
*For a visual demonstration of these techniques, be sure to watch the full video tutorial. It provides invaluable insights and practical tips that complement these written instructions.
General Seam Ripping Tips and Best Practices
Beyond the specific techniques for different seam types, there are universal best practices that can enhance your seam ripping experience and protect your precious fabric:
- Good Lighting is Your Best Friend: Adequate lighting is paramount. It allows you to clearly see individual stitches, distinguish thread colors, and avoid accidentally cutting the fabric. A bright desk lamp or natural daylight is ideal.
- Work on a Flat, Stable Surface: Lay your fabric flat on a clean, stable surface. This provides support, prevents stretching or distortion of the fabric, and makes it easier to maneuver your tools.
- Keep Your Tools Sharp: A dull seam ripper or dull scissors are more likely to snag, pull, and damage fabric. Ensure your seam ripper is sharp, and if using small snips, make sure they have a fine, sharp point.
- Use a Lint Roller or Tape for Cleanup: After ripping a seam, you’ll be left with numerous small thread snippets. A lint roller or a piece of sticky tape is incredibly effective for quickly gathering and removing these threads from your fabric, preventing them from getting sewn back into your next seam.
- Patience and Practice: Seam ripping is a skill that improves with practice. Don’t rush, especially on delicate fabrics or complex seams. Take your time, and you’ll become more efficient and confident with each project.
- Consider a Magnifying Glass: For very fine stitches, dark fabrics, or if your eyesight isn’t as sharp as it used to be, a magnifying glass (perhaps one with an integrated light) can be a game-changer.
- Know When to Use Small Scissors: While the seam ripper is excellent for most tasks, small, sharp embroidery scissors are perfect for precise snips, especially when isolating a single stitch or working in very tight areas where a seam ripper might be too bulky.
- Protect Your Fabric: Always be mindful of the fabric itself. Avoid digging too deeply with your seam ripper. For delicate fabrics like silk or chiffon, consider using a very fine needle to gently pull stitches apart rather than cutting them, or proceed with extreme caution.
- Pressing After Ripping: Once a seam is ripped and the fabric is clean of threads, it’s often beneficial to press the fabric. This helps to remove any lingering creases from the old seam line and prepares the fabric for a fresh start.
The Benefits of Efficient Seam Ripping: More Than Just Undoing Mistakes
Embracing these advanced seam ripping techniques offers a wealth of benefits that extend far beyond simply correcting errors:
- Increased Efficiency: The most immediate benefit is the dramatic reduction in time spent on unpicking. What once felt like a monumental task now becomes a quick, manageable step in your project.
- Reduced Frustration: Eliminating the struggle with stubborn stitches and the fear of damaging fabric significantly lowers stress levels, making your entire sewing process more enjoyable.
- Enhanced Project Quality: When you can easily correct mistakes, you’re more likely to aim for perfection. This leads to cleaner finishes, better-fitting garments, and overall higher quality in your handmade items.
- Greater Creativity and Confidence: Knowing you can easily undo stitches frees you to experiment with new patterns, techniques, and designs without the crippling fear of irreversible mistakes. This confidence fuels creativity.
- Fabric Preservation: Proper seam ripping techniques minimize damage to your fabric, extending its lifespan and making it suitable for reuse or repurposing in future projects. This is crucial for sustainable sewing.
- Empowerment for Upcycling: Upcycling relies heavily on the ability to deconstruct garments. Efficient seam ripping skills are empowering, allowing you to confidently transform old items into unique, new pieces.
By investing a little time in learning and practicing these methods, you’re not just learning how to unpick stitches; you’re investing in your overall sewing proficiency and enjoyment.
*All image credit belongs to BlueprintDIY via YouTube. Follow and subscribe to her channel for more incredible sewing tutorials and tips!
Transform Your Sewing Experience with Expert Seam Ripping
The journey of sewing is filled with creativity, learning, and occasional challenges. While seam ripping might seem like a minor, unglamorous part of this journey, mastering it is a pivotal step towards becoming a more confident, efficient, and skilled sewer. No longer will the thought of unpicking a mistake fill you with dread; instead, you’ll approach it with the knowledge and tools to get the job done quickly and cleanly.
We’ve explored three fundamental techniques – the ‘glide’ method for straight stitches with a seam ripper, the magical unraveling of chain stitches, and the systematic dismantling of 3-thread serger seams. Coupled with general best practices, these methods provide a comprehensive toolkit for tackling virtually any seam you encounter. Remember, practice is key, and with each seam you confidently unpick, your skills will grow, and your love for sewing will deepen.
So, the next time a seam needs to come out, don’t despair. Embrace the opportunity to apply these techniques, save time, protect your fabric, and elevate your craftsmanship. Happy sewing and happy ripping!